Amazon SNS 4.5 Connector Examples
Common use cases for the connector include:
-
Sending SNS messages to Amazon SQS queues
-
Sending Amazon SNS messages to HTTP/HTTPS endpoints
Send Amazon SNS Messages to Amazon SQS Queues
Amazon SNS works closely with Amazon Simple Queue Service (Amazon SQS). By using Amazon SNS and Amazon SQS together, messages can be delivered to applications that:
-
Require immediate notification of an event.
-
Are persisted in an Amazon SQS queue for other applications to process later.
When you subscribe an Amazon SQS queue to an Amazon SNS topic, you can publish a message to the topic. Amazon SNS then sends an Amazon SQS message to the subscribed queue.
Use AWS Management Console to simplify the process of subscribing an Amazon SQS queue to an Amazon SNS topic.
Send Amazon SNS Messages to HTTP/HTTPS Endpoints
You can use Amazon SNS to send notification messages to one or more HTTP or HTTPS endpoints. When you subscribe an endpoint to am Amazon SNS topic, you can publish a notification to the topic. Amazon SNS then sends an HTTP POST request that delivers the contents of the notification to the subscribed endpoint.
Example: Use the Connector to Send SNS Messages to Amazon SQS Queues
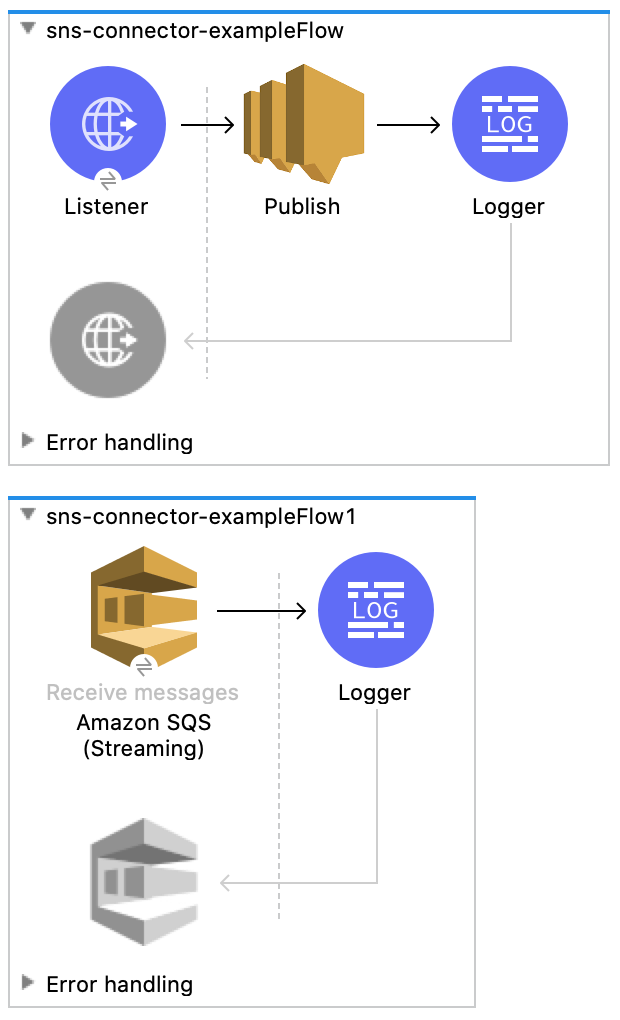
The following diagram shows an example flow for this use case:

Before you try the example, access Anypoint Studio, and verify that the Mule Palette displays entries for Amazon SNS and Amazon SQS. If not, follow the instructions in Install the Connector in Studio Using Exchange to install both connectors.
To configure a Mule app that uses a connector to send Amazon SNS messages to Amazon SQS queues:
-
Create a new Mule project in Anypoint Studio.
-
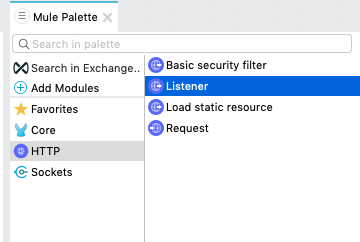
In the Mule Palette, search for HTTP, and select the Listener operation:
-
Drag the Listener operation to the canvas.
-
In the Listener configuration, click + next to the Connector configuration field to add a global element.
-
Accept the defaults.
-
In the Listener configuration General tab, set the Display Name field to
HTTPand the Path field to`/''.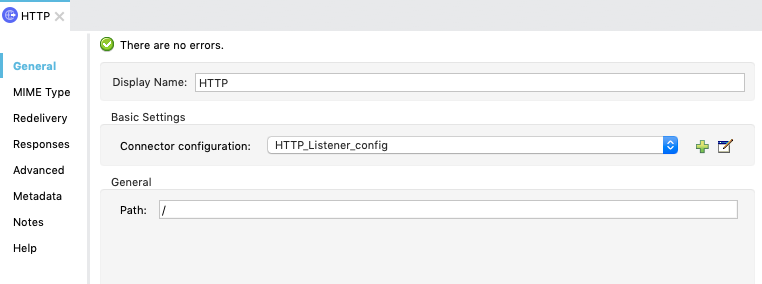
-
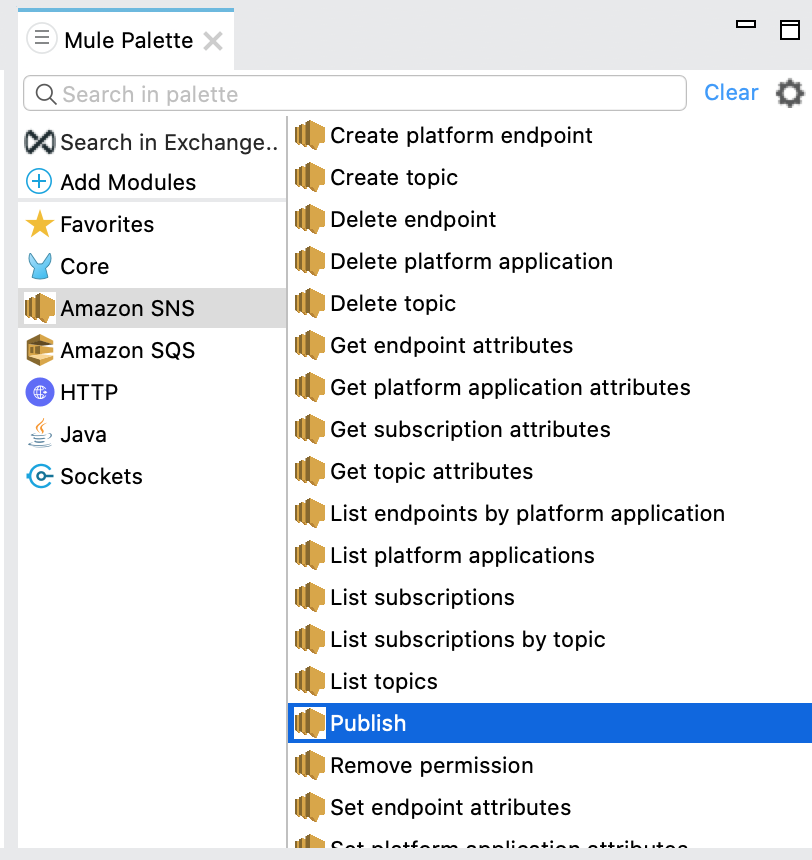
In the Mule Palette, search for SNS and select the Publish operation:
-
Drag the Publish operation to the right of the HTTP Listener component.
-
In the Publish configuration, click + next to the Connector configuration field to add a global element.
-
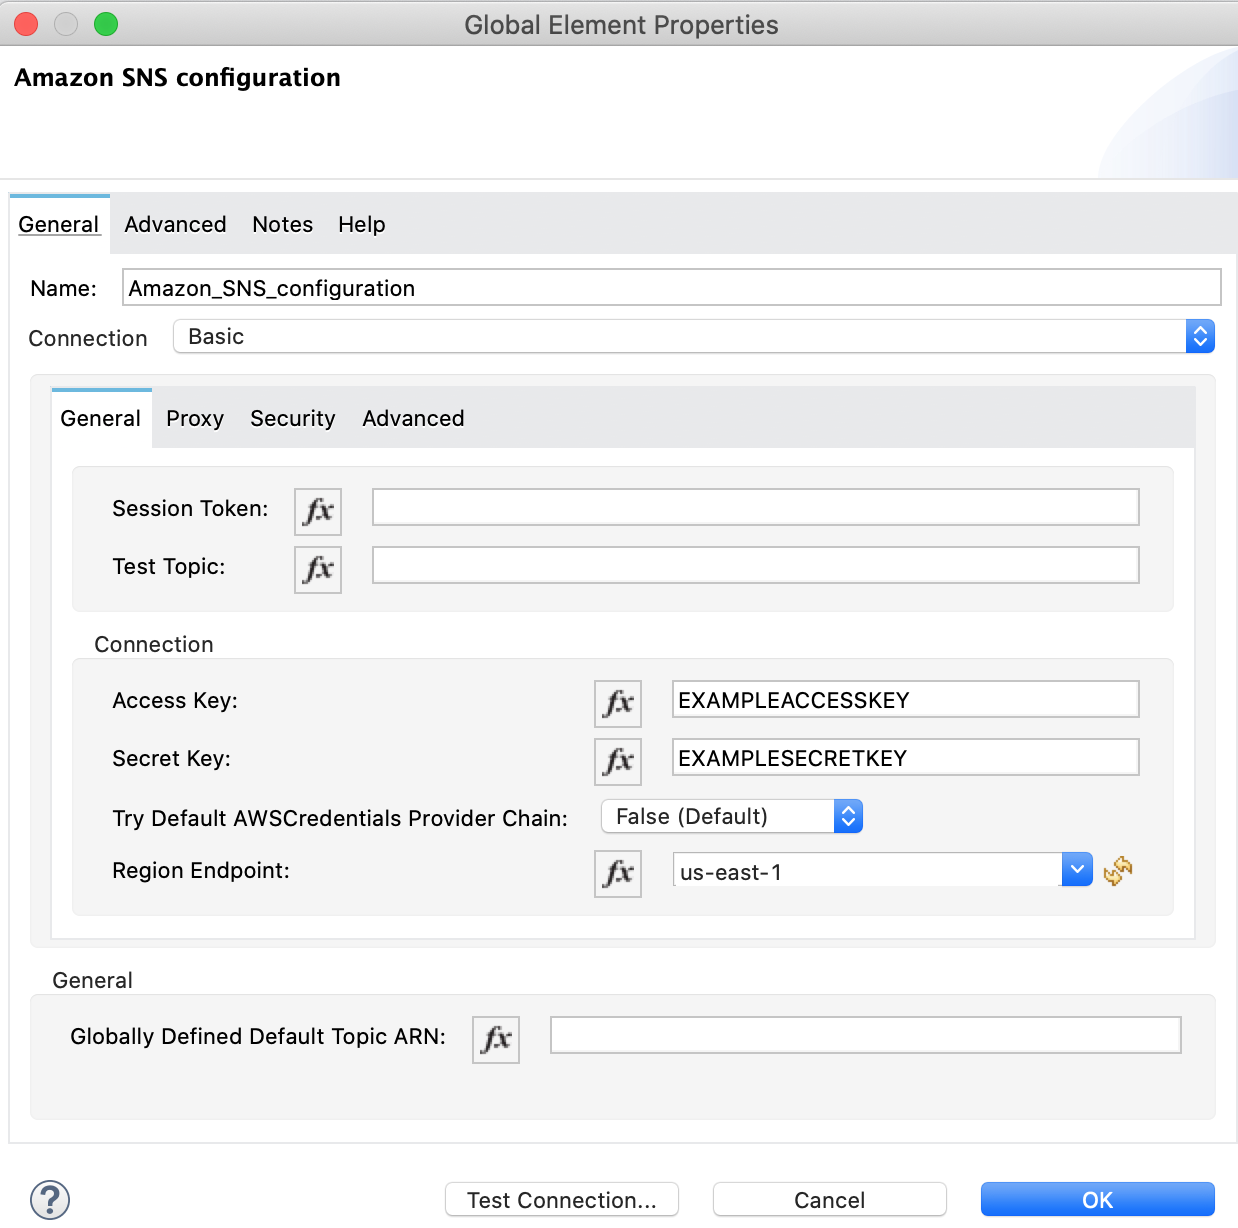
Configure the global element as follows:
Parameter Description Value Name
Name used to reference the configuration
Amazon_SNS_Configurationor another nameAccess Key
Alphanumeric text string that uniquely identifies the user who owns the account.
AWS Access Key
Secret Key
Key that plays the role of a password
AWS secret key
Region Endpoint
Queue region.
The queue region
The following image shows a sample global element for the Publish operation:
-
Select the Configuration XML tab to view the corresponding XML:
<sns:config name="Amazon_SNS_Configuration" doc:name="Amazon SNS configuration" > <sns:basic-connection accessKey="EXAMPLEACCESSKEY" secretKey="EXAMPLESECRETKEY" /> </sns:config> -
Select the Global Elements tab.
-
Select the Amazon SNS configuration (Configuration) and click Edit.
-
Click Test Connection to confirm that Mule can connect with the SNS instance.
-
If the connection is successful, click OK to save the configuration.
-
Otherwise, review or correct any incorrect parameters, and test again.
-
-
Go back to the flow and select Publish.
-
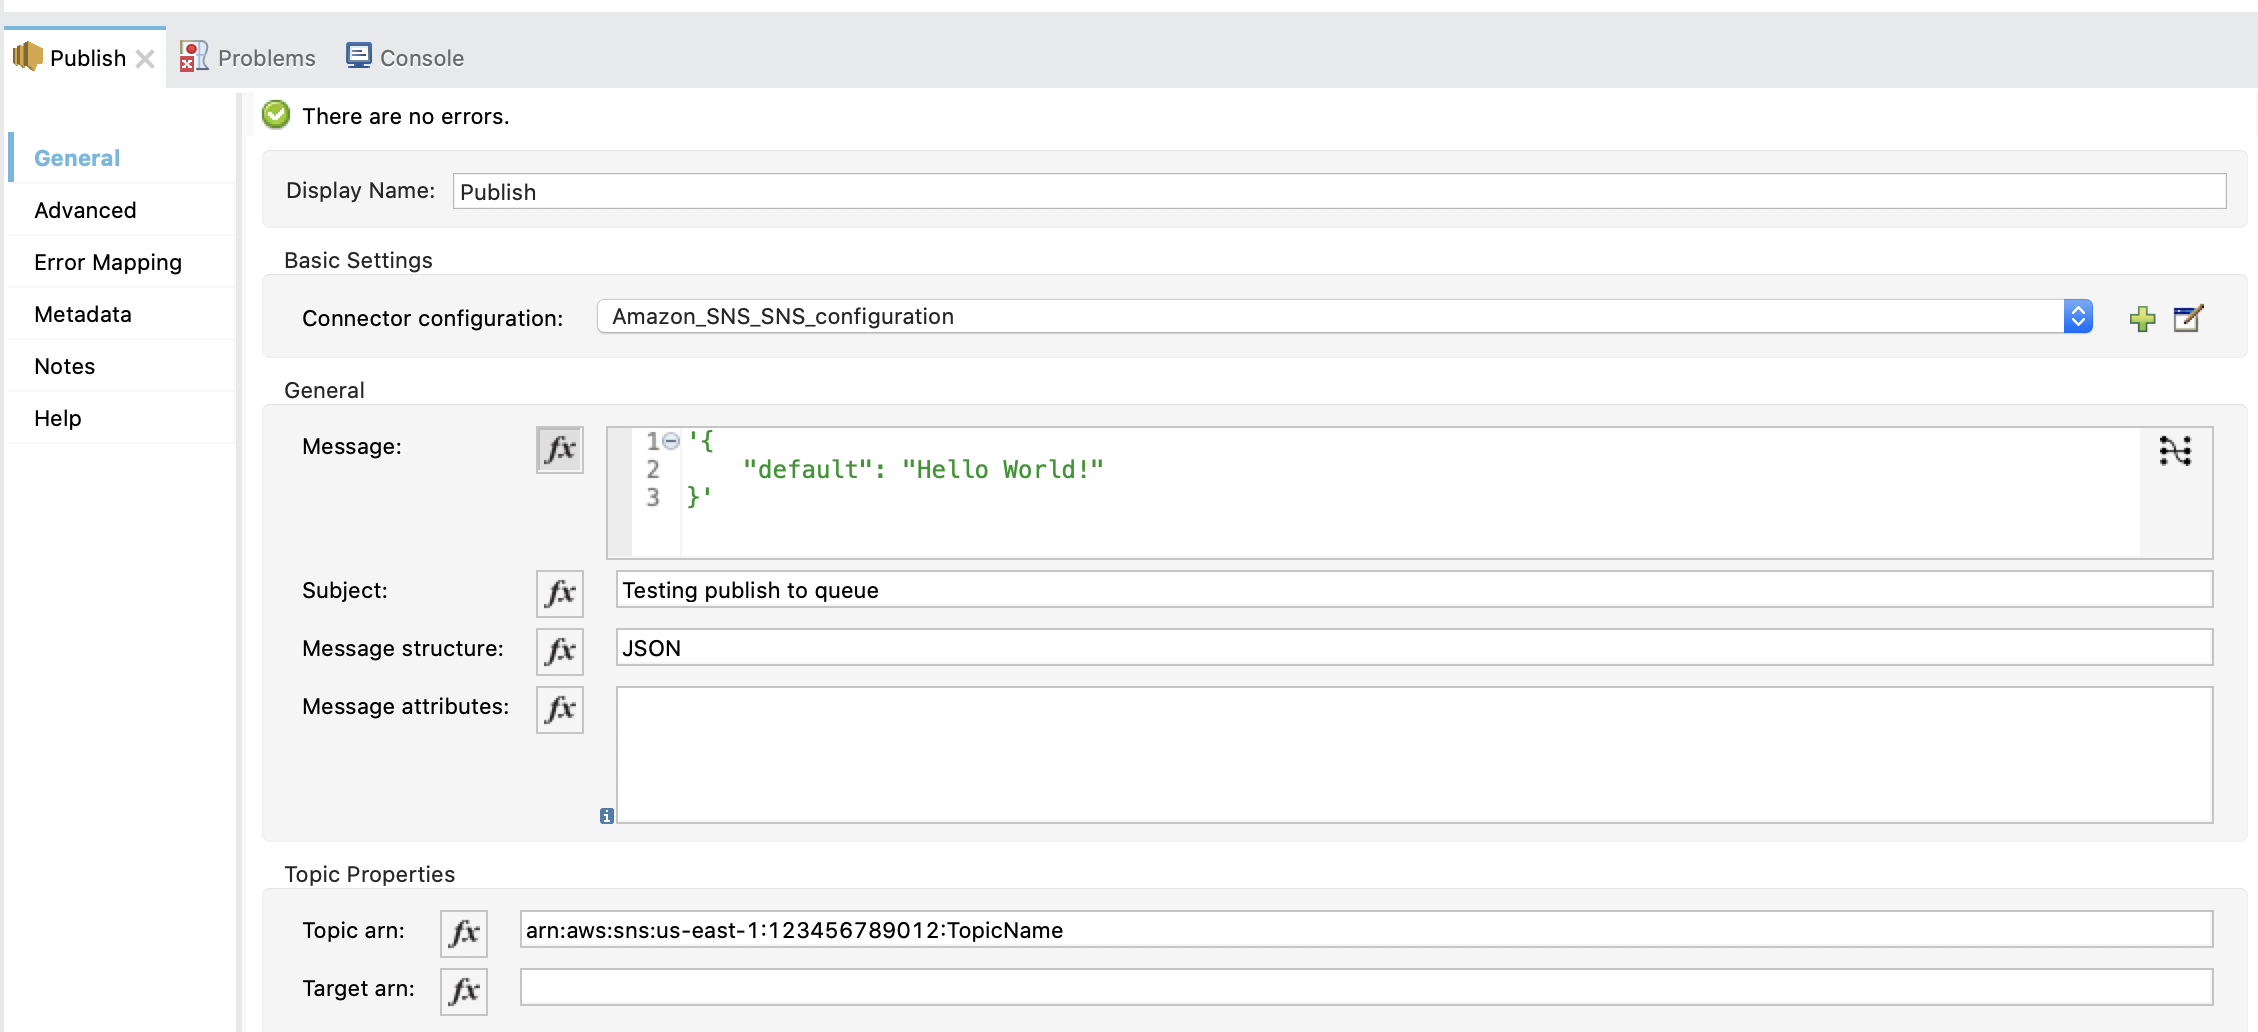
Configure the remaining parameters:
Parameter Value Display Name
Publishor another name.Basic Settings section
Connector configuration
Amazon_SNS_configuration(the reference name to the global element you created)General section
Message
`Hello World!`Subject
Testing publish to queueMessage structure
JSONMessage attributes
Amazon SNS message attributes, as described in the Amazon Simple Notification Service Developer Guide
Topic Properties section
Topic arn
Amazon Resource Name (ARN) of the topic you want to publish to
Target arn
Amazon Resource Name (ARN) of the platform endpoint you want to publish to
The following image shows a sample configuration for the Publish Message operation:
-
Select the Configuration XML tab to view the corresponding XML:
<sns:publish doc:name="Publish" doc:id="276aca8a-334a-4a04-a2ec-8ca4b21743c5"
    config-ref="Amazon_SNS_SNS_configuration"
    topicArn="arn:aws:sns:us-east-1:123456789012:TopicName"
    subject="Testing publish to queue"
    messageStructure="JSON">
    <sns:message ><![CDATA[#['{"default": "Hello world!"}']]]></sns:message>
</sns:publish>
The
defaultJSON key has a special meaning for SQS. The key’s value is sent as a message to every subscriber, regardless of the protocol used. You must specify this key for the Publish Message operation. You can optionally specify other top-level keys that define the message to send to a specific transport protocol, such as HTTP or SQS. For more information, see Publish in the Amazon Simple Notification Service documentation.
Display the Data Processed by the Publish Operation
Using the same example, add a Logger component to display the data processed by the Publish operation on the Mule console.
-
In the Mule Palette, search for the Logger component and drag it to the right of the Amazon SNS Connector (Publish).
-
Configure the Logger component as follows:
Parameter Value Display Name
Loggeror another nameMessage
Message: #[payload]Level
INFO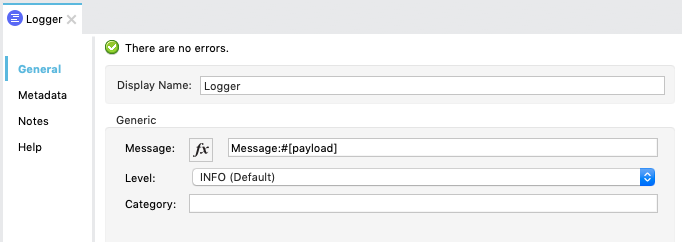
Receive SNS Messages
Using the same example, add a second flow that enables Amazon SQS to receive messages published by Amazon SNS:
-
In the Mule Palette, search for Flow and drag the Flow component to the canvas.
-
In the Mule Palette, search for SQS, select the Receive messages operation, and drag it to the left of the Flow component.
-
Select the new component.
-
Click + next to the Connector configuration field to add a new Amazon SQS Connector global element.
-
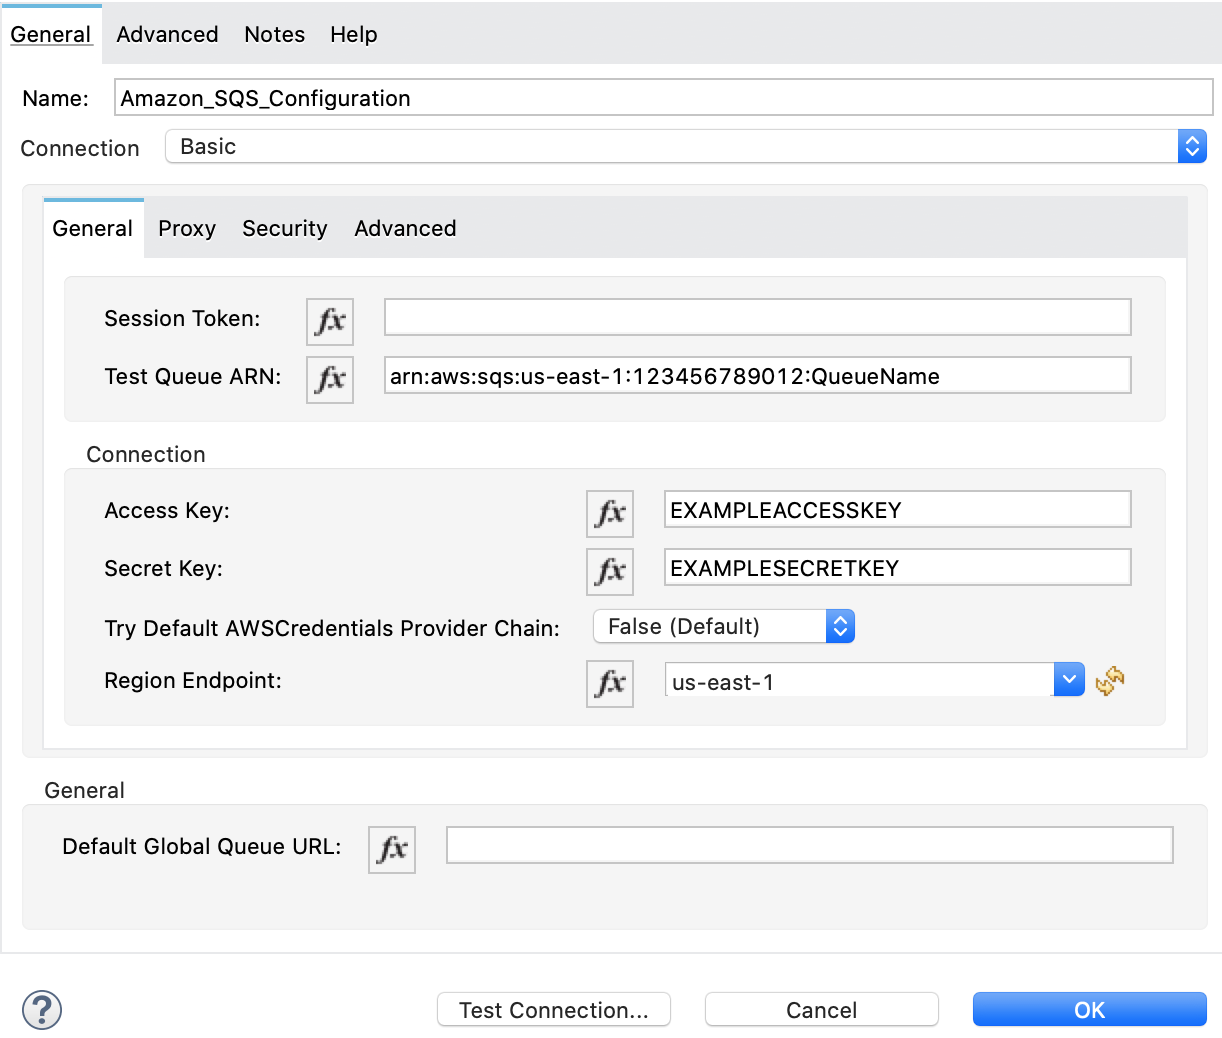
Configure the global element as follows:
Parameter Description Value Name
A name by which to refer to the configuration
Amazon_SQS_Configurationor another nameAccess Key
Alphanumeric text string that uniquely identifies the user who owns the account
AWS access key
Secret Key
Key that plays the role of a password.
AWS secret key
Region Endpoint
Queue region.
The queue region
Test Queue ARN
Queue ARN which will be used in the next step to test the connection
Test queue ARN in the following format -
arn:aws:sqs:region:account-id:queue-nameThe following image shows a sample global element for the Receive messages operation:
-
Select the Configuration XML tab to view the corresponding XML:
<sqs:config name="Amazon_SQS_Configuration" doc:name="Amazon SQS Configuration" > <sqs:basic-connection region="us_east_1" accessKey="EXAMPLEACCESSKEY" secretKey="EXAMPLESECRETKEY" testQueueArn="arn:aws:sqs:us-east-1:123456789012:QueueName"/> </sqs:config> -
Click Test Connection to confirm that Mule can connect with the SQS instance:
-
If the connection is successful, click OK to save it.
-
If the connection is not successful, review or correct any incorrect parameters, and then test again.
-
-
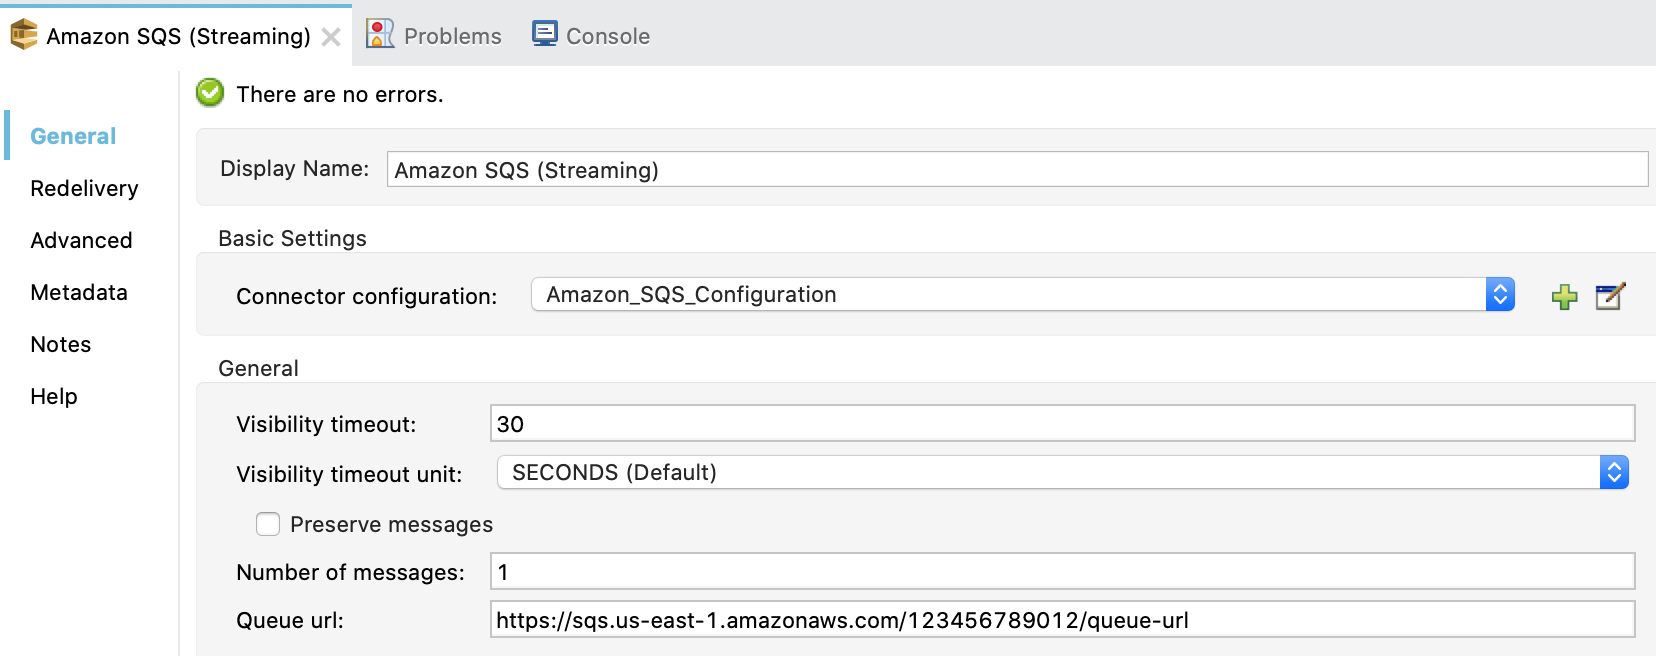
In the properties editor of Amazon SQS Connector, configure the remaining parameters:
Parameter Value Basic Settings section
Display Name
Amazon SQS (Streaming)or another nameConnector configuration*
Amazon_SQS_Configuration(the reference name to the global element you created)Queue url
Queue URL in the following format -
https://sqs.region.amazonaws.com/account-id/queue-nameOther fields in the General group
Default values
Verify that the SQS queue in the configuration is subscribed to the SNS topic.
For example:
-
Select the Configuration XML tab to view the corresponding XML:
<sqs:receivemessages doc:name="Amazon SQS (Streaming)" queueUrl="https://sqs.us-east-1.amazonaws.com/123456789012/queue-url" config-ref="Amazon_SQS_Configuration"/> -
Add a Logger scope after Amazon SQS Connector to print the data passed by the Receive operation in the Mule console. Configure the Logger as follows:
Parameter Value Display Name
Display Messageor another nameMessage
Received Message: #[payload]Level
INFO -
Save the project.
To run the project as a Mule app:
-
Right-click the project in Package Explorer and select Run As > Mule Application.
-
Open a web browser, enter the URL
http://localhost:8081/, and check the response.The logger shows the published message ID on the browser and the received message on the Mule console.
Demo Mule Application XML Code
Paste this code into your XML editor to quickly load the flow for this example use case into your Mule application. If needed, change the values to reflect your environment.
<?xml version="1.0" encoding="UTF-8"?>

<mule xmlns:sqs="http://www.mulesoft.org/schema/mule/sqs"
	xmlns:sns="http://www.mulesoft.org/schema/mule/sns"
	xmlns:http="http://www.mulesoft.org/schema/mule/http"
	xmlns="http://www.mulesoft.org/schema/mule/core"
	xmlns:doc="http://www.mulesoft.org/schema/mule/documentation"
	xmlns:xsi="http://www.w3.org/2001/XMLSchema-instance"
	xsi:schemaLocation="http://www.mulesoft.org/schema/mule/core http://www.mulesoft.org/schema/mule/core/current/mule.xsd
http://www.mulesoft.org/schema/mule/http http://www.mulesoft.org/schema/mule/http/current/mule-http.xsd
http://www.mulesoft.org/schema/mule/sns http://www.mulesoft.org/schema/mule/sns/current/mule-sns.xsd
http://www.mulesoft.org/schema/mule/sqs http://www.mulesoft.org/schema/mule/sqs/current/mule-sqs.xsd">
	<http:listener-config name="HTTP_Listener_config" doc:name="HTTP Listener config">
		<http:listener-connection host="0.0.0.0" port="8081" />
	</http:listener-config>
	<sns:config name="Amazon_SNS_configuration" doc:name="Amazon SNS configuration">
		<sns:basic-connection accessKey="EXAMPLEACCESSKEY" secretKey="EXAMPLESECRETKEY" />
	</sns:config>
	<sqs:config name="Amazon_SQS_Configuration" doc:name="Amazon SQS Configuration">
		<sqs:basic-connection accessKey="EXAMPLEACCESSKEY" secretKey="EXAMPLESECRETKEY"
		testQueueArn="arn:aws:sqs:us-east-1:123456789012:QueueName"/>
	</sqs:config>
	<flow name="sns-connector-exampleFlow">
		<http:listener doc:name="Listener" config-ref="HTTP_Listener_config" path="/"/>
		<sns:publish doc:name="Publish" config-ref="Amazon_SNS_configuration"
		topicArn="arn:aws:sns:us-east-1:123456789012:TopicName"
		subject="Testing publish to queue"
		messageStructure="JSON">
			<sns:message><![CDATA[#['{
	"default": "Hello World!"
}']]]></sns:message>
		</sns:publish>
		<logger level="INFO" doc:name="Logger" message="Message: #[payload]"/>
	</flow>
	<flow name="sns-connector-exampleFlow1">
		<sqs:receivemessages doc:name="Amazon SQS (Streaming)" config-ref="Amazon_SQS_Configuration"
		queueUrl="https://sqs.us-east-1.amazonaws.com/123456789012/queue-url"/>
		<logger level="INFO" doc:name="Logger" message="Received Message: #[payload]"/>
	</flow>
</mule>


