Amazon SQS Connector 5.11 Examples
The following examples show several Mule flows for Amazon SQS Connector:
Send and Receive Messages
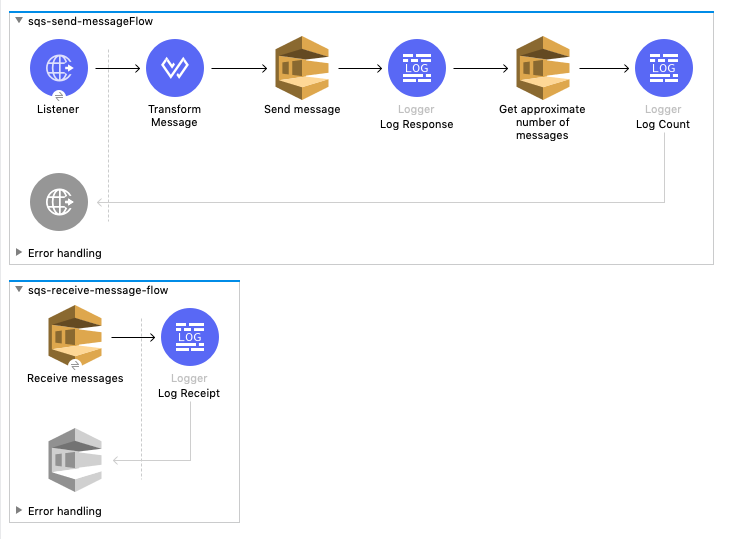
This example sends a message with metadata to an Amazon SQS queue and then receives the message from the queue. The example contains two flows:
-
The first flow sends a message with metadata and gets the count of the messages in the queue to validate that the message was sent.
-
The second flow receives the message and logs the message body.
Configure the First Flow
Configure the first flow that sends a message to the queue. Creating the first flow involves configuring a Listener component, a Transform Message component, a Send message operation, a Logger component, a Get approximate number of messages operation, and a second Logger component.
Configure the HTTP Listener
Configure the Listener component to initiate a Mule flow when a call is made to the / path:
-
Create a new Mule project in Studio.
-
From the Mule Palette view, select HTTP and drag the Listener component to the canvas.
-
In the properties window, click + next to the Connector configuration field to add a global element.
-
Accept the defaults.
-
In the properties window, set the Path field value to
/.
Add the Transform Message Component
Add the Transform Message component to attach the metadata and convert the values from the HTTP input form to Java format so they can be used as input to the Send message operation:
-
From the Mule Palette view, select Core and drag a Transform Message component to the right of Listener.
-
In the properties window, overlay the brackets in the Output section with this DataWeave code:
%dw 2.0
output application/java
---
{
	delaySeconds: 0,
	body: "Hello World",
	messageAttributes: {
		"AccountId": {
			"stringValue" : "000123456",
			"dataType" : "String.AccountId"
		} as Object {
			class: "org.mule.extension.sqs.api.model.MessageAttributeValue"
		},
		"NumberId": {
			"stringValue" : "230.000000000000000001",
			"dataType" : "Number"
		} as Object {
			class : "org.mule.extension.sqs.api.model.MessageAttributeValue"
		}
	} as Object {
		class: "java.util.HashMap"
	}
} as Object {
	class: "org.mule.extension.sqs.api.model.Message"
}
Add the Send Message Operation
Add the Send message operation to send the message to the specified queue:
-
From the Mule Palette view, select Amazon SQS and drag the Send message operation to the right of Transform Message.
-
In the properties window, click + next to the Connector configuration field to add a global element.
-
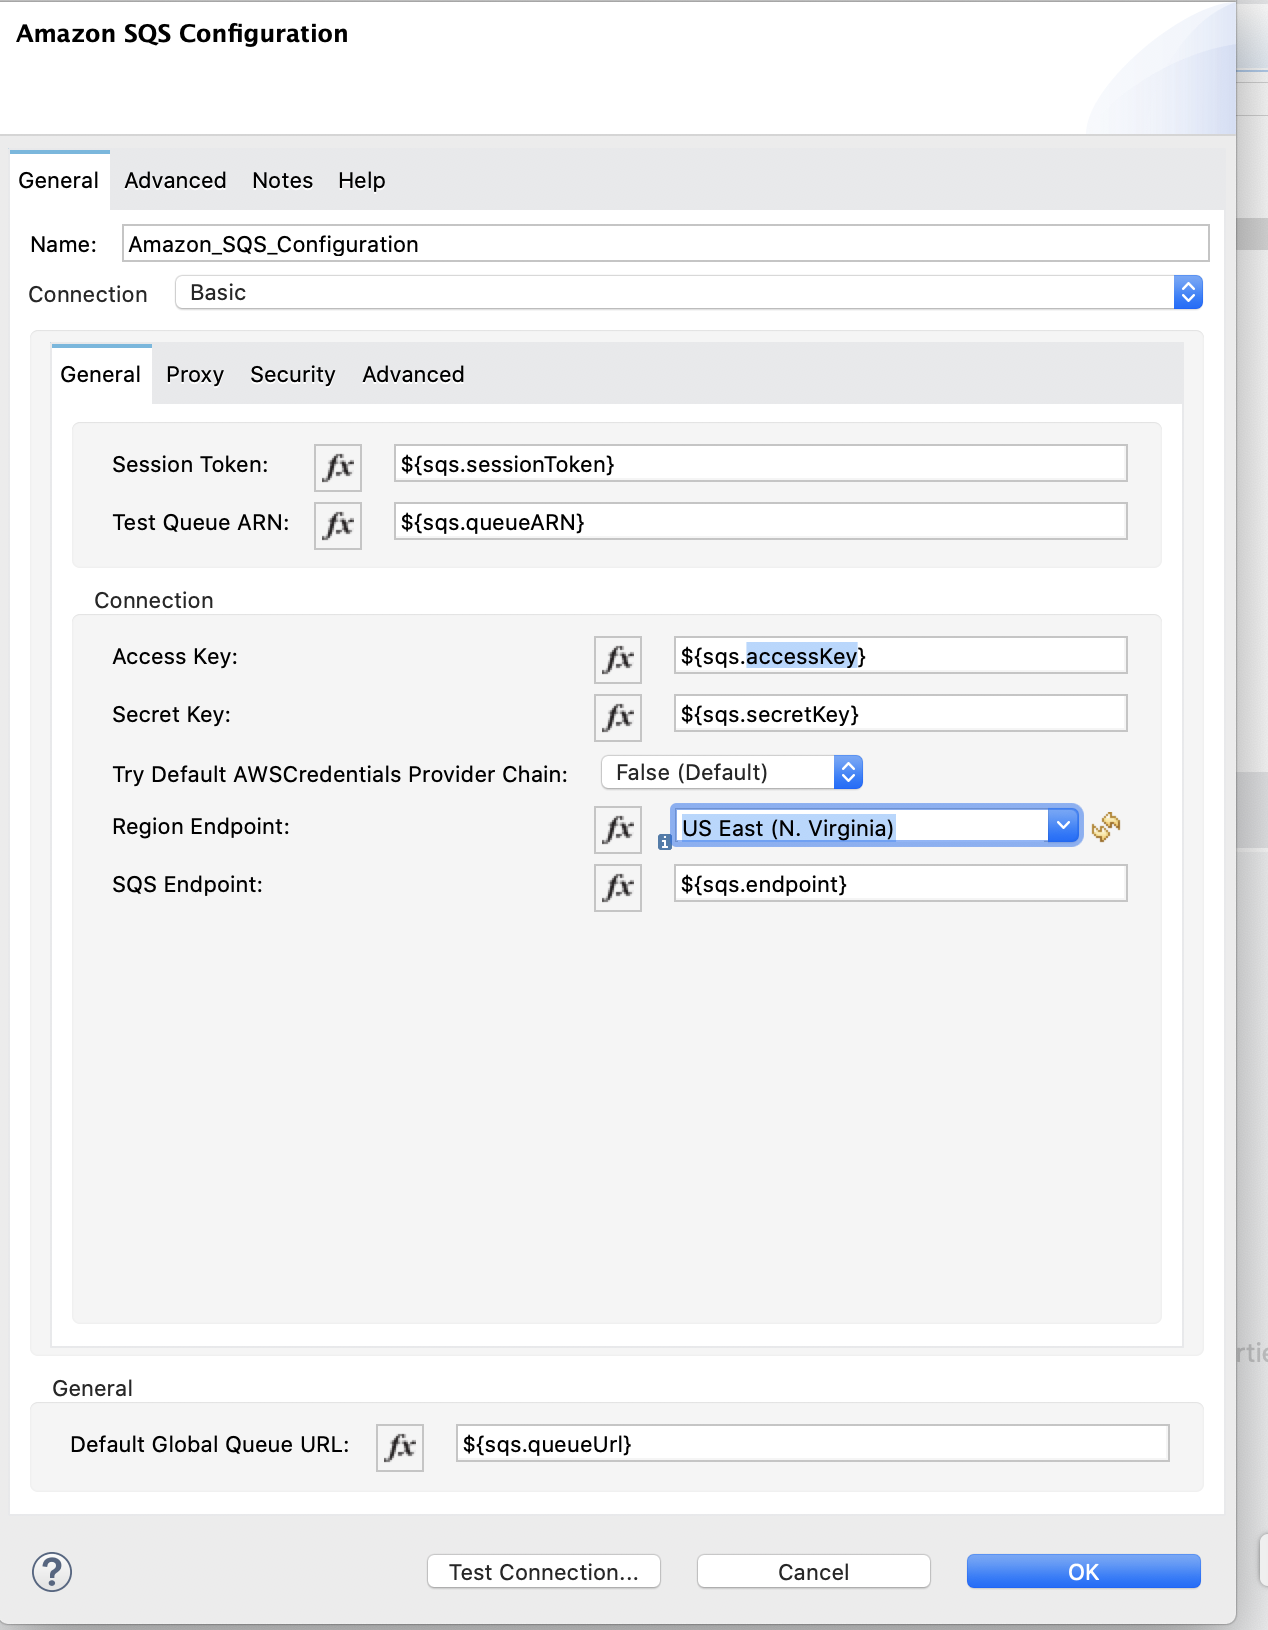
Configure the global element as follows:
Field Value Name
Name used to reference the configuration.
Session Token
Session token used to validate the temporary security credentials.
Access Key
Alphanumeric text string that uniquely identifies the user who owns the account.
Secret Key
Key that acts as a password.
Region Endpoint
Queue region.
SQS Endpoint
SQS endpoint for Amazon VPC support.
Default Global Queue URL
Default Amazon SQS queue URL credentials.
The following image shows an example of the Send Message configuration of the global element:
-
In the properties window, configure the following fields:
Field Value Display Name
Name for the connector operation.
Connector configuration
Global configuration you just created.
Message
payloadQueue url
Amazon SQS queue URL.
If provided, the value of this field takes precedence over the value of the Default Global Queue URL field on the Global Configuration Elements window.
The following image shows an example of the Send Message configuration in the properties window:

Add the First Logger Component
Add the first Logger component to display the response in the Mule console:
-
From the Mule Palette view, select Core and drag a Logger component to the right of Send message.
-
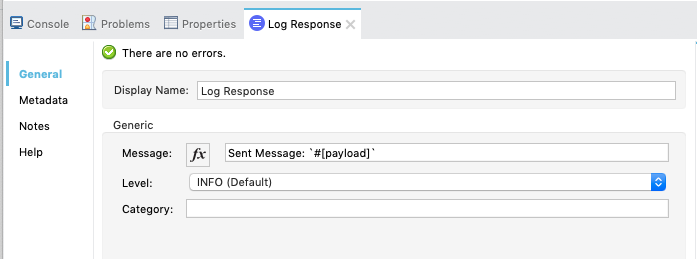
In the properties window, configure the following fields:
Field Value Display Name
Name for the logger, such as
Log Response.Message
Sent Message: `#[payload]`Level
INFO (Default)
The following image shows an example of the Logger configuration in the properties window:
Add the Get Approximate Number of Messages Operation
Add the Get approximate number of messages operation to obtain the number of messages in the queue:
-
From the Mule Palette view, select Amazon SQS and drag the Get approximate number of messages operation to the right of Logger.
-
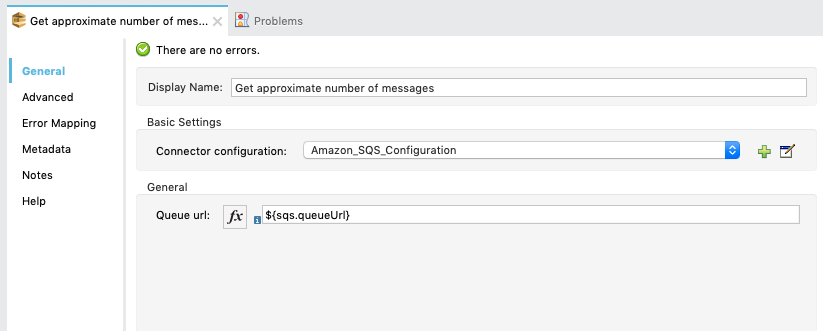
In the properties window, configure the following fields:
Field Value Display Name
Name for the connector operation.
Connector configuration
Global configuration you just created.
Queue url
${sqs.queueUrl}The following image shows an example of the Get approximate number of messages configuration in the properties window:
Add the Second Logger Component
Add the second Logger component to display the message count in the Mule console:
-
From the Mule Palette view, select Core and drag a Logger component to the right of Get approximate number of messages.
-
In the properties window, configure the following fields:
Field Value Display Name
Name for the logger, such as
Log Count.Message
Sent Message: `#[payload]`Level
INFO (Default)
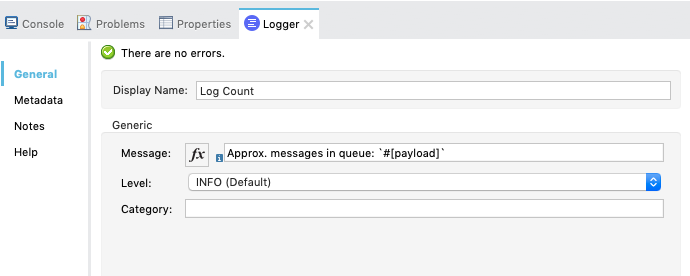
The following image shows an example of the Logger configuration in the properties window:
Configure the Second Flow
Configure the second flow that receives and logs the messages before the messages are deleted from the queue. Creating the second flow involves configuring a Receive messages source and a Logger component.
Add the Receive Messages Source
Add the Receive messages source to retrieve messages:
-
From the Mule Palette view, select Amazon SQS and drag the Receive messages source to the canvas.
-
In the properties window, configure the following fields:
Field Value Display Name
Name for the connector operation.
Connector configuration
Global configuration you just created.
Number of messages
1Queue url
Amazon SQS queue URL.
If provided, the value of this field takes precedence over the value of the Default Global Queue URL field on the Global Configuration Elements window.
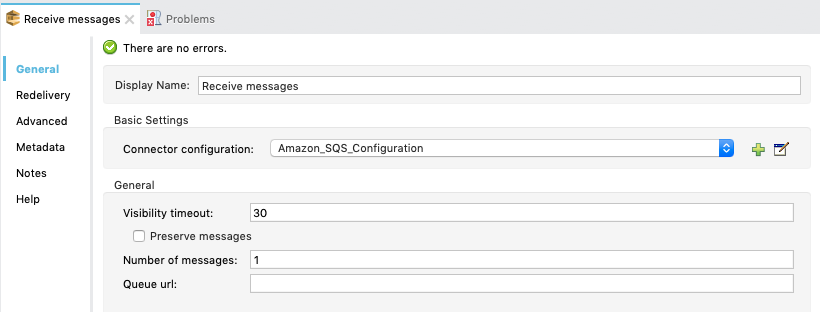
The following image shows an example of the Receive messages configuration in the properties window:
Add the Logger Component
Add the Logger component to display the message in the Mule console:
-
From the Mule Palette view, select Core and drag a Logger component to the right of Receive messages.
-
In the properties window, configure the following fields:
Field Value Display Name
Name for the logger, such as
Log Receipt.Message
`#[payload]`Level
INFO (Default)
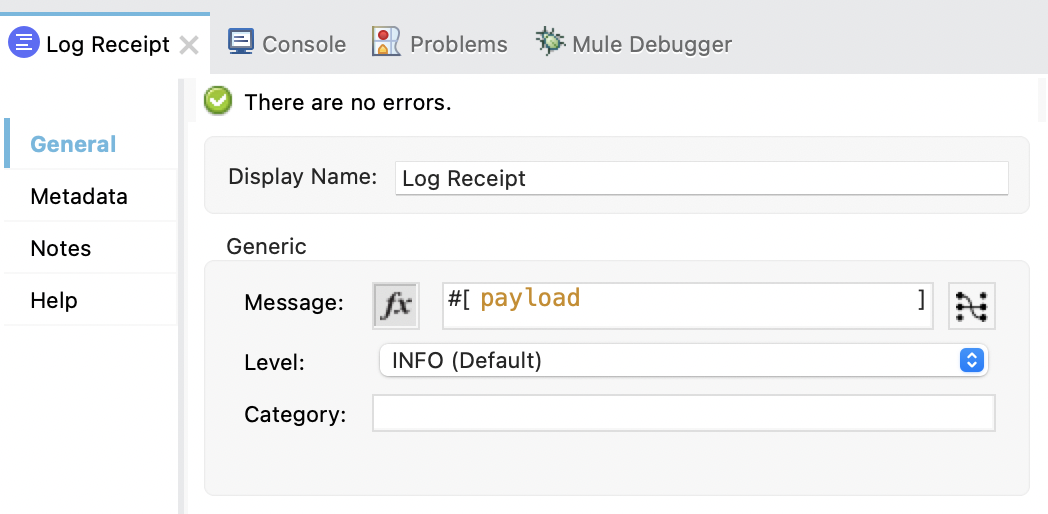
The following image shows an example of the Logger configuration in the properties window:
XML for This Example
Paste this code into the Studio XML editor to quickly load the flow for this example into your Mule app:
<mule xmlns:sqs="http://www.mulesoft.org/schema/mule/sqs" xmlns:ee="http://www.mulesoft.org/schema/mule/ee/core"
xmlns:http="http://www.mulesoft.org/schema/mule/http"
xmlns="http://www.mulesoft.org/schema/mule/core" xmlns:doc="http://www.mulesoft.org/schema/mule/documentation" xmlns:xsi="http://www.w3.org/2001/XMLSchema-instance"
xsi:schemaLocation="http://www.mulesoft.org/schema/mule/core http://www.mulesoft.org/schema/mule/core/current/mule.xsd http://www.mulesoft.org/schema/mule/http
http://www.mulesoft.org/schema/mule/http/current/mule-http.xsd
http://www.mulesoft.org/schema/mule/ee/core
http://www.mulesoft.org/schema/mule/ee/core/current/mule-ee.xsd
http://www.mulesoft.org/schema/mule/sqs
http://www.mulesoft.org/schema/mule/sqs/current/mule-sqs.xsd">
<http:listener-config name="HTTP_Listener_config" doc:name="HTTP Listener config" >
<http:listener-connection host="0.0.0.0" port="8081" />
</http:listener-config>
<sqs:config name="Amazon_SQS_Configuration" doc:name="Amazon SQS Configuration"
defaultQueueUrl="${sqs.queueUrl}" >
<sqs:basic-connection accessKey="${sqs.accessKey}" secretKey="$sqs.secretKey}" region="us-east-1"/>
</sqs:config>
<flow name="sqs-send-messageFlow" >
<http:listener doc:name="Listener"
config-ref="HTTP_Listener_config"
path="/"/>
<ee:transform doc:name="Transform Message" >
<ee:message >
<ee:set-payload ><![CDATA[%dw 2.0
output application/java
---
{
delaySeconds: 0,
body: "Hello World",
messageAttributes: {
"AccountId": {
"stringValue" : "000123456",
"dataType" : "String.AccountId"
} as Object {
class: "org.mule.extension.sqs.api.model.MessageAttributeValue"
},
"NumberId": {
"stringValue" : "230.000000000000000001",
"dataType" : "Number"
} as Object {
class : "org.mule.extension.sqs.api.model.MessageAttributeValue"
}
} as Object {
class: "java.util.HashMap"
}
} as Object {
class: "org.mule.extension.sqs.api.model.Message"
}]]></ee:set-payload>
</ee:message>
</ee:transform>
<sqs:send-message doc:name="Send message"/>
<logger level="INFO"
doc:name="Log Response"
message="payload"/>
<sqs:get-approximate-number-of-messages
doc:name="Get approximate number of messages"
config-ref="Amazon_SQS_Configuration"
queueUrl="${sqs.queueUrl}"/>
<logger level="INFO" doc:name="Log Count"
message="Sent Message: `#[payload]`"/>
</flow>
<flow name="sqs-receive-message-flow" >
<sqs:receivemessages doc:name="Receive messages"
config-ref="Amazon_SQS_Configuration"/>
<logger level="INFO" doc:name="Log Receipt" />
</flow>
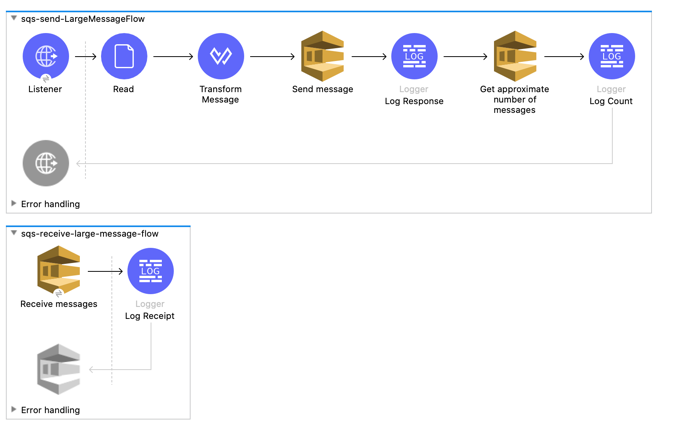
</mule>Send and Receive Large Messages
| Enabling this feature incurs additional charges associated with using AWS S3. |
This example sends a large message with metadata to an Amazon SQS queue that references the AWS S3 bucket to use for storing large message payloads, and then receives the large message from the queue. The example contains two flows:
-
The first flow sends a large message with metadata and gets the count of the messages in the queue to validate that the large message was sent.
-
The second flow receives the large message and logs the message body.
Before You Begin
Before you begin, you must have:
-
Access to the Amazon SQS target resource and Anypoint Platform
-
A file containing a payload larger than 256 KB
-
An AWS S3 bucket created on AWS S3 to use for storing the large payload messages
-
AWS Identity and Access Management (IAM) credentials
Configure the First Flow
Configure the first flow that sends a large message to the queue. Creating the first flow involves configuring a Listener component, a Read operation, a Transform Message component, a Send Message operation, a Logger component, a Get approximate number of messages operation, and a second Logger component.
Configure the HTTP Listener
Configure the Listener component to initiate a Mule flow when a call is made to the /largePayload path:
-
Create a new Mule project in Studio.
-
From the Mule Palette view, select HTTP and drag the Listener component to the canvas.
-
In the properties window, click + next to the Connector configuration field to add a global element.
-
Accept the defaults.
-
In the properties window, set the Path field value to
/largePayload.
Add the Read Operation
Add the Read operation to read the large payload:
-
From the Mule Palette view, select File and drag the Read operation to the right of Listener.
-
In the properties window, click + next to the Connector configuration field to add a global element.
-
Select the Connection checkbox.
-
In Working Directory, enter the directory that will serve as the root directory for every relative path used with this connector.
The default is your user home directory.In this example, the file is read from
src/main/resourcesof the Mule application: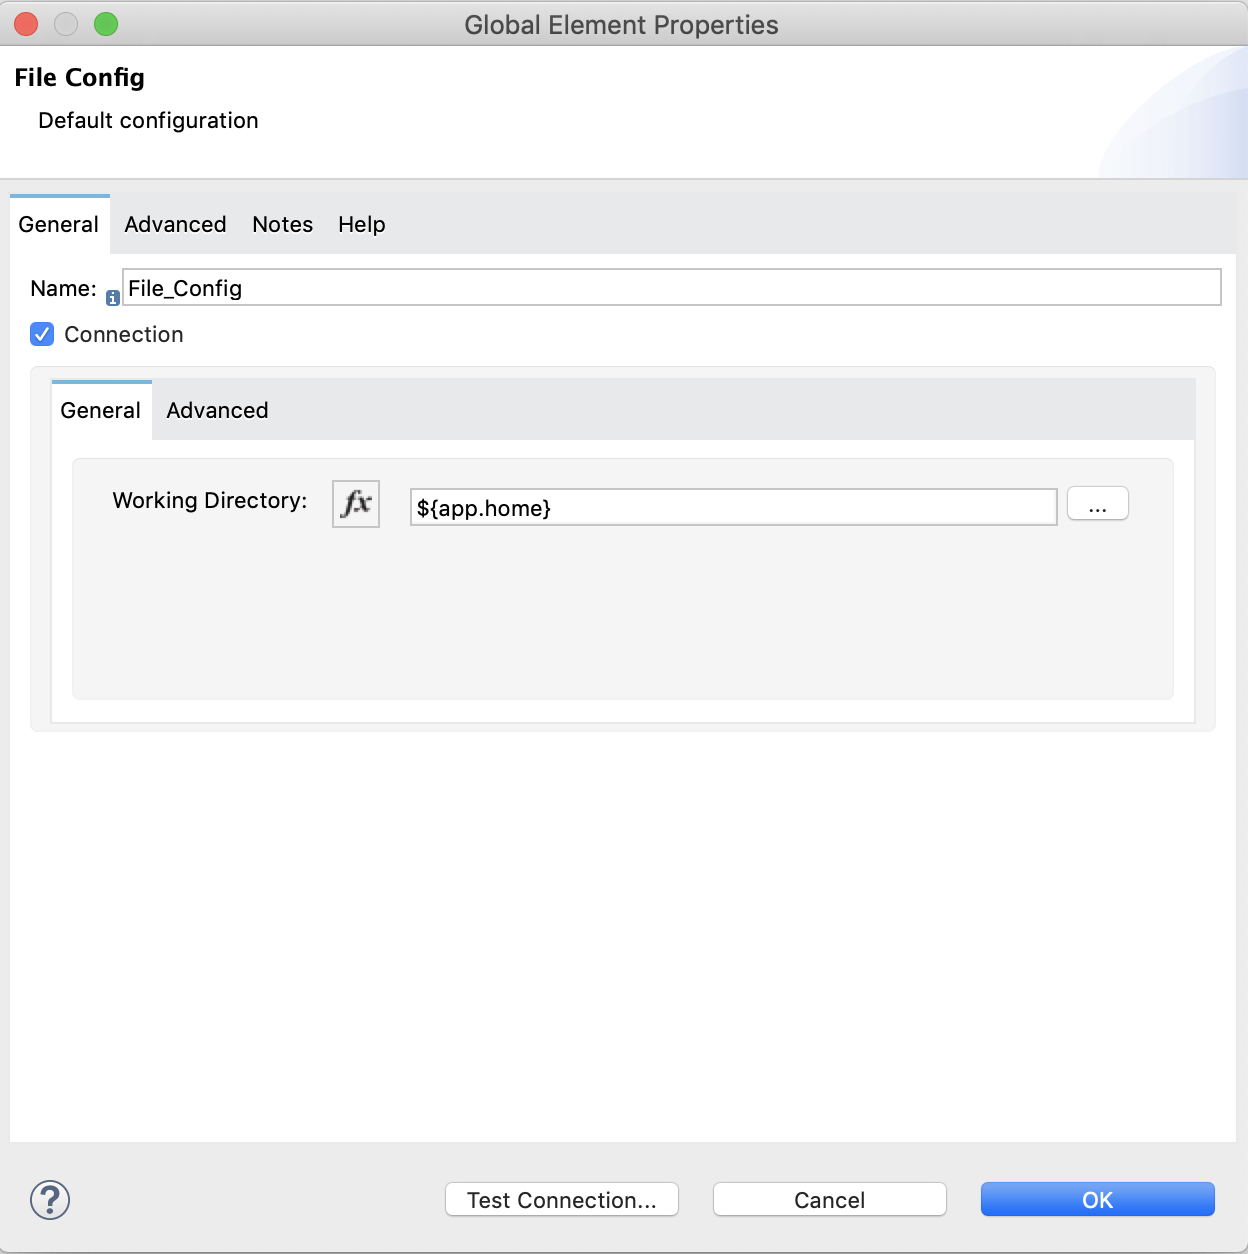
-
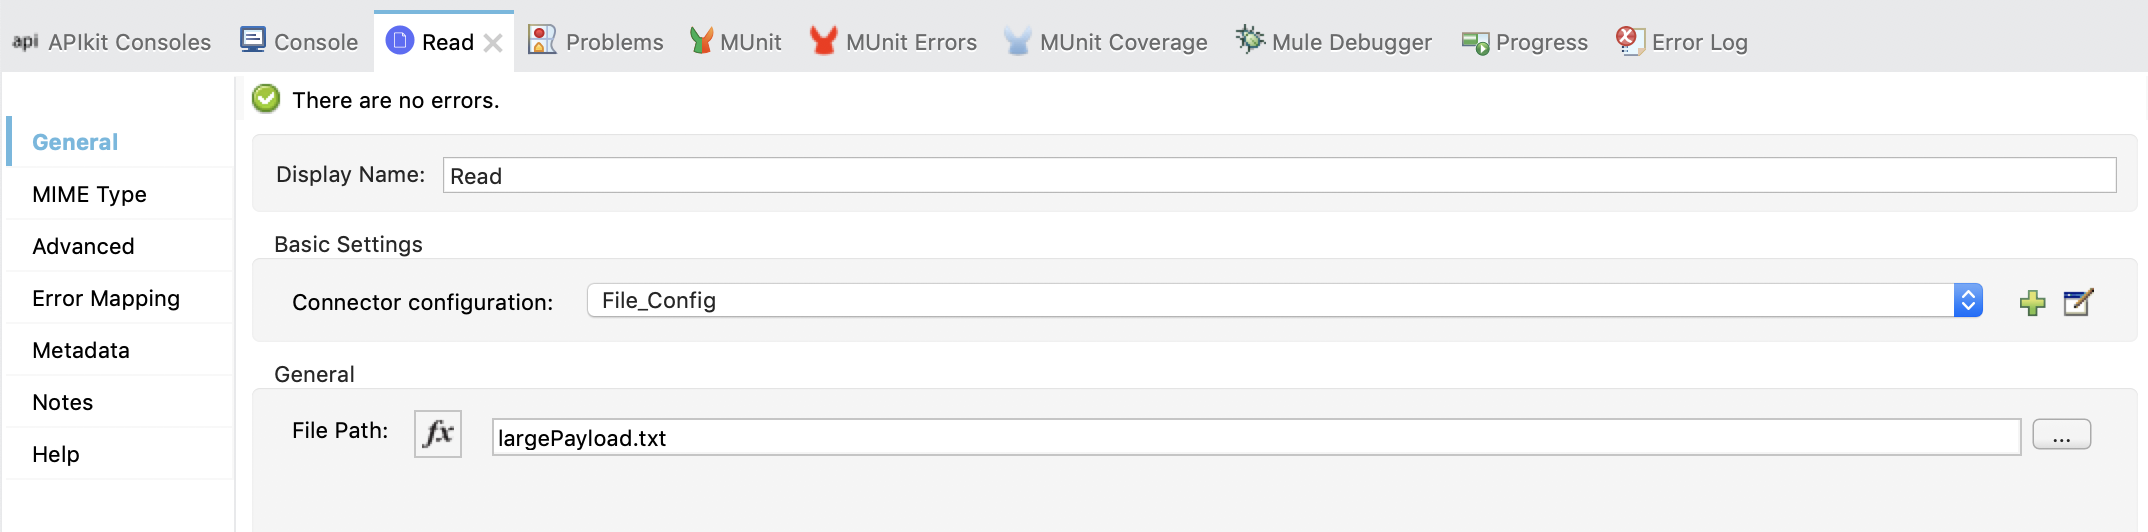
In the properties window, configure the following fields:
Field Value Display Name
Name for the connector operation.
Connector configuration
Global configuration you just created.
File Path
Path to the file to read.
The following image shows an example of the Read configuration in the properties window:
Add the Transform Message Component
Add the Transform Message component to attach the metadata and convert the values from the HTTP input form to Java format so they can be used as input to the Send message operation:
-
From the Mule Palette view, select Core and drag a Transform Message component to the right of Read.
-
In the properties window, overlay the brackets in the Output section with this DataWeave code:
%dw 2.0
output application/java
---
{
	delaySeconds: 0,
	body: "Hello World",
	messageAttributes: {
		"AccountId": {
			"stringValue" : "000123456",
			"dataType" : "String.AccountId"
		} as Object {
			class: "org.mule.extension.sqs.api.model.MessageAttributeValue"
		},
		"NumberId": {
			"stringValue" : "230.000000000000000001",
			"dataType" : "Number"
		} as Object {
			class : "org.mule.extension.sqs.api.model.MessageAttributeValue"
		}
	} as Object {
		class: "java.util.HashMap"
	}
} as Object {
	class: "org.mule.extension.sqs.api.model.Message"
}
Add the Send Message Operation
Add the Send message operation to send the large message to the specified queue:
-
From the Mule Palette view, select Amazon SQS and drag the Send message operation to the right of Transform Message.
-
In the properties window, click + next to the Connector configuration field to add a global element.
-
Configure the global element as follows:
Field Value Name
Name used to reference the configuration.
Session Token
Session token used to validate the temporary security credentials.
Access Key
Alphanumeric text string that uniquely identifies the user who owns the account.
Secret Key
Key that acts as a password.
Region Endpoint
Queue region.
SQS Endpoint
SQS endpoint for Amazon VPC support.
Default Global Queue URL
Default Amazon SQS queue URL credentials.
The following image shows an example of the Send Message configuration of the global element:
-
In the Connection section, click the Advanced tab.
-
In the Large Payload Support field, select one of the following:
-
Expression or Bean reference
-
Edit inline
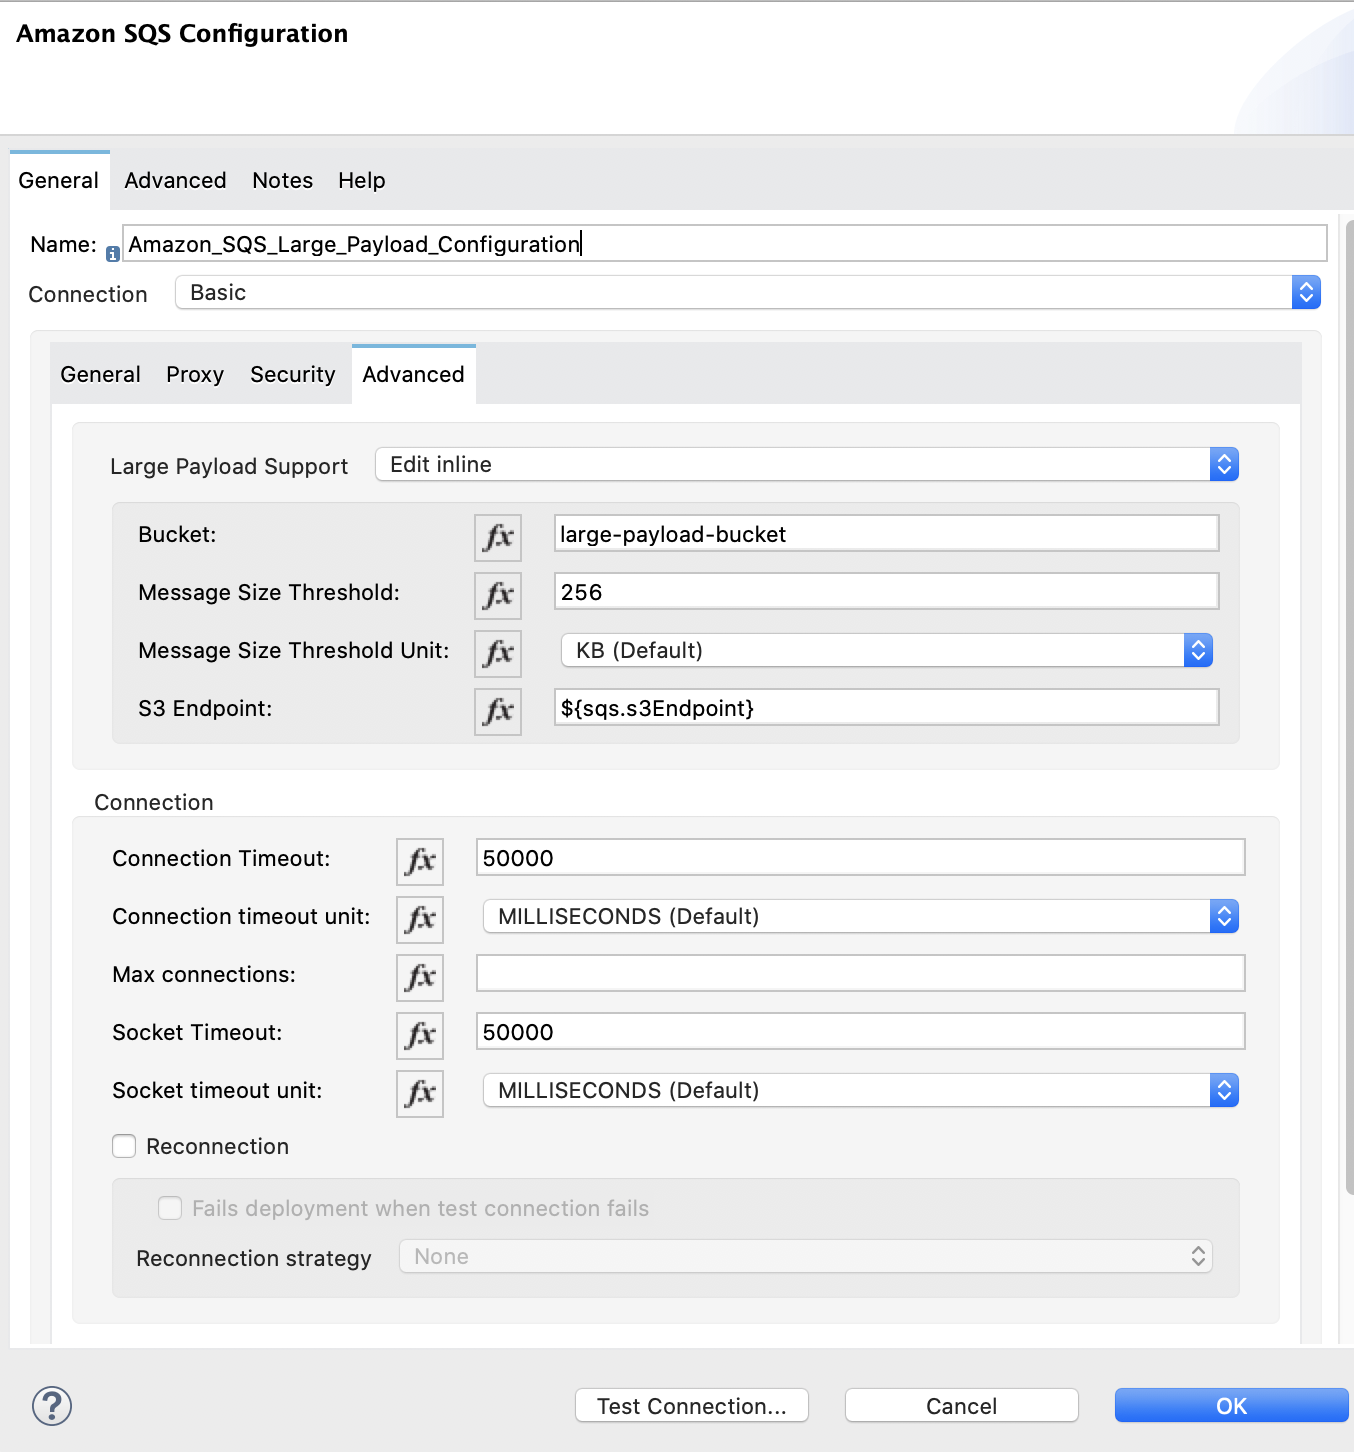
Configure the fields as follows:
Field Value Bucket
Name of the AWS S3 bucket to use for storing large message payloads. The bucket must already be created and configured in AWS S3. Enabling this feature incurs additional charges for using AWS S3.
Message Size Threshold
Message size threshold for storing message payloads in the AWS S3 bucket. The default value for message size threshold is 256 KB and the maximum threshold size value is 256 KB. The maximum message size is 2 GB.
Message Size Threshold Unit
Data unit for the message size threshold.
Custom S3 Endpoint
Amazon S3 endpoint URL for VPC support.
The following image shows an example of the Large Payload Support fields configuration:
-
-
In the properties window, configure the following fields:
Field Value Display Name
Name for the connector operation.
Connector configuration
Global configuration you just created.
Message
payloadQueue url
Amazon SQS queue URL.
If provided, the value of this field takes precedence over the value of the Default Global Queue URL field on the Global Configuration Elements window.
The following image shows an example of the Send Message configuration in the properties window:
Add the First Logger Component
Add the first Logger component to display the response in the Mule console:
-
From the Mule Palette view, select Core and drag a Logger component to the right of Send message.
-
In the properties window, configure the following fields:
Field Value Display Name
Name for the logger, such as
Log Response.Message
Sent Message: `#[payload]`Level
INFO (Default)
The following image shows an example of the Logger configuration in the properties window:
Add the Get Approximate Number of Messages Operation
Add the Get approximate number of messages operation to obtain the number of messages in the queue:
-
From the Mule Palette view, select Amazon SQS and drag the Get approximate number of messages operation to the right of Logger.
-
In the properties window, configure the following fields:
Field Value Display Name
Name for the connector operation.
Connector configuration
Global configuration you just created.
Queue url
${sqs.queueUrl}The following image shows an example of the Get approximate number of messages configuration in the properties window:
Add the Second Logger Component
Add the second Logger component to display the message count in the Mule console:
-
From the Mule Palette view, select Core and drag a Logger component to the right of Get approximate number of messages.
-
In the properties window, configure the following fields:
Field Value Display Name
Name for the logger, such as
Log Count.Message
Sent Message: `#[payload]`Level
INFO (Default)
The following image shows an example of the Logger configuration in the properties window:
Configure the Second Flow
Configure the second flow that receives and logs the large messages before the large messages are deleted from the queue. Creating the second flow involves configuring a Receive messages source and a Logger component.
Add the Receive Messages Source
Add the Receive messages source to retrieve large messages:
-
From the Mule Palette view, select Amazon SQS and drag the Receive messages source to the canvas.
-
In the properties window, configure the following fields:
Field Value Display Name
Name for the connector operation.
Connector configuration
Global configuration you just created.
Number of messages
1Queue url
Amazon SQS queue URL.
If provided, the value of this field takes precedence over the value of the Default Global Queue URL field on the Global Configuration Elements window.
The following image shows an example of the Receive messages configuration in the properties window:
Add the Logger Component
Add the Logger component to display the large message in the Mule console:
-
From the Mule Palette view, select Core and drag a Logger component to the right of Receive messages.
-
In the properties window, configure the following fields:
Field Value Display Name
Name for the logger, such as
Log Receipt.Message
`#[payload]`Level
INFO (Default)
The following image shows an example of the Logger configuration in the properties window:
XML for This Example
Paste this code into the Studio XML editor to quickly load the flow for this example into your Mule app:
<mule xmlns:sqs="http://www.mulesoft.org/schema/mule/sqs" xmlns:ee="http://www.mulesoft.org/schema/mule/ee/core"
	xmlns:file="http://www.mulesoft.org/schema/mule/file"
	xmlns:http="http://www.mulesoft.org/schema/mule/http"
	xmlns="http://www.mulesoft.org/schema/mule/core" xmlns:doc="http://www.mulesoft.org/schema/mule/documentation" xmlns:xsi="http://www.w3.org/2001/XMLSchema-instance"
	xsi:schemaLocation="
http://www.mulesoft.org/schema/mule/http http://www.mulesoft.org/schema/mule/http/current/mule-http.xsd
http://www.mulesoft.org/schema/mule/file http://www.mulesoft.org/schema/mule/file/current/mule-file.xsd
http://www.mulesoft.org/schema/mule/ee/core http://www.mulesoft.org/schema/mule/ee/core/current/mule-ee.xsd http://www.mulesoft.org/schema/mule/core http://www.mulesoft.org/schema/mule/core/current/mule.xsd
  http://www.mulesoft.org/schema/mule/http/current/mule-http.xsd
  http://www.mulesoft.org/schema/mule/ee/core
  http://www.mulesoft.org/schema/mule/ee/core/current/mule-ee.xsd
  http://www.mulesoft.org/schema/mule/file
  http://www.mulesoft.org/schema/mule/file/current/mule-file.xsd
  http://www.mulesoft.org/schema/mule/sqs
	http://www.mulesoft.org/schema/mule/sqs/current/mule-sqs.xsd">
	<http:listener-config name="HTTP_Listener_config" doc:name="HTTP Listener config" >
		<http:listener-connection host="0.0.0.0" port="8081" />
	</http:listener-config>

	<sqs:config name="Amazon_SQS_Configuration" doc:name="Amazon SQS Configuration"
	defaultQueueUrl="${sqs.queueUrl}" >
		<sqs:basic-connection accessKey="${sqs.accessKey}" secretKey="$sqs.secretKey}" region="us-east-1" />
	</sqs:config>

	<sqs:config name="Amazon_SQS_Large_Payload_Configuration" doc:name="Amazon SQS Configuration"
	defaultQueueUrl="${sqs.queueUrl}" >
		<sqs:basic-connection accessKey="${sqs.accessKey}" secretKey="$sqs.secretKey}" region="us-east-1" >
			<sqs:large-payload-support bucket="large-sqs-payload-bucket" messageSizeThreshold="256" messageSizeThresholdUnit="KB" />
		</sqs:basic-connection>
	</sqs:config>

	<file:config name="File_Config" doc:name="File Config" >
		<file:connection workingDir="${app.home}" />
	</file:config>

	<flow name="sqs-send-LargeMessageFlow" >
		<http:listener doc:name="Listener"
		config-ref="HTTP_Listener_config"
		path="/largePayload"/>
		<file:read doc:name="Read" config-ref="File_Config" path="largePayload.txt"/>
		<ee:transform doc:name="Transform Message" >
			<ee:message >
				<ee:set-payload ><![CDATA[%dw 2.0
output application/java
---
{
	delaySeconds: 0,
	body: payload,
	messageAttributes: {
		"AccountId": {
			"stringValue" : "000123456",
			"dataType" : "String.AccountId"
		} as Object {
			class: "org.mule.extension.sqs.api.model.MessageAttributeValue"
		},
		"NumberId": {
			"stringValue" : "230.000000000000000001",
			"dataType" : "Number"
		} as Object {
			class : "org.mule.extension.sqs.api.model.MessageAttributeValue"
		}
	} as Object {
		class: "java.util.HashMap"
	}
} as Object {
	class: "org.mule.extension.sqs.api.model.Message"
}]]></ee:set-payload>
			</ee:message>
		</ee:transform>
		<sqs:send-message doc:name="Send message" configref="Amazon_SQS_Large_Payload_Configuration" config-ref="Amazon_SQS_Large_Payload_Configuration"/>
		<logger level="INFO"
		doc:name="Log Response"
		message="payload"/>
		<sqs:get-approximate-number-of-messages
		doc:name="Get approximate number of messages"
		config-ref="Amazon_SQS_Large_Payload_Configuration"
		queueUrl="${sqs.queueUrl}"/>
		<logger level="INFO" doc:name="Log Count"
		message="Sent Message: `#[payload]`"/>
	</flow>
	<flow name="sqs-receive-large-message-flow" >
		<sqs:receivemessages doc:name="Receive messages"
		config-ref="Amazon_SQS_Large_Payload_Configuration"/>
		<logger level="INFO" doc:name="Log Receipt" />
	</flow>
</mule>