Amazon SQS Connector 5.9 Examples
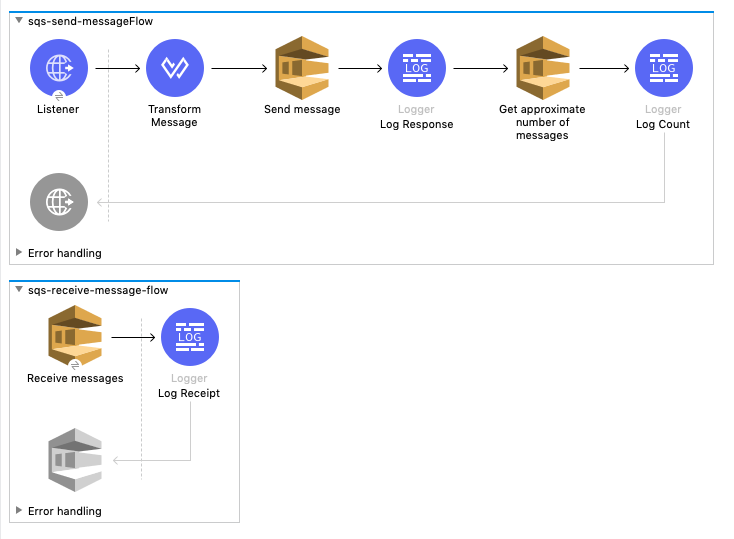
This example sends a message with metadata to an Amazon SQS queue and then receives it from the queue. The example contains two flows:
-
The first flow sends a message with metadata and gets the count of the messages in the queue to validate that the message was sent.
-
The second flow receives the message and logs the message body.
This example uses variables for some field values. You can either replace the variables with their values in the code, or you can provide the values for each variable in the src/main/resources/mule-artifact.properties file.
Before you try the example, access Anypoint Studio (Studio) and verify that the Mule Palette view displays entries for Amazon SNS and Amazon SQS. If not, follow the instructions in Amazon SQS Studio Configuration to install both connectors.
Create a Flow to Send a Message
To start the example, create a flow that sends a message to the queue. Creating the flow involves creating a new Mule project and configuring a Listener component, Transform message component, SQS Send Message operation, Logger component, SQS Get approximate number of messages operation, and a second Logger component.
-
Create a new Mule project in Studio.
-
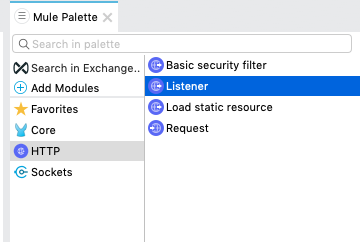
In the Mule Palette view, search for HTTP and select the Listener operation:
-
Drag the Listener operation onto the canvas.
-
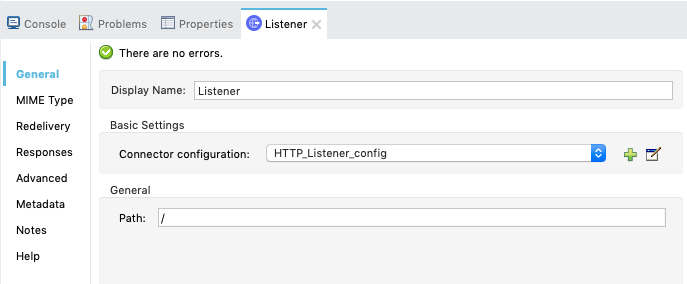
In the Listener configuration, click + next to the Connector configuration field to add a global element.
-
Accept the defaults.
-
Set the Path field to
/:
Add a Transform Message Component to Attach the Metadata
-
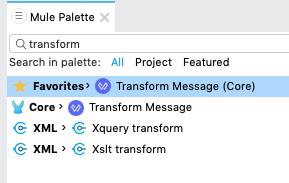
In the Mule Palette view, search for Transform Message:
-
Drag the Transform Message component onto the canvas, to the right of the Listener component.
-
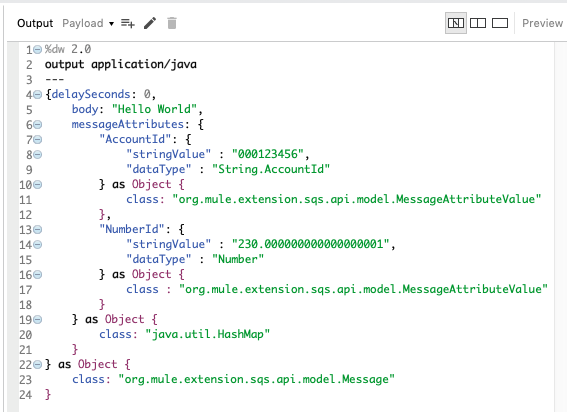
In the Transform Message configuration, overlay the brackets in the Output section with this XML:
{
	delaySeconds: 0,
	body: "Hello World",
	messageAttributes: {
		"AccountId": {
			"stringValue" : "000123456",
			"dataType" : "String.AccountId"
		} as Object {
			class: "org.mule.extension.sqs.api.model.MessageAttributeValue"
		},
		"NumberId": {
			"stringValue" : "230.000000000000000001",
			"dataType" : "Number"
		} as Object {
			class : "org.mule.extension.sqs.api.model.MessageAttributeValue"
		}
	} as Object {
		class: "java.util.HashMap"
	}
} as Object {
	class: "org.mule.extension.sqs.api.model.Message"
}
The following screenshot shows the XML as it appears in the Output section of Studio:
Add and Configure the SQS Send Message Operation
-
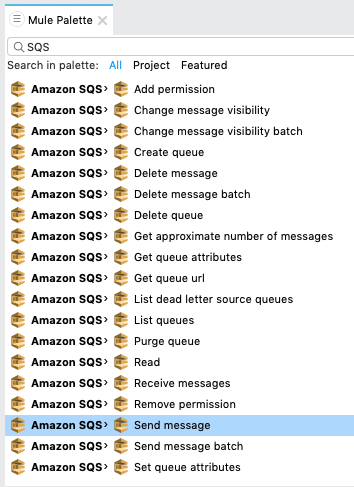
In the Mule Palette view, search for SQS and select the Send message operation:
-
Drag the Send message operation onto the canvas, to the right of the Transform Message component.
-
In the Send message configuration, click + next to the Connector configuration field to add a global element.
-
Configure the global element as follows:
Field Value Name
Name used to reference the configuration
Session Token
Session token used to validate the temporary security credentials
Access Key
Alphanumeric text string that uniquely identifies the user who owns the account
Secret Key
Key that acts as a password
Region Endpoint
Queue region
Default Global Queue URL
Default Amazon SQS queue URL credentials
For example:

-
Select the Configuration XML tab to view the corresponding XML:
<sqs:config name="Amazon_SQS_Configuration" doc:name="Amazon SQS Configuration" defaultQueueUrl="${sqs.queueUrl}"> <sqs:basic-connection accessKey="${sqs.accessKey}" secretKey="${sqs.secretKey}" region="us-east-1" sessionToken="${sqs.sessionToken}"/> </sqs:config> -
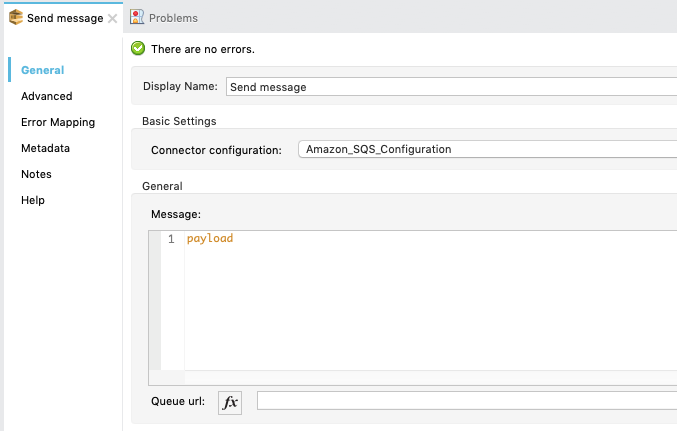
Configure the following fields in the properties window:
Field Value Display Name
Name for the connector operation
Connector Configuration
Global configuration you just created
Message
payloadQueue url
Amazon SQS queue URL.
If provided, the value of this field takes precedence over the value of the Default Global Queue URL field on the Global Configuration Elements window.
For example:
Add a Logger Component to Display the Response in the Mule Console
-
In the Mule Palette view, search for Logger.
-
Drag the component onto the canvas, to the right of the Send Message component.
-
Configure the following fields:
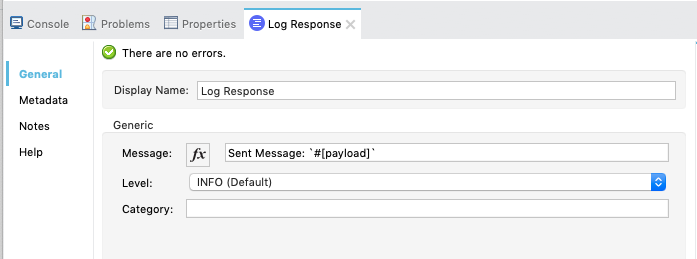
Field Value Display Name
Name for the logger, such as
Log ResponseMessage
Sent Message: `#[payload]`Level
INFO (Default)
For example:
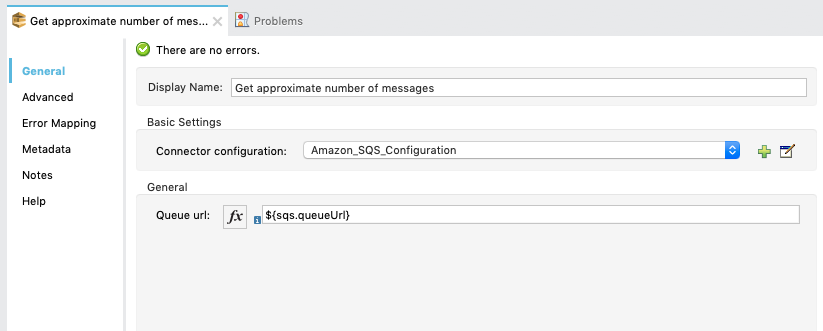
Obtain the Number of Messages in the Queue
-
In the Mule Palette view, search for Amazon SQS.
-
Select the Get approximate number of messages operation and drag it onto the canvas, to the right of the Logger component.
-
Configure the Amazon Queue url, for example:
-
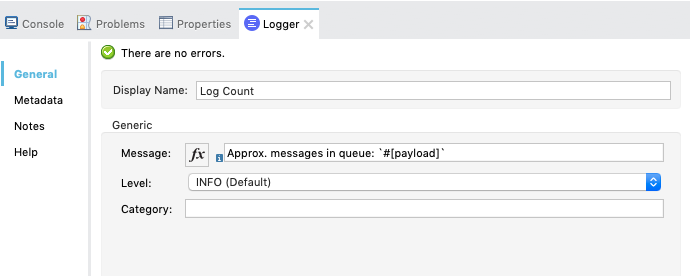
Configure the following fields:
-
Display Name
Name for the Logger component -
Message
String or DataWeave expression that specifies the Mule log message -
Level
Configures the logging level. The default isINFO.The following image shows example values for the fields:
-
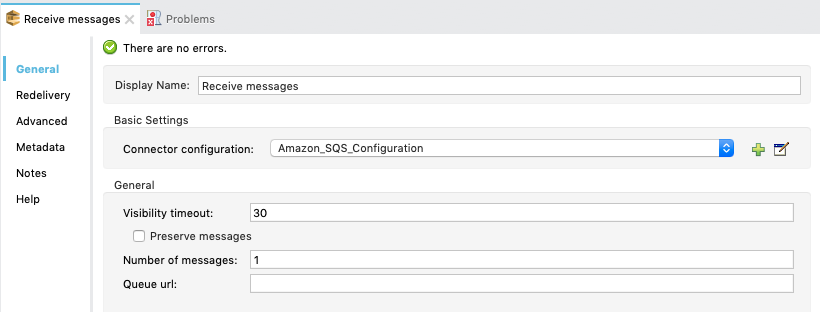
Create a Flow to Receive Messages
Finish this example by creating another flow to receive messages and log them before they are deleted from the queue.
-
In the Mule Palette view, search for SQS and select the Receive messages operation:

-
Drag the Receive messages operation onto the canvas.
-
Configure the following fields in the properties window:
Field Value Display Name
Name for the connector operation
Connector Configuration
Global configuration you created previously
Amazon_SQS_Configuration. If you want to receive large messages useAmazon_SQS_Large_Payload_ConfigurationNumber of Messages
10
Queue url
Amazon SQS queue URL.
If provided, the value of this field takes precedence over the value of the Default Global Queue URL field on the Global Configuration Elements window.
For example:
-
Add a Logger to display the message in the Mule Console.
-
Configure the Logger with these field values:
Field Value Display Name
Name of your choice
Message
`#[payload]`Level
INFO (Default)
Example Mule Application XML Code
Paste this code into your XML editor to quickly load the flow for this example use case into your Mule application. If needed, change the values to reflect your environment.
<mule xmlns:sqs="http://www.mulesoft.org/schema/mule/sqs" xmlns:ee="http://www.mulesoft.org/schema/mule/ee/core"
	xmlns:http="http://www.mulesoft.org/schema/mule/http"
	xmlns="http://www.mulesoft.org/schema/mule/core" xmlns:doc="http://www.mulesoft.org/schema/mule/documentation" xmlns:xsi="http://www.w3.org/2001/XMLSchema-instance"
	xsi:schemaLocation="http://www.mulesoft.org/schema/mule/core http://www.mulesoft.org/schema/mule/core/current/mule.xsd
  http://www.mulesoft.org/schema/mule/http/current/mule-http.xsd
  http://www.mulesoft.org/schema/mule/ee/core
  http://www.mulesoft.org/schema/mule/ee/core/current/mule-ee.xsd
  http://www.mulesoft.org/schema/mule/sqs
	http://www.mulesoft.org/schema/mule/sqs/current/mule-sqs.xsd">
	<http:listener-config name="HTTP_Listener_config" doc:name="HTTP Listener config" >
		<http:listener-connection host="0.0.0.0" port="8081" />
	</http:listener-config>
	<sqs:config name="Amazon_SQS_Configuration" doc:name="Amazon SQS Configuration"
	defaultQueueUrl="${sqs.queueUrl}" >
		<sqs:basic-connection accessKey="${sqs.accessKey}" secretKey="$sqs.secretKey}" region="us-east-1" />
	</sqs:config>
	<flow name="sqs-send-messageFlow" >
		<http:listener doc:name="Listener"
		config-ref="HTTP_Listener_config"
		path="/"/>
		<ee:transform doc:name="Transform Message" >
			<ee:message >
				<ee:set-payload ><![CDATA[%dw 2.0
output application/java
---
{
	delaySeconds: 0,
	body: "Hello World",
	messageAttributes: {
		"AccountId": {
			"stringValue" : "000123456",
			"dataType" : "String.AccountId"
		} as Object {
			class: "org.mule.extension.sqs.api.model.MessageAttributeValue"
		},
		"NumberId": {
			"stringValue" : "230.000000000000000001",
			"dataType" : "Number"
		} as Object {
			class : "org.mule.extension.sqs.api.model.MessageAttributeValue"
		}
	} as Object {
		class: "java.util.HashMap"
	}
} as Object {
	class: "org.mule.extension.sqs.api.model.Message"
}]]></ee:set-payload>
			</ee:message>
		</ee:transform>
		<sqs:send-message doc:name="Send message" configref="Amazon_SQS_Configuration"/>
		<logger level="INFO"
		doc:name="Log Response"
		message="payload"/>
		<sqs:get-approximate-number-of-messages
		doc:name="Get approximate number of messages"
		config-ref="Amazon_SQS_Configuration"
		queueUrl="${sqs.queueUrl}"/>
		<logger level="INFO" doc:name="Log Count"
		message="Sent Message: `#[payload]`"/>
	</flow>
	<flow name="sqs-receive-message-flow" >
		<sqs:receivemessages doc:name="Receive messages"
		config-ref="Amazon_SQS_Configuration"/>
		<logger level="INFO" doc:name="Log Receipt" />
	</flow>
</mule>