Installing and Testing Your Connector
| DevKit is compatible only with Studio 6 and Mule 3. To build Mule 4 connectors, see the Mule SDK documentation. |
Having built a project with the Anypoint DevKit plugin, you can install the skeletal connector in Anypoint Studio to confirm its basic functionality before adding more operations to it. This document describes the steps to take to build, then install and test your connector in Anypoint Studio.
The steps of this procedure are:
-
Set required @Connector annotations.
-
Add a "put in barn" operation to connector.
-
Document the "put in barn" operation.
-
Build the connector project and Install it using the Anypoint DevKit plugin.
-
Test the connector’s basic functionality.
Prerequisites
This document assumes you have created a connector project.
Setting @Connector Annotation Parameters
The @Connector annotation on the Maven-generated class has a required parameter: friendlyName. (See example below.) This parameter defines a human-readable name for the connector, which appears as the connector’s label in Studio’s palette. Without this parameter, the connector does not appear in the palette in Anypoint Studio.
@Connector(name = "barn", schemaVersion = "1.0", friendlyName = "Barn")Adding an Operation
The connector project you created is immediately ready to build, then install and test in Anypoint Studio. However, to make testing more interesting, you can add an operation to the connector that receives an animal as a string and returns the same animal name followed by "has been placed in the barn". Follow the steps below to add this operation.
-
In Anypoint Studio, open the main Java file,
src/main/java/org.mule.modules.barn/BarnConnector.java -
Paste the following code in the connector class:
/**
 * Custom processor that places an animal in the barn.
 *
 * {@sample.xml ../../../doc/barn-connector.xml.sample barn:putInBarn}
 *
 * @param animal Name of the animal to be place in the barn
 * @return returns processed message
 */
 @Processor
 public String putInBarn(String animal) {
    return animal + " has been placed in the barn";
 }
The identifier nameis reserved and cannot be used as a parameter. -
Confirm that the complete class appears as follows:
/** * (c) 2003-2014 MuleSoft, Inc. The software in this package is published * under the terms of the CPAL v1.0 license, a copy of which has been * included with this distribution in the LICENSE.md file. */ package org.mule.modules.barn; import org.mule.api.annotations.Config; import org.mule.api.annotations.Connector; import org.mule.api.annotations.Configurable; import org.mule.api.annotations.Processor; import org.mule.api.annotations.param.Default; /** * Anypoint Connector * * @author MuleSoft, Inc. */ @Connector(name="barn", schemaVersion="1.0", friendlyName="Barn") public class BarnConnector { /** * Configurable */ @Configurable @Default("value") private String myProperty; @Config ConnectorConfig config; /** * Custom processor * * {@sample.xml ../../../doc/barn-connector.xml.sample barn:my-processor} * * @param content Content to be processed * @return Some string */ @Processor public String myProcessor(String content) { /* * MESSAGE PROCESSOR CODE GOES HERE */ return content; } /** * Custom processor that places an animal in the barn. * * {@sample.xml ../../../doc/barn-connector.xml.sample barn:putInBarn} * * @param animal Name of the animal to be place in the barn * @return returns processed message */ @Processor public String putInBarn(String animal) { return animal + " has been placed in the barn"; } /** * Set property * * @param myProperty My property */ public void setMyProperty(String myProperty) { this.myProperty = myProperty; } /** * Get property */ public String getMyProperty() { return this.myProperty; } public ConnectorConfig getConnectorConfig() { return this.config; } public void setConnectorConfig(ConnectorConfig connectorConfig) { this.config = connectorConfig; } } -
In Anypoint Studio, select
ConnectorConfigin the code, and on a Mac press the CMD key, or in Windows, press the Ctrl key. TheConnectorConfig.javafile opens and you can see the connection management implementation for this connector.
Documenting the Operation
Because DevKit enforces proper documentation of all projects, you must provide at least one example of how to use each operation you add to a connector.
-
In your Anypoint Studio, open the file
doc/barn-connector.xml.samplethen paste the following snippet at the end:<!-- BEGIN_INCLUDE(barn:putInBarn) --> <barn:put-in-barn animal="#[map-payload:animal]" /> <!-- END_INCLUDE(barn:putInBarn) --> -
Confirm that the complete contents of the file appears as:
<!-- BEGIN_INCLUDE(barn:myProcessor) -->
    <barn:my-processor content="#[map-payload:content]" />
<!-- END_INCLUDE(barn:myProcessor) -->

<!-- BEGIN_INCLUDE(barn:putInBarn) -->
    <barn:put-in-barn animal="#[map-payload:animal]" />
<!-- END_INCLUDE(barn:putInBarn) -->
Building and Installing the Connector
At this point the connector is ready to be built and used for the first time. The DevKit plugin for Anypoint Studio automates the process of building the connector, running tests, and packaging it to be used in Anypoint Studio.
To start the process to compile and install your connector, right-click your project and select Anypoint Connector > Install or Update.
For manual installation of a new connector, run the below command from the command console from within the connector project directory:
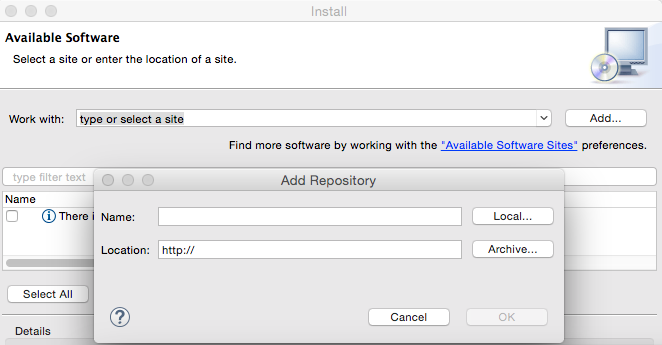
mvn clean packageInstallation from Update Site
|
After running the
The Install or Update feature can suggest automatic updates to your connector in Anypoint Studio. |
For more information about how to package your connector, check Packaging Your Connector for Release.
Testing the Connector
To see your new connector function, create, then run a Mule application which uses the Barn Connector. You can create the application using either the Studio Visual Editor or its XML Editor.
Studio Visual Editor
-
Create a simple flow using an HTTP connector and your new Barn Connector. Use the default values configured in the HTTP endpoint (port:
8081, host:localhost).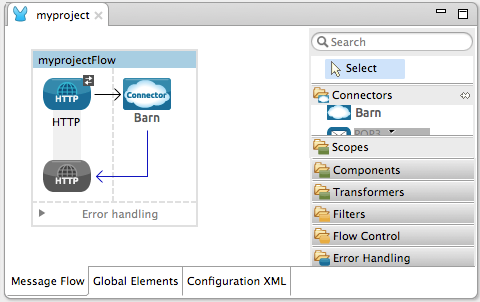
-
Select the connector to open the properties editor. Notice the parameters Studio makes available to the end user to configure. Configure the parameters according to the table below.
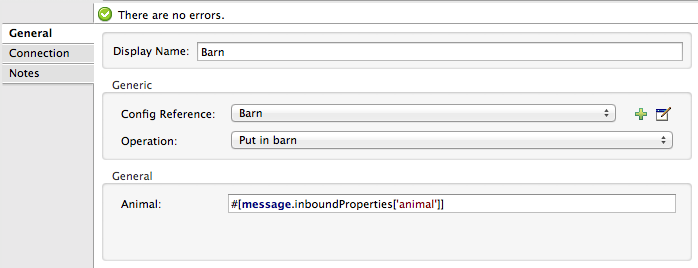
Parameter Value Display Name
BarnConfig Reference
See next step
Operation
Put In Barn
Animal
#[message.inboundProperties['animal']] -
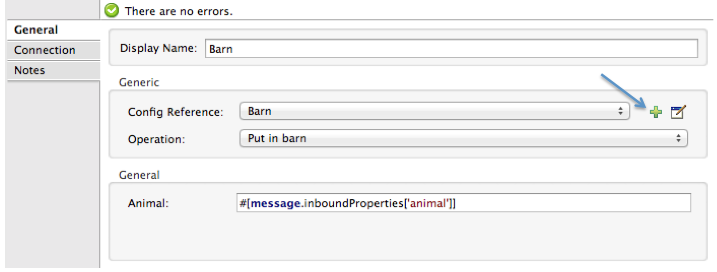
Click the plus sign next to the Config Reference field to create a new global element for your connector to use.
-
In the My Property, Username, and Password fields, enter any string as the value, then click OK.
image::global-elements.png[] -
Save, then run the project as a Mule Application (right-click project name, then select Run As > Mule Application).
-
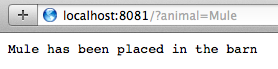
From a browser, navigate to
http://localhost:8081/?animal=Mule -
The application returns the response in your browser (see below).
XML
-
Create a simple flow using an HTTP connector and your new
barn:config. Configure the parameters of each element according to the code sample below.<mule xmlns:barn="http://www.mulesoft.org/schema/mule/barn" xmlns:http="http://www.mulesoft.org/schema/mule/http" xmlns="http://www.mulesoft.org/schema/mule/core" xmlns:doc="http://www.mulesoft.org/schema/mule/documentation" xmlns:spring="http://www.springframework.org/schema/beans" xmlns:xsi="http://www.w3.org/2001/XMLSchema-instance" xsi:schemaLocation="http://www.springframework.org/schema/beans http://www.springframework.org/schema/beans/spring-beans-current.xsd http://www.mulesoft.org/schema/mule/core http://www.mulesoft.org/schema/mule/core/current/mule.xsd http://www.mulesoft.org/schema/mule/http http://www.mulesoft.org/schema/mule/http/current/mule-http.xsd http://www.mulesoft.org/schema/mule/barn http://www.mulesoft.org/schema/mule/barn/current/mule-barn.xsd"> <barn:config name="Barn" username="user" password="pass" myProperty="whatever you want" doc:name="Barn"> <barn:connection-pooling-profile initialisationPolicy="INITIALISE_ONE" exhaustedAction="WHEN_EXHAUSTED_GROW" /> </barn:config> <flow name="barntestFlow1" doc:name="barntestFlow1"> <http:inbound-endpoint exchange-pattern="request-response" host="localhost" port="8081" doc:name="HTTP" /> <barn:put-in-barn config-ref="Barn" animal="#[message.inboundProperties['animal']]" doc:name="Barn" /> </flow> </mule> -
Save, then run the project.
-
From a browser, navigate to
http://localhost:8081/?animal=Mule -
The application returns the response in your browser (see below).
See Also
-
NEXT STEP: Implement authentication on your connector.