Deploying an API or Proxy to API Gateway Runtime
You deploy an API or proxy to a Mule 3.9.0 runtime, or to an earlier API Gateway Runtime if you are running Mule versions earlier than 3.8.
API Gateway Runtime versions are on-premises and cloud-based. You can use HTTPS protocol.
Using the Command Line On Premises
-
Navigate to the directory where the .zip file is located and copy the .zip file. Ensure that your copy of the file does not have any spaces in the name.
-
Drop the copy of the .zip file into the
<MULE_HOME>/appsfolder.<MULE_HOME>is the value of the MULE_HOME variable employed by MuleSoft’s API Gateway, usually the root directory of the installation, such as/opt/Mule/api-gateway-2.2.0/.The API Gateway polls this folder for new applications every five seconds. Watch your command line window to track the progress of the deployment.
The proxy application is deployed to your API Gateway.
Next, return to the API Version Details page. If you deployed the application to API Gateway and set your API URL in the Version Details page to match the inbound endpoint in your application, the Anypoint Platform agent tracks your endpoint. The indicator light turns green.
To undeploy your application, navigate to the app directory and delete the file your_application.txt. This removes your application from the /app directory, which automatically undeploys it from the API Gateway.
To update your application at runtime, drop a new .zip version of the app into the <MULE_HOME>/apps directory. The API Gateway detects this as an existing app update and ensures a clean redeployment of the application.
On-Premises Using Runtime Manager
This procedure works with API Gateway 2.0 and above.
-
Register your server in Runtime Manager using these simplified instructions or the full instructions.
-
In Anypoint Platform, go to Runtime Manager.
If using the Anypoint Platform Private Cloud Edition, this section is named Applications.
-
Click the Servers tab, then Add Servers.
-
The Add Servers screen displays a command which includes *token* specifically generated for your Gateway Runtime. Copy this token to your clipboard.
-
In the server where your gateway resides, open a terminal and go to the gateway’s
bindirectory. -
Run the following command:
./amc_setup -H <token> <server name><token>is the token displayed in the Add Servers screen, and<server name>is the name you select for your server. This should register your server with the Runtime Manager console. -
In Anypoint Platform, click APIs to go to the API management page.
-
Click Add new API.
-
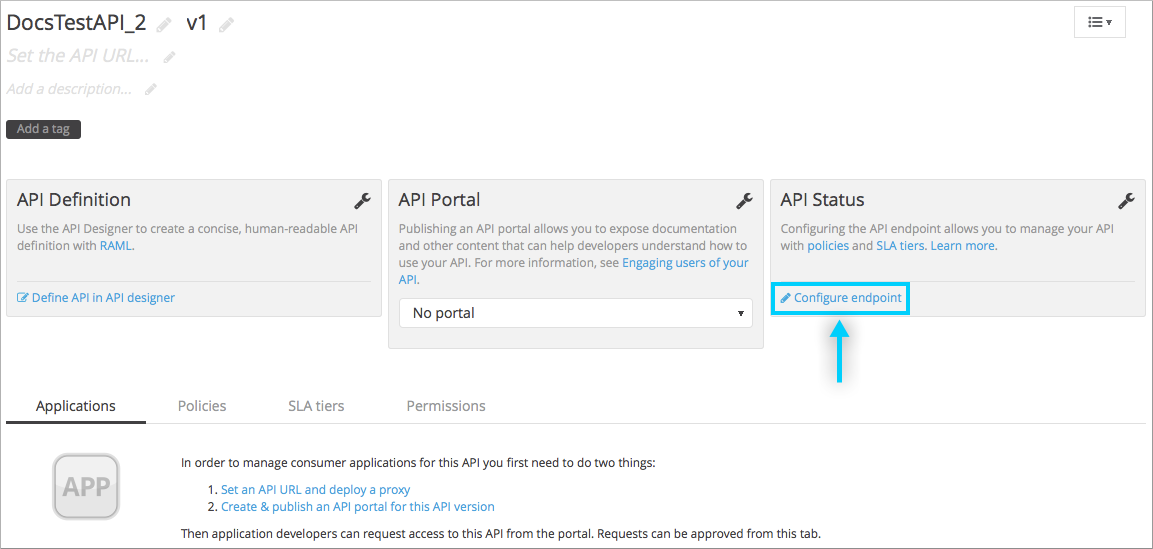
Anypoint Platform displays the information page for the API, shown below. Under API Status, click Configure endpoint.
-
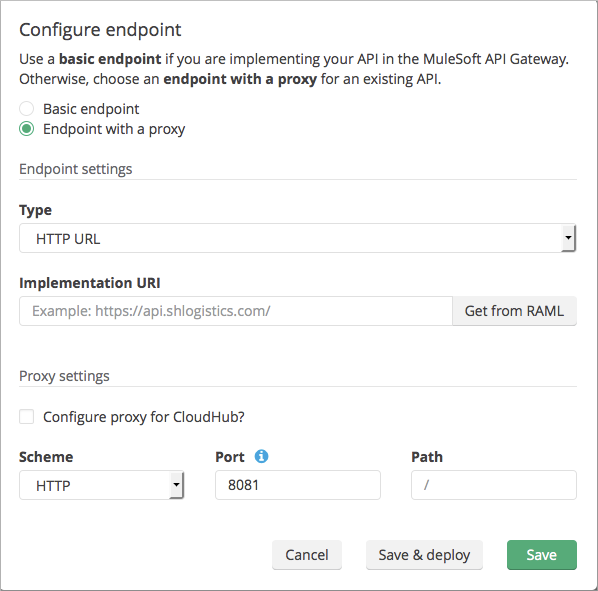
In the endpoint configuration screen, fill in the required information for the API you would like to manage.
-
Click Save & deploy. You see the status of your gateway is running.
If you don’t see the API Gateway, its server was not properly registered. In this case, you see a screen like the one shown below.
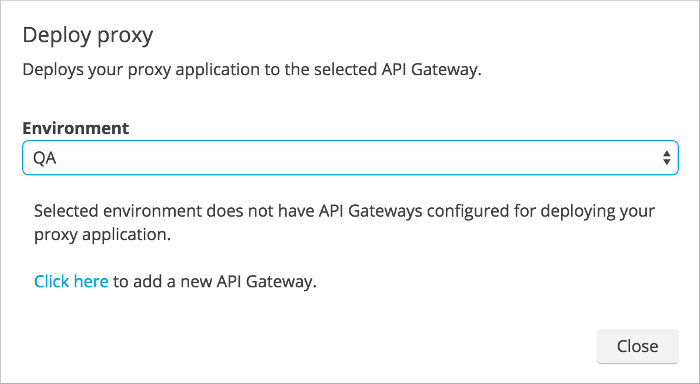
The screen gives you the option to add a new API Gateway.
-
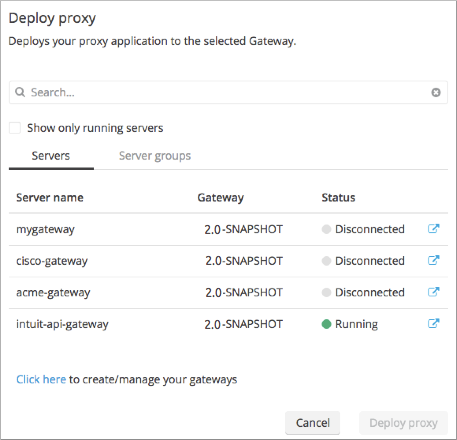
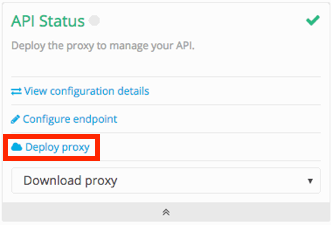
Select your gateway, then click Deploy proxy.
-
After deployment, the API status symbol turns green, for active.
Automatic Deployment to CloudHub
To deploy to CloudHub automatically, use the Anypoint Platform account where your API is registered. Your user account must have the appropriate permissions both on CloudHub and on the API Platform. If this is not the case, see the next tab CloudHub API Gateway - Manual.
Currently, HTTPS proxies can only be deployed to CloudHub manually.
-
In your API Administration page, click Configure Endpoint under the API Status section.
-
Tick the box labeled Configure proxy for CloudHub.
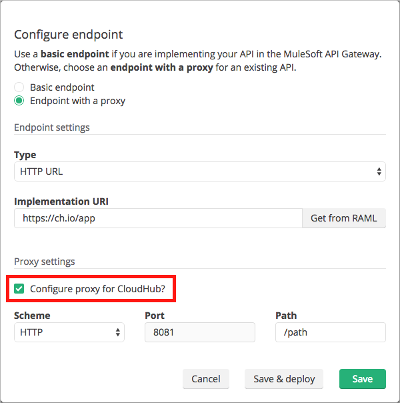
When ticking the box, the Port field changes.
-
Click Save & Deploy to deploy your proxy right away. Otherwise, click Save and deploy later. After configuring the proxy for CloudHub, a new link labeled Deploy proxy appears in the API Status section. Use it to open the deploy menu.
-
In the deploy menu, pick an app name, environment, and API Gateway version, or accept the defaults.
Under the API Status section, a new link appears labeled Manage CloudHub proxy. This links you to the actual application on Runtime Manager for further management, such as changing the worker type and advanced settings.
-
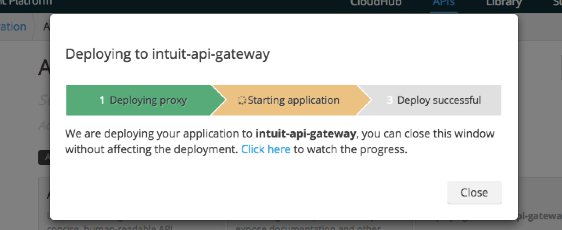
The status of the API deployment is indicated by the marker in the API Status section of the API version page. While the app is starting, a spinner appears. Once it starts successfully, the light turns green.
After the app starts, a new link under the API Status labeled Re-deploy proxy appears. If you make changes to the endpoint configuration you can click this link to re-deploy your proxy application to the same application on CloudHub.
Manual Deployment to CloudHub
-
Log in to your Anypoint Platform account and click Runtime Manager.
-
Ensure that you are in the correct environment for deployment. If necessary, click your username, then click Switch environment .
-
Click Add application.

-
In the Add Application screen, give your application a unique domain name.
The domain name forms part of the URLs that applications should use to call your API, so it should represent your API itself.
-
Click Choose file and select the .zip file of your proxy application or APIkit project.
-
Open the Properties section and define the following Environment Variables.
anypoint.platform.client_id="[your organization's unique client_id]"
anypoint.platform.client_secret="[your organization's unique client secret]"
Use your client ID and client secret, which you can obtain from an organization administrator. Log in to Anypoint Platform as an administrator, click the menu icon on the top-left and select the Access Management section, then select the Organization tab. The client ID and secret id appear.
-
When deploying your application, pick a runtime version in the Mule Version field.
-
Click Create.
-
Runtime Manager automatically moves to the Logs view where you can track the status of the deployment. Watch for this message:

The application is deployed to your API Gateway.
Next, return to your API Version Details page. If you deployed your application with a valid client ID and client secret for your Anypoint Platform organization and set your API URL in the Version Details page to match the inbound endpoint in your application’s XML configuration, the Anypoint Platform agent should track your endpoint, and the indicator light turns green.
To undeploy your application, on the Deployment tab and click Stop Application.
To update your application at runtime, you can upload a new .zip file on the Deployment tab and click Update. The API Gateway performs a zero downtime update using the new application file.
If you plan to expose your API through SSL, then there are a couple of additional steps you need to take.