Configuring OAuth 2.0 for Connectors
Many services enable you to use an OAuth 2.0 authentication scheme for increased security when interacting with their APIs. Many connectors support configuring a standard OAuth 2.0 setup.
Prerequisites
To configure OAuth 2.0 for a connector, you must have access to the following:
-
OAuth provider (Okta, Azure AD, Google, PingFederate, and so on)
-
Anypoint Studio
OAuth 2.0 Configuration Fields
Here are the configuration fields typically available for OAuth 2.0 for connectors:
OAuth 2.0 Authorization Code:
| Name | Type | Description | Default Value | Required |
|---|---|---|---|---|
Consumer Key |
String |
OAuth consumer key, as registered with the service provider. |
X |
|
Consumer Secret |
String |
OAuth consumer secret, as registered with the service provider. |
X |
|
Authorization URL |
String |
URL of the service provider’s authorization endpoint in which the user is redirected to provide their user credentials. This URL typically ends with |
X |
|
Access Token Url |
String |
URL of the service provider’s access token endpoint in which the app automatically exchanges an authorization code for an access token. |
X |
|
Scopes |
String |
Space-delimited list of OAuth scopes to request during the OAuth dance. This value defaults to the scopes in the annotation. |
|
|
Resource Owner ID |
String |
ID of the resource owner’s account that authorizes the connector to access their resources. |
OAuth 2.0 Callback Configuration:
| Name | Type | Description | Default Value | Required |
|---|---|---|---|---|
Callback Path |
String |
Server path to which the user’s browser is redirected to after the OAuth provider successfully authenticates the user. The callback path is typically |
X |
|
Authorize Path |
String |
Server path in which the user begins the OAuth dance. The authorize path is typically |
X |
|
External Callback Url |
String |
Full, publicly accessible URL on your server in which the user’s browser is redirected to when authorization is successful with the OAuth provider. This field enables you to override the Callback path field, for example, |
OAuth 2.0 Flow Overview
Anypoint Connectors use the Authorization Code Grant flow for their OAuth 2.0 dance. The following steps show a typical flow for configuring OAuth 2.0 for a connector:
-
In your browser, navigate to the path specified in the Authorize Path field to begin the OAuth dance. For example, if you are running the connector on
localhostand your path is set to/authorizewith port8080, navigate tohttp://localhost:8080/authorize. -
Provide values for the Authorization URL, Scopes, Resource Owner ID, and Callback Path fields. The following conditions must be true for the OAuth provider to accept the authorization request:
-
The Authorization URL is reachable from the user’s browser.
-
The provided scopes for Scopes are supported.
-
The Resource Owner ID (if provided) is registered with the OAuth provider.
-
The full Callback Path is registered with the OAuth provider.
-
-
Enter your username, password, and other credentials that the OAuth provider accepts, such as 2FA requests. If the authentication is successful, the OAuth provider might ask permission for the app to access your account. This typically occurs the first time you authenticate.
-
Once the OAuth provider authenticates the user and authorizes access to the connector, the user’s web browser is redirected to the callback URL that is registered with the OAuth provider, for example,
http://localhost:8080/callback.Ensure that the user running the flow has access to the server and endpoint; otherwise, the authorization approval will not reach the connector.
You can use
localhostfor testing locally, but you cannot uselocalhostfor production environments and cloud deployment. For example, if your connector app is running onhttp://my.server.com, you must specify the External Callback Url field with thehttp://my.server.com/callbackvalue. Thehttp://my.server.com/callbackURL must also be registered with the OAuth provider. -
Once the user’s browser successfully reaches the callback URL, the connector obtains an authorization code that is automatically exchanged for an access token using the URL configured in the Access Token URL field. This token is long-lived and is automatically refreshed by the connector indefinitely (if allowed by the OAuth provider).
The connector is now fully authorized and can use any service that accepts the new access token issued by the OAuth provider.
Example: How to Configure OAuth 2.0 For Gmail Connector
The following example shows how to configure OAuth 2.0 for Gmail Connector.
Configuring the OAuth Provider
To configure the OAuth provider for Gmail Connector, you can use Google Cloud Console. The following steps show how to configure the OAuth provider:
| If you haven’t enabled the Gmail API previously, you must create a new project and enable the Gmail API in the Enabled APIs & Services menu section. |
-
Add a new client (your connector app) to Google OAuth 2.0. To do so, navigate to APIs & Services > Credentials > Create Credentials > OAuth Client ID.
-
Create a new web application by using the Web Application field.
-
Enter a name, for example,
OAuthDemoApp. -
Add the following URL to the Authorized redirect URIs field:
http://127.0.0.1:8080/callback. -
Click Create and copy the new client ID and client secret for later use.
-
Click OK.
Configuring the Connector
Configure the connector with OAuth 2.0 using Anypoint Studio or XML.
Configuring the Connector Using Anypoint Studio
The following steps show how to configure the connector with OAuth 2.0 using Anypoint Studio.
-
In Studio, create a Mule project.
-
In the Mule Palette view, click (X) Search in Exchange.
-
In Add Dependencies to Project, enter
gmailin the search field. -
Click Gmail Connector - Mule 4 in Available modules.
-
Click Add.
-
Click Finish.
-
Configure the OAuth 2.0 authorization code. Create a new Gmail Connector connection and use the client ID and the client secret from the previous section as your Consumer Key and Consumer Secret respectively. You can leave the Resource Owner ID field empty.
Gmail Connector comes with pre-filled values for the Authorization URL, Access Token URL, and Scopes fields, so no further action is required. However, if you are setting up a different connector that uses a third-party OAuth provider such as Okta or Ping, you must use their respective Authorization URL, Access Token URL, and Scopes fields. 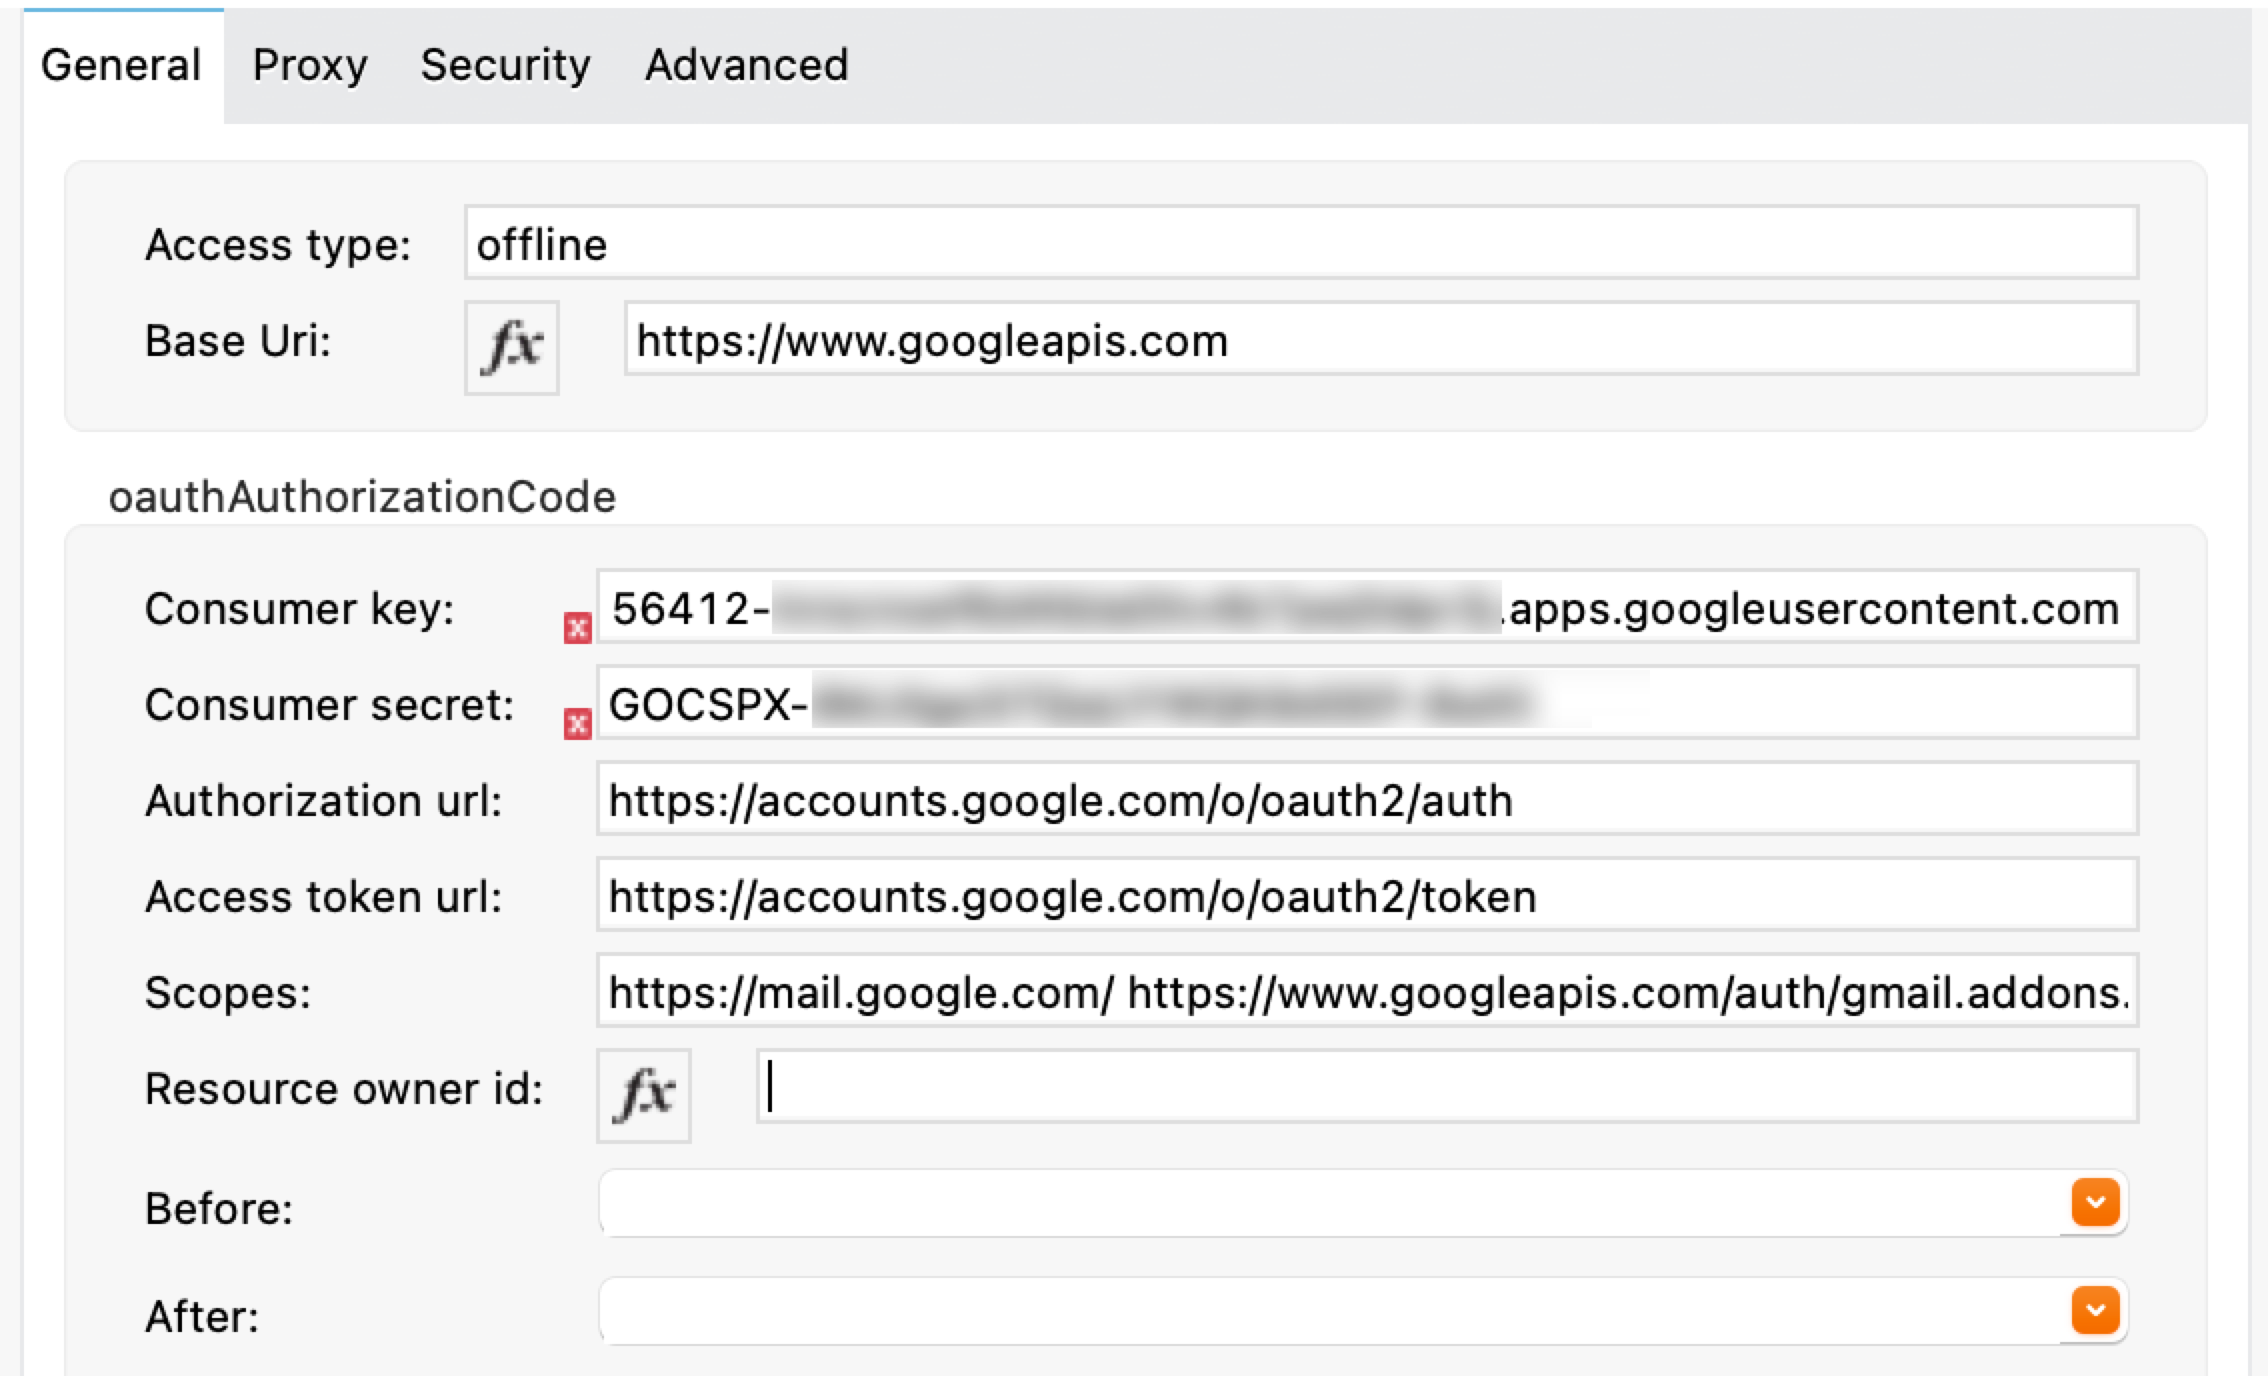
-
Configure the OAuth 2.0 callback configuration. Drag a new HTTP Listener to the message flow and set Protocol to
HTTP (Default), Host tolocalhost, and Port to8080.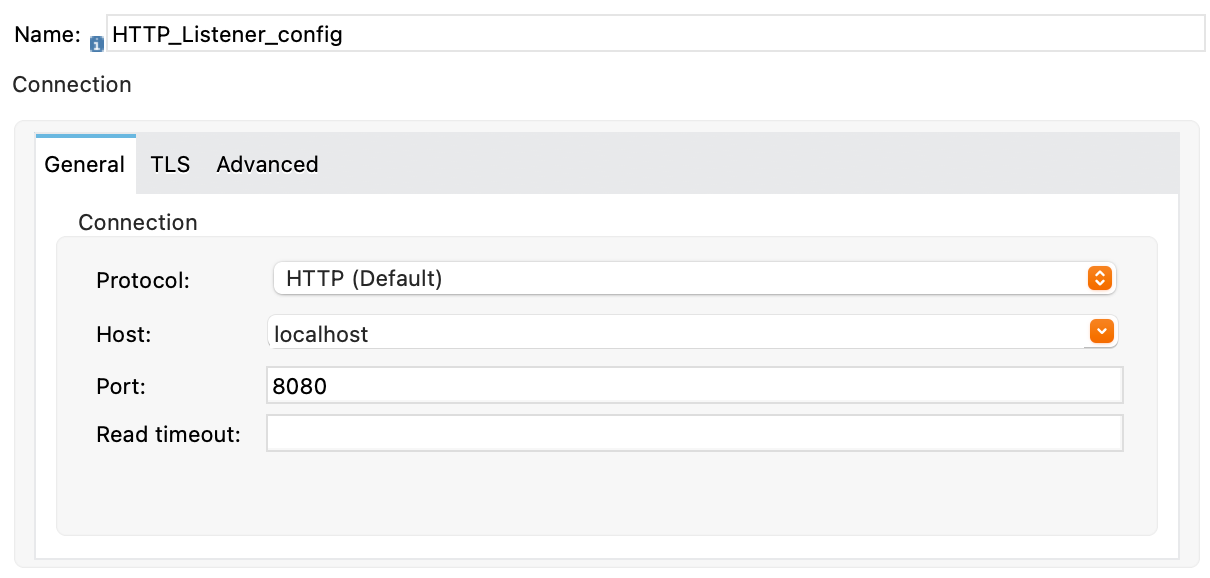
-
Select this HTTP Listener in the Gmail Connector connection configuration.
-
Set Callback path to
callbackand Authorize path toauthorize. You can leave the External Callback Url field empty.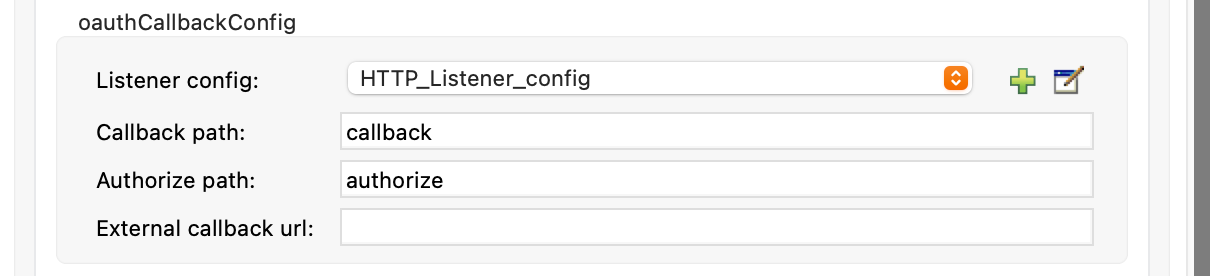
-
Run the app.
Configuring the Connector Using XML
The following steps show how to configure the connector with OAuth 2.0 using XML.
-
Add the following dependency into your pom.xml.
<dependency> <groupId>com.mulesoft.connectors</groupId> <artifactId>mule4-gmail-connector</artifactId> <version>1.0.5</version> <classifier>mule-plugin</classifier> </dependency> -
Configure the OAuth 2.0 authorization code. Create a new Gmail Connector connection and use the client ID and the client secret from the previous section as your Consumer Key and Consumer Secret respectively. You can leave the Resource Owner ID field empty.
Gmail Connector comes with pre-filled values for the Authorization URL, Access Token URL, and Scopes fields, so no further action is required. However, if you are setting up a different connector that uses a third-party OAuth provider such as Okta or Ping, you must use their respective Authorization URL, Access Token URL, and Scopes fields.
-
Configure the OAuth 2.0 callback configuration. Create a new HTTP Listener configuration and set Protocol to
HTTP (Default), Host tolocalhost, and Port to8080.Here is the XML for this HTTP Listener:
<http:listener-config name="HTTP_Listener_config" > <http:listener-connection host="localhost" port="8080" /> </http:listener-config> -
Select this HTTP Listener in the Gmail Connector connection configuration.
-
Set Callback path to
callbackand Authorize path toauthorize. You can leave the External Callback Url field empty.Here is the XML for the OAuth 2.0 callback configuration for Gmail Connector:
<gmail:config name="Gmail_Connector_Config" > <gmail:oauth2c-connection > <gmail:oauth-authorization-code consumerKey="YOUR_CLIENT_ID" consumerSecret="YOUR_CLIENT_SECRET" /> <gmail:oauth-callback-config listenerConfig="HTTP_Listener_config" callbackPath="callback" authorizePath="authorize"/> </gmail:oauth2c-connection> </gmail:config> -
Run the app.
Performing the OAuth Dance
Perform the OAuth dance and authorize your app to access your Gmail account via the connector. The following steps show how to perform the OAuth dance:
-
In your browser, navigate to the path specified in the Authorize Path field to begin the OAuth dance. In this example, the path is
http://localhost:8080/authorize. If everything is configured correctly, you will see a Google Authentication screen in which you select your user account and give permission to the app to access your account. Google shows a list of permissions that require approval, for example: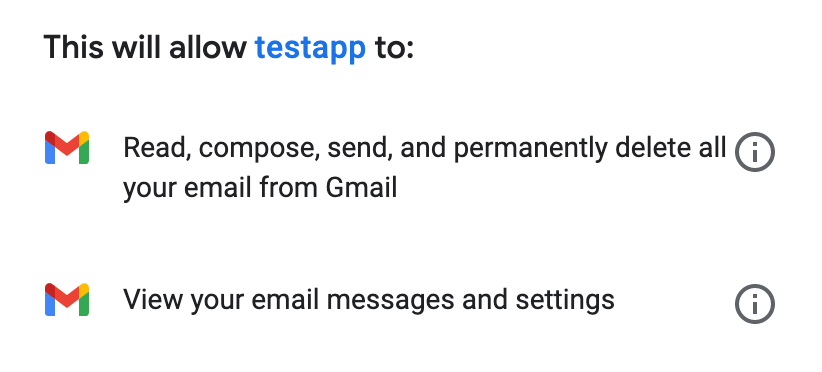
These permissions are dependent on the Scopes field configured in the Gmail Connector connection configuration. You can accept the defaults, but if you want to limit the access, you can remove the unwanted scopes. For example, remove the https://www.googleapis.com/auth/gmail.sendscope to disallow the connector from sending new emails from your account, however, doing so limits connector functionality, such as the ability to use the Send Message or Send Draft operations. -
Click Allow. The OAuth provider redirects you to
http://127.0.0.1:8080/callback, which is the redirect URI that you configured in the OAuth provider and is open in the connector configuration. If the OAuth dance is successful, aSuccessfully retrieved access tokenmessage shows up on the browser, which means the connector is now fully authorized and ready to use your Gmail account.You do not need to authorize the app again unless you restart Anypoint Studio or the access token expires. Access tokens are automatically refreshed if the refresh token flow is enabled in your OAuth provider. Google supports this automatically, so your tokens are refreshed indefinitely.
If you want your authorization to persist over restarts, you can configure an object store in the Gmail Connector connection configuration.
Testing the Connector
Now that your connector is functional and authorized, you can test a flow using the connector. The following steps show how to retrieve some of your emails:
-
Drag an HTTP Listener to the flow. Set Path to
/messages. -
Drag the List Messages operation to the flow. The only required field is User Id, which contains the user’s email address that you want to access. For example, this is useful for corporate email servers with multiple users registered under one company account. Set User Id to
meto retrieve emails from your main account directly. You can also set Max Results to a lower number if you want. -
Restart the project.
-
Navigate to
http://localhost:8080/messages. You should see a JSON formatted list of message IDs and thread IDs. You can retrieve the details of these messages or threads using the Get Message or the Get Thread operations.
XML for this Example
Paste this code into the Studio XML editor to quickly load the flow for this testing example into your Mule app:
<?xml version="1.0" encoding="UTF-8"?>

<mule xmlns:gmail="http://www.mulesoft.org/schema/mule/gmail" xmlns:http="http://www.mulesoft.org/schema/mule/http"
	xmlns="http://www.mulesoft.org/schema/mule/core"
	xmlns:doc="http://www.mulesoft.org/schema/mule/documentation" xmlns:xsi="http://www.w3.org/2001/XMLSchema-instance" xsi:schemaLocation="http://www.mulesoft.org/schema/mule/core http://www.mulesoft.org/schema/mule/core/current/mule.xsd
http://www.mulesoft.org/schema/mule/http http://www.mulesoft.org/schema/mule/http/current/mule-http.xsd
http://www.mulesoft.org/schema/mule/gmail http://www.mulesoft.org/schema/mule/gmail/current/mule-gmail.xsd">
	<http:listener-config name="HTTP_Listener_config" >
		<http:listener-connection host="localhost" port="8080" />
	</http:listener-config>
	<gmail:config name="Gmail_Connector_Config">
		<gmail:oauth2c-connection >
			<gmail:oauth-authorization-code consumerKey="300484156412-lnrscnoef6d4tbla0itv4b7pej0dpr3j.apps.googleusercontent.com" consumerSecret="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" scopes="https://mail.google.com/ https://www.googleapis.com/auth/gmail.addons.current.action.compose https://www.googleapis.com/auth/gmail.addons.current.message.action https://www.googleapis.com/auth/gmail.addons.current.message.readonly https://www.googleapis.com/auth/gmail.compose https://www.googleapis.com/auth/gmail.insert https://www.googleapis.com/auth/gmail.labels https://www.googleapis.com/auth/gmail.modify https://www.googleapis.com/auth/gmail.readonly"/>
			<gmail:oauth-callback-config listenerConfig="HTTP_Listener_config" callbackPath="callback" authorizePath="authorize"/>
		</gmail:oauth2c-connection>
	</gmail:config>

	<flow name="oauthFlow" >
		<http:listener config-ref="HTTP_Listener_config" path="/messages"/>
		<gmail:gmailusersmessageslist config-ref="Gmail_Connector_Config" userIdUriParam="me" maxResultsQueryParam="5"/>
	</flow>
</mule>