Configure Database Connector Data Types Examples
The following examples show how to configure Anypoint Connector for Database (Database Connector) data types by using the Parameters types field to specify the type of each input parameter in the query and the Column types field to set custom data types when connected to a particular database provider.
Configure the Parameter Types Field in Studio
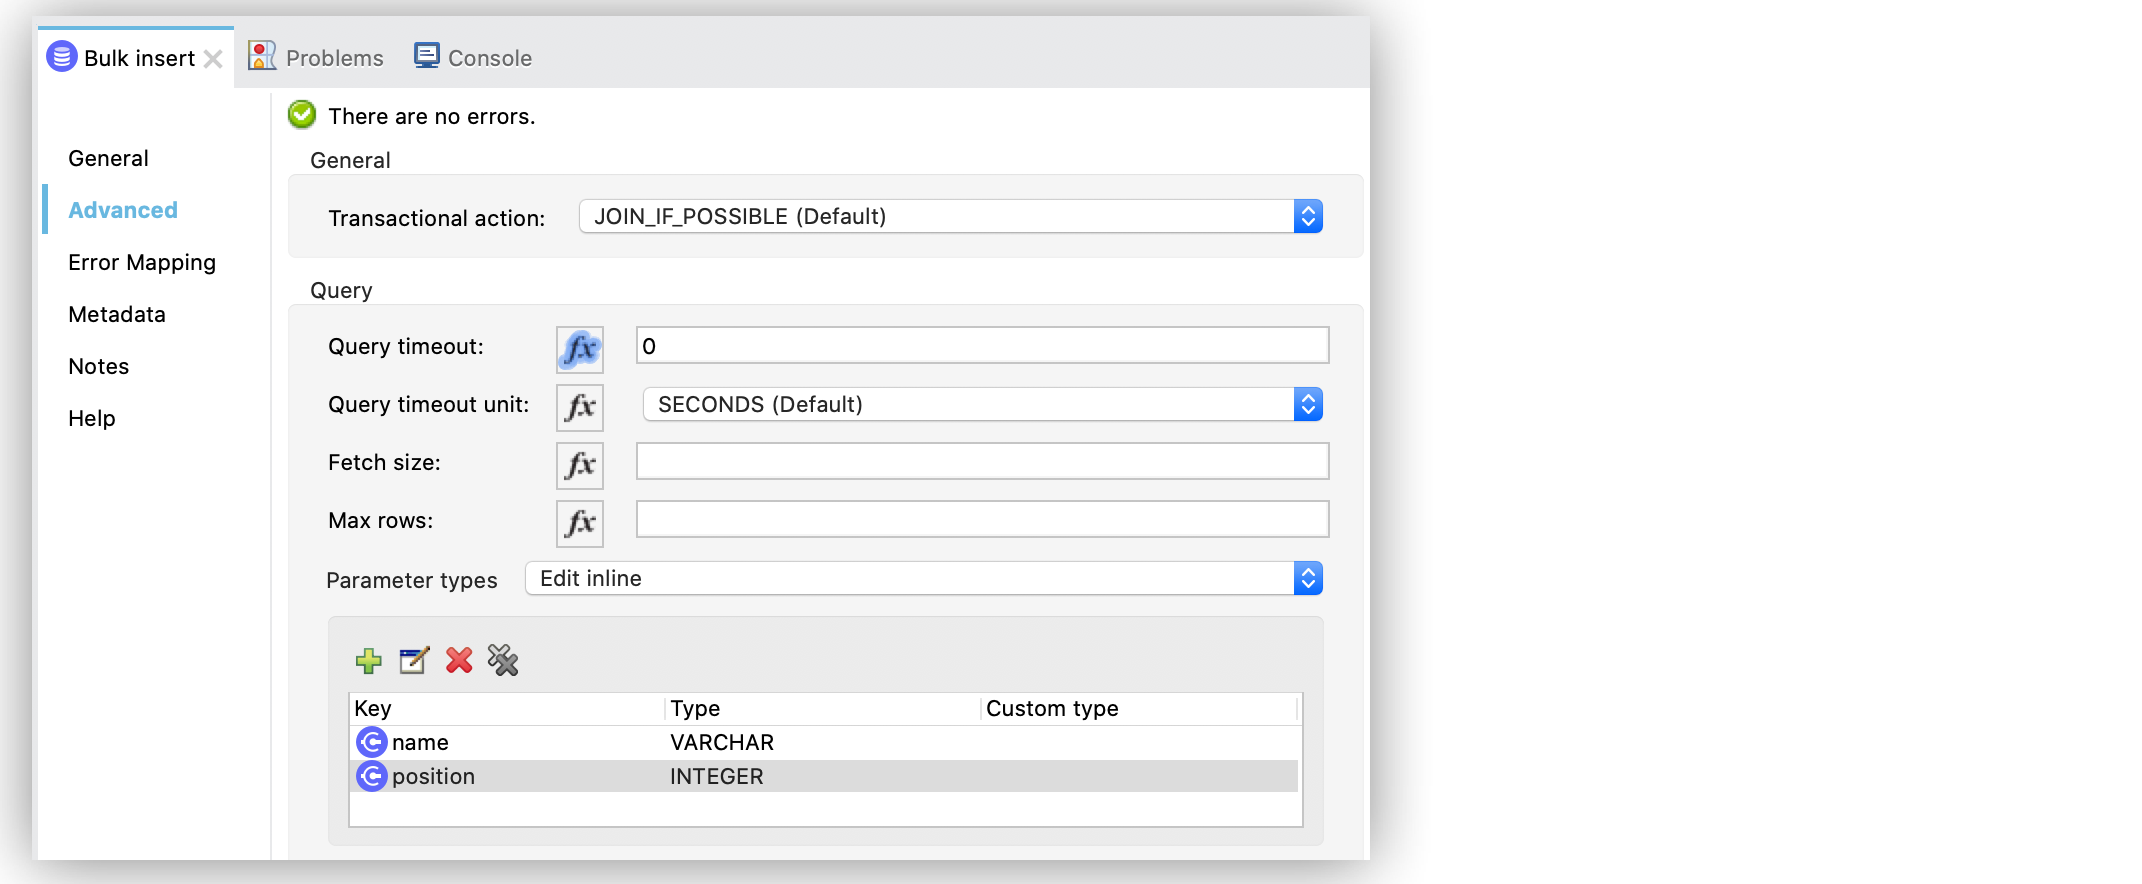
If your JDBC driver either cannot determine the type of the input, or a parameter is of a custom type, configure the Parameter types field to specify the type of each input parameter. The following example shows how to configure the Parameter types field in the Bulk insert operation:
-
In your Studio flow, select the Bulk insert operation.
-
In the General tab of the operation configuration screen, click the plus sign (+) next to the Connector configuration field to access the global element configuration fields.
-
Specify the database connection information and click OK.
-
Set the SQL Query Text field to the SQL query to execute, for example:
INSERT INTO PLANET(POSITION, NAME) VALUES (:position, :name) -
In the operation configuration screen, click the Advanced tab.
-
Set the Parameter types field to
Edit inline. -
Click the green plus sign (+) to create a new parameter type.
-
In the parameter type window, set the Key field to
nameand the Type field toVARCHAR. -
Click Finish.
-
Repeat Step 7.
-
In the parameter type window, set the Key field to
positionand the Type field toINTEGER. -
Click Finish.
The following screenshot shows the configuration in Studio:

In the XML editor, the <db:parameter-types> configuration looks like this:
<db:bulk-insert queryTimeout="0" queryTimeoutUnit="SECONDS">
     <db:sql>INSERT INTO PLANET(POSITION, NAME) VALUES (:position, :name)</db:sql>
     <db:parameter-types>
         <db:parameter-type key="name" type="VARCHAR" />
         <db:parameter-type key="position" type="INTEGER" />
     </db:parameter-types>
 </db:bulk-insert>
Configure the Column Types Field in Studio
Each connection provider uses exclusive and common parameters, such as Derby and Oracle. A child element of the connection provider element defines custom data types parameters you can use when connected to a particular provider.
The following table provides the JDBC Data Type codes and IDs that you can use to define custom data types:
| JDBC Data Type Code | id |
|---|---|
ARRAY |
2003 |
BIGINT |
-5 |
BINARY |
-2 |
BIT |
-7 |
BLOB |
2004 |
BOOLEAN |
16 |
CHAR |
1 |
CLOB |
2005 |
DATALINK |
70 |
DATE |
91 |
DECIMAL |
3 |
DISTINCT |
2001 |
DOUBLE |
8 |
FLOAT |
6 |
INTEGER |
4 |
JAVA_OBJECT |
2000 |
LONGNVARCHAR |
-16 |
LONGVARBINARY |
-4 |
LONGVARCHAR |
-1 |
NCHAR |
-15 |
NCLOB |
2011 |
NULL |
0 |
NUMERIC |
2 |
NVARCHAR |
-9 |
OTHER |
1111 |
REAL |
7 |
REF |
2006 |
REF_CURSOR |
2012 |
ROWID |
-8 |
SMALLINT |
5 |
SQLXML |
2009 |
STRUCT |
2002 |
TIME |
92 |
TIME_WITH_TIMEZONE |
2013 |
TIMESTAMP |
93 |
TIMESTAMP_WITH_TIMEZONE |
2014 |
TINYINT |
-6 |
VARBINARY |
-3 |
VARCHAR |
12 |
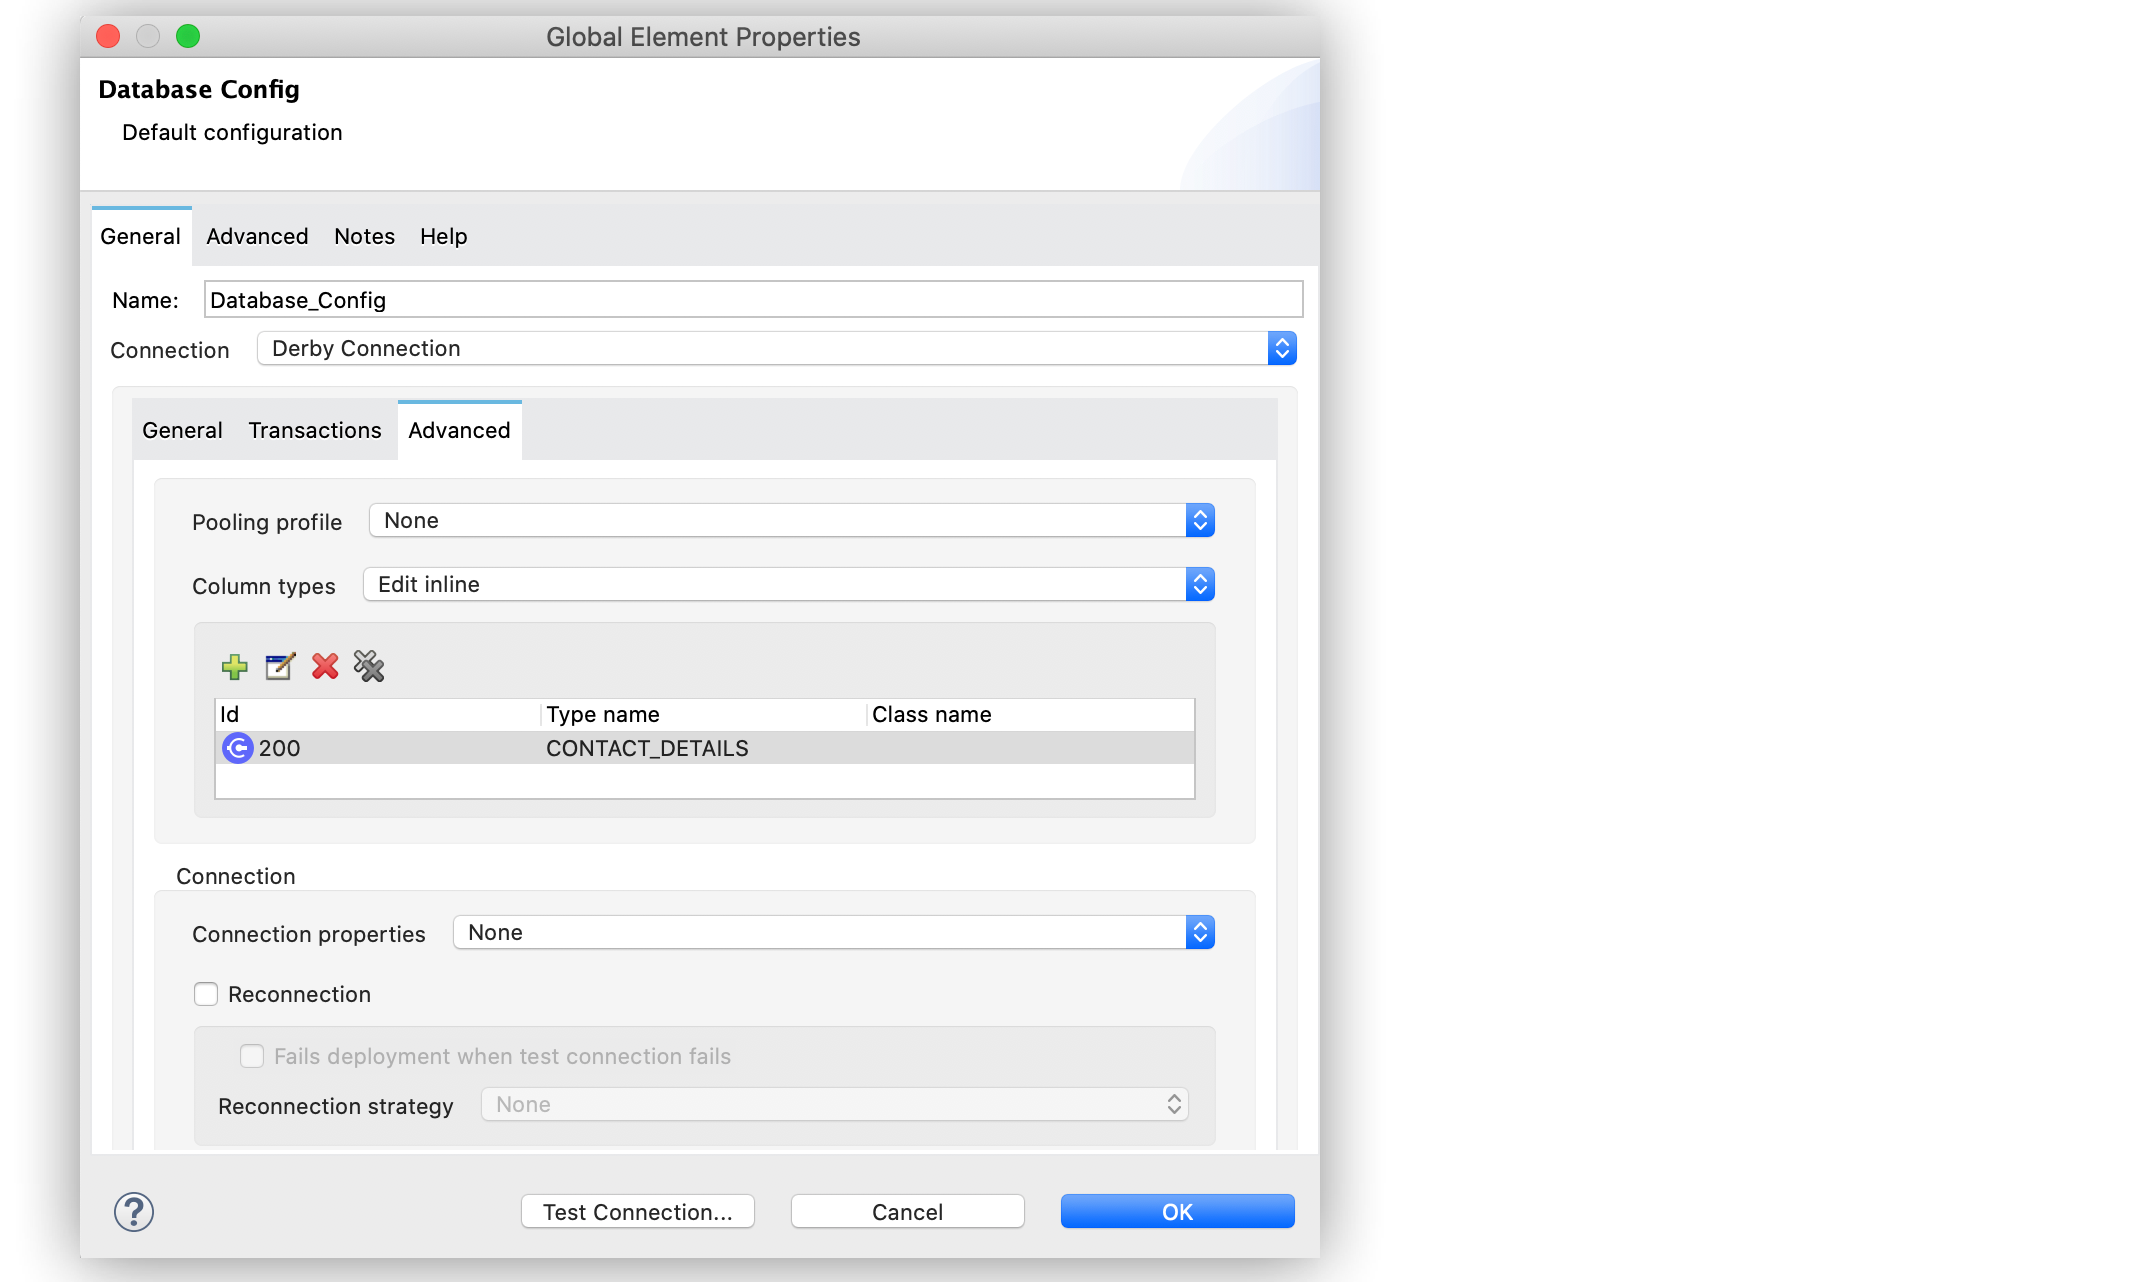
The following example shows how to configure the Column types field in the Derby global configuration connection element:
-
In Studio, navigate to the Global Elements tab.
-
Click Create.
-
In the Global Type window, filter by typing
database. -
Select Database Config and click OK.
-
Set the Connection field to
Derby Connection. -
Configure the required libraries for the Derby JDBC Driver and the additional connection fields.
-
Click the Advanced tab.
-
Set the Column types field to
Edit inline. -
Click the green plus sign (+) to create a custom column type.
-
In the parameter type window, set the Id field to
2000and the Type field toCONTACT_DETAILS. -
Click Finish.
The following screenshot shows the configuration in Studio:

In the XML editor, the <db:column-type> configuration looks like this:
<db:config name="dbConfig">
   <db:derby-connection url="jdbc:derby:muleEmbeddedDB;create=true">
       <db:column-types>
           <!-- Derby uses JAVA_OBJECT for UDT-->
           <db:column-type typeName="CONTACT_DETAILS" id="2000"/>
       </db:column-types>
   </db:derby-connection>
</db:config>


