Call Oracle Stored Procedure That Uses User-Defined Types (UDT) Example
Oracle enables you to create your custom data types, known as user-defined types (UDTs). The following example shows how to configure Anypoint Connector for Database (Database Connector) Stored procedure operation in a Mule application to call a stored procedure that uses UDTs from an Oracle database.
The stored procedure performs two actions:
-
Inserts the first name, last name, age, and phone number of people whose age is less than 100 into a table
-
Returns a list of phone numbers of all the people added to the table
To accomplish this example, you must:
-
Run a script to create UDTs, the table, and the stored procedure
-
Configure an Oracle database connection
-
Create the Mule application
-
Use
createStructandcreateArrayDataWeave functions to map application data to custom types -
Run and test the application with curl commands
The following screenshot shows the Anypoint Studio app flow for this example:

Create the UDTs, the Table and the Stored Procedure
Before configuring the Oracle database connection and creating the Mule application, use your desired SQL client tool to run an .sql script that creates in the database, these UDTs:
-
PEOPLE -
PERSON -
PHONE_NUMBER -
PHONE_NUMBER_ARRAY -
PHONE_BOOK
Because some UDTs contain others, the order in which they are defined is important. For example, the object type PERSON must be defined before its member PHONE_NUMBER_ARRAY is defined.
The script also creates a table called HUMANS and a stored procedure called PROC_INSERT_HUMANS. This stored procedure is intended to receive as an input parameter an object of type PEOPLE, from which it takes all the people whose age is less than 100 and inserts them into the table HUMANS. The stored procedure also defines an output parameter of type PHONE_BOOK that comprises a list of the phone numbers of all the people previously inserted into the HUMANS table
The script that runs to create these UDTs, the table, and the stored procedure is as follows:
--CREATE CUSTOM DATA TYPES (UDTs)
CREATE OR REPLACE TYPE PHONE_NUMBER AS object(areaCode VARCHAR2(10), phoneNumber VARCHAR2(20));
CREATE OR REPLACE TYPE PHONE_NUMBER_ARRAY AS VARRAY(10) OF PHONE_NUMBER;
CREATE OR REPLACE TYPE PERSON IS OBJECT(firstName VARCHAR(50), surname VARCHAR(50), age NUMBER, phoneNumbers PHONE_NUMBER_ARRAY);
CREATE OR REPLACE TYPE PEOPLE IS TABLE OF PERSON;

CREATE OR REPLACE TYPE PHONE_BOOK AS VARRAY(10) OF VARCHAR2(200);


--CREATE TABLE HUMANS;
CREATE TABLE HUMANS(
  firstName VARCHAR(50),
  surname VARCHAR(50),
  age NUMBER,
  phoneNumbers PHONE_NUMBER_ARRAY
);

--CREATE STORED PROCEDURE
create or replace procedure PROC_INSERT_HUMANS(people IN PEOPLE, contactList OUT PHONE_BOOK) IS
    phoneBook PHONE_BOOK := PHONE_BOOK();
    BEGIN
        FOR idx IN people.first .. people.last LOOP
            IF people(idx).age < 100 THEN
                INSERT INTO HUMANS(firstName, surname, age, phoneNumbers)
                VALUES(people(idx).firstName, people(idx).surname, people(idx).age, people(idx).phoneNumbers);
            END IF;
        END LOOP;

        FOR humanContact IN (SELECT * FROM  HUMANS h, TABLE(h.phoneNumbers) n) LOOP
            phoneBook.EXTEND(1);
            phoneBook(phoneBook.COUNT) := humanContact.surname || ',' || humanContact.firstname || ':' || humanContact.areaCode ||'-'|| humanContact.phoneNumber;
        END LOOP;

        contactList := phonebook;

        COMMIT;
END PROC_INSERT_HUMANS;
Configure an Oracle Database Connection
After you create your UDTs, the table and stored procedure in the Oracle database, go to Anypoint Studio to configure the Oracle database connection:
-
Create a new Mule project in Studio.
-
Navigate to the Global Elements view.
-
Click Create to open the Choose Global Type view.
-
In the Filter field, type
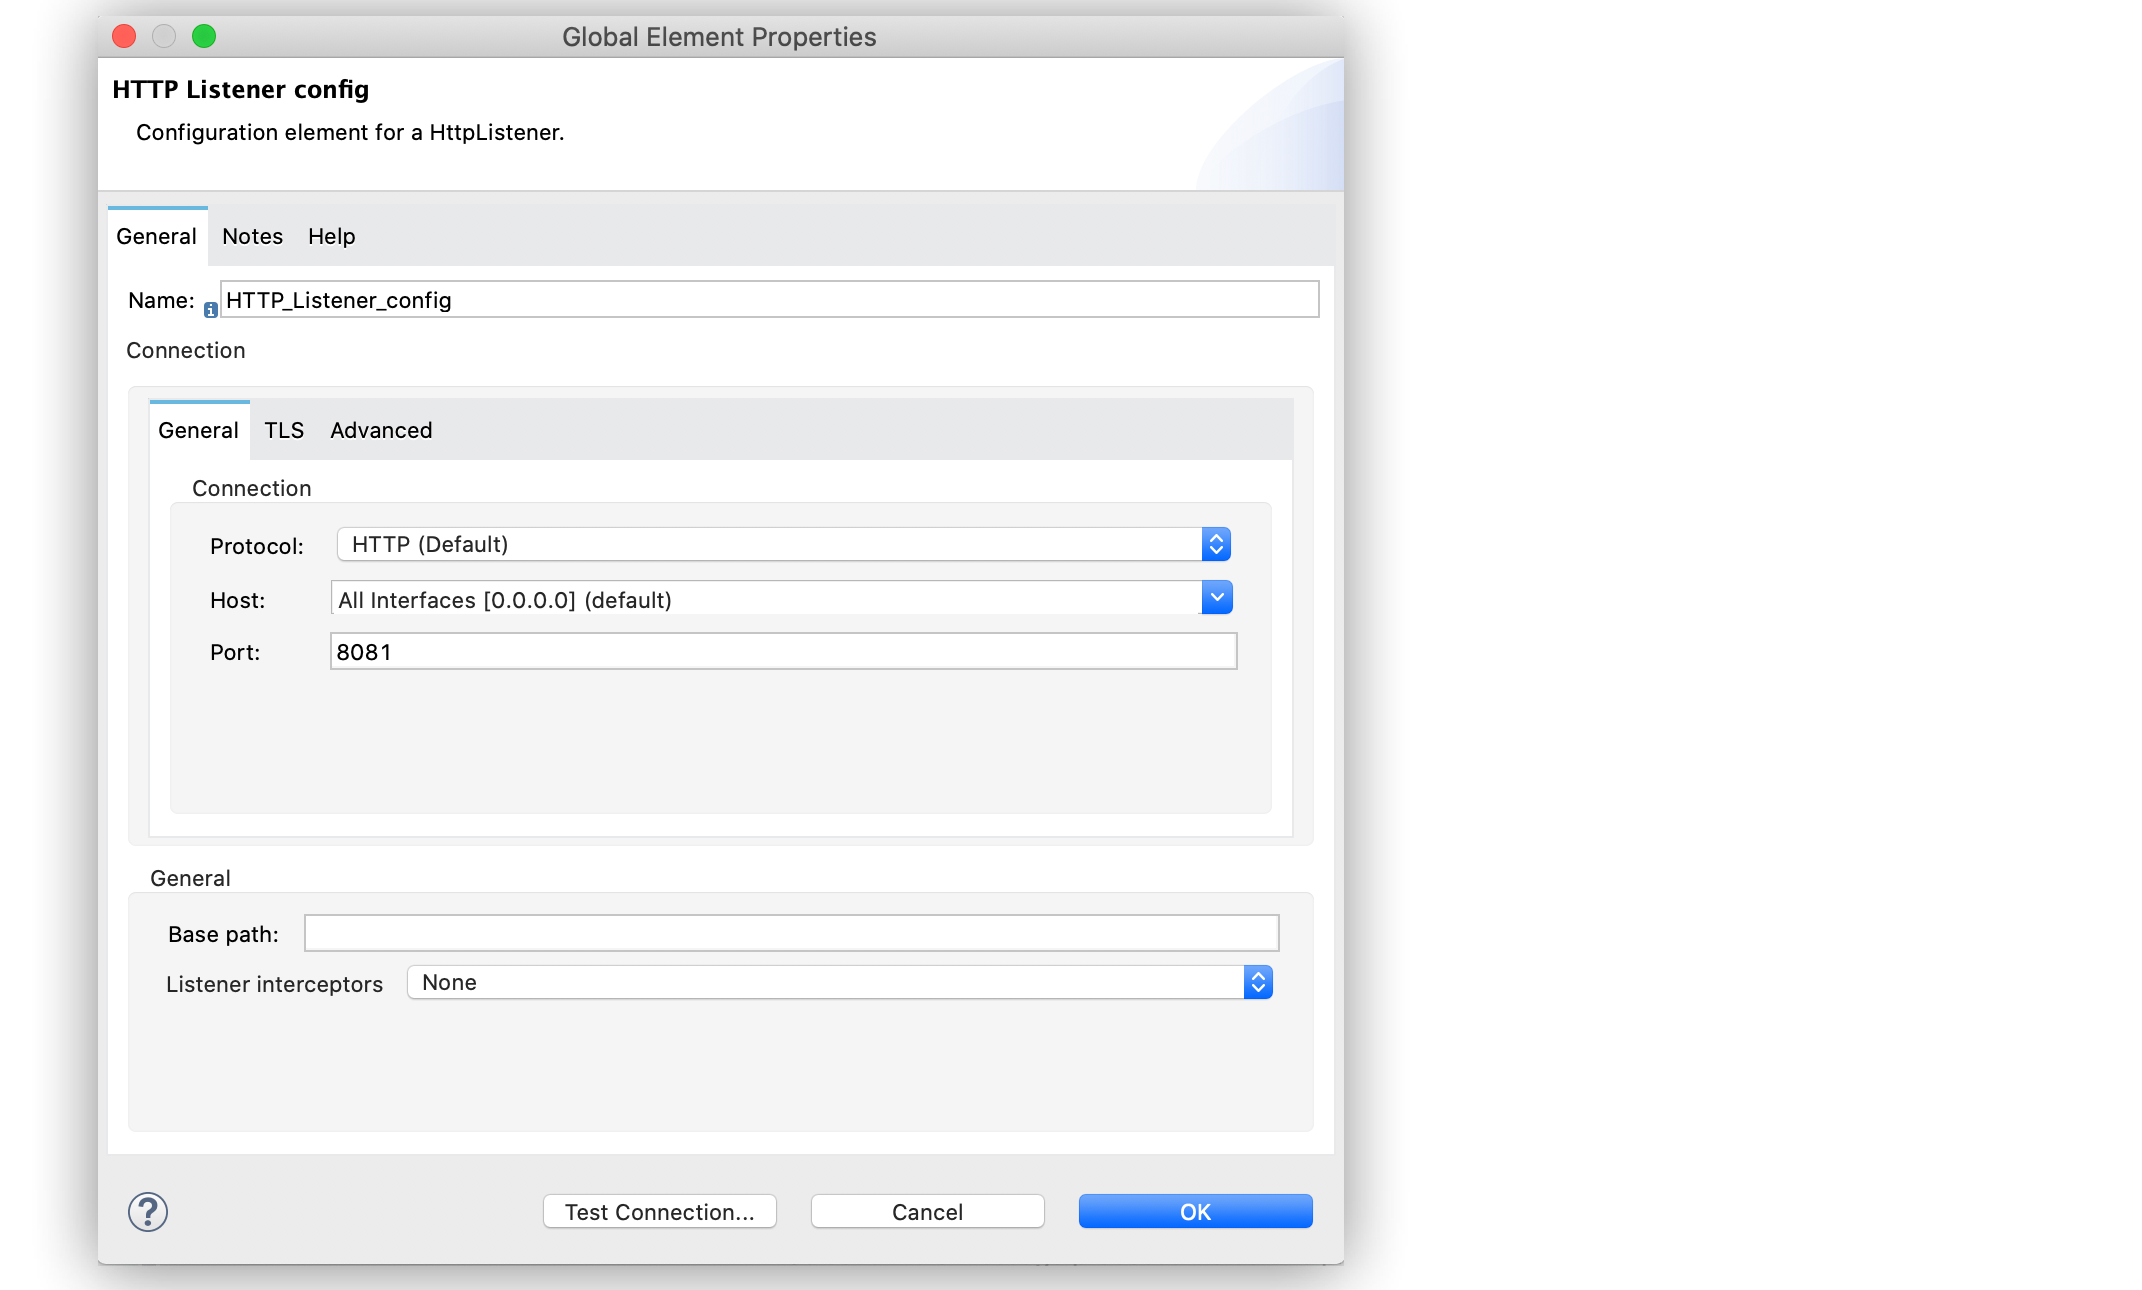
http, select HTTP Listener config, and click OK.
This configuration is for the HTTP Listener source that initiates the Mule application flow. -
In the HTTP Listener config window, set the following parameters:
-
Protocol
HTTP (Default) -
Host
All Interfaces [0.0.0.0] (default) -
Port
8081
-
-
Click OK.
-
In the Global Elements view, click Create to open the Choose Global Type view.
-
In the Filter field, type
database, select Database Config, and click OK. -
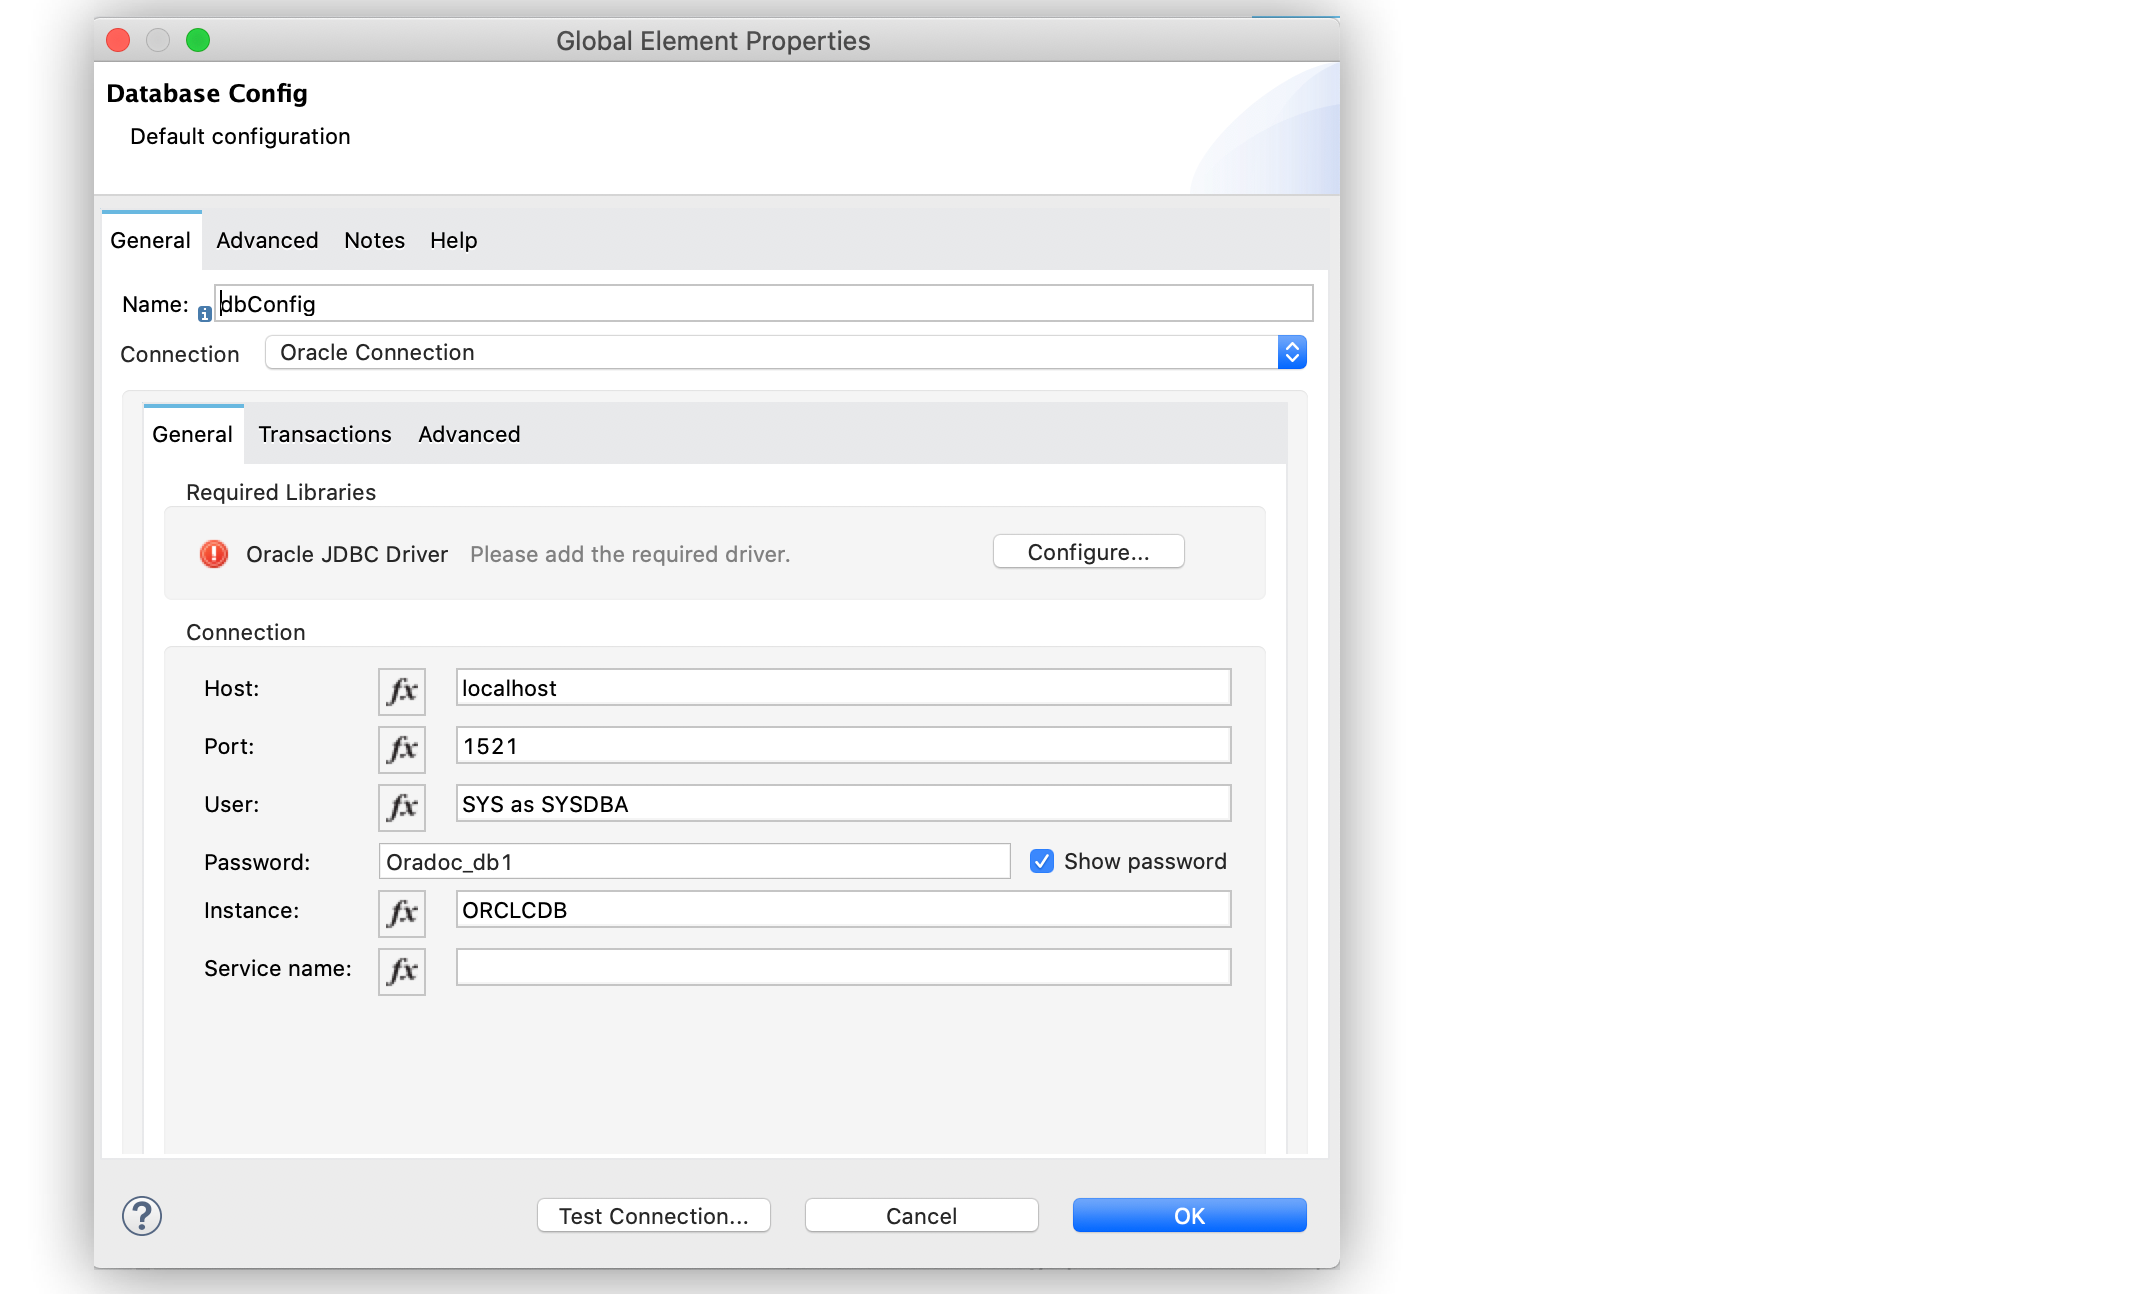
In the Database Config window, set the Name field to
dbConfig. -
In the Connection field, select Oracle Connection.
-
Click Configure to add the required Oracle JDBC driver and select either:
-
Use local file
Installs the library by using a local file. -
Add Maven dependency
Installs a Maven dependency to add to the project.
-
-
In the Connection section, set the following parameters:
-
Host
localhost -
Port
1521 -
User
SYS as SYSDBA -
Password
Oradoc_db1 -
Instance
ORCLCDB
-
-
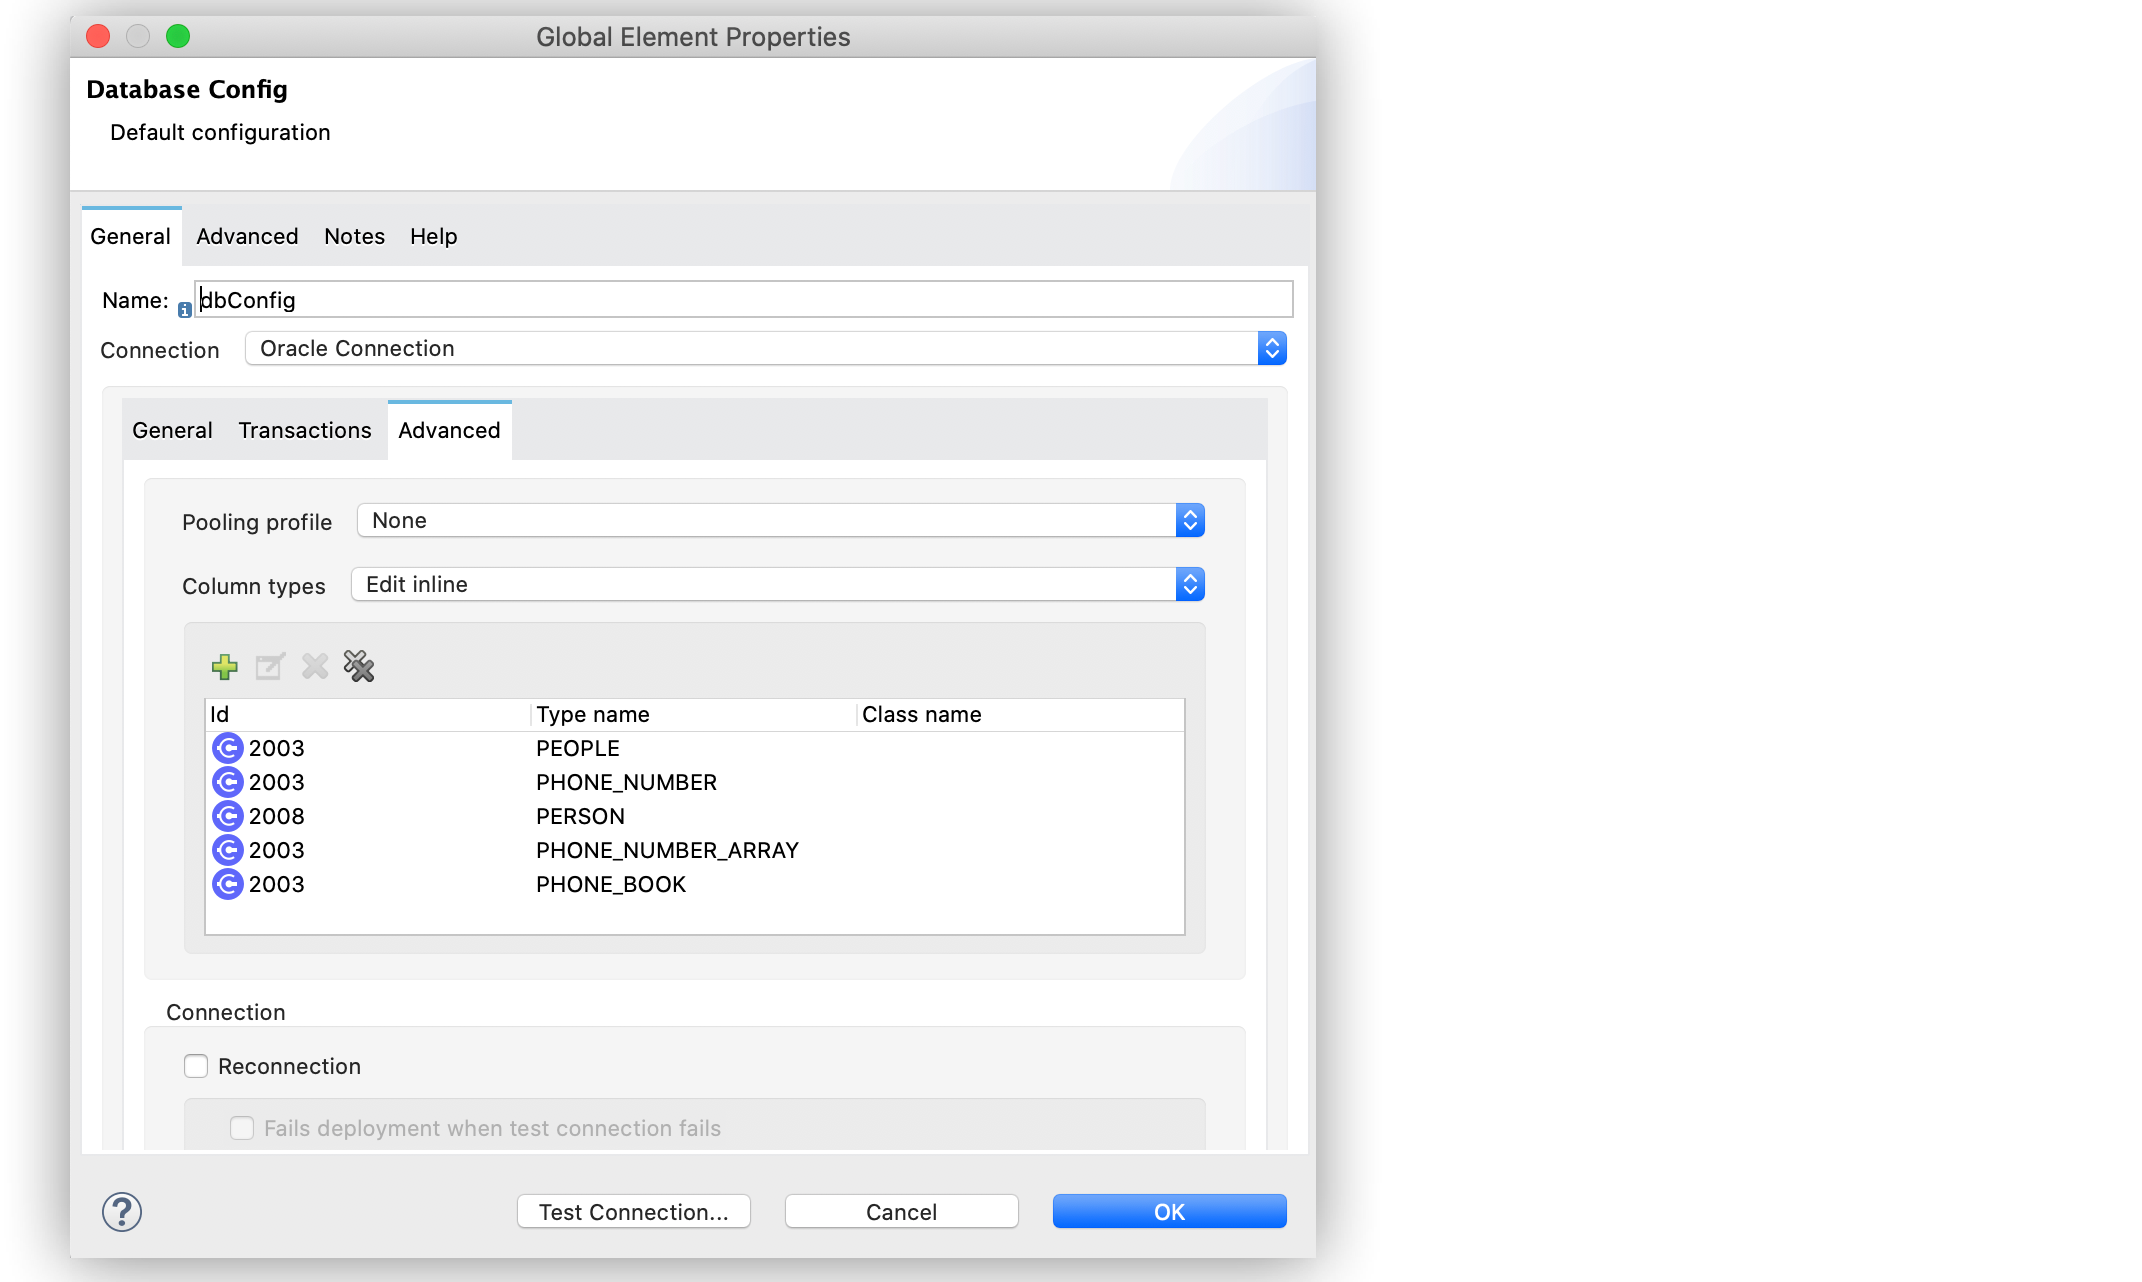
On the Advanced tab, set the Column types field to Edit inline.
-
Click the plus sign (+) to add new column types to list all the UDTs that were previously created.
-
Specify the following values in the Id and Type name fields:
Id Type name 2003
PEOPLE2003
PHONE_NUMBER2008
PERSON2003
PHONE_ARRAY2003
PHONE_BOOK -
Click Finish to close the Column type window.
-
Click Test Connection to confirm that Mule can connect to the database.
-
Click OK.
The following screenshot shows the HTTP Listener global element configuration in Studio:

The following screenshots show the Database global element configuration in Studio:


Create, Run and Test the Mule Application
After you configure the Oracle database connection, create, run an test the Mule application to call the stored procedure.
Configure the HTTP Listener and Set Payload Component
To create the Mule flow:
-
In the Mule Palette view, select the HTTP Listener source and drag it on to the canvas.
The source initiates the flow by listening for incoming HTTP message attributes. -
In the Connector configuration field, select
HTTP_Listener_configglobal configuration. -
Set the Path field to
/oracle. -
Drag a Set Payload component to the right of Listener.
This component creates a list of items to send to the stored procedure for processing. -
In the Value field, specify items to be listed:
[{'name':'Anthony J', 'surname':'Crowley', 'age': 6000, 'phoneNumber': {'areaCode':'020', 'phoneNumber': '777'}}, {'name':'A.Z', 'surname':'Fell', 'age': 6000, 'phoneNumber':{'areaCode':'020', 'phoneNumber': '888'}}, {'name':'Adam', 'surname':'Young', 'age': 11, 'phoneNumber':{'areaCode':'046', 'phoneNumber': '666'}}, {'name':'Anathema', 'surname':'Device', 'age': 27, 'phoneNumber':{'areaCode':'020', 'phoneNumber': '123'}}, ] -
Set the Mime Type field to
application/java.

Configure the Transform Message Component with DataWeave Functions
Continue creating the Mule application using a Transform Message component with createStruct and createArray DataWeave functions that map application data to the example custom user data types:
-
Drag a Transform Message component to the right of Set Payload.
This component transforms the JSON objects into an object that can be mapped to the data typePEOPLEthat the stored procedure expects as an input parameter. -
Double-click the component in the Studio canvas and set the name to
Transform Message - Prepare UDT. -
In the Output source code view of the component, click the Edit Current Target button.
-
In the Selection dialog box, set the Output field to
Variableand the Variable name toin_people_tab, and then click OK. -
In the Output field, specify the following DataWeave expression that contains the
createStructandcreateArrayfunctions:%dw 2.0 output application/java fun toPhoneNumberArray(phoneNumber) = Db::createArray("dbConfig", "PHONE_NUMBER_ARRAY",[Db::createStruct("dbConfig", "PHONE_NUMBER", [phoneNumber.areaCode, phoneNumber.phoneNumber])]) fun toPerson(person) = Db::createStruct("dbConfig", "PERSON", [person.name, person.surname, person.age, toPhoneNumberArray(person.phoneNumber)]) --- Db::createArray("dbConfig", "PEOPLE", payload map (item, index) -> ( toPerson(item) ) ) Figure 6. Transform Message configuration
The createStruct function creates JDBC struct objects based on the Name type and their corresponding properties. In the example, types PERSON and PHONE_NUMBER are struct objects. The function expects the following parameters in order:
-
configName
A string with the name of the configuration that creates theStructtype: in this example,dbConfig -
typeName
A string with the name of theStructtype to create: in this example,PERSONorPHONE_NUMBER -
values
An array of values that conforms to theStructproperties: in this example, forPHONE_NUMBER,['046', '666']
The createArray function creates JDBC array objects based on the Array type. In this example, types PHONE_NUMBER_ARRAY, PEOPLE, and PHONE_BOOK are array objects. The function expects the following parameters in order:
-
configName
A string with the name of the configuration that creates theArraytype: in this example,dbConfig -
typeName
A string with the name of theArraytype to create: in this example,PEOPLEorPHONE_NUMBER_ARRAY -
values
An array of values that conforms to theArraytype: in this example, is an array ofPERSONobjects created using thecreateStructfunction
Note that you can combine and use these functions to create subtypes or nested types. In this example, the type PERSON contains the PHONE_NUMBER_ARRAY objects. At the same time, the type PHONE_NUMBER_ARRAY is defined as an array of PHONE_NUMBER.
Additionally, you can combine these functions for complex types if you use the createArray function when you are matching to a UDT based on the Array type.
Configure the Stored Procedure Operation
Use the Database Connector Stored Procedure operation to call the Oracle stored procedure with UDTs:
-
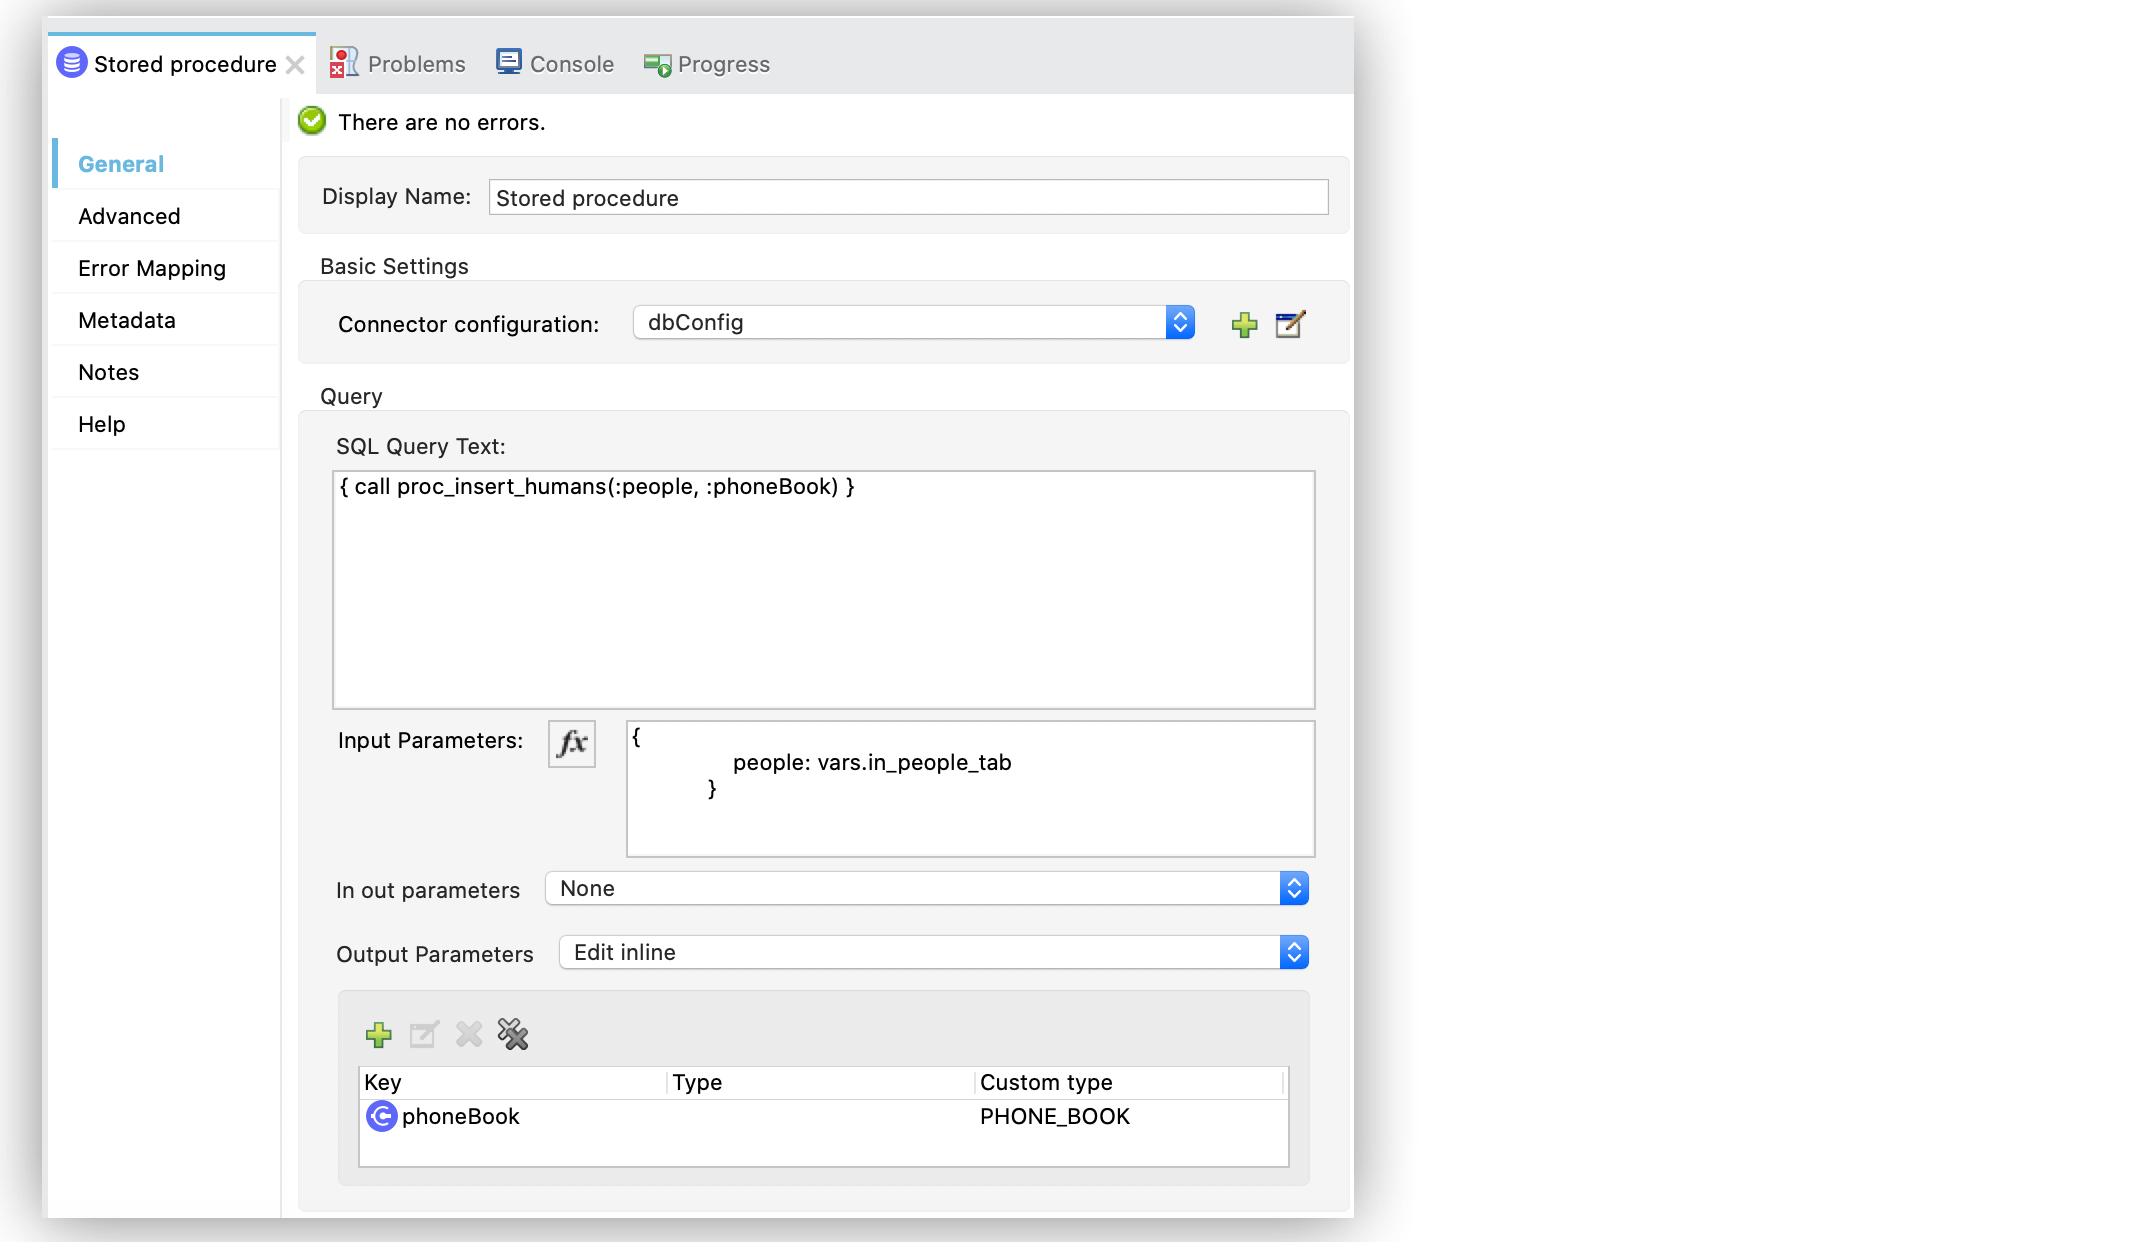
Drag a Stored procedure operation to the right of Transform Message.
This operation calls the stored procedure using Database Connector. -
In the Connector configuration field, select
dbConfigglobal configuration. -
In the SQL Query Text field, enter
{ call proc_insert_humans(:people, :phoneBook) }. -
In the Input Parameters field, enter
{ people: vars.in_people_tab}
This step maps the output of the transformation, which is stored in the variable calledin_people_tabto the input parameter. -
In the Output Parameters field, select
Edit inlineand click the plus sign (+) to set a custom parameter:-
Key
phoneBook -
Custom type
PHONE_BOOK
-

-
Drag a second Transform Message component to the right of Stored procedure.
-
Double-click the component in the Studio canvas and set the name to
Transform Message - response to JSON. -
In the Output source code view of the component, set the following DataWeave expression:
%dw 2.0
output application/json
---
payload
Run and Test the Mule Application
To complete and test the Mule application:
-
Save the project in Studio.
-
Test the app by using the following curl command in your terminal:
curl localhost:8081/oracle.
The stored procedure should return the list of phone numbers of all the people added to the tableHUMANS.
XML for Calling Oracle Stored Procedure with UDTs
Paste this code into your Studio XML editor to quickly load the flow for this example into your Mule app:
<?xml version="1.0" encoding="UTF-8"?>

<mule xmlns:ee="http://www.mulesoft.org/schema/mule/ee/core"
	xmlns:db="http://www.mulesoft.org/schema/mule/db" xmlns:http="http://www.mulesoft.org/schema/mule/http"
	xmlns="http://www.mulesoft.org/schema/mule/core"
	xmlns:doc="http://www.mulesoft.org/schema/mule/documentation" xmlns:xsi="http://www.w3.org/2001/XMLSchema-instance" xsi:schemaLocation="
http://www.mulesoft.org/schema/mule/ee/core http://www.mulesoft.org/schema/mule/ee/core/current/mule-ee.xsd http://www.mulesoft.org/schema/mule/core http://www.mulesoft.org/schema/mule/core/current/mule.xsd
http://www.mulesoft.org/schema/mule/http http://www.mulesoft.org/schema/mule/http/current/mule-http.xsd
http://www.mulesoft.org/schema/mule/db http://www.mulesoft.org/schema/mule/db/current/mule-db.xsd">

	<http:listener-config name="HTTP_Listener_config" >
		<http:listener-connection host="0.0.0.0" port="8081" />
	</http:listener-config>

	<db:config name="dbConfig" >
		<db:oracle-connection host="localhost" user="SYS as SYSDBA" password="Oradoc_db1" instance="ORCLCDB">
			<db:column-types>
				<db:column-type id="2003" typeName="PEOPLE"/>
				<db:column-type id="2003" typeName="PHONE_NUMBER"/>
				<db:column-type id="2008" typeName="PERSON" />
				<db:column-type id="2003" typeName="PHONE_NUMBER_ARRAY"/>
				<db:column-type id="2003" typeName="PHONE_BOOK"/>
			</db:column-types>
		</db:oracle-connection>
	</db:config>

	<flow name="oracle-udtsFlow" >
		<http:listener config-ref="HTTP_Listener_config" path="/oracle"/>

		<set-payload value="#[[{'name':'Anthony J', 'surname':'Crowley', 'age': 6000, 'phoneNumber': {'areaCode':'020', 'phoneNumber': '777'}},
	{'name':'A.Z', 'surname':'Fell', 'age': 6000, 'phoneNumber':{'areaCode':'020', 'phoneNumber': '888'}},
	{'name':'Adam', 'surname':'Young', 'age': 11, 'phoneNumber':{'areaCode':'046', 'phoneNumber': '666'}},
	{'name':'Anathema', 'surname':'Device', 'age': 27, 'phoneNumber':{'areaCode':'020', 'phoneNumber': '123'}},
	]]" mimeType="application/java"/>


	<ee:transform doc:name="Transform Message - Prepare UDT">
			<ee:variables>
				<ee:set-variable variableName="in_people_tab"><![CDATA[%dw 2.0
				output application/java
				fun toPhoneNumberArray(phoneNumber) = Db::createArray("dbConfig", "PHONE_NUMBER_ARRAY",[Db::createStruct("dbConfig", "PHONE_NUMBER", [phoneNumber.areaCode, phoneNumber.phoneNumber])])
				fun toPerson(person) = Db::createStruct("dbConfig", "PERSON", [person.name, person.surname, person.age, toPhoneNumberArray(person.phoneNumber)])
				---
				Db::createArray("dbConfig", "PEOPLE", payload map (item, index) -> ( toPerson(item) ) )
				]]></ee:set-variable>
			</ee:variables>
		</ee:transform>
		<db:stored-procedure config-ref="dbConfig">
			<db:sql><![CDATA[{ call proc_insert_humans(:people, :phoneBook) }]]></db:sql>
			<db:input-parameters><![CDATA[{
				people: vars.in_people_tab
			}]]></db:input-parameters>
			<db:output-parameters >
				<db:output-parameter key="phoneBook" customType="PHONE_BOOK" />
			</db:output-parameters>
		</db:stored-procedure>
		<ee:transform doc:name="Transform Message - response to JSON" >
			<ee:message >
				<ee:set-payload ><![CDATA[%dw 2.0
					output application/json
					---
					payload]]></ee:set-payload>
			</ee:message>
		</ee:transform>
	</flow>

</mule>


