Creating Servers
Create and manage individual Mule runtime engine instances (servers) through Anypoint Runtime Manager to deploy and monitor your applications in hybrid standalone environments. Manage servers either individually or in server groups or clusters.
Understanding Servers
Servers communicate with Runtime Manager using the Runtime Manager agent. After creating a server, use Runtime Manager to deploy applications to the Mule instance and view information about the environment where you installed Mule.
For each Mule instance that you want to manage, add a server to Runtime Manager. In environments with multiple Mule instances, use server groups and clusters for redundancy, high availability, and ease of management.
Before You Begin
Before adding a server to Runtime Manager:
-
Have a current enterprise license.
-
Run Mule 4.x or later.
-
Install the Runtime Manager agent.
-
Have an Enterprise support account if downloading the agent.
-
Remove existing server registration if already registered in another Runtime Manager instance.
For details, refer to Install or Update the Runtime Manager agent.
Create a Server
To create a server, add it to Runtime Manager:
-
From Anypoint Platform, select Runtime Manager.
-
Click Servers in the menu.
-
Click the Add Server button.
-
Enter a name for your server.
Server names can contain up to 60 alphanumeric characters (a-z, A-Z, 0-9), periods (.), hyphens (-), and underscores (_), but not spaces or other special characters. Runtime Manager supports Unicode characters in server names.
The server name must be unique in the environment, but it can be the same for the same organization in different environments.
Runtime Manager generates the
amc_setupcommand. This command includes the server name you specified (server-name) and the registration token (token) required to register Mule in your environment. The registration token includes your organization ID and the current environment.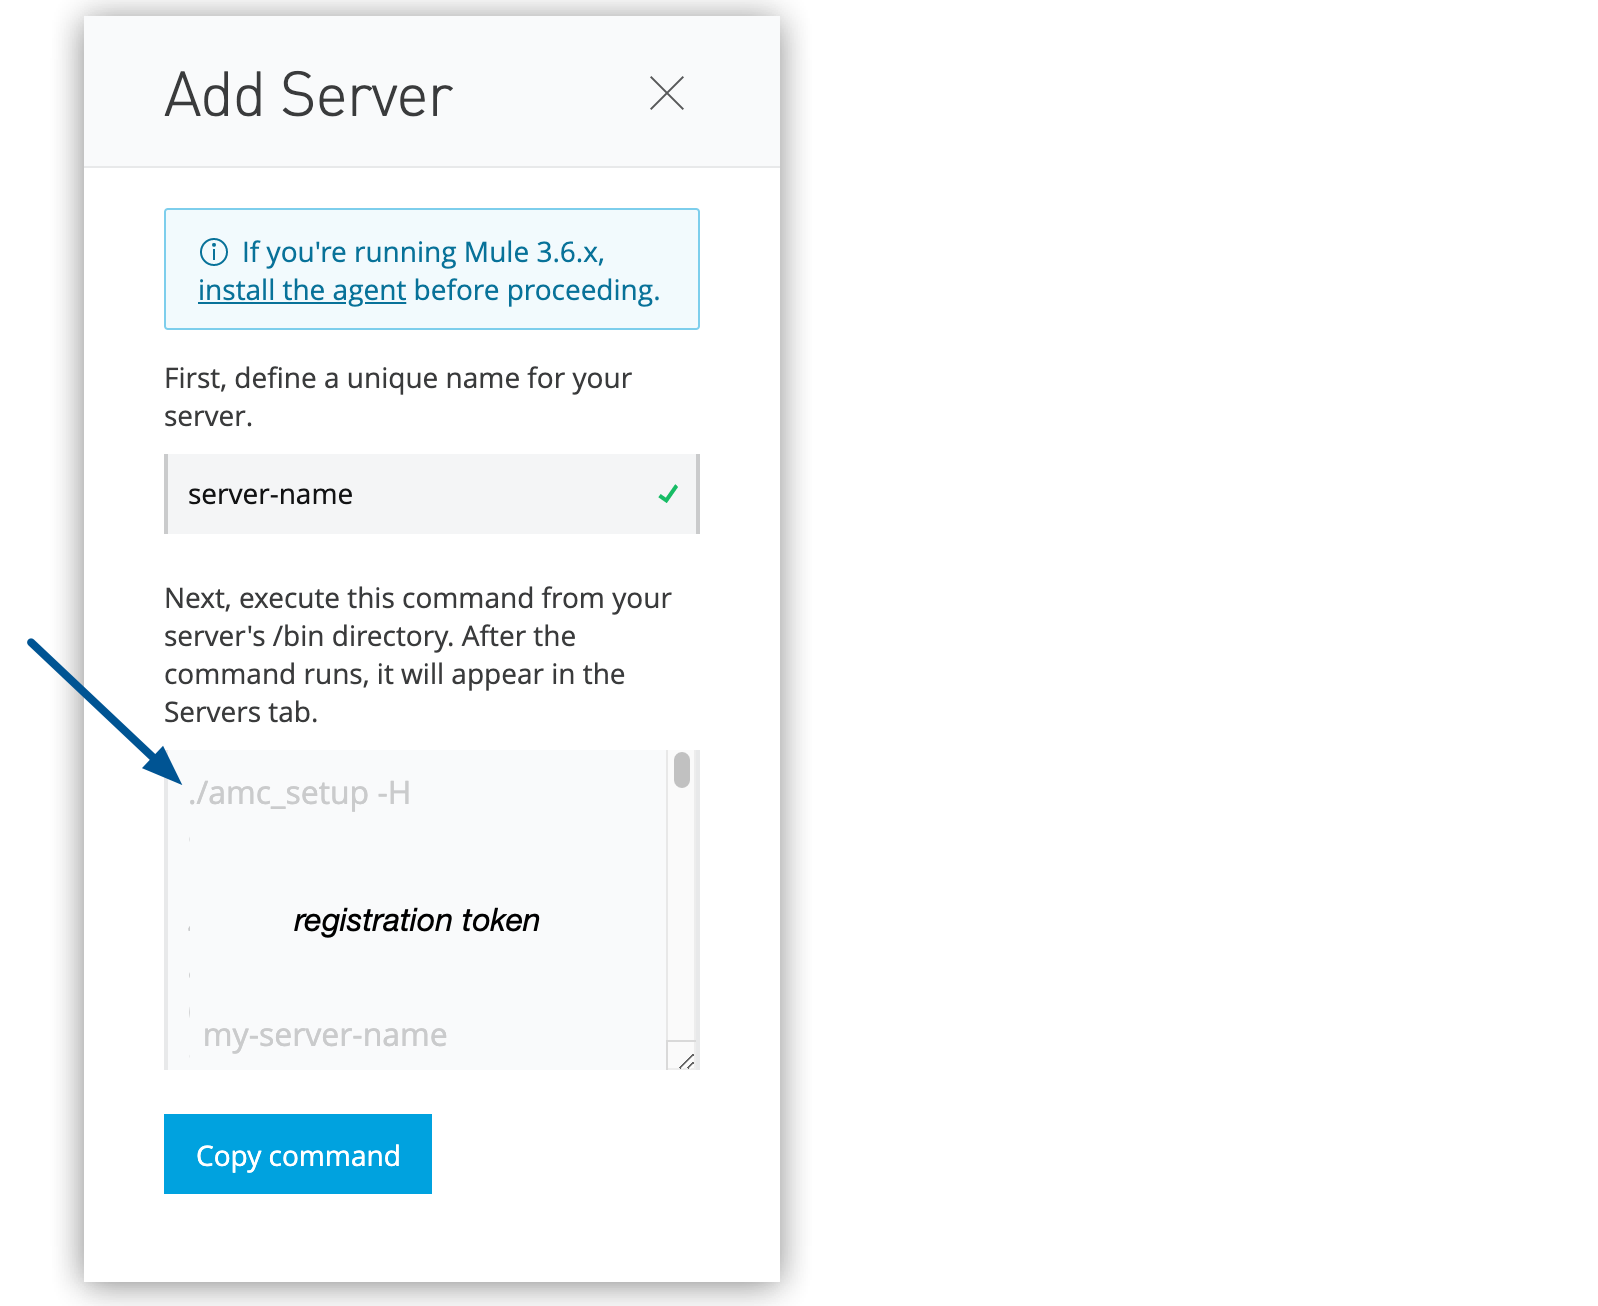 Figure 1. The arrow shows the
amc_setupcommand in the Add Server window. -
Click Copy command to copy the
amc_setupcommand.This button appears only if the server name you specify is valid.
-
In a terminal window, change to the
$MULE_HOME/bindirectory for the Mule instance that you’re registering. -
Paste the command on the command line.
-
Include any other parameters on the
amc_setupcommand line.For information, see amc_setup Parameters.
-
If your environment requires all outbound calls to go through a proxy, specify proxy settings in either the
$MULE_HOME/conf/mule-agent.ymlfile or the$MULE_HOME/conf/wrapper.conffile.
When the amc_setup command completes successfully, you see:
Mule Agent configured successfully
Connecting to Access Management to extract client_id and client_secret
Credentials extracted correctly, updating wrapper conf file
After the script completes successfully, the name of your server appears on the Servers tab of Runtime Manager with a status of Created.
If the server was running when you ran the amc_setup script, restart the server to reconnect with Runtime Manager.
Remove a Server from Another Runtime Manager Instance
If the server you want to add is already registered with a different instance of Runtime Manager, you must remove it before you can register the new one.
To remove the server:
-
From Anypoint Platform, select Runtime Manager.
-
Select Servers.
-
Click the server name.
-
Click Settings.
-
From the Actions menu, select Delete.
-
In the
$MULE_HOME/confdirectory, delete themule-agent.yamlandmule-agent.jksfiles.
For details, refer to Managing Servers.