Managing Server Groups
Manage server groups in your hybrid standalone environment to coordinate multiple servers as unified deployment targets. Server group management includes adding and removing servers from groups, maintaining group membership, and performing administrative operations like group deletion while preserving individual server integrity.
Add Servers to a Group
Add individual servers to an existing server group to expand your deployment capacity and enable load distribution across multiple runtime instances.
Make sure that you follow these requirements:
-
The target server group already exists.
-
At least one server is configured and available.
-
No applications are currently deployed on servers you want to add to the group.
To add servers to a server group:
-
From Anypoint Platform, select Runtime Manager.
-
Select Servers.
-
Click Group in the Type column to display the details pane.
-
Click the Add Server button:
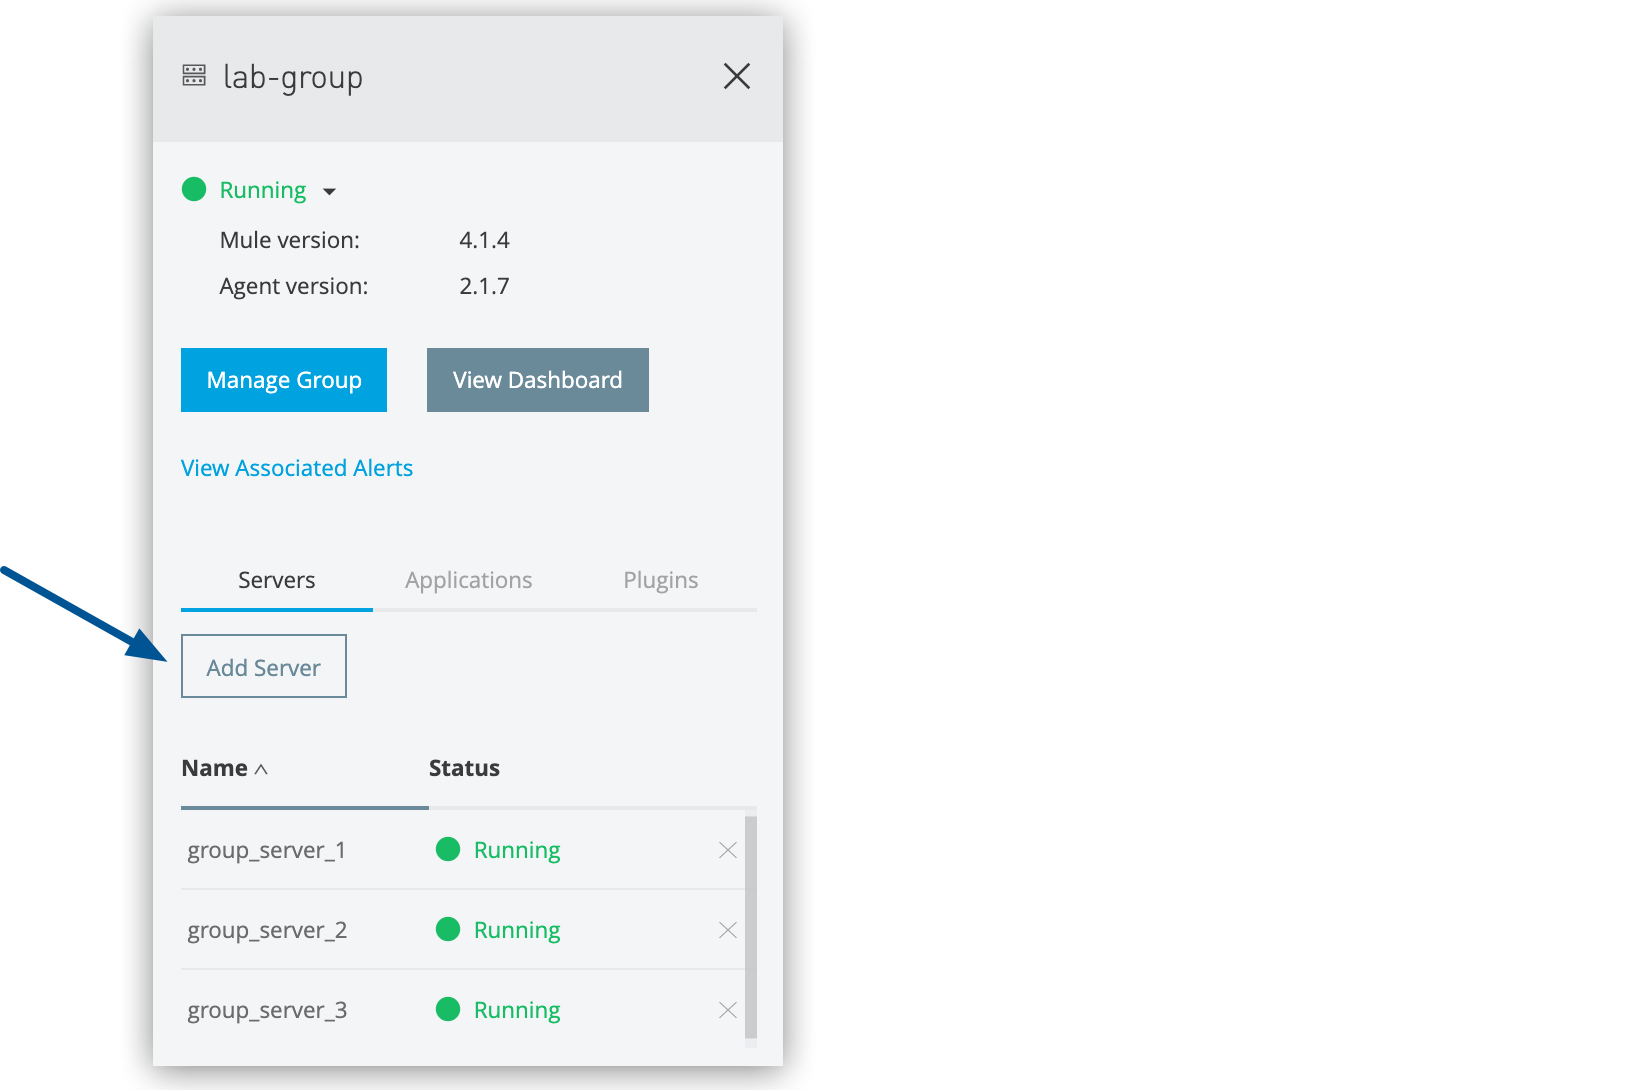 Figure 1. The arrow shows the Add Server button in the details pane.
A list of available servers appears.
-
Select the servers to add to the group, and click Add Servers.
-
The servers no longer appear in the Servers list.
-
To see the list of servers in the server group, click the group name.
-
Remove Servers from a Server Group
To remove a server from a group:
-
From Anypoint Platform, select Runtime Manager.
-
Select Servers.
-
Click Group in the Type column to display the details pane.
-
Click the X icon next to the server to remove the server:
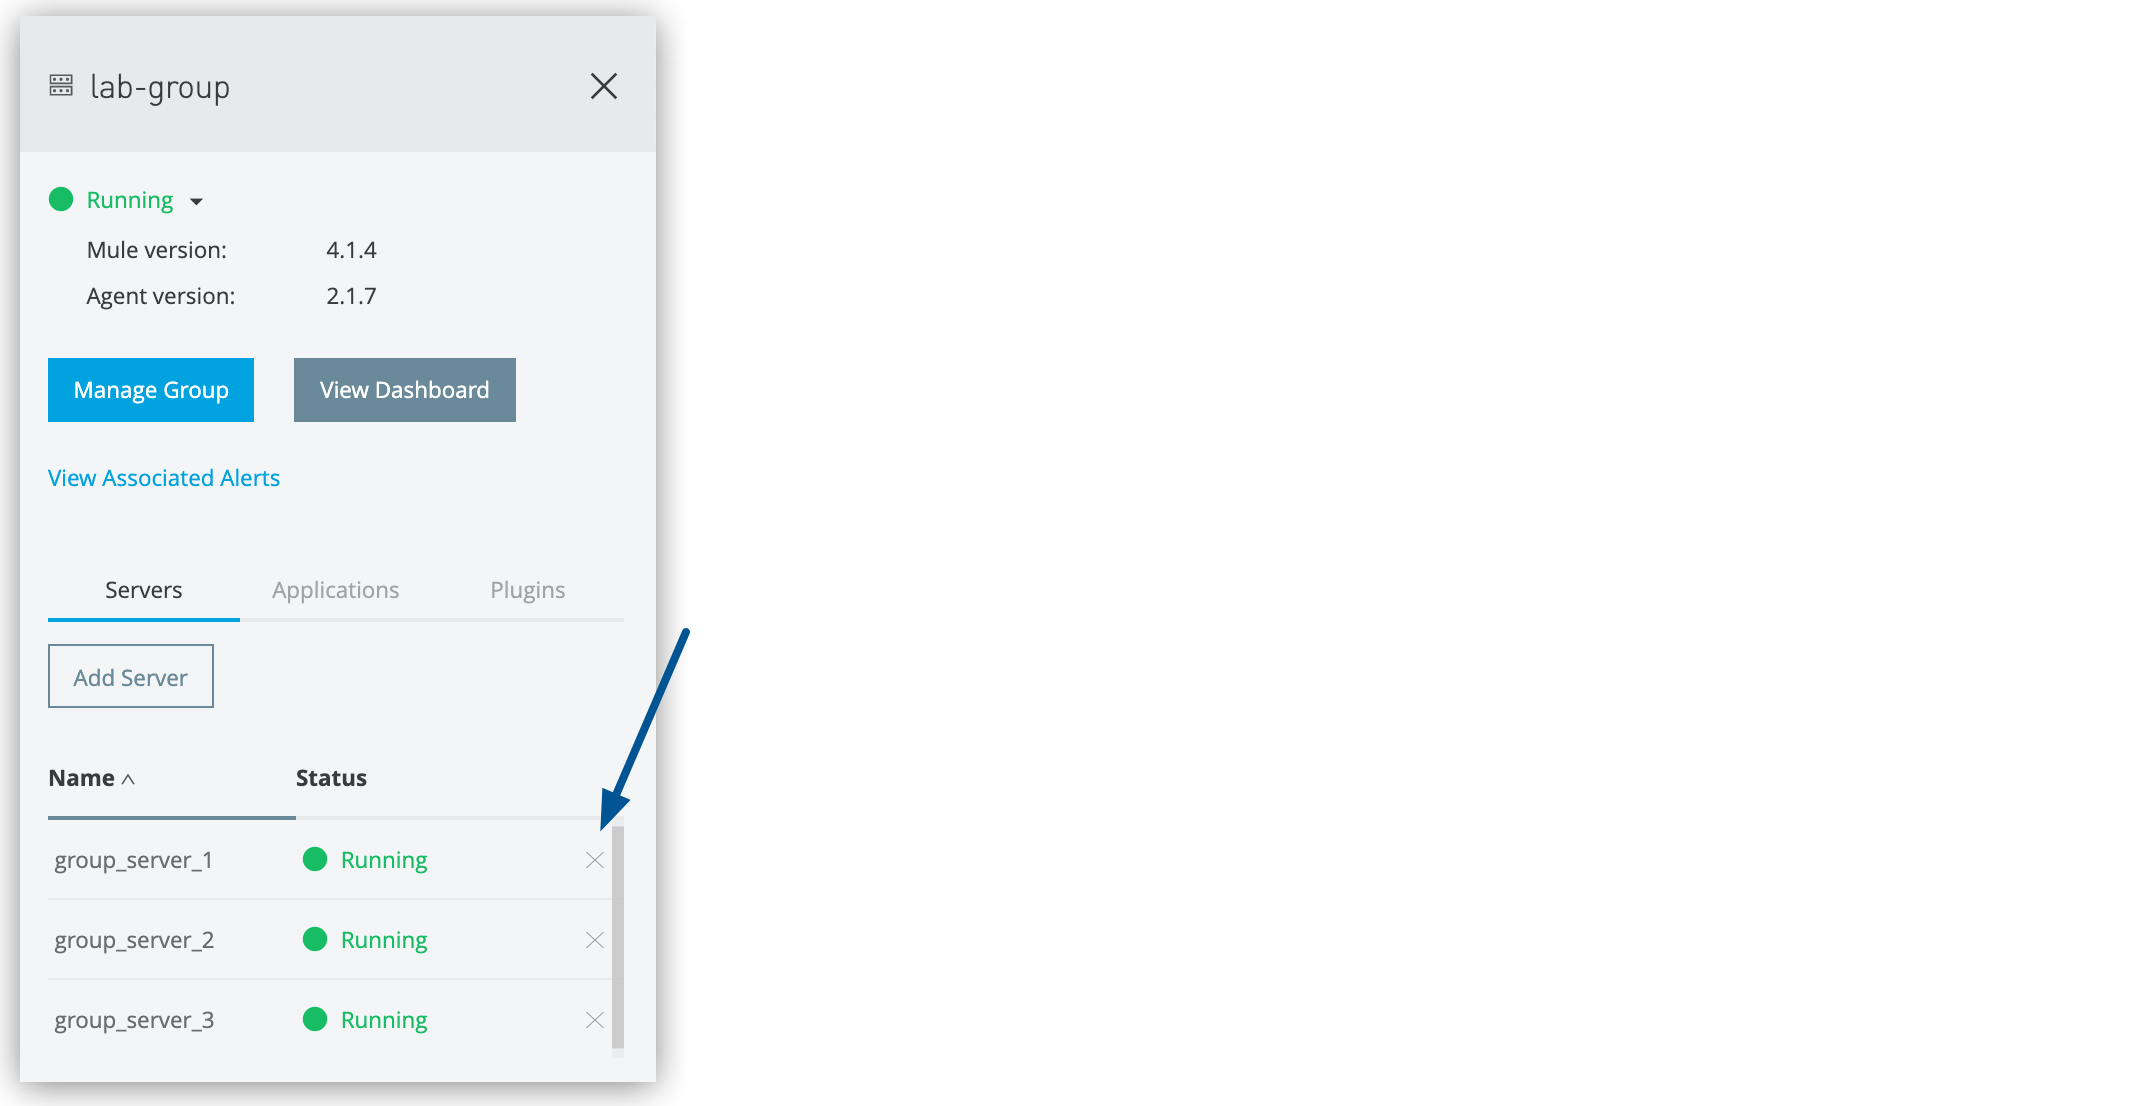 Figure 2. The arrow shows the X icon in the details pane.
 -
In the Remove confirmation window, select the checkbox to verify that you want to remove the server from the group.
-
Click Remove.
Delete Server Groups
When you delete a server group, these actions occur:
-
Alert definitions and history for the server group are deleted.
-
Applications deployed to each server in the server group are cloned on each server.
Deleting a server group doesn’t delete, restart, or shut down the assigned servers. The servers appear on the Servers page. You can deploy applications to them individually or add them to other server groups or clusters.
To delete a server group:
-
From Anypoint Platform, select Runtime Manager.
-
Select Servers
-
Click Group in the Type column to display the details pane.
-
Click the group status and select Delete from the menu:
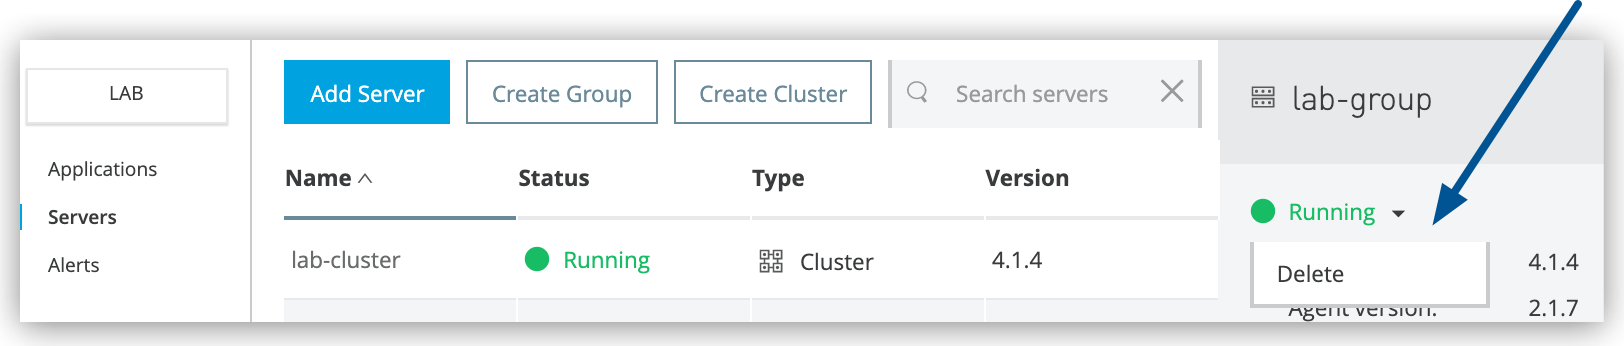 Figure 3. The arrow shows the Delete option in the details pane.
 -
In the Delete confirmation window, select the checkbox to verify that you want to delete the server group.
-
Click Delete Server Group.
Upgrade the Mule Runtime Version in a Runtime Manager Server Group
Follow these steps to upgrade the Mule version in a Runtime Manager server group:
-
Go to Anypoint Runtime Manager.
-
Switch to the corresponding environment.
-
Select Servers in the navigation menu.
-
Select the server group to update.
-
In the server group dashboard, select the Servers tab and select the server to upgrade.
-
In the actions dropdown menu, select Shutdown.
-
Repeat the previous two steps for each server in your server group.
-
-
Open a terminal in the local machine that hosts your Mule instance.
-
If your Runtime Manager agent version is earlier than 2.2.0, upgrade to the latest version.
Go to the current Mule Home directory and run the following commands:cd ${MULE-4.1.5_HOME}/bin
cp ~/Downloads/agent-setup-2.4.20.zip .
unzip agent-setup-2.4.20.zip
./amc_setup -U -
Go to the target directory for the new Mule runtime version and install it:
cd ${MULE-4.3.0_DIRECTORY}
cp ~/Downloads/mule-ee-distribution-standalone-4.3.0.zip .
unzip mule-ee-distribution-standalone-4.3.0.zip -
Install the latest agent version:
cd mule-enterprise-standalone-4.3.0/bin
cp ~/Downloads/agent-setup-2.4.20.zip .
unzip agent-setup-2.4.20.zip
./amc_setup -I
rm ../conf/mule-agent.yml -
Copy the following files from the previous Mule runtime /conf directory to the new Mule runtime /conf directory:
-
All YAML files (
*.yml) -
All keystore files (
*.jks)
-
-
Confirm that the DNS configured in mule-agent.yml has the following values:
websocket.transport:
  consoleUri: wss://runtime-manager.anypoint.mulesoft.com:443/mule

authenticationProxy:
  endpoint: https://data-authenticator.anypoint.mulesoft.com
-
If you installed domains in your previous Mule instance, copy those domains to your new Mule instance:
cp -R ${MULE-4.1.5_HOME}/domains${MULE-4.3.0_HOME}/domains -
Start Mule:
cd ${MULE-4.3.0_HOME}/bin
./mule start -
Go to Runtime Manager to confirm that your Mule applications are deployed and displayed as Running.