Publish and Then Consume a Topic with Kafka Connector
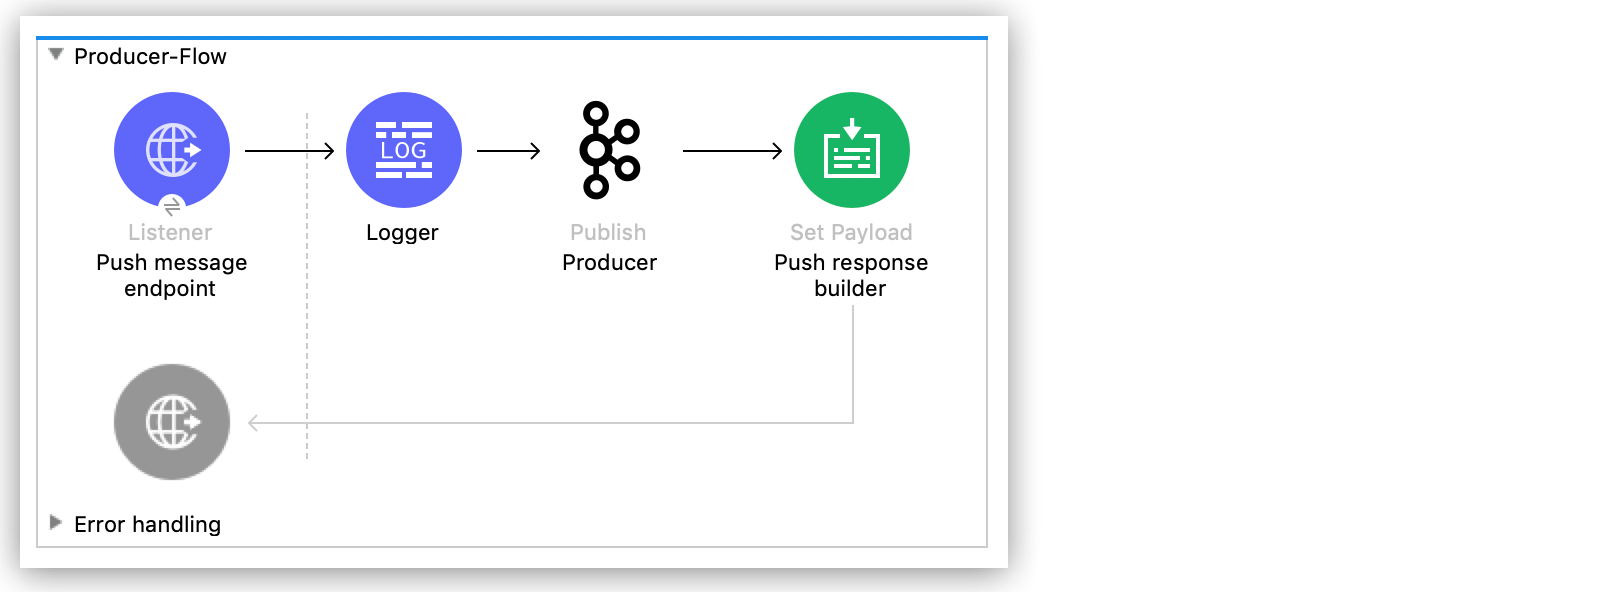
This example shows how to use two Apache Kafka Connector operations, Publish and Consume, to publish a message to Apache Kafka and then retrieve it. The example contains two flows:
-
The first flow is the Producer flow, which publishes a message to Apache Kafka.
-
The second flow is the Consumer flow, which consumes a message from Apache Kafka.


Configure the First Flow
Configure the first flow that publishes a message to Apache Kafka. Creating the first flow involves configuring a Listener component, a Logger component, a Publish operation, and a Set Payload transformer.
Configure the HTTP Listener
Configure the Listener component to initiate a Mule flow when a call is made to the /pushMessage path:
-
Create a new Mule project in Studio.
-
From the Mule Palette view, select HTTP and drag the Listener component to the canvas.
-
In the properties window, click + next to the Connector configuration field to add a global element.
-
Accept the defaults.
-
In the properties window, set the Path field value to
/pushMessage.
Add the Logger Component
Add the Logger component to display the response in the Mule console:
-
From the Mule Palette view, select Core and drag a Logger component to the right of Listener.
-
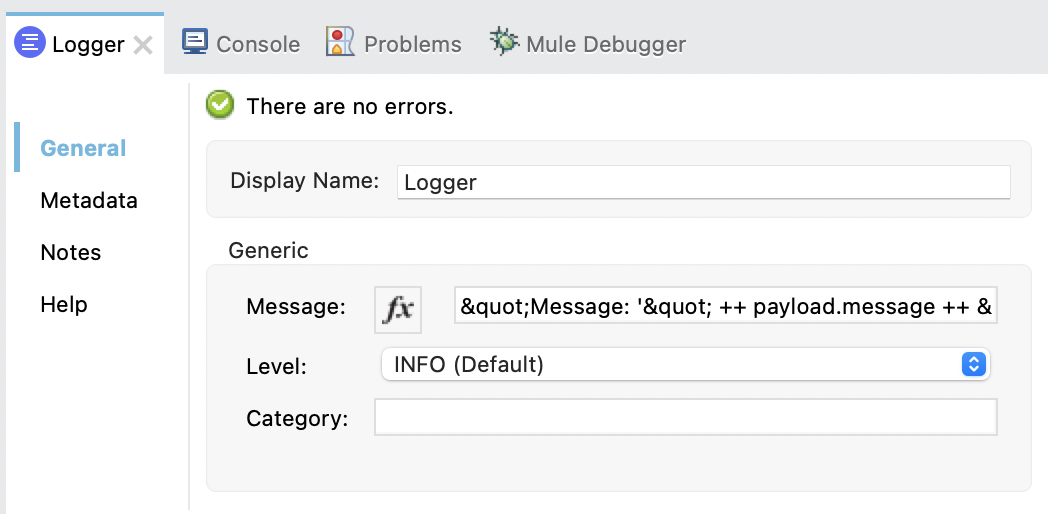
In the properties window, configure the following fields:
Field Value Display Name
Name for the logger.
Message
#["Message: '" payload.message "' is going to be published to topic: '" payload.topic "'."]Level
INFO (Default)
The following image shows an example of the Logger configuration in the properties window:
Add the Publish Operation
Add the Publish operation to publish a message to the specified Kafka topic:
-
From the Mule Palette view, select Apache Kafka and drag the Publish operation to the right of Logger.
-
In the properties window, click + next to the Connector configuration field to add a global element.
-
Configure the global element as follows:
-
In the Bootstrap Server URLs field, select Edit inline and then click the green plus sign.
-
Enter the value
${config.basic.bootstrapServers}and click Finish.
-
-
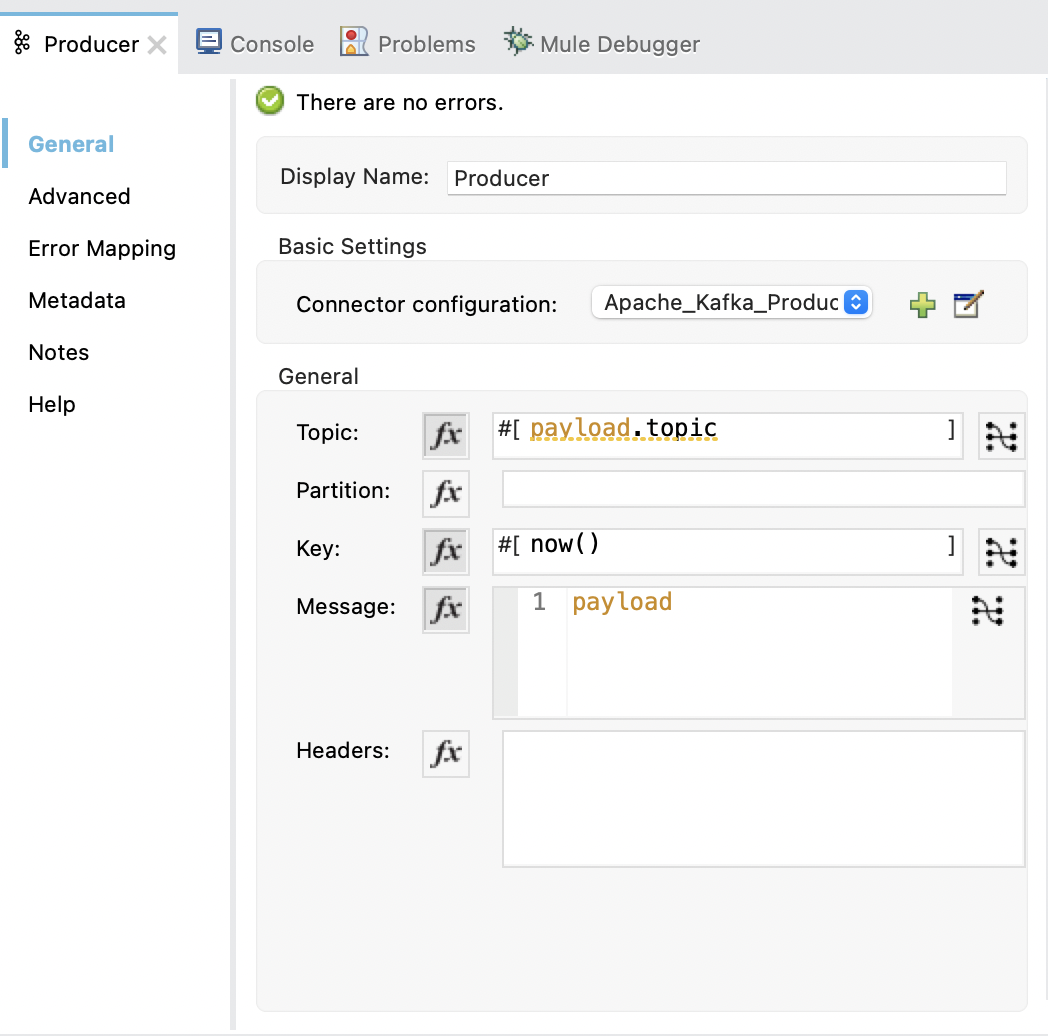
In the properties window, configure the following fields:
Field Value Display Name
Name for the connector operation.
Connector configuration
Global configuration you just created.
Topic
\#[payload.topic]Key
#[now()]Message
payloadThe following image shows an example of the Publish configuration in the properties window:
Add the Set Payload Transformer
Add the Set Payload transformer to push the response builder:
-
From the Mule Palette view, select Core and drag the Set Payload transformer to the right of Publish.
-
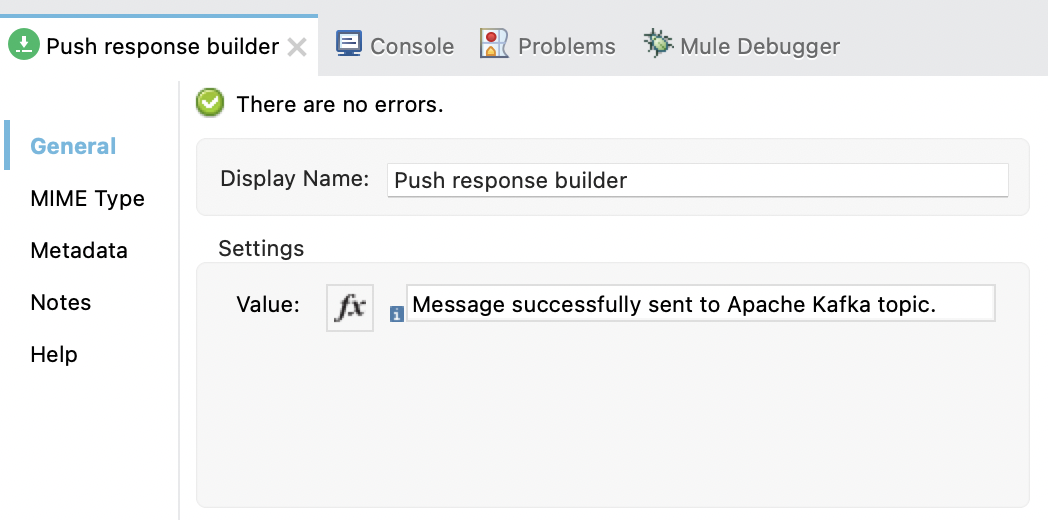
In the properties window, configure the following fields:
Field Value Display Name
Name for the transformer, such as
Push response builder.Value
Message successfully sent to Apache Kafka topic.The following image shows an example of the Set Payload configuration in the properties window:
Configure the Second Flow
Configure the second flow that consumes a message from Apache Kafka. Creating the second flow involves configuring a Message listener source and a Logger component.
Add the Message Listener Source
Add the Message listener source to consume a message endpoint:
-
From the Mule Palette view, select Apache Kafka and drag the Message listener source to the canvas.
-
In the properties window, click + next to the Connector configuration field to add a global element.
-
Configure the global element as follows:
-
In the Bootstrap Server URLs field, select Edit inline and then click the green plus sign.
-
Enter the value
${config.basic.bootstrapServers}and click Finish. -
In the Group ID field, enter
${consumer.groupId}. -
In the Topic Subscription Patterns field, select Edit inline and then click the green plus sign.
-
Enter the value
${topic1}and click Finish.
-
-
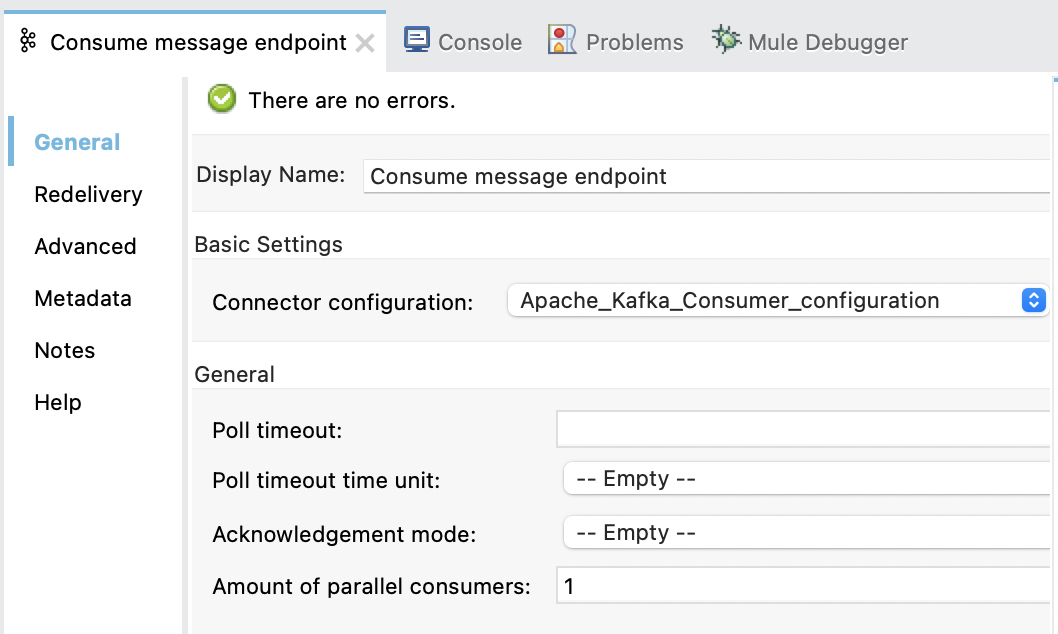
In the properties window, configure the following fields:
Field Value Display Name
Name for the connector source.
Connector configuration
Global configuration you just created.
The following image shows an example of the Message listener configuration in the properties window:
Add the Logger Component
Add the Logger component to display the response in the Mule console:
-
From the Mule Palette view, select Core and drag a Logger component to the right of Message listener.
-
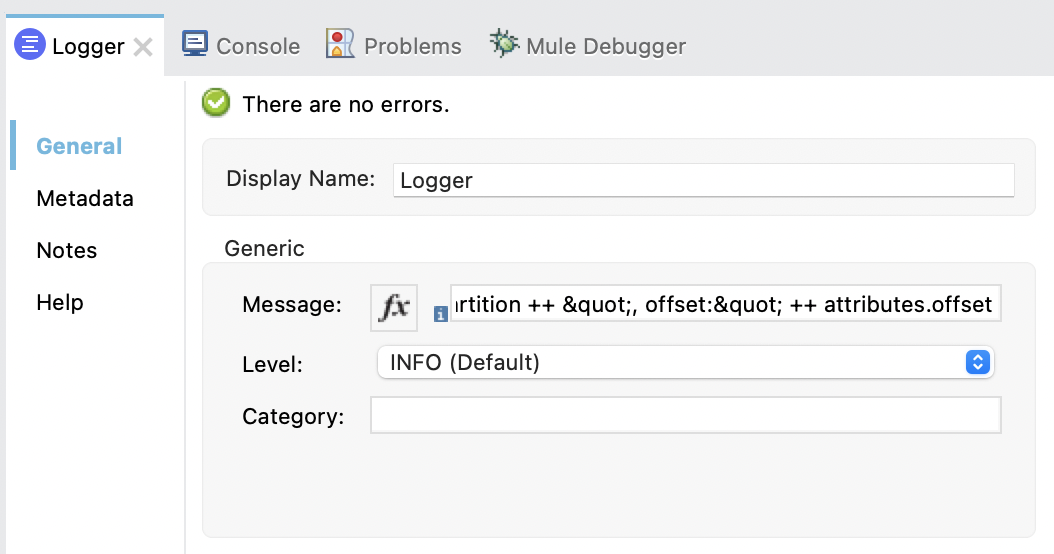
In the properties window, configure the following fields:
Field Value Display Name
Name for the logger.
Message
"New message arrived: " payload ", key:" attributes.key ", partition:" attributes.partition ", offset:" ++ attributes.offsetLevel
INFO (Default)
The following image shows an example of the Logger configuration in the properties window:
XML for This Example
Paste this code into the Studio XML editor to quickly load the flow for this example into your Mule app:
<?xml version="1.0" encoding="UTF-8"?>
<mule xmlns:ee="http://www.mulesoft.org/schema/mule/ee/core"
xmlns:Kafka="http://www.mulesoft.org/schema/mule/Kafka"
xmlns:http="http://www.mulesoft.org/schema/mule/http"
xmlns="http://www.mulesoft.org/schema/mule/core"
xmlns:doc="http://www.mulesoft.org/schema/mule/documentation"
xmlns:spring="http://www.springframework.org/schema/beans"
xmlns:xsi="http://www.w3.org/2001/XMLSchema-instance"
xsi:schemaLocation="
http://www.mulesoft.org/schema/mule/http http://www.mulesoft.org/schema/mule/http/current/mule-http.xsd
http://www.mulesoft.org/schema/mule/http
http://www.mulesoft.org/schema/mule/http/current/mule-http.xsd
http://www.springframework.org/schema/beans
http://www.springframework.org/schema/beans/spring-beans-current.xsd
http://www.mulesoft.org/schema/mule/core
http://www.mulesoft.org/schema/mule/core/current/mule.xsd
http://www.mulesoft.org/schema/mule/http
http://www.mulesoft.org/schema/mule/http/current/mule-http.xsd
http://www.mulesoft.org/schema/mule/ee/core
http://www.mulesoft.org/schema/mule/ee/core/current/mule-ee.xsd
http://www.mulesoft.org/schema/mule/kafka
http://www.mulesoft.org/schema/mule/kafka/current/mule-kafka.xsd">
<configuration-properties file="mule-app.properties">
</configuration-properties>
<http:listener-config name="HTTP_Listener_config"
doc:name="HTTP Listener config" >
<http:listener-connection host="0.0.0.0" port="8081" />
</http:listener-config>
<kafka:consumer-config name="Apache_Kafka_Consumer_configuration"
doc:name="Apache Kafka Consumer configuration" >
<kafka:consumer-plaintext-connection groupId="${consumer.groupId}" >
<kafka:bootstrap-servers >
<kafka:bootstrap-server value="${config.basic.bootstrapServers}" />
</kafka:bootstrap-servers>
<kafka:topic-patterns >
<kafka:topic-pattern value='${topic1}
<kafka:topic-pattern value="topic-1" />
<kafka:topic-pattern value="topic-2" />
</kafka:topic-patterns>]' />
</kafka:topic-patterns>
</kafka:consumer-plaintext-connection>
</kafka:consumer-config>
<kafka:producer-config name="Apache_Kafka_Producer_configuration"
doc:name="Apache Kafka Producer configuration" >
<kafka:producer-plaintext-connection >
<kafka:bootstrap-servers >
<kafka:bootstrap-server value="${config.basic.bootstrapServers}" />
</kafka:bootstrap-servers>
</kafka:producer-plaintext-connection>
</kafka:producer-config>
<kafka:consumer-config name="Apache_Kafka_Consumer_configuration1" doc:name="Apache Kafka Consumer configuration" >
<kafka:consumer-plaintext-connection groupId="${consumer.groupId}" >
<kafka:bootstrap-servers >
<kafka:bootstrap-server value="${config.basic.bootstrapServers}" />
</kafka:bootstrap-servers>
<kafka:topic-patterns >
<kafka:topic-pattern value="${config.topics}" />
</kafka:topic-patterns>
</kafka:consumer-plaintext-connection>
</kafka:consumer-config>
<flow name="Producer-Flow" >
<http:listener doc:name="Push message endpoint" config-ref="HTTP_Listener_config" path="/pushMessage" />
<logger level="INFO" doc:name="Logger" message="&quot;Message: '&quot; ++ payload.message ++ &quot;' is going to be published to topic: '&quot; ++ payload.topic ++ &quot;'.&quot;" />
<kafka:publish doc:name="Producer" topic="#[payload.topic]" key="#[now()]" config-ref="Apache_Kafka_Producer_configuration" />
<set-payload value="Message successfully sent to Apache Kafka topic." doc:name="Push response builder" />
</flow>
<flow name="Consumer-Flow" >
<kafka:message-listener doc:name="Consume message endpoint" config-ref="Apache_Kafka_Consumer_configuration"/>
<logger level="INFO" doc:name="Logger" message="'New message arrived: ' ++ payload ++ &quot;, key:&quot; ++ attributes.key ++ &quot;, partition:&quot; ++ attributes.partition ++ &quot;, offset:&quot; ++ attributes.offset"/>
</flow>
</mule>


