CloudHub Connector
Support Category: Select
Anypoint Connector for CloudHub (CloudHub Connector) enables you to create custom notifications inside your flows and exception strategies. You can also manage actions and alerts in your CloudHub instance.
Install from Anypoint Exchange
-
In Anypoint Studio, click the Exchange X icon in the Studio task bar.
-
Click Login in Exchange and supply your Anypoint Platform username and password.
-
In the Exchange window, search for the connector and click Add to project.
-
Follow the prompts to install the connector.
Demo Configuration
Add and configure the CloudHub connector according to the basic setup in Deploying to CloudHub.
-
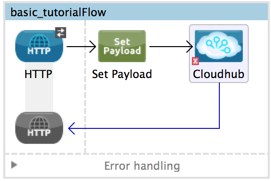
In Anypoint Studio, find the CloudHub connector on the right menu and then drag and drop it next to the Set Payload transformer:
-
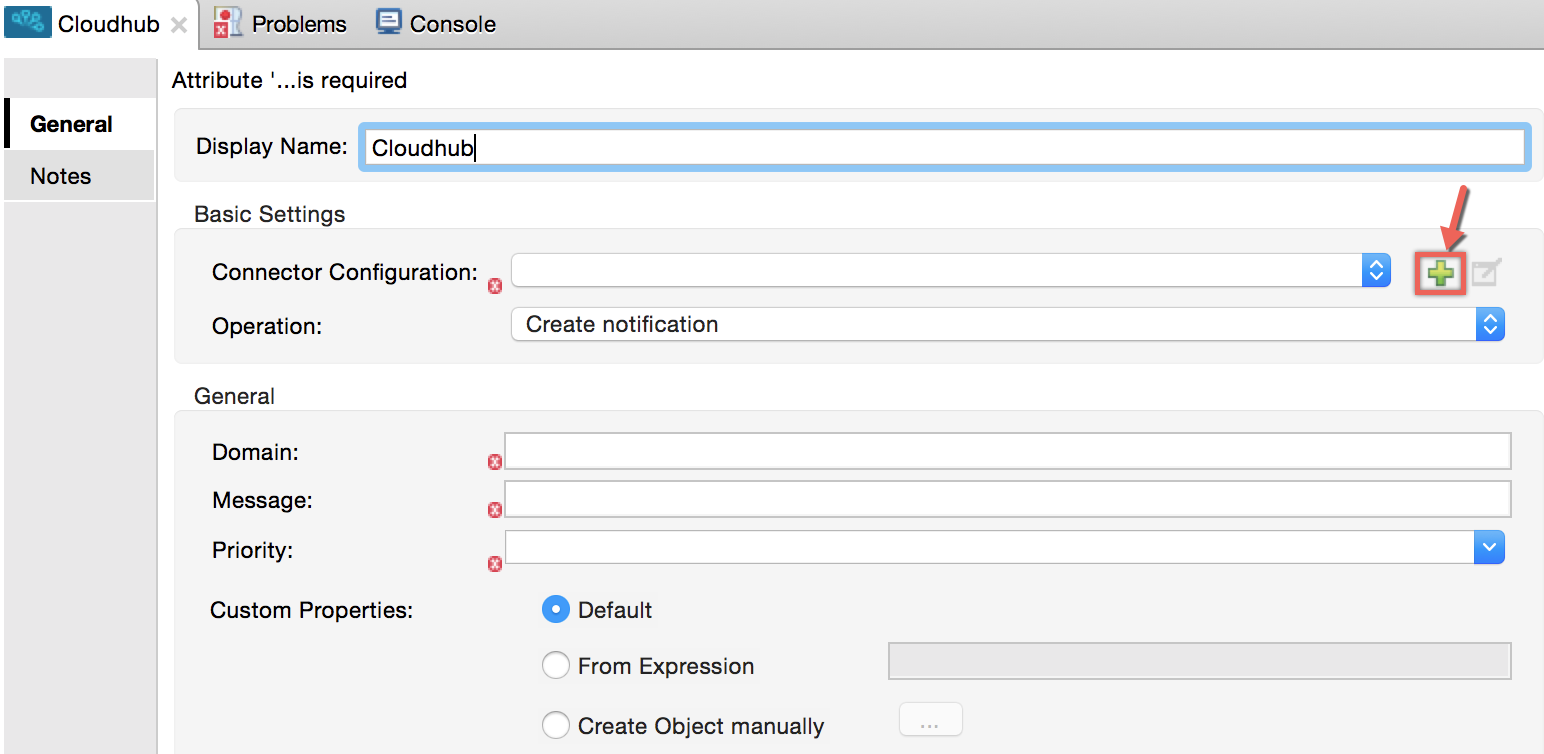
Open the configuration for the CloudHub connector. Create a new Connector Configuration for the connector by clicking the plus sign "+":
-
For this demo, select Basic Authentication configuration, which must be configured with the corresponding Username and Password.
Inherited Token Authentication is a configuration option that works only when the CloudHub connector’s application runs inside a CloudHub instance. The connector retrieves the API token based on the user who first created the application. If the user who created the application was previously deleted, this authentication method fails. -
Enter your Anypoint Platform credentials into the configuration fields and click OK. The Url field specifies the path to CloudHub in an Anypoint Platform control plane. For example, you can change the Url field to access the EU control plane at
https://eu1.anypoint.mulesoft.com/.
-
Make sure that you have selected the Create notification operation and set the properties for:
-
Domain: The domain you set for your application when you first created it. This is not the complete domain name
myapp.cloudhub.io, but only the application name, such asmyapp. -
Message: The message you want your notification to display, for example,
Hello World!. -
Priority: The type of the notification. If you select
INFO, your notification displays an informative message. If you selectERROR, your notification displays a red alert message.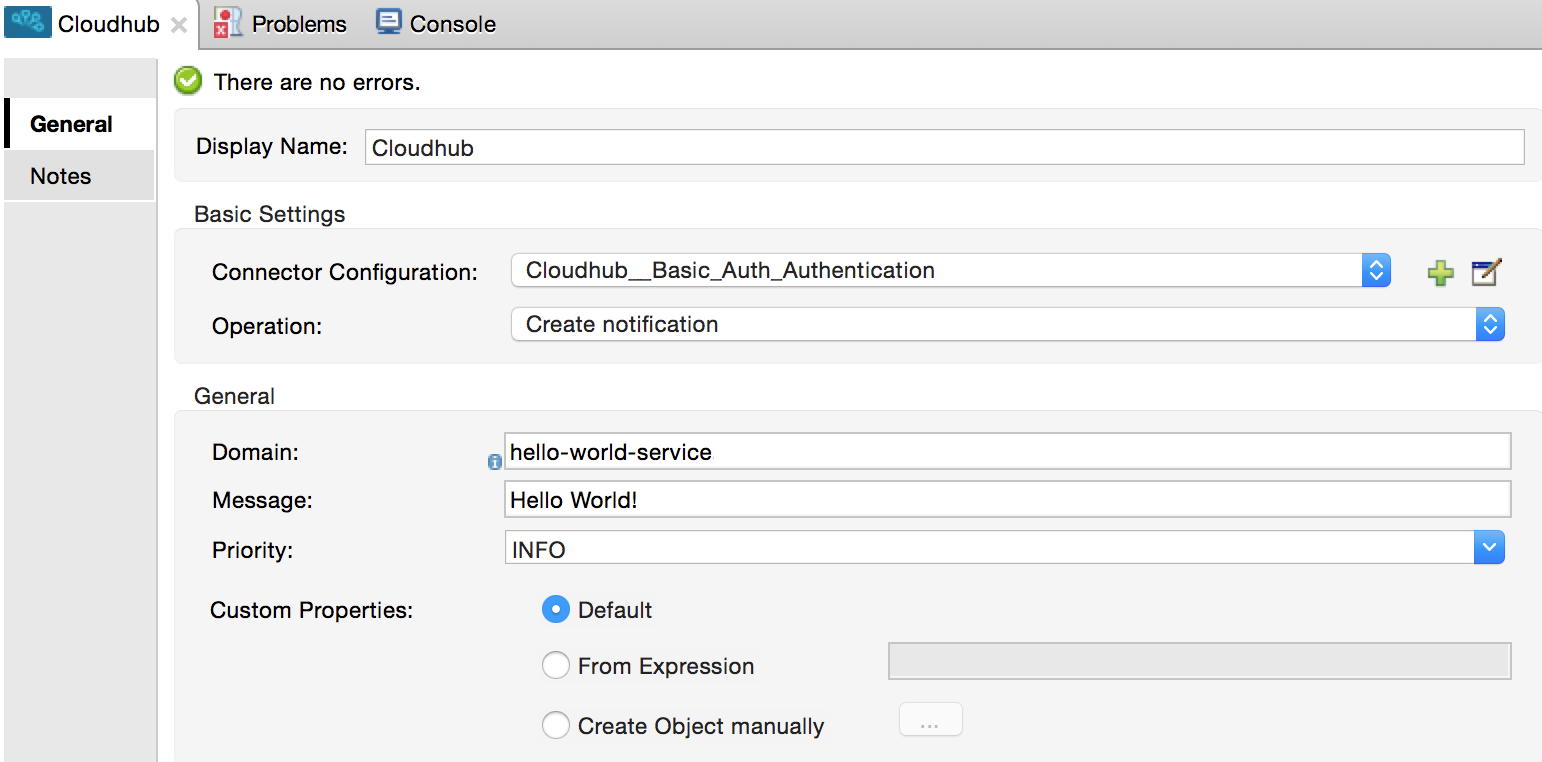
-
-
You can include additional information with the notification by configuring the Custom Properties section.
The custom properties format is Map <String, String>and is typically referenced using a Java bean or a variable where you have defined a map, for example,[flowVars.magicMap], or by defining a map using the[['key1':'value1']]Mule Expression Language (MEL) format. -
At this point, your application is ready to deploy and run. When users visit your domain root, the Create notification operation in the CloudHub connector displays a
Hello World!notification message for the domain on which the application runs.
To create notifications in CloudHub, use the Create notification operation. This operation requires that you configure the connector with your Anypoint Platform username and password.
|
| The Retrieve Logs operation is no longer supported. To download logs, use the CloudHub API or the Anypoint Platform CLI. |