MUnit Suite
Definition
The base file in the MUnit Framework is the MUnit Test Suite file. These files are the .xml files located under the src/test/munit folder in your Mule application’s folder structure. Each MUnit Test Suite file is a collection of MUnit tests. It is meant to work on its own, and should be able to run independently from other MUnit test suite files.
Components of an MUnit Test Suite
An MUnit test suite file should contain any combination of the following components:
-
Bean Definitions
| Each MUnit test suite file is, behind the scenes, no different than a Mule application XML file. You can use several of the Mule top level elements such as flow, sub-flow, etc. |
Imports
Defining Imports
Each MUnit suite is meant to test a particular set of Mule flows. To do that, you need to tell MUnit where those flows are defined in your application structure. For this we use imports, which are in fact spring imports.
Studio Visual Editor
In the Global Elements Tab of your MUnit Test Suite, go to your Import (Configuration) element, and double-click it to show the Global Element Properties:
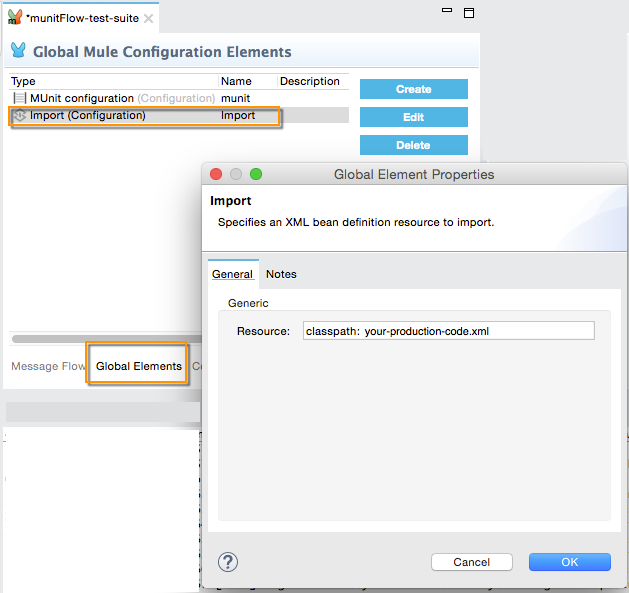
Edit the Resource: field with the reference of the .xml file name of the application you are testing.
XML or Standalone Editor
<spring:beans>
  <spring:import resource="classpath:your-production-code.xml"/>
</spring:beans>| If your application is spread across multiple files and the components in those files cross-reference each other, you need to import all of the files. |
| Ideally, your production code and your flows should be arranged in a cohesive way — this improves readability, maintainability and testability. |
Before/After Suites
Defining Before and After Suites
As with other testing frameworks, MUnit provides certain features around the test suite concept. In particular, you can add processing/actions to be run before and/or after the entire MUnit Test Suite executions.
Defining a Before Suite
The MUnit Before Suite is a scope. It can contain code that is meant to be executed before the whole suite.
For instance, let’s suppose you have an MUnit Test Suite file with four tests. The code inside an MUnit Before Suite runs just once, before your four tests.
The MUnit Before Suite is a top level scope, so you can have as many Before Suites as you need. They all follow the same execution rule: Run before the tests, just once.
| If there is more than one Before Suite, MUnit does not guarantee the order in which the Before Suites run amongst themselves. |
Studio Visual Editor
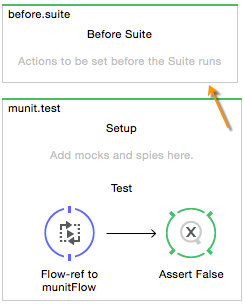
Note that the before-suite is located outside the MUnit test.
XML or Standalone Editor
<munit:before-suite name="before.suite" description="A description">
  <!-- some mule code here -->
</munit:before-suite >

<munit:test name="munit.test" description="Test">
  <!-- some more mule code here -->
</munit:test>
Note that the before-suite is located outside the MUnit test.
| Attribute Name | Description |
|---|---|
|
Defines the name of the Before suite. The name must be unique inside the suite. |
|
Describes the actions performed. |
| One instance in which the MUnit Before Suite is useful is when you need to set up a test environment before the whole test runs. |
Defining an After Suite
The MUnit After Suite is a scope. It can contain code that is meant to be executed after the whole suite.
For instance, let’s suppose you have an MUnit Test Suite File with four tests. The code inside an MUnit After Suite, runs just once, after all your tests.
The MUnit After Suite is a top level scope, thus you can have as many After Suites as you need. They all follow the same execution rule: Run after the tests, just once.
| If there is more than one After Suite, MUnit does not guarantee the order in which the After Suites run amongst themselves. |
Studio Visual Editor
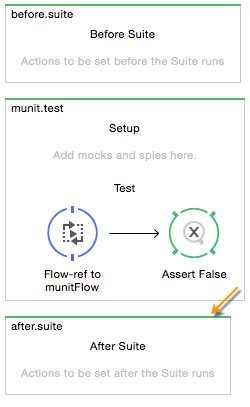
Note that the after-suite is located outside the MUnit test
XML or Standalone Editor
<munit:before-suite name="before.suite" description="A description">
  <!-- some mule code here -->
</munit:before-suite >

<munit:test name="munit.test" description="Test">
  <!-- some more mule code here -->
</munit:test>

<munit:after-suite  name="after.suite" description="A description">
  <!-- some Mule code here -->
</munit:after-suite >
Note that the after-suite is located outside the MUnit test
| Attribute Name | Description |
|---|---|
|
Defines the name of the After suite. The name must be unique inside the suite. |
|
Describes the actions performed. |
| One instance in which the MUnit After Suite is useful is when you need to set up a test environment after the whole test runs. |
Before/After Tests
Defining Before and After Tests
MUnit provides the ability to perform Before and After tests. These are similar to the concepts defined by JUnit. You can add processing/actions to be run before and/or after the execution of each MUnit Test suite.
Defining a Before Test
The MUnit Before Test is a scope. It can contain code that is meant to be executed before each test.
For instance, let’s suppose you have an MUnit Test Suite file with four tests. The code inside an MUnit Before test runs before each of your four tests; it runs four times.
The MUnit Before Test is a top-level scope, thus you can have as many Before tests as you need. They all follow the same execution rule: Run before each test.
| If there is more than one Before test, MUnit does not guarantee the order in which the Before tests run amongst themselves. |
Studio Visual Editor
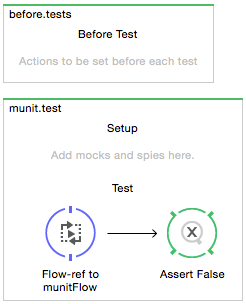
Note that the before.test is located outside the MUnit test
XML or Standalone Editor
<munit:before-test name="before.tests" description="A description">
  <!-- some mule code here -->
</munit:before-test>

<munit:test name="munit.test" description="Test">
  <!-- some more mule code here -->
</munit:test>
Note that the before.test is located outside the MUnit test
| Attribute Name | Description |
|---|---|
name |
Defines the name of the Before test. The name must be unique inside the test. |
description |
Describes the actions performed. |
| One instance in which the MUnit Before Suite is useful is when you need to set up a test environment before the whole test runs. |
Defining an After Test
The MUnit After Test is a scope. It can contain code that is meant to be executed after each test.
For instance, let’s suppose you have an MUnit Test Suite file with four tests. The code inside an MUnit After Test runs after each of your four tests; it runs four times.
The MUnit After Test is a top level scope, so you can have as many After Tests as you need. They all follow the same execution rule: Run after each test.
| If there is more than one After test, MUnit does not guarantee the order in which the After Tests run amongst themselves. |
Studio Visual Editor
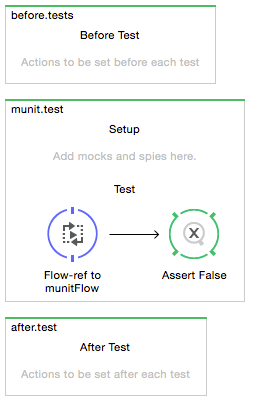
Note that the after.suite is located outside the MUnit test
XML or Standalone Editor
<munit:before-test name="before.tests" description="A description">
  <!-- some mule code here -->
</munit:before-test>

<munit:test name="munit.test" description="Test">
  <!-- some more mule code here -->
</munit:test>

<munit:after-test  name="after.test" description="A description">
  <!-- some mule code here -->
</munit:after-test>
Note that the after.suite is located outside the MUnit test
| Attribute Name | Description |
|---|---|
name |
Defines the name of the After test. The name must be unique inside the test. |
description |
Describes the actions performed. |
| One instance in which the MUnit After test is useful is when you need to set up a test environment after the whole test runs. |
MUnit Tests
Defining an MUnit Test
The MUnit Test is the basic building block of an MUnit Test Suite. It represents each test scenario you want to try.
Studio Visual Editor
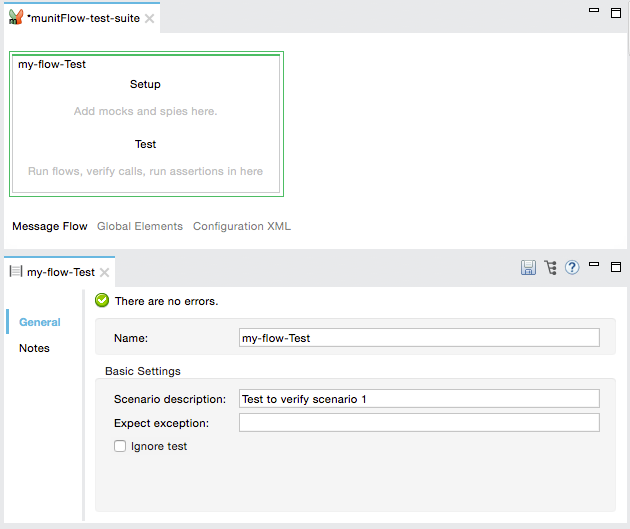
XML or Standalone Editor
<munit:test name="my-flow-Test" description="Test to verify scenario 1">
</munit:test>| Name | Description |
|---|---|
|
Mandatory. Defines the name of the test. The name must be unique inside the test suite. |
|
Mandatory. Describes the scenario being tested. |
|
Defines if the test should be ignored. If not present, the test is not ignored. |
|
Defines the exception that should be received after the execution of this test. |
Defining Properties
In MUnit, you can load properties from the mule-app.properties file as well as using the context:property-placeholder to load properties from an additional file.
MUnit provides several ways to override these properties when running MUnit with Anypoint Studio. Properties for the mule-app.properties file are loaded as System properties.
Defining an MUnit Test Description
In MUnit, it’s mandatory that you write a description in your test, that is, the description attribute is mandatory.
Ideally, you should write a useful, representative description of the scenario you are testing. This description displays in the test console before running the test, and also in the reports.
| The more representative the description, the more easy to read and troubleshoot any failures. |
Studio Visual Editor
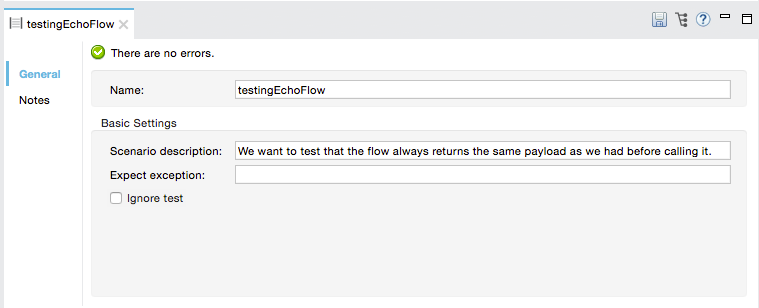
XML or Standalone Editor
<munit:test name="testingEchoFlow"
    description="We want to test that the flow always returns the same payload as we had before calling it.">
Defining an MUnit Test To Ignore
There may be scenarios where you need to shoot-down a test. Whether this be because the test is failing or because it has nasty side effects.
The point is you shouldn’t have to comment out the code.
In this case, MUnit allows you to ignore a specific test.
You can ignore any of your tests by adding the ignore boolean to the test definition, as shown below.
Studio Visual Editor
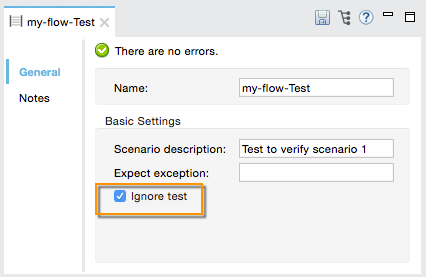
XML or Standalone Editor
<munit:test name="my-flow-Test"
      ignore="true"
      description="Test to verify scenario 1">
</munit:test>
Valid values for ignore are true and false. If the attribute is not present, the default is false.
|
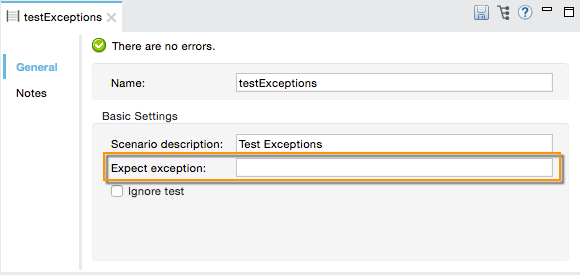
Defining an Expected Exception
Sometimes, the only thing you want to validate is that the flow or sub-flow you are testing fails and throws a specific exception, which depends on the business logic being tested. In these cases, MUnit provides a simple way to validate the scenario.
In these cases you can add the attribute expectException, as shown below.
Studio Visual Editor
XML or Standalone Editor
<munit:test name="testExceptions" description="Test Exceptions" expectException="">
  <flow-ref name="exceptionFlow"/>
</munit:test>
The attribute expectException expects one of the following:
-
A literal exception class name (canonical form)
-
A MEL expression
Studio Visual Editor
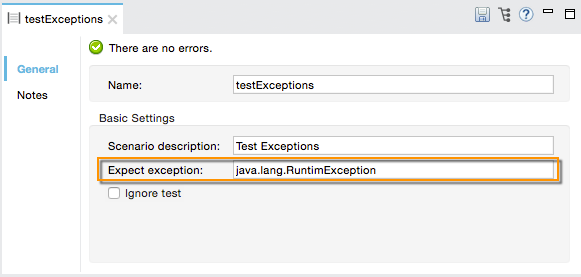
XML or Standalone Editor
<munit:test name="testExceptions" description="Test Exceptions" expectException="java.lang.RuntimeException">
  <flow-ref name="exceptionFlow"/>
</munit:test>
If you define that your test expects an exception and none is thrown, the test fails immediately.
expectException - Literal Value
When you provide a literal value, it should take the form of the canonical class name of the exception that is expected. In these cases, Mule always throws a MuleMessagingException. MUnit validates the provided classname if the underlying cause of the MuleMessagingException thrown is of the exact same type.
| When providing exceptions in this way, a subclass of the provided exception does not pass the validation — MUnit looks for the exact same type. |
expectException - MEL Expression Value
If you choose to use expressions, Mule itself offers a collection of MEL expressions that simplifies the validations of the exceptions thrown.
| Name | Description |
|---|---|
|
Evaluates if the exception was caused by an (instance of) the provided exception type.
Example: |
|
Evaluates if the exception was caused by the specific exception type provided, discarding all other exception types. For example, if the provided exception type is |
|
Checks the cause exception type name matches the provided regex. Supports any java regex plus, prefix, suffix. Example: |
You can combine any expressions as a boolean expression. For example:exception.causeMatches('*') && !exception.causedBy(java.lang.ArithmeticException) &&
!exception.causedBy(org.mule.api.registry.ResolverException)
|
This MEL expression is meant to be used with the expressions listed above, but no verification is performed done to avoid other usages. The only contract being enforced is: The MEL expression should return a boolean value. If true, the test is successful.
If the MEL expression returns something that cannot be cast to a Boolean value, the test fails.
All MEL expression shortcuts, such as message or payload, are valid. Just bear in mind that if an exception is thrown, the original payload most likely is lost.