Run and Wait Scope
Functionality
The Run and Wait scope provided by MUnit allows you to instruct MUnit to wait until all asynchronous executions have completed. Hence, test execution does not start until all threads opened by production code have finished processing.
If you are using Maven, you need to add the MUnit Synchronize module artifact to your pom file:
<!-- Synchronize Scope Dependency -->
<dependency>
          <groupId>com.mulesoft.munit.utils</groupId>
          <artifactId>munit-synchronize-module</artifactId>
          <version>1.1.0</version>
</dependency>
If you choose to mavenize your project, Studio will notify you that the Synchronize module dependency will be added.
Additionally, if you are not using Anypoint Studio you also need to install the mule-module-batch-ee dependency by adding this to your pom file:
<dependency>
 <groupId>com.mulesoft.muleesb.modules</groupId>
 <artifactId>mule-module-batch-ee</artifactId>
 <version>${mule.version}</version>
 <scope>provided</scope>
</dependency>
Defining Run and Wait
In some cases, your production code may launch threads that produce key results. Usually, these are the results that you want to validate. But if those results are being processed in a separate thread, your test runs and finishes before that separate thread completes, that is, before the results that you want to validate are available. To avoid this problem, you can use the run-and-wait scope.
For the purposes of this document, we assume that we are testing the following Mule code:
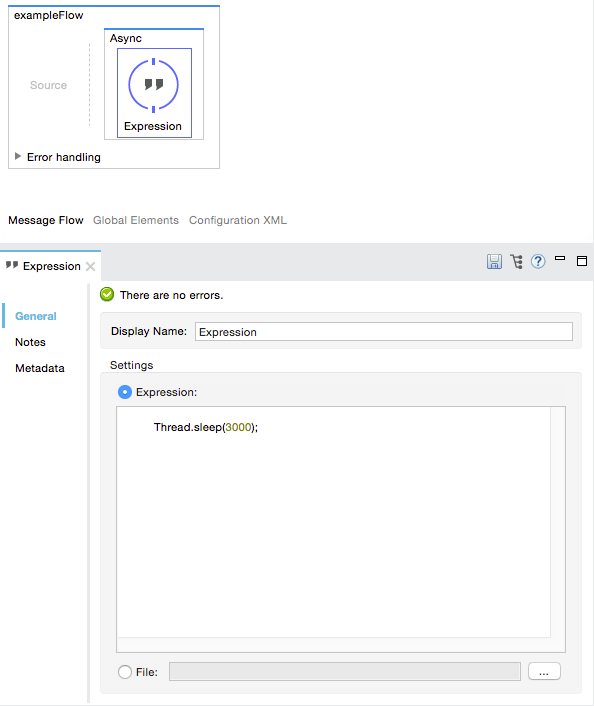
XML or Standalone Editor
<flow name="exampleFlow">
  <async>
      <expression-component>
          Thread.sleep(3000);
      </expression-component>
  </async>
</flow>
The goal is to make your test wait until the exampleFlow has finished. To do so, implement the test as shown below.
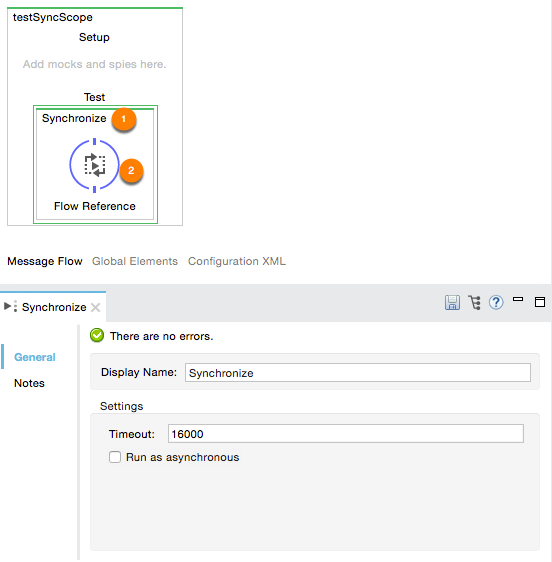
XML or Standalone Editor
<flow name="testFlow">
    <synchronize:run-and-wait timeout="16000"> (1)
        <flow-ref name="exampleFlow"/> (2)
    </synchronize:run-and-wait>
</flow>| 1 | Define run-and-wait scope. |
| 2 | Call the actual production code to test. |
| Attribute Name | Description |
|---|---|
|
Defines the time (in milliseconds) to wait for all the threads to complete. |
|
Boolean. When runAsync is set to true, the synchronize module copies the triggering MuleEvent and sets its |
| Using this tool is the only way to run an MUnit test on Mule batch jobs. |
Defining Run and Wait With Java Code
Java API usage
To define the run-and-wait scope in Java, you need to implement the Synchronizer abstract class:
import org.mule.construct.Flow;
import org.mule.Synchronizer;
import org.mule.api.MuleEvent;

public class TheTest extends FunctionalMunitSuite {

  @Test
  public void test() throws Exception{
    final Flow flow = (Flow) muleContext.getRegistry().
      lookupFlowConstruct("testFlow");   (1)

    Synchronizer synchronizer =
      new Synchronizer(muleContext, 12000){  (2)

        @Override
        protected MuleEvent process(MuleEvent event) throws Exception{

            return flow.process(event);  (3)
        }
    };

    MuleEvent event = testEvent("payload");
    synchronizer.runAndWait(event);   (4)
  }
}| 1 | Obtain the flow to test. |
| 2 | Create a new Synchronizer and implement the abstract method process. |
| 3 | Usually what you want to do is run a flow. |
| 4 | Call the Synchronizer implementation defined in Note #2. |