Spy Message Processor
Overview
The Spy feature provided by MUnit allows you to spy what happens before and after a message processor is called. This allows you to, among other things, validate that a selected Mule message that reaches a specific message processor, does so containing a specific payload or variable.
Defining Spies
When defining a spy, we are telling MUnit to run a set of instructions (usually assertions or verifications) before and/or after the execution of a message processor.
| You can define a spy over any message processor (even if you haven’t created a mock for it). |
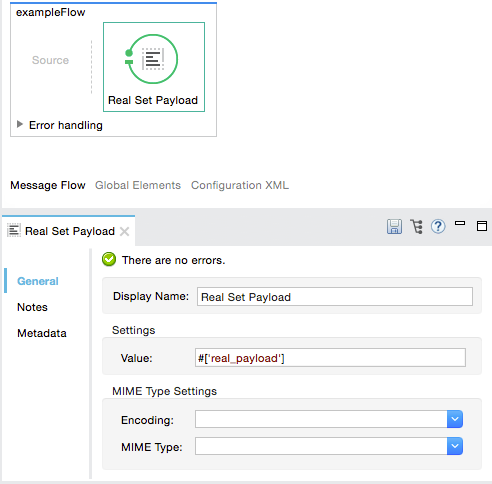
For the purposes of this document, we assume we are testing the following Mule code:
Studio Visual Editor
XML or Standalone Editor
<flow name="exampleFlow">
<set-payload value="#['real_payload']" doc:name="Real Set Payload"/>
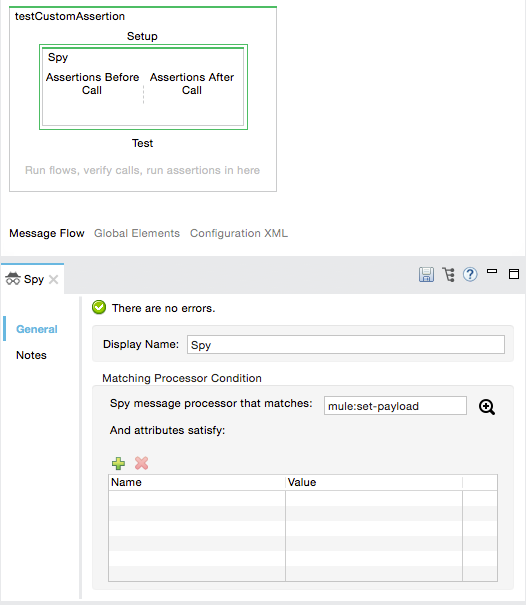
</flow>Defining which Message Processor to Spy
Studio Visual Editor
XML or Standalone Editor
<mock:spy messageProcessor="mule:set-payload"/>| Attribute Name | Description |
|---|---|
|
This attribute is used to describe which message processor we want to mock. It takes the form |
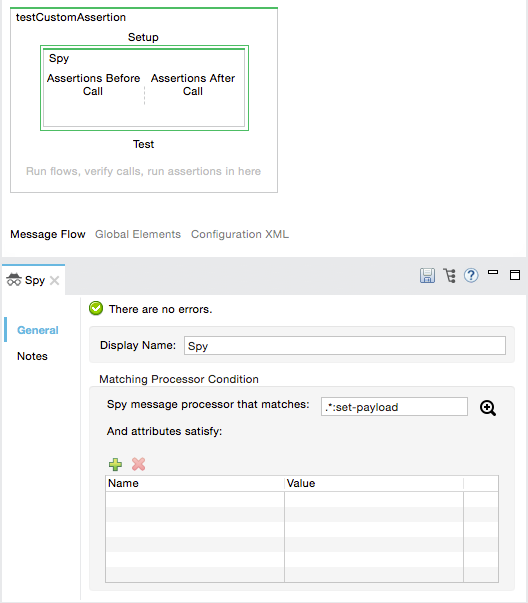
Since the messageProcessor attribute accepts regular expressions, you could create the same verification as shown below.
Studio Visual Editor
XML or Standalone Editor
<mock:spy messageProcessor=".*:set-payload"/>In the example above we define a spy for a message processor named set-payload, disregarding which namespace the message processor belongs to.
| Use regular expressions in Spy only if strictly necessary. Regular expressions make it very easy to apply the Spy and its code to more message processors that you intended. |
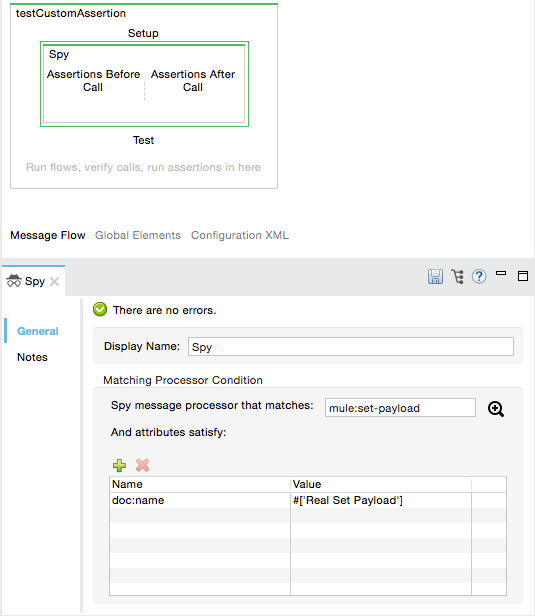
Defining Spy with Message Processor Attributes
A Spy definition is based on matchers, that is, parameters that match features of the desired message processor. Defining a spy solely on the name of the message processor largely limits your scope and actions regarding the mock. For this reason, MUnit allows you to define a spy by defining matchers over the value of a message processor’s attributes.
Studio Visual Editor
XML or Standalone Editor
<mock:spy messageProcessor="mule:set-payload" doc:name="Spy">
  <mock:with-attributes>
    <mock:with-attribute whereValue="#['Real Set Payload']" name="doc:name"/>
  </mock:with-attributes>
</mock:spy>
You can define as many attributes as you deem necessary to make the verification as representative as possible.
When defining an attribute, you do so by defining:
| Attribute Name | Description |
|---|---|
|
The name of the attribute. This value is literal, it does not accept regular expressions. |
|
Defines the value that the attribute (of the real message processor) should contain. It accepts MEL expressions. If left as a literal, it assumes a string value. |
If the attribute you wish the Spy message processor to match is similar to config-ref and resolves to an actual bean, you can use the MUnit MEL function getBeanFromMuleContext('bean_name'). This function inspects the Mule registry and returns the bean with the matching name if present. See Assertion Message Processors for details.
|
Defining Spy Actions
Spy’s power resides on its ability to run actions before or after a message processor call.
Studio Visual Editor
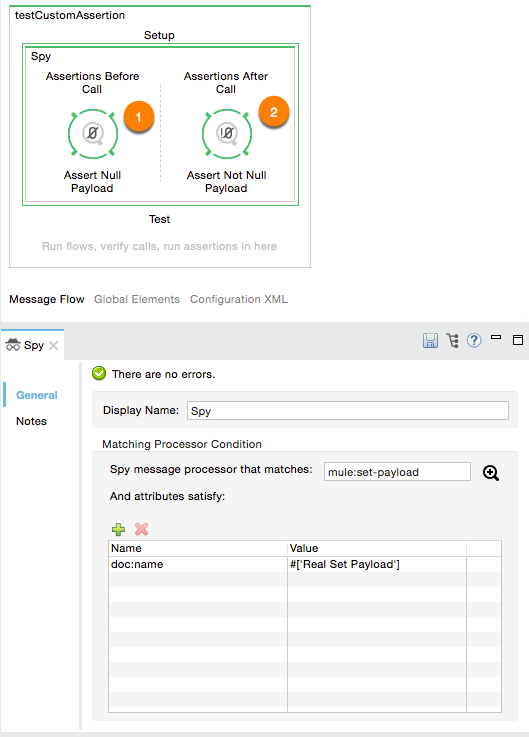
-
The actions inside
assertions-before-callare run before the message processor call. -
The actions inside
assertions-after-callare run after the message processor call.
XML or Standalone Editor
<mock:spy messageProcessor="mule:set-payload" doc:name="Spy">
            <mock:with-attributes>
                <mock:with-attribute name="doc:name" whereValue="#['Real Set Payload']"/>
            </mock:with-attributes>
            <mock:assertions-before-call>   (1)
                <munit:assert-null message="Oops! Payload Is not Null" doc:name="Assert Null Payload"/>
            </mock:assertions-before-call>
            <mock:assertions-after-call>   (2)
                <munit:assert-not-null message="Oops! Payload is Null" doc:name="Assert Not Null Payload"/>
            </mock:assertions-after-call>
</mock:spy>| 1 | The actions inside assertions-before-call are run before the message processor call. |
| 2 | The actions inside assertions-after-call are run after the message processor call. |
| It makes no sense to define a spy after a mocked message processor, since you would end up validating your own mock. |
| Currently, the actions inside a spy message processor apply only to the message payload and to the invocation properties. |
| A current limitation is that you cannot modify the content of a Mule message payload inside a spy. This action results in an exception. |
One Way Endpoints and Message Processors
Using the information in this guide, you can now spy any message processor. However, for one-way endpoints, ensure that the spying is done before the endpoint executes and not afterwards. This is because a one-way endpoint does not wait for a response and returns a VoidMuleEvent.
If a message processor attempts to take actions on the VoidMuleEvent, and even though those actions are assertions, the action fails.
To avoid unexpected errors, the MUnit Spy message processor fails with an MUnitError if a VoidMuleEvent is sent to any section of the Spy message processor.
You can still spy over one-way endpoints, but no after section or message processors inside this section can be present.
Defining Spy With Java Code
The following example reproduces the behavior described above using the MUnit Java API.
import org.junit.Test;
import org.mule.munit.common.mocking.Attribute;
import org.mule.munit.common.mocking.SpyProcess;
import org.mule.munit.runner.functional.FunctionalMunitSuite;

public class TheTest extends FunctionalMunitSuite {

  @Test
  public void test() throws Exception{
    Attribute attribute = Attribute.attribute("name").
      ofNamespace("doc").withValue("Real Set Payload"); (1)

    spyMessageProcessor("set-payload")    (2)
      .ofNamespace("mule")                (3)
      .withAttributes(attribute)
      .before(beforeCallSpy())            (4)
      .after(afterCallSpy());             (5)
  }

  private SpyProcess beforeCallSpy(){
    return  new SpyProcess() {
      public void spy(MuleEvent event) throws MuleException {
        /* Define actions */              (6)
        }
  	};
  }

  private SpyProcess afterCallSpy(){
    return  new SpyProcess() {
      public void spy(MuleEvent event) throws MuleException {
        /* Define actions */             (7)
        }
  	};
  }
}| 1 | Define the real message processor attribute to match. |
| 2 | Define the name of the message processor to verify (accepts regular expressions). |
| 3 | Define the namespace of the message processor to verify (accepts regular expressions). |
| 4 | Set SpyProcess to run before the message processor executes. |
| 5 | Set SpyProcess to run after the message processor executes. |
| 6 | Define the actions to run before the message processor executes. |
| 7 | Define the actions to run after the message processor executes. |