Use a published RPA Process in Salesforce Flow
Publishing an invocable run configuration in RPA Manager, creates an External MuleSoft Service in Salesforce. The service’s name consists of the name of the RPA Manager automation project without the blanks, followed by a '10'.
To use your process in a Salesforce Flow, follow these steps:
-
Create a new flow. In this example we use a screen flow for illustrational purposes.
-
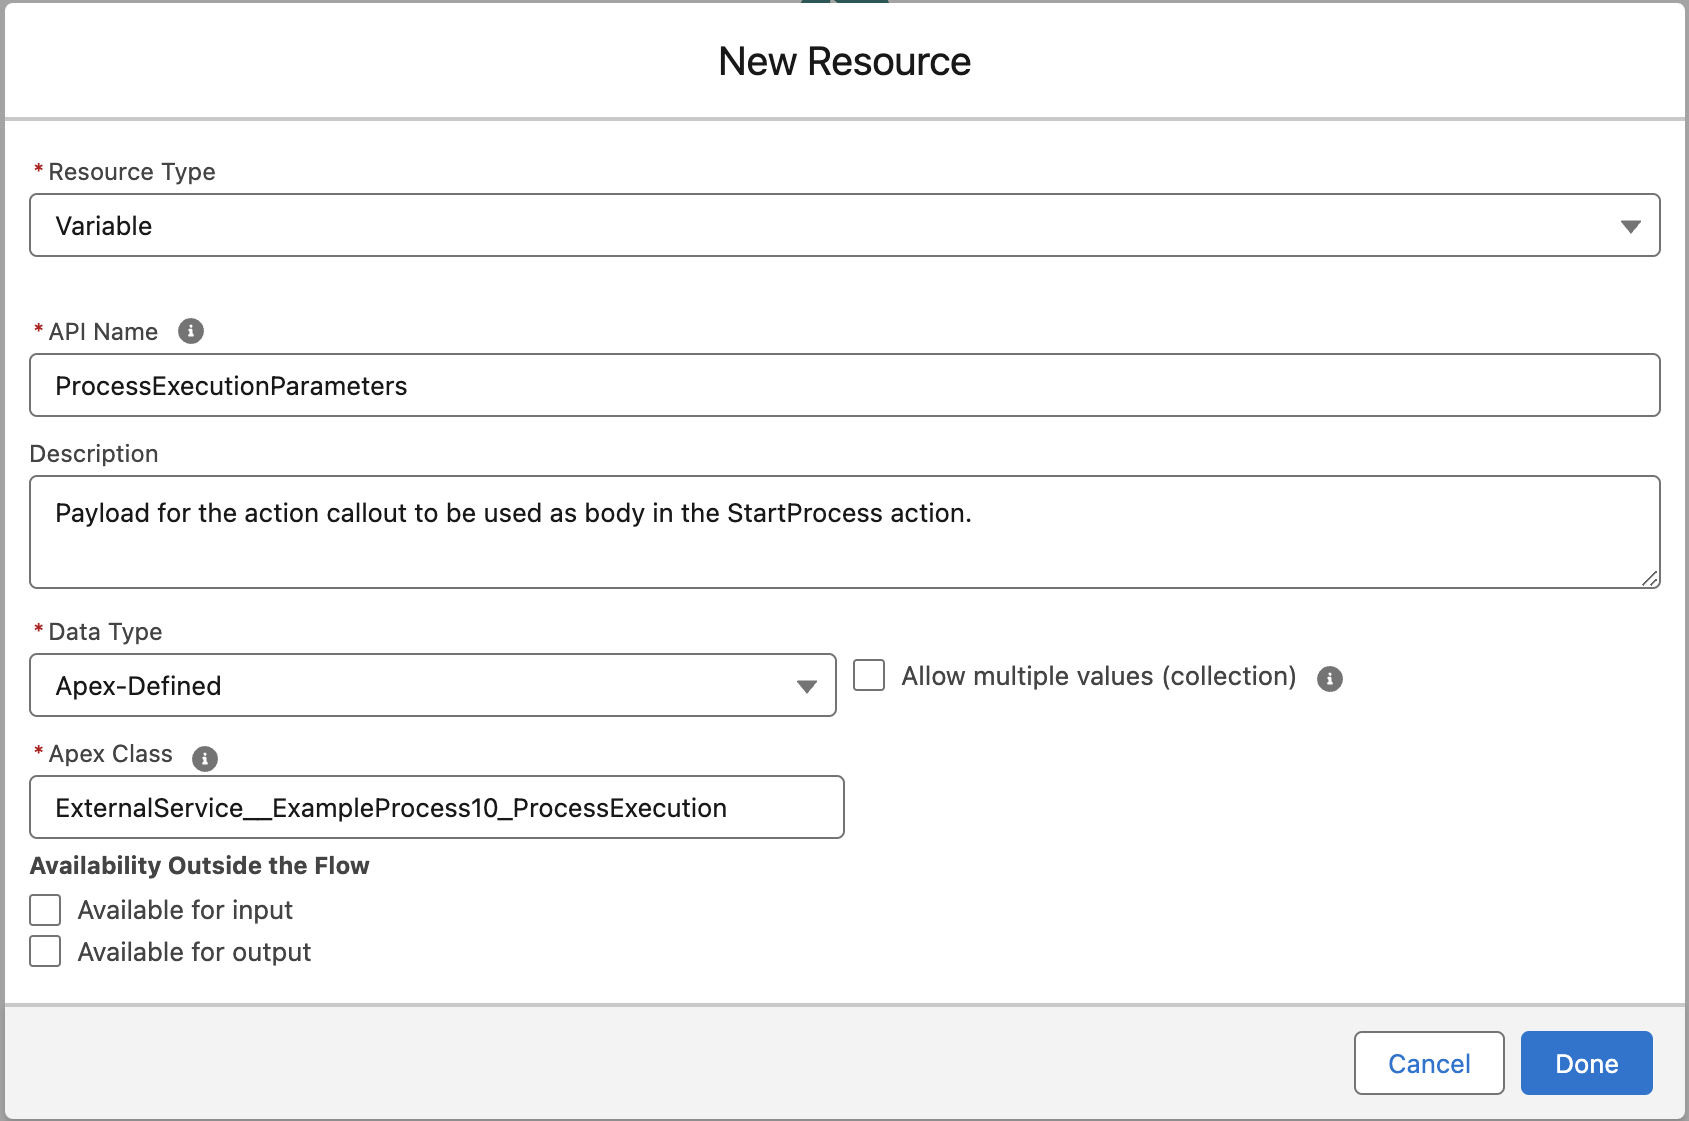
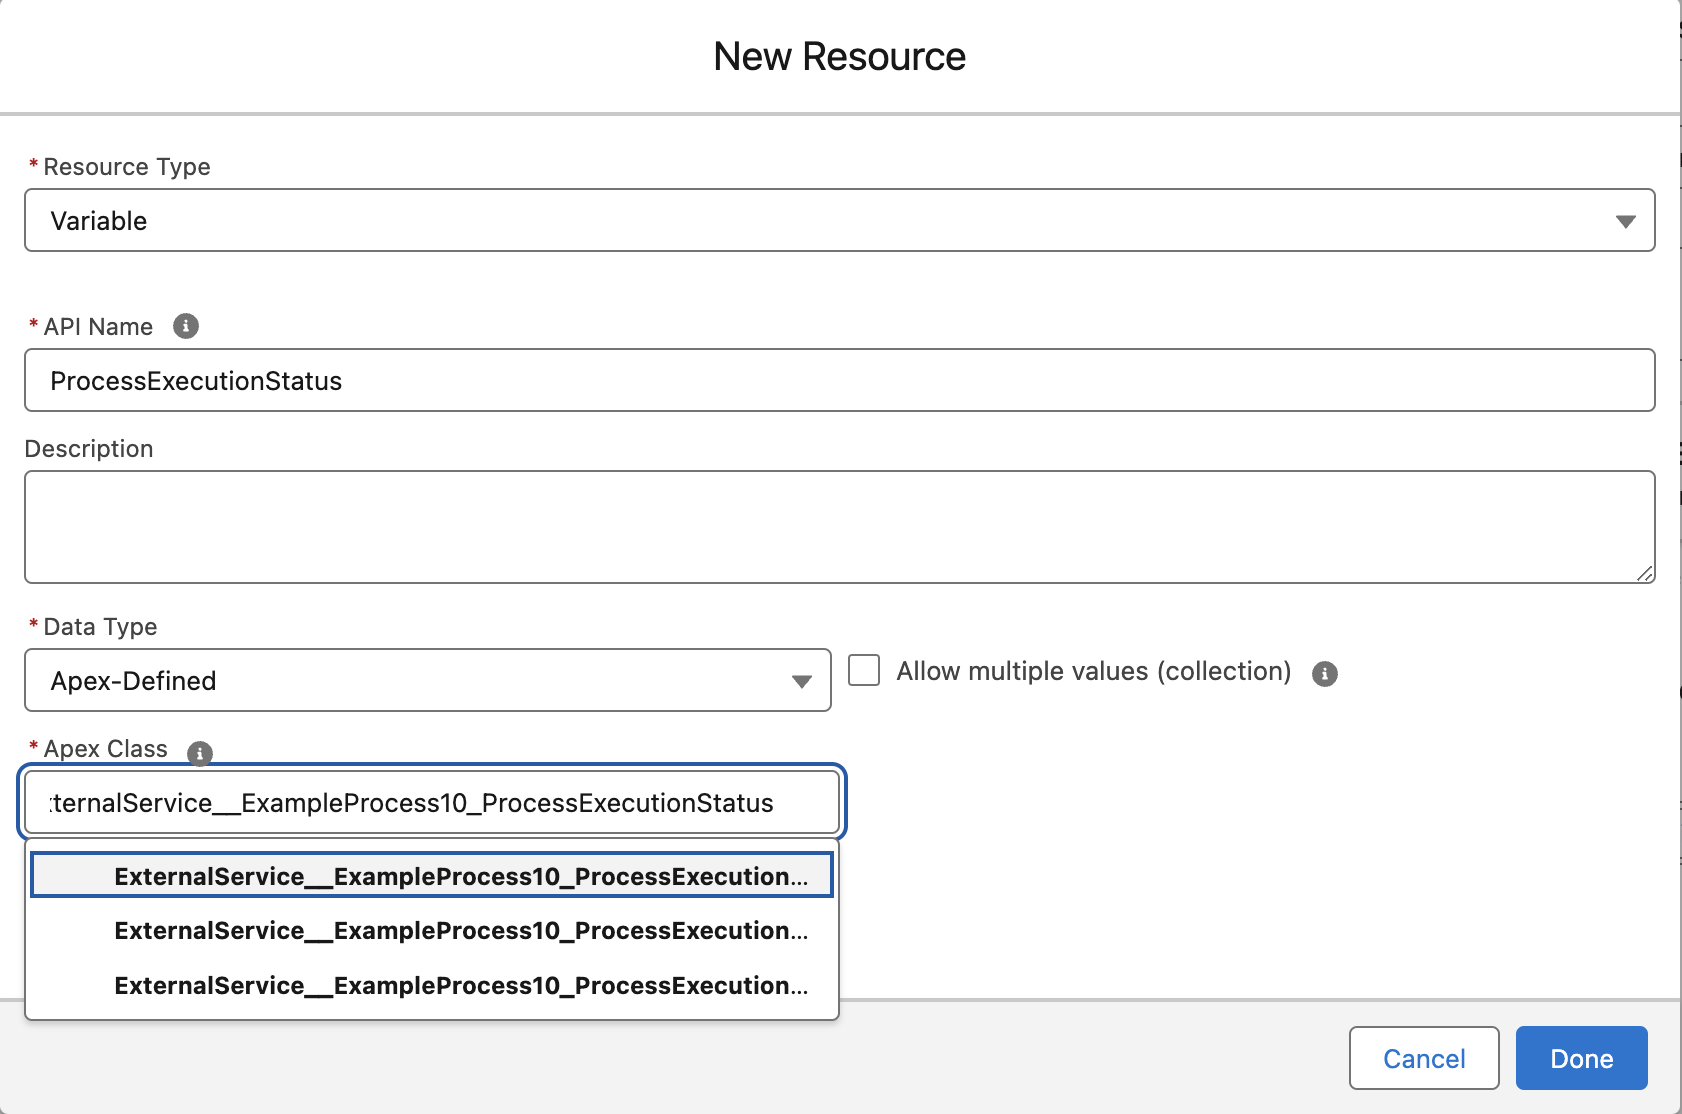
Create a resource for the process execution input:
Field
Value
Resource Type
Variable.
API Name
Name of this resource; for example
ProcessParameters.Data Type
Apex-Defined.
Apex Class
Apex class ExternalService<RPA Project Name>10_ProcessExecution; for example
ExternalServiceExampleProcess10_ProcessExecution` -
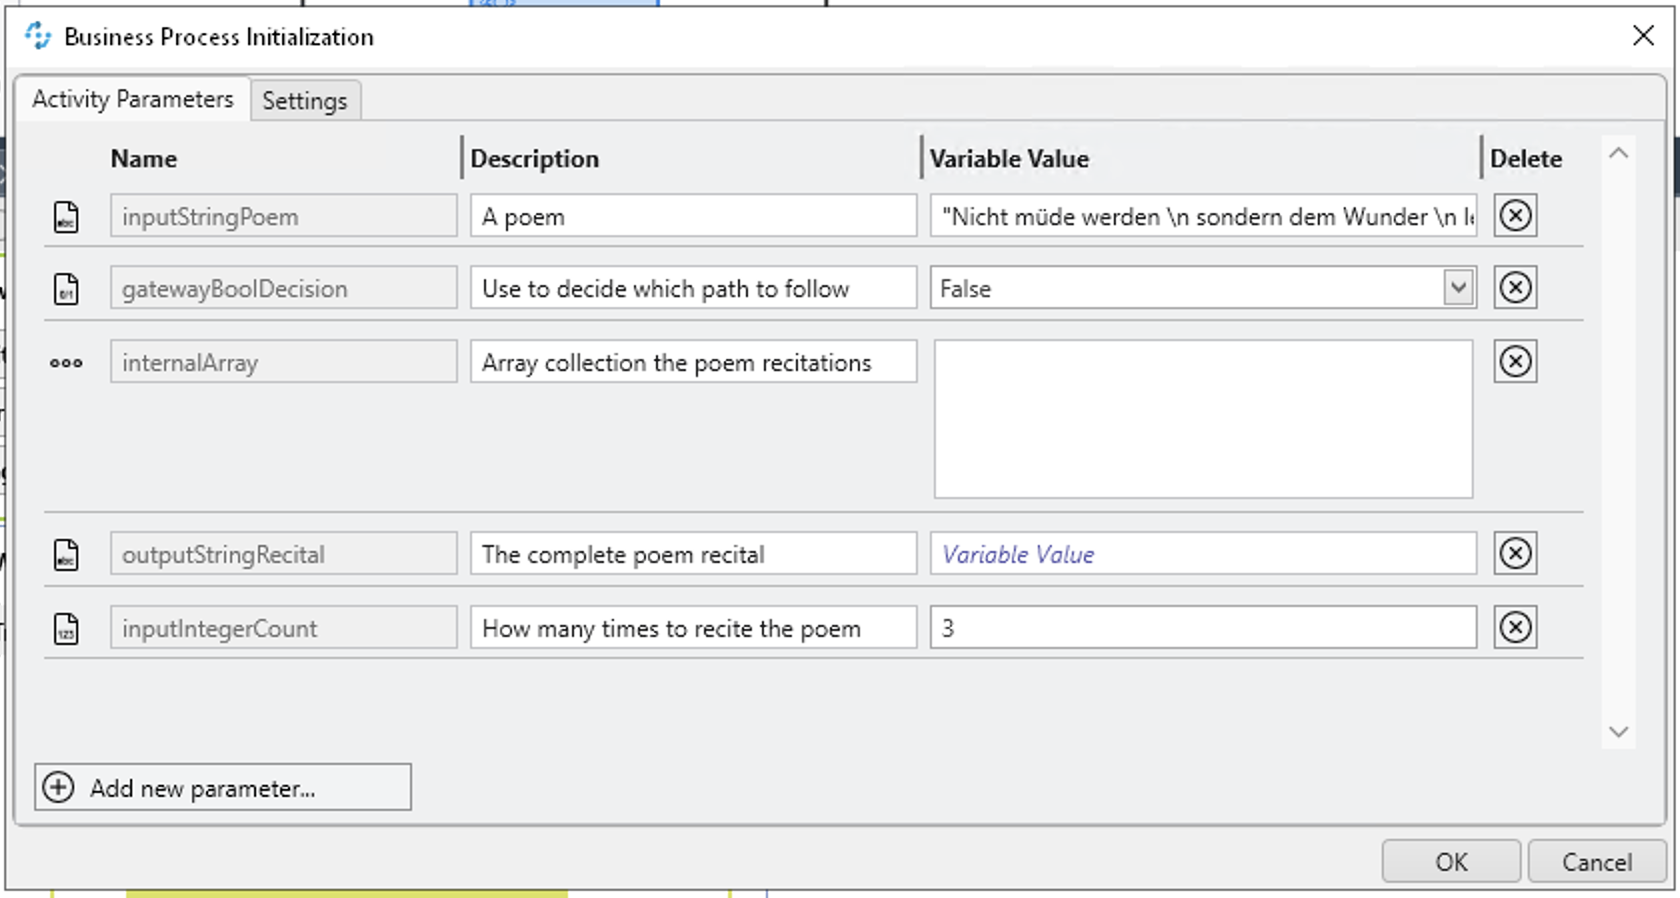
Use a screen to set the input parameters for debugging purposes:
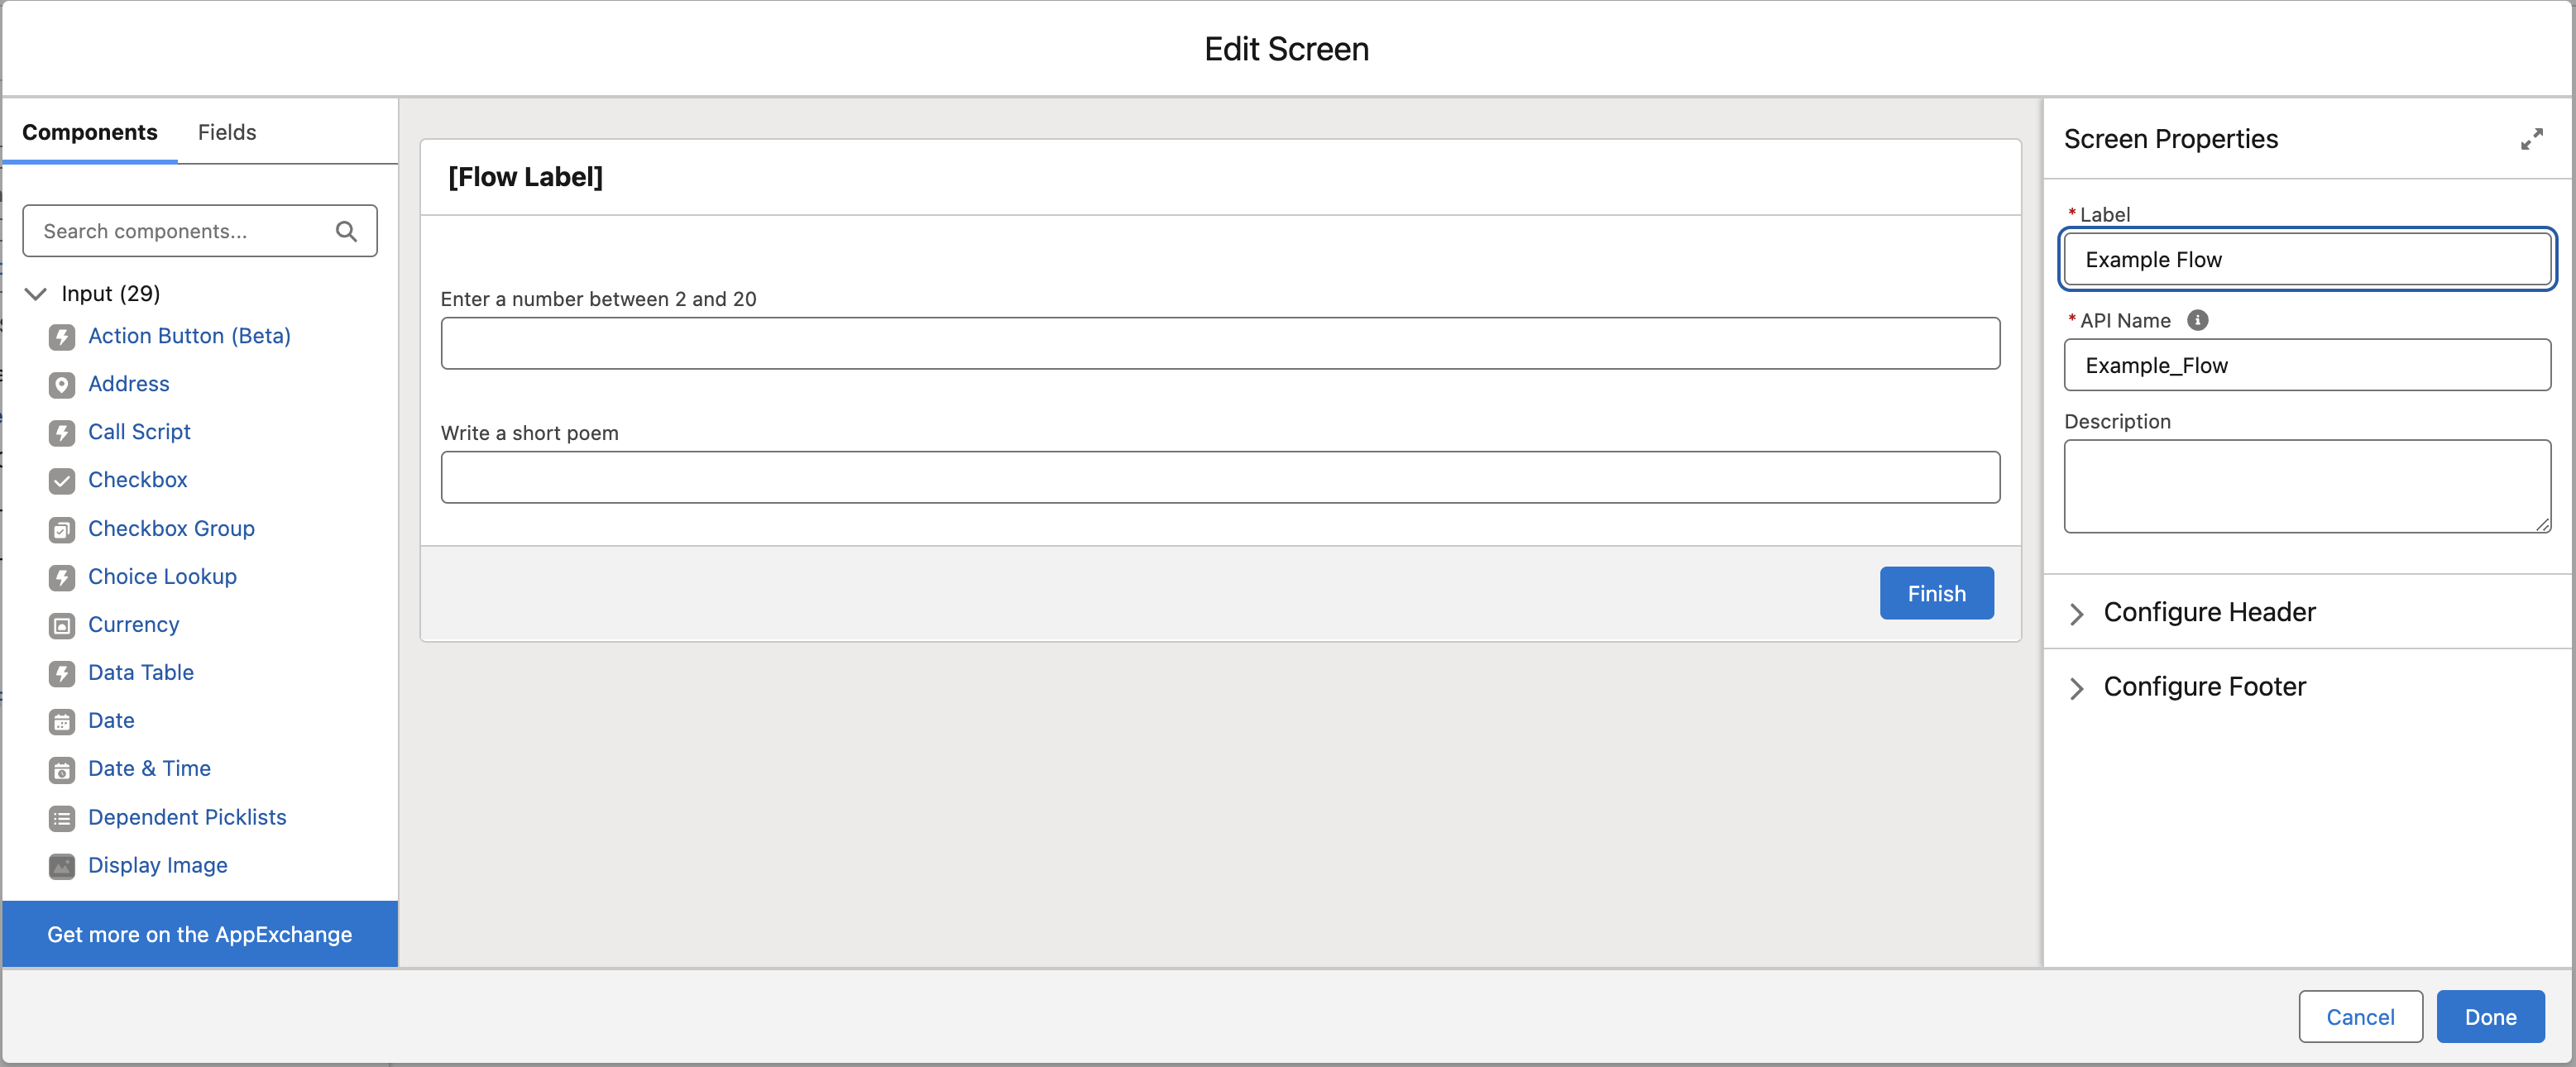
-
Assign all required values to the process parameters:
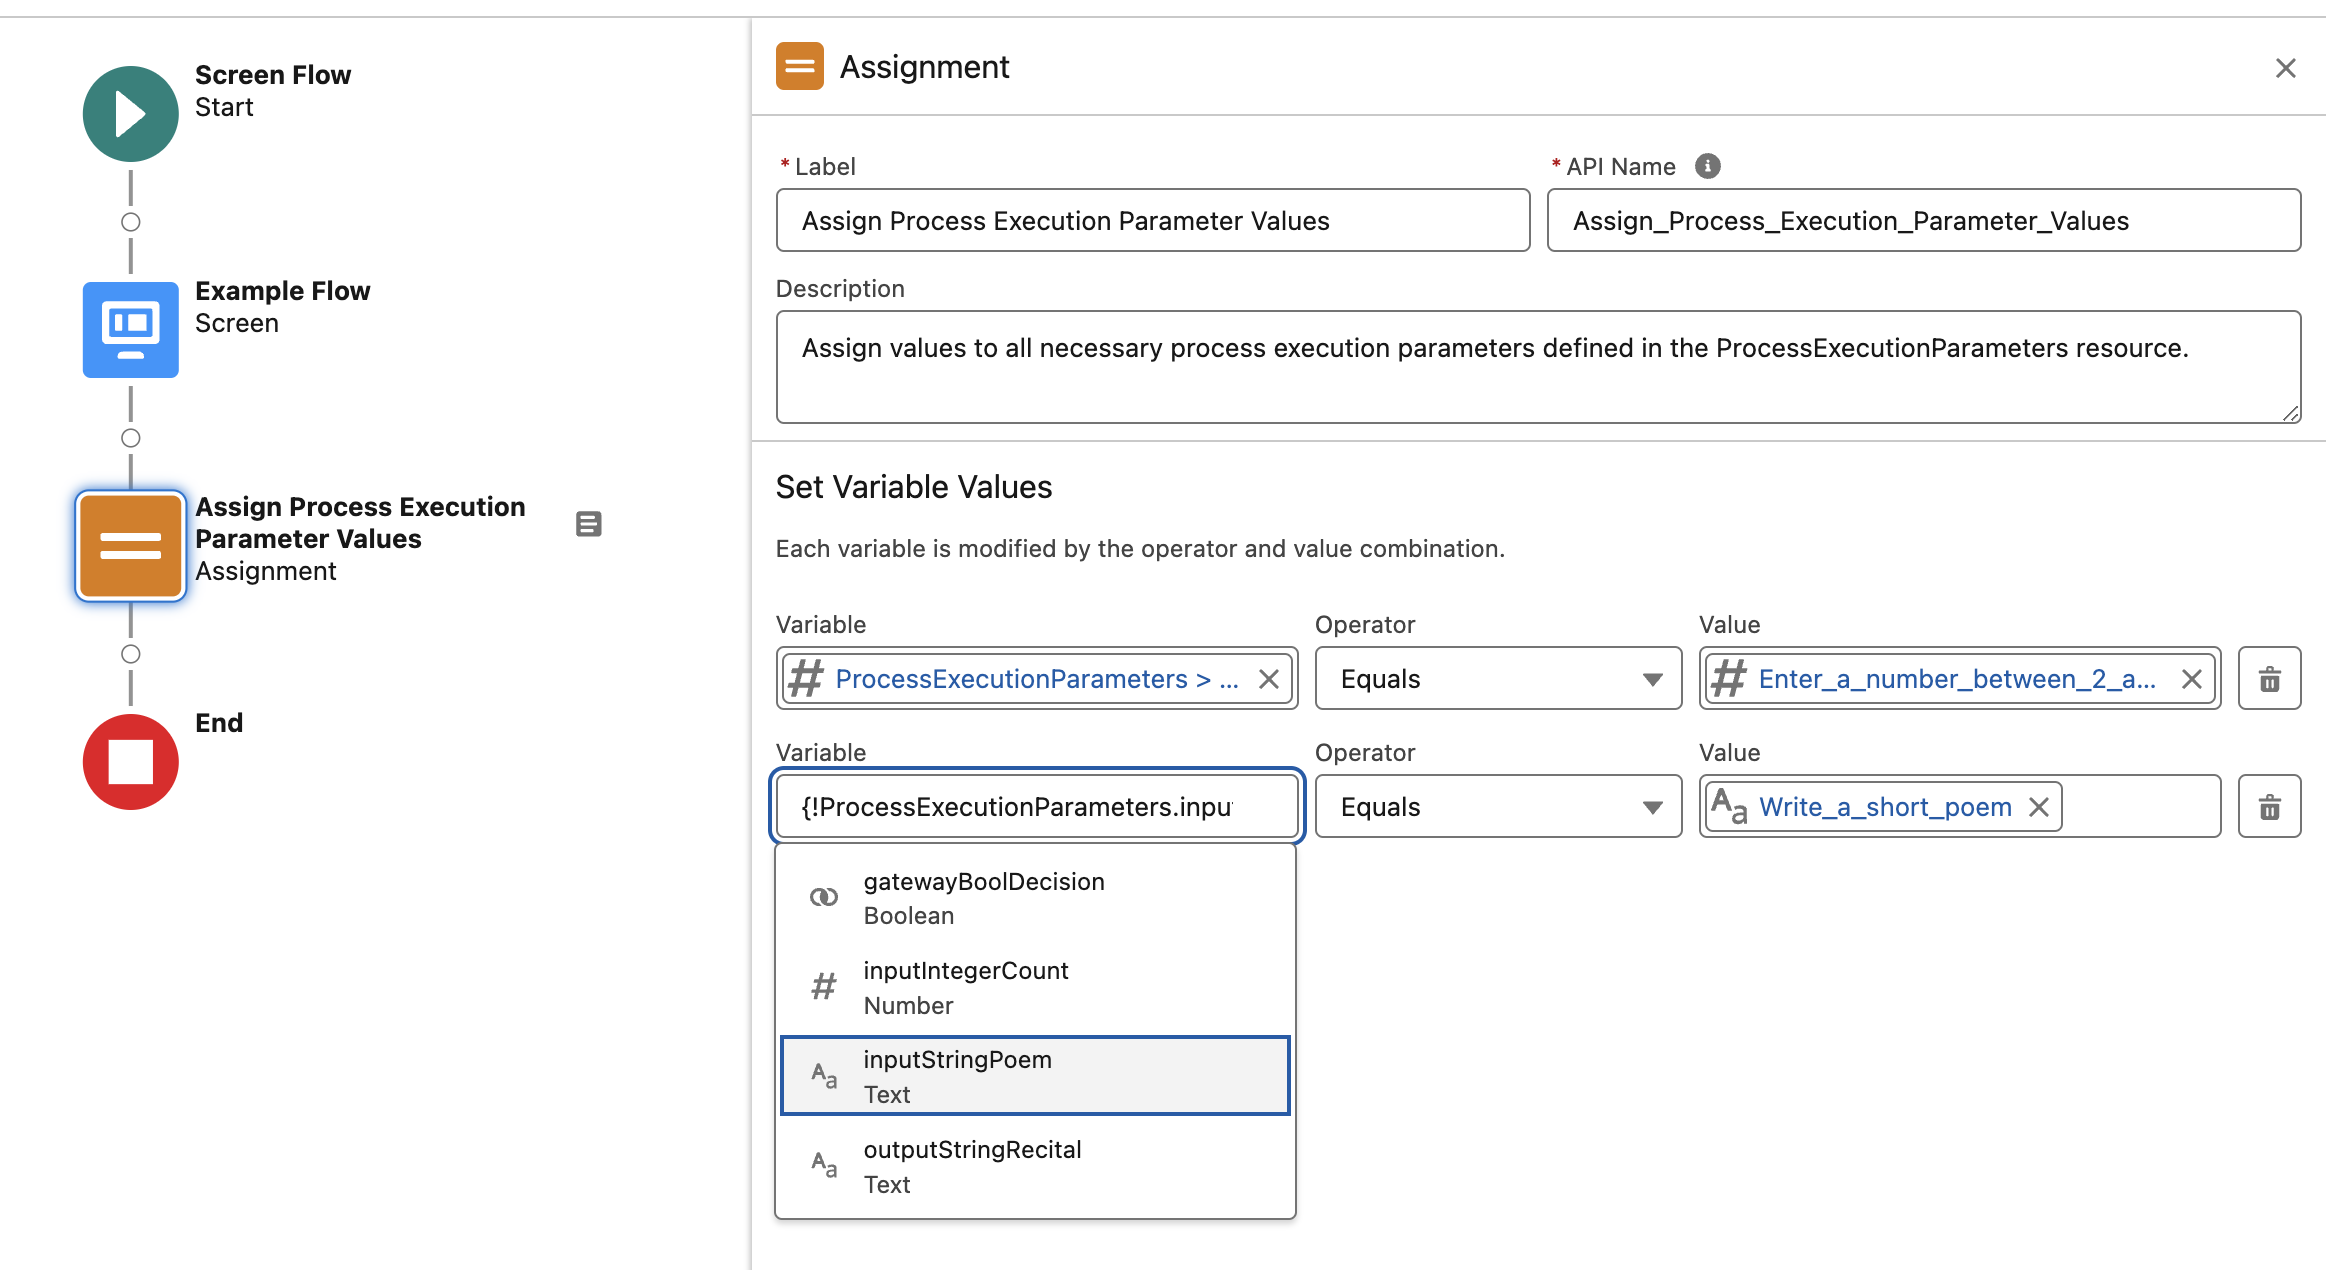
The variable names are the same as the Activity Parameter names defined in RPA Builder:
-
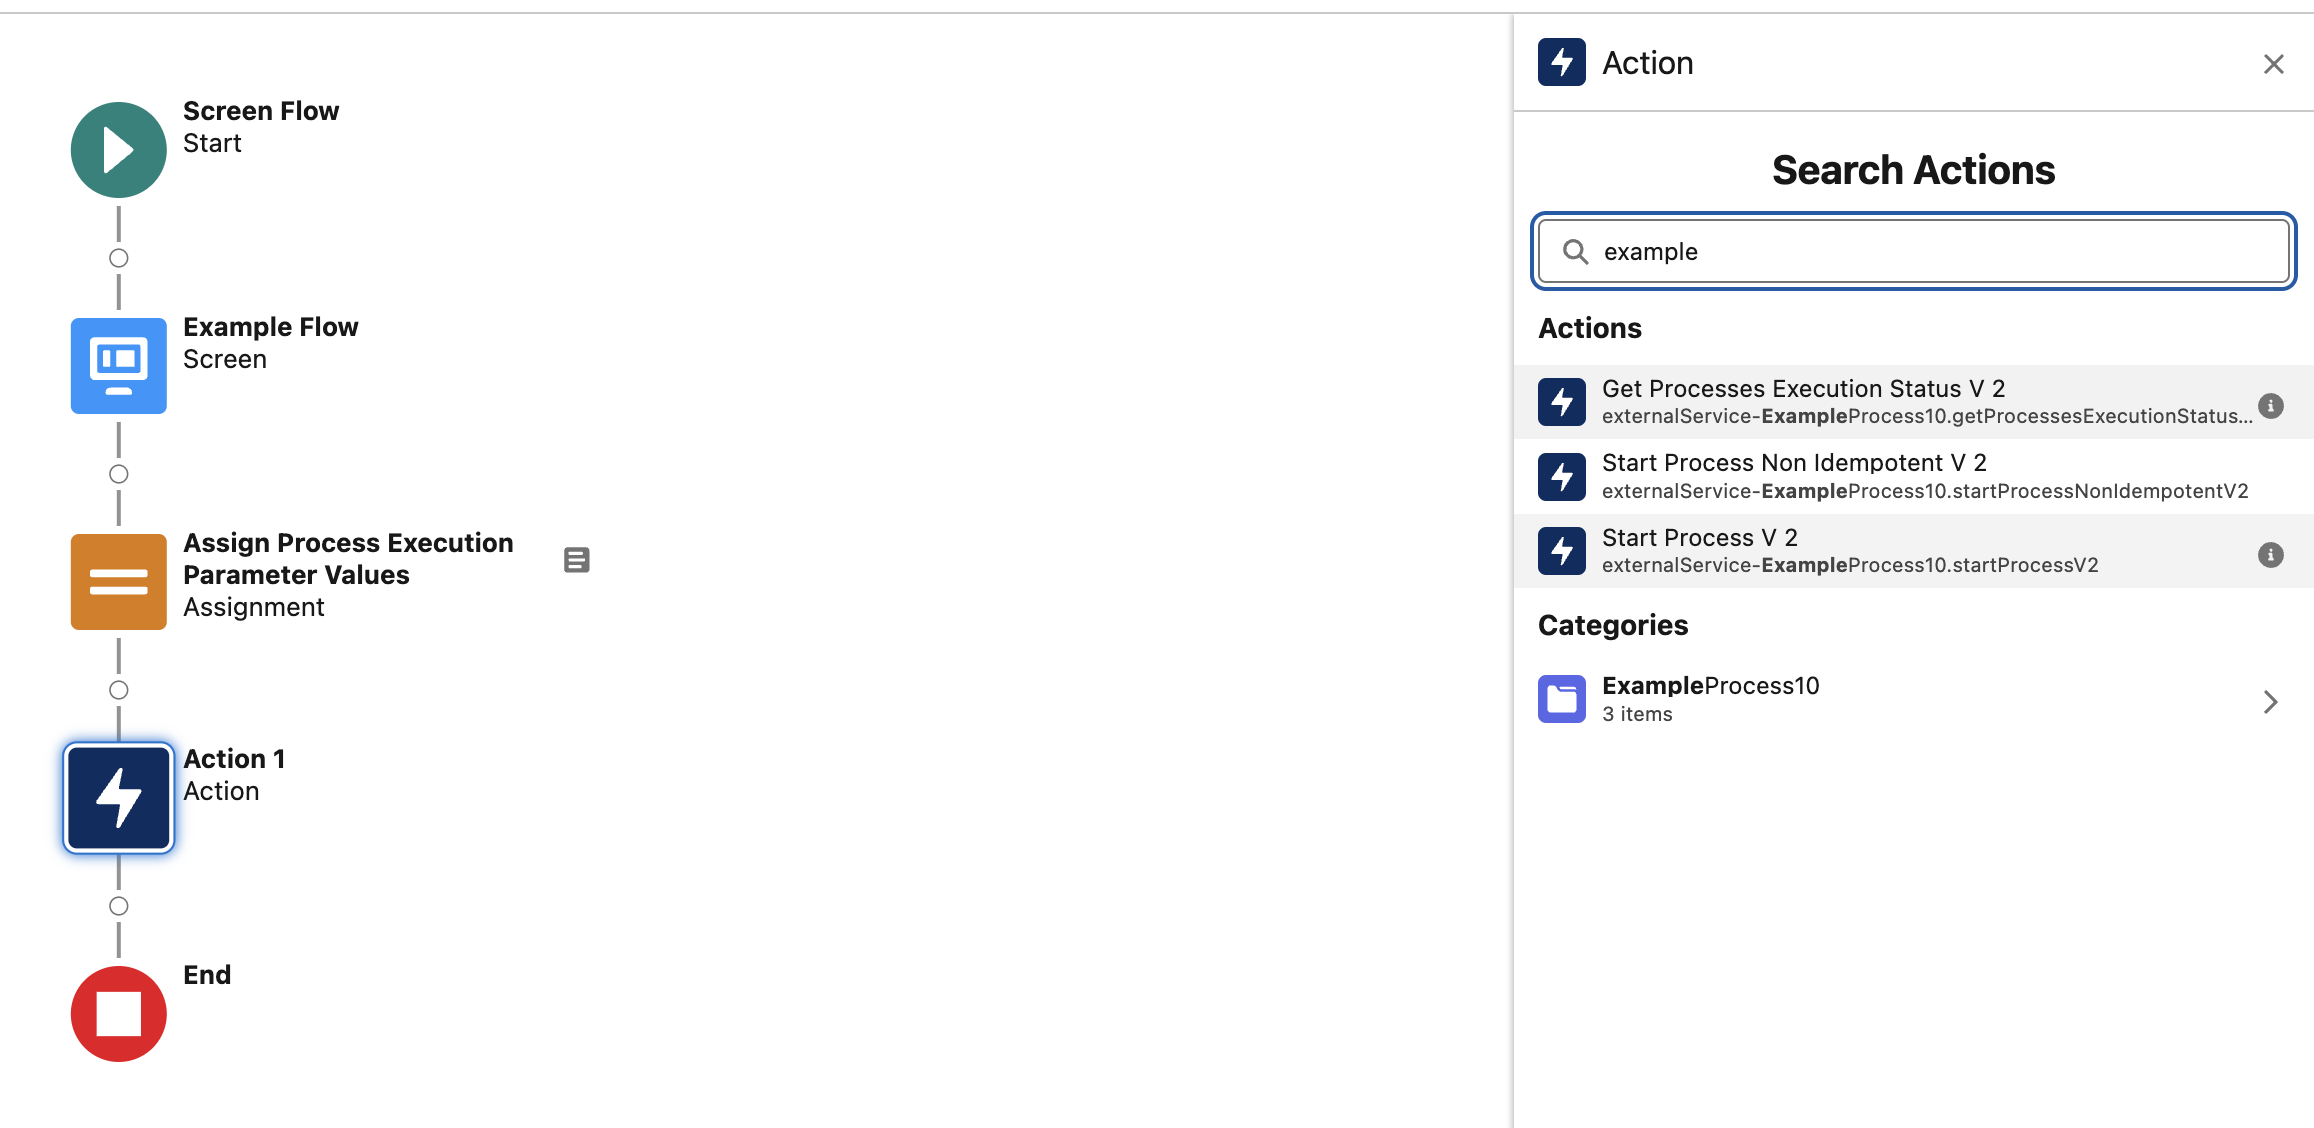
Choose the Start Process Action. You can filter for your process by name.
Process Start Type
Application
Start Process V2
If you use this endpoint, you must provide a process execution ID. This ensures that the process starts only once, even if it is called multiple times. For example, in case of network issues that prevent the return of the server’s answer, the client resends the request. That might generate duplicates or interfere with the original process.
Start Process Non Idempotent V2
If you use this endpoint, RPA Manager provides a new process ID for each call.
-
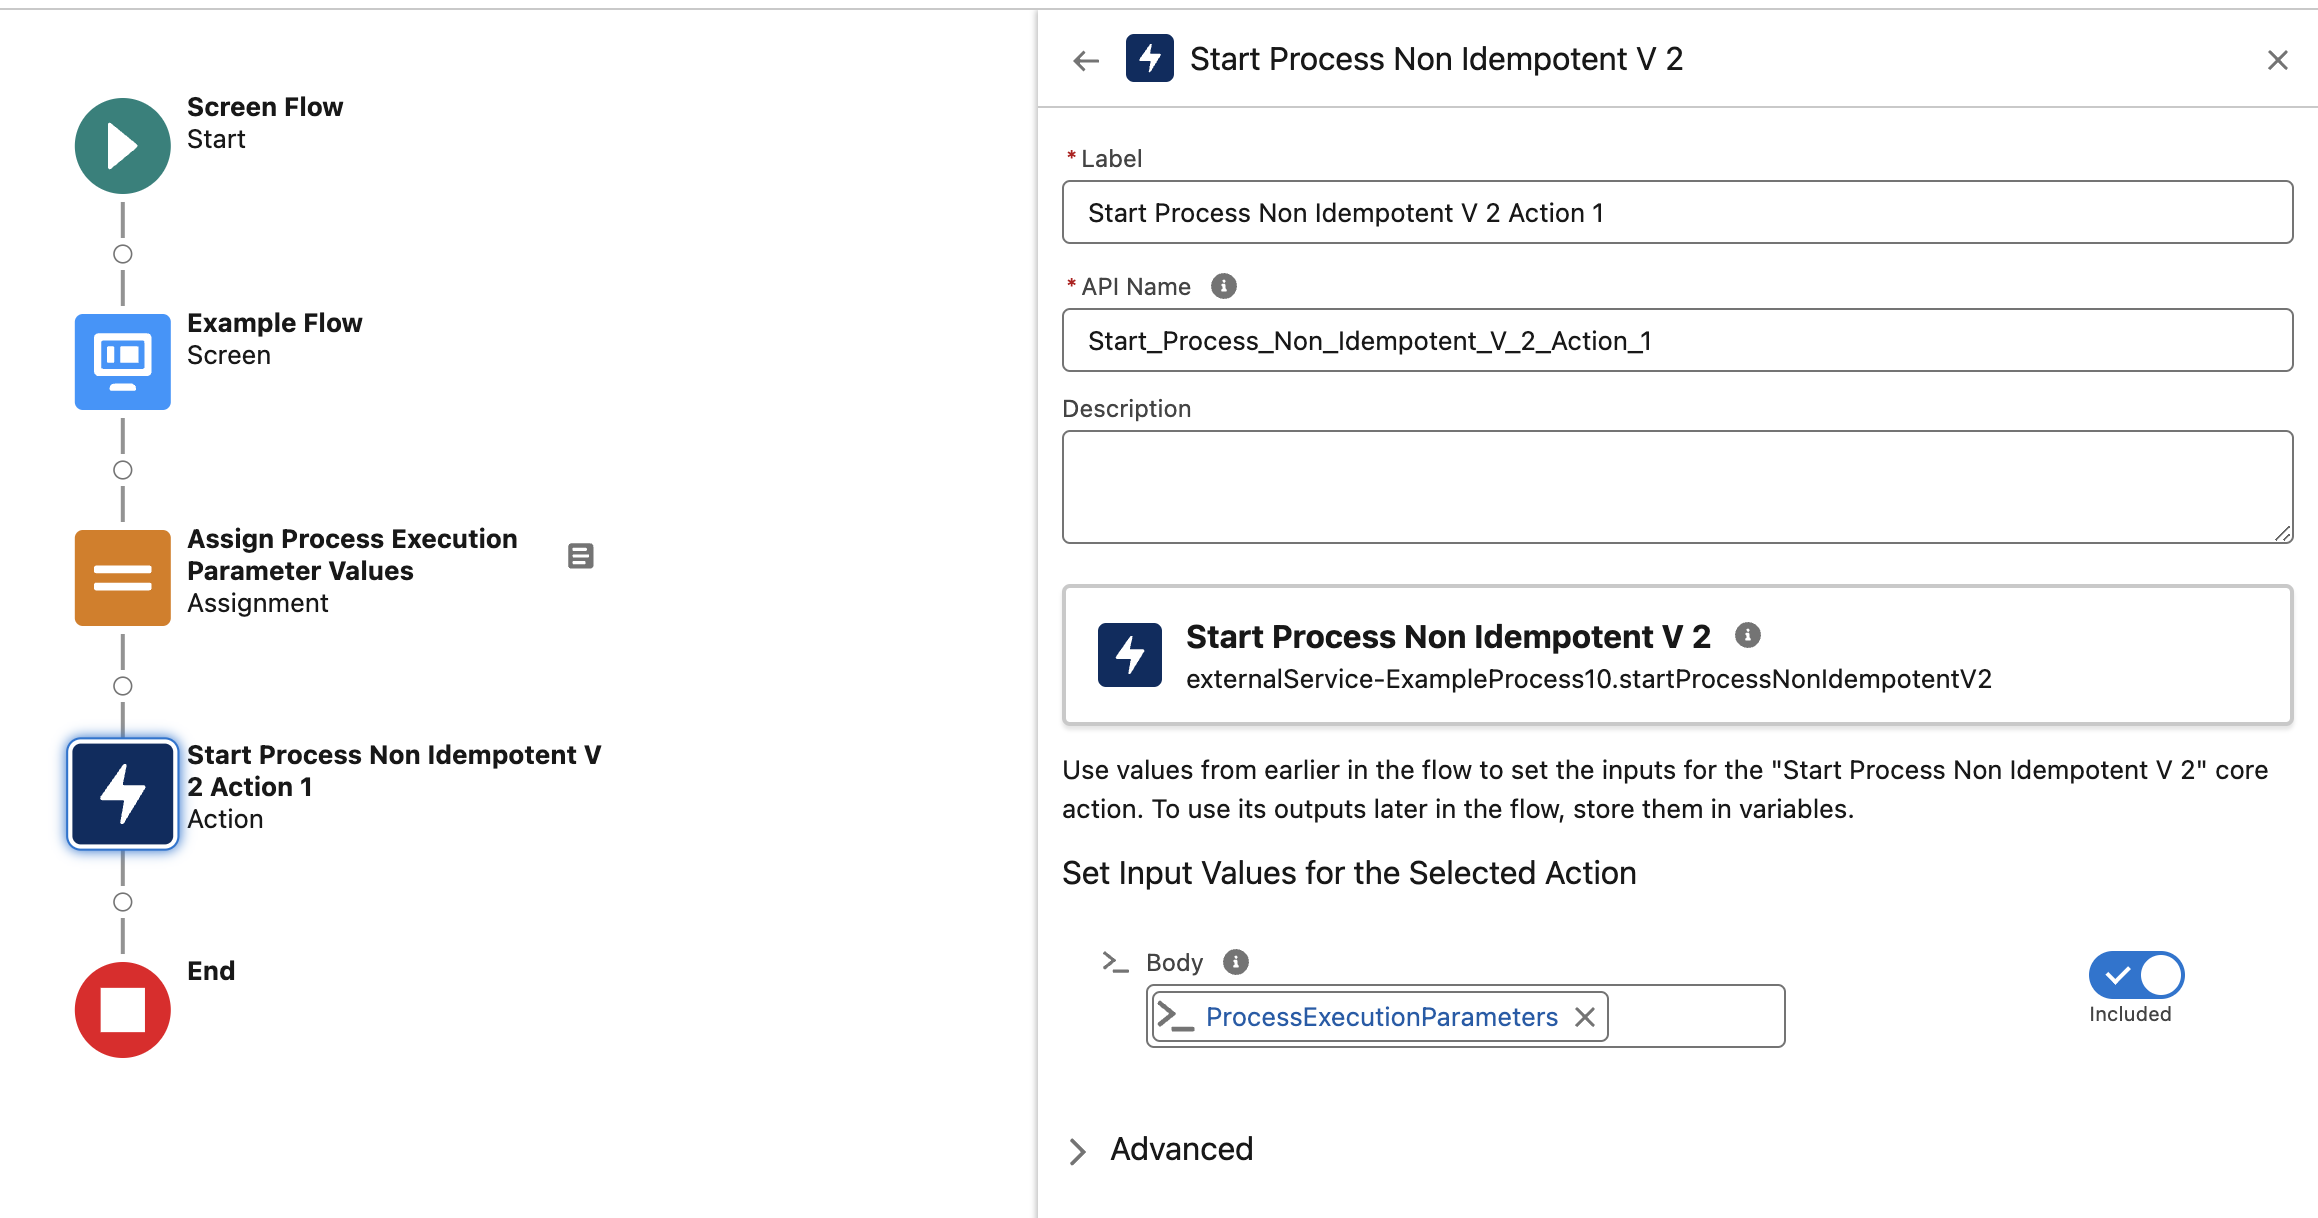
Configure the action by filling the body with the resource that you defined earlier:
-
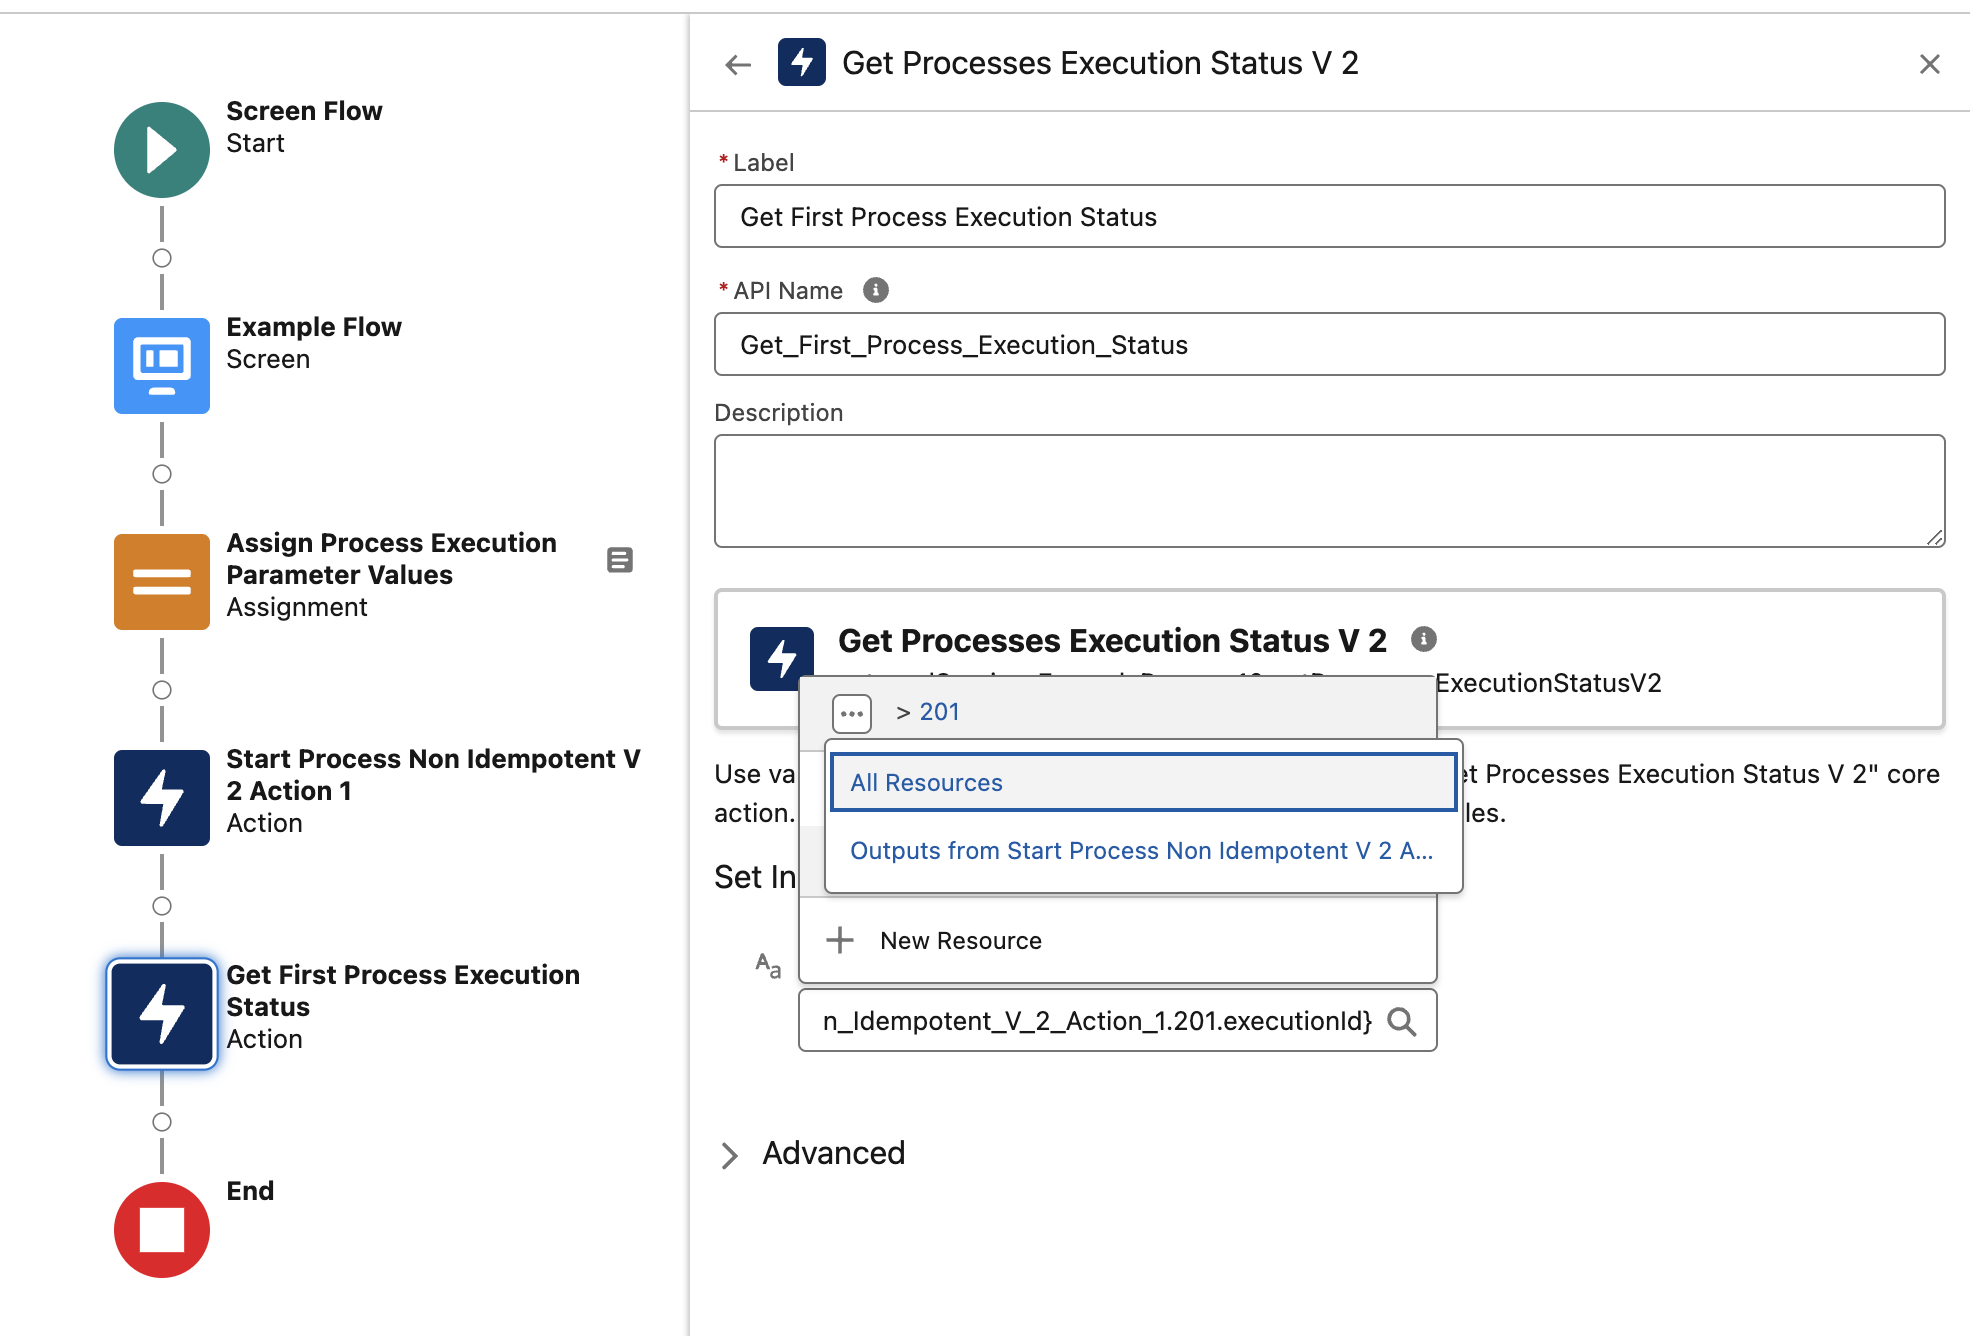
Get the execution status for the first time:
-
Create a resource for the execution status:
-
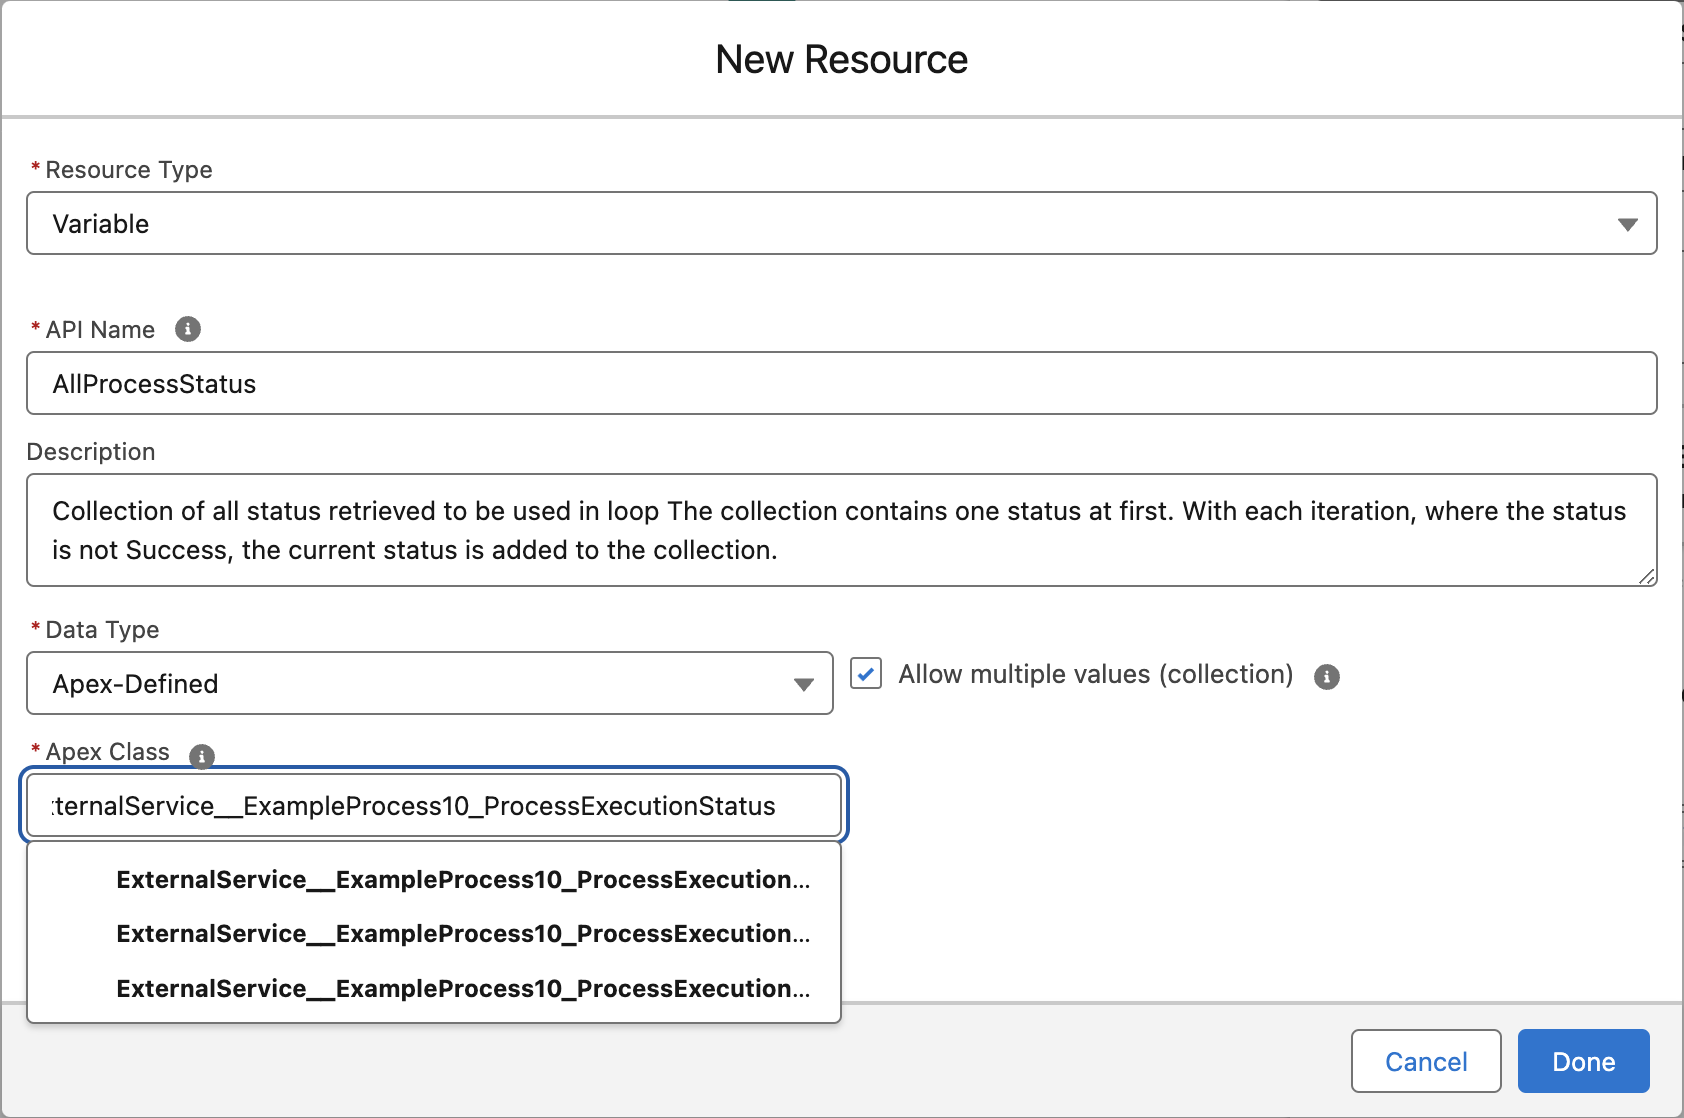
Create a resource for collecting all states that the started process returns while it runs:
-
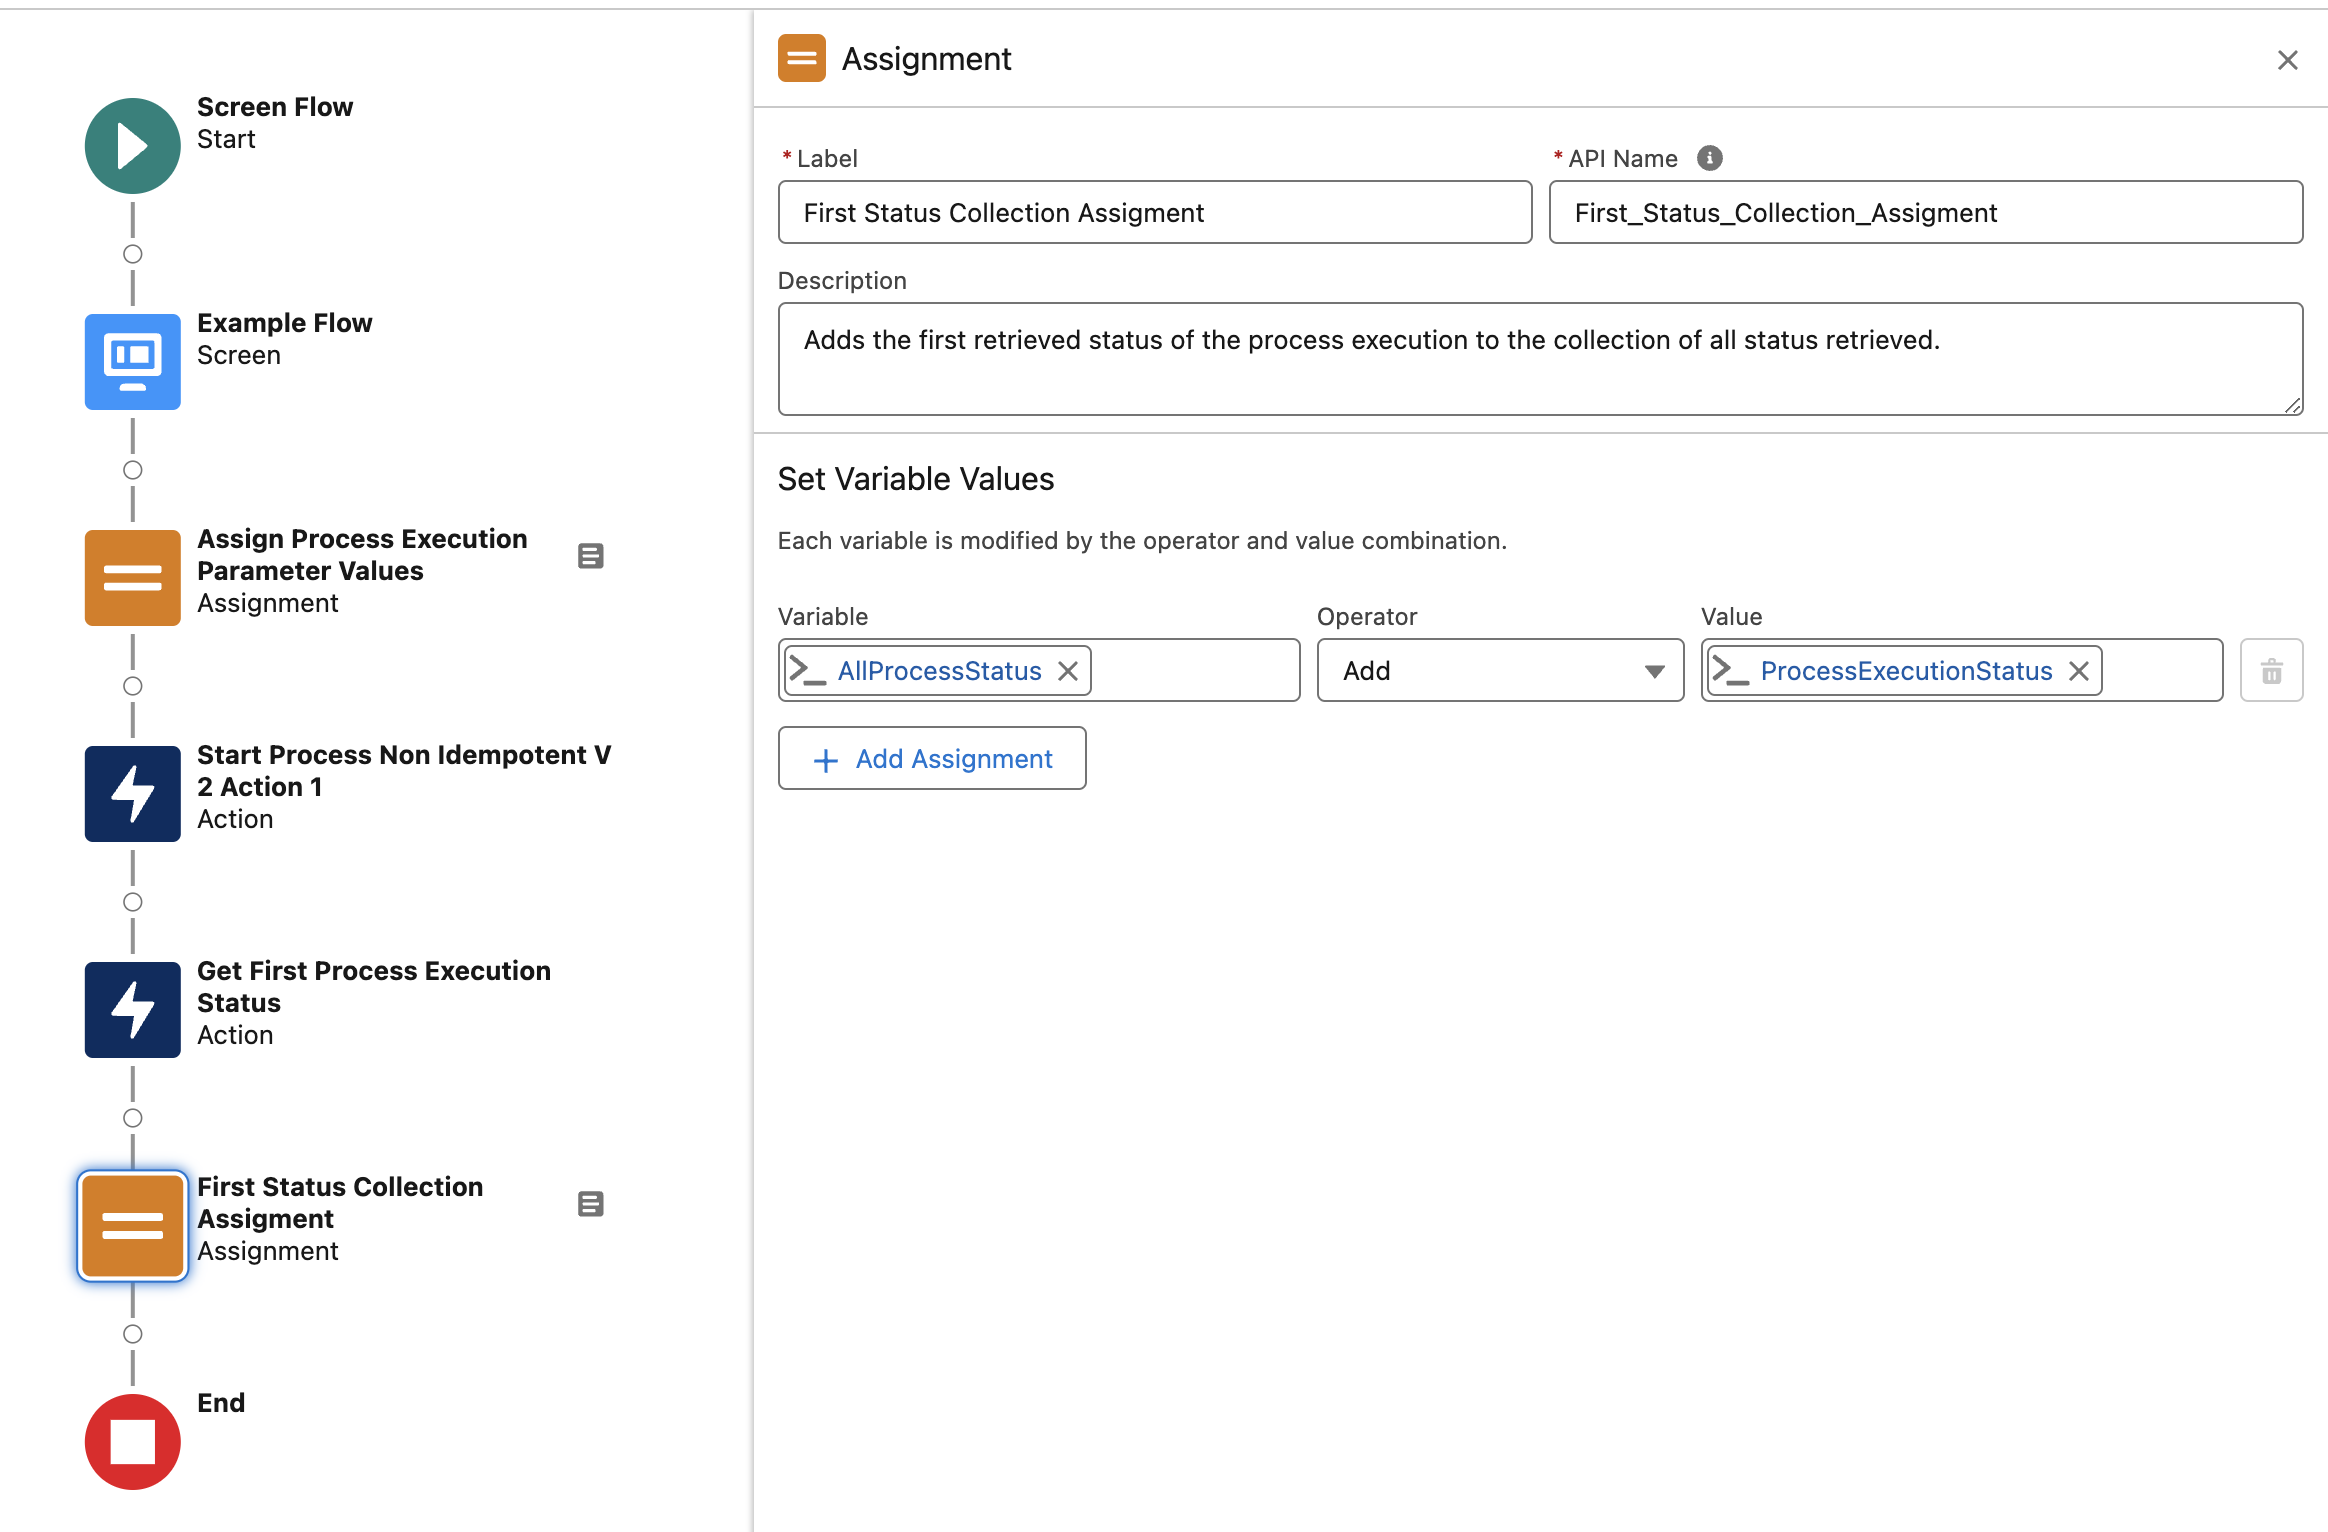
Add the first returned status to the status collection:
-
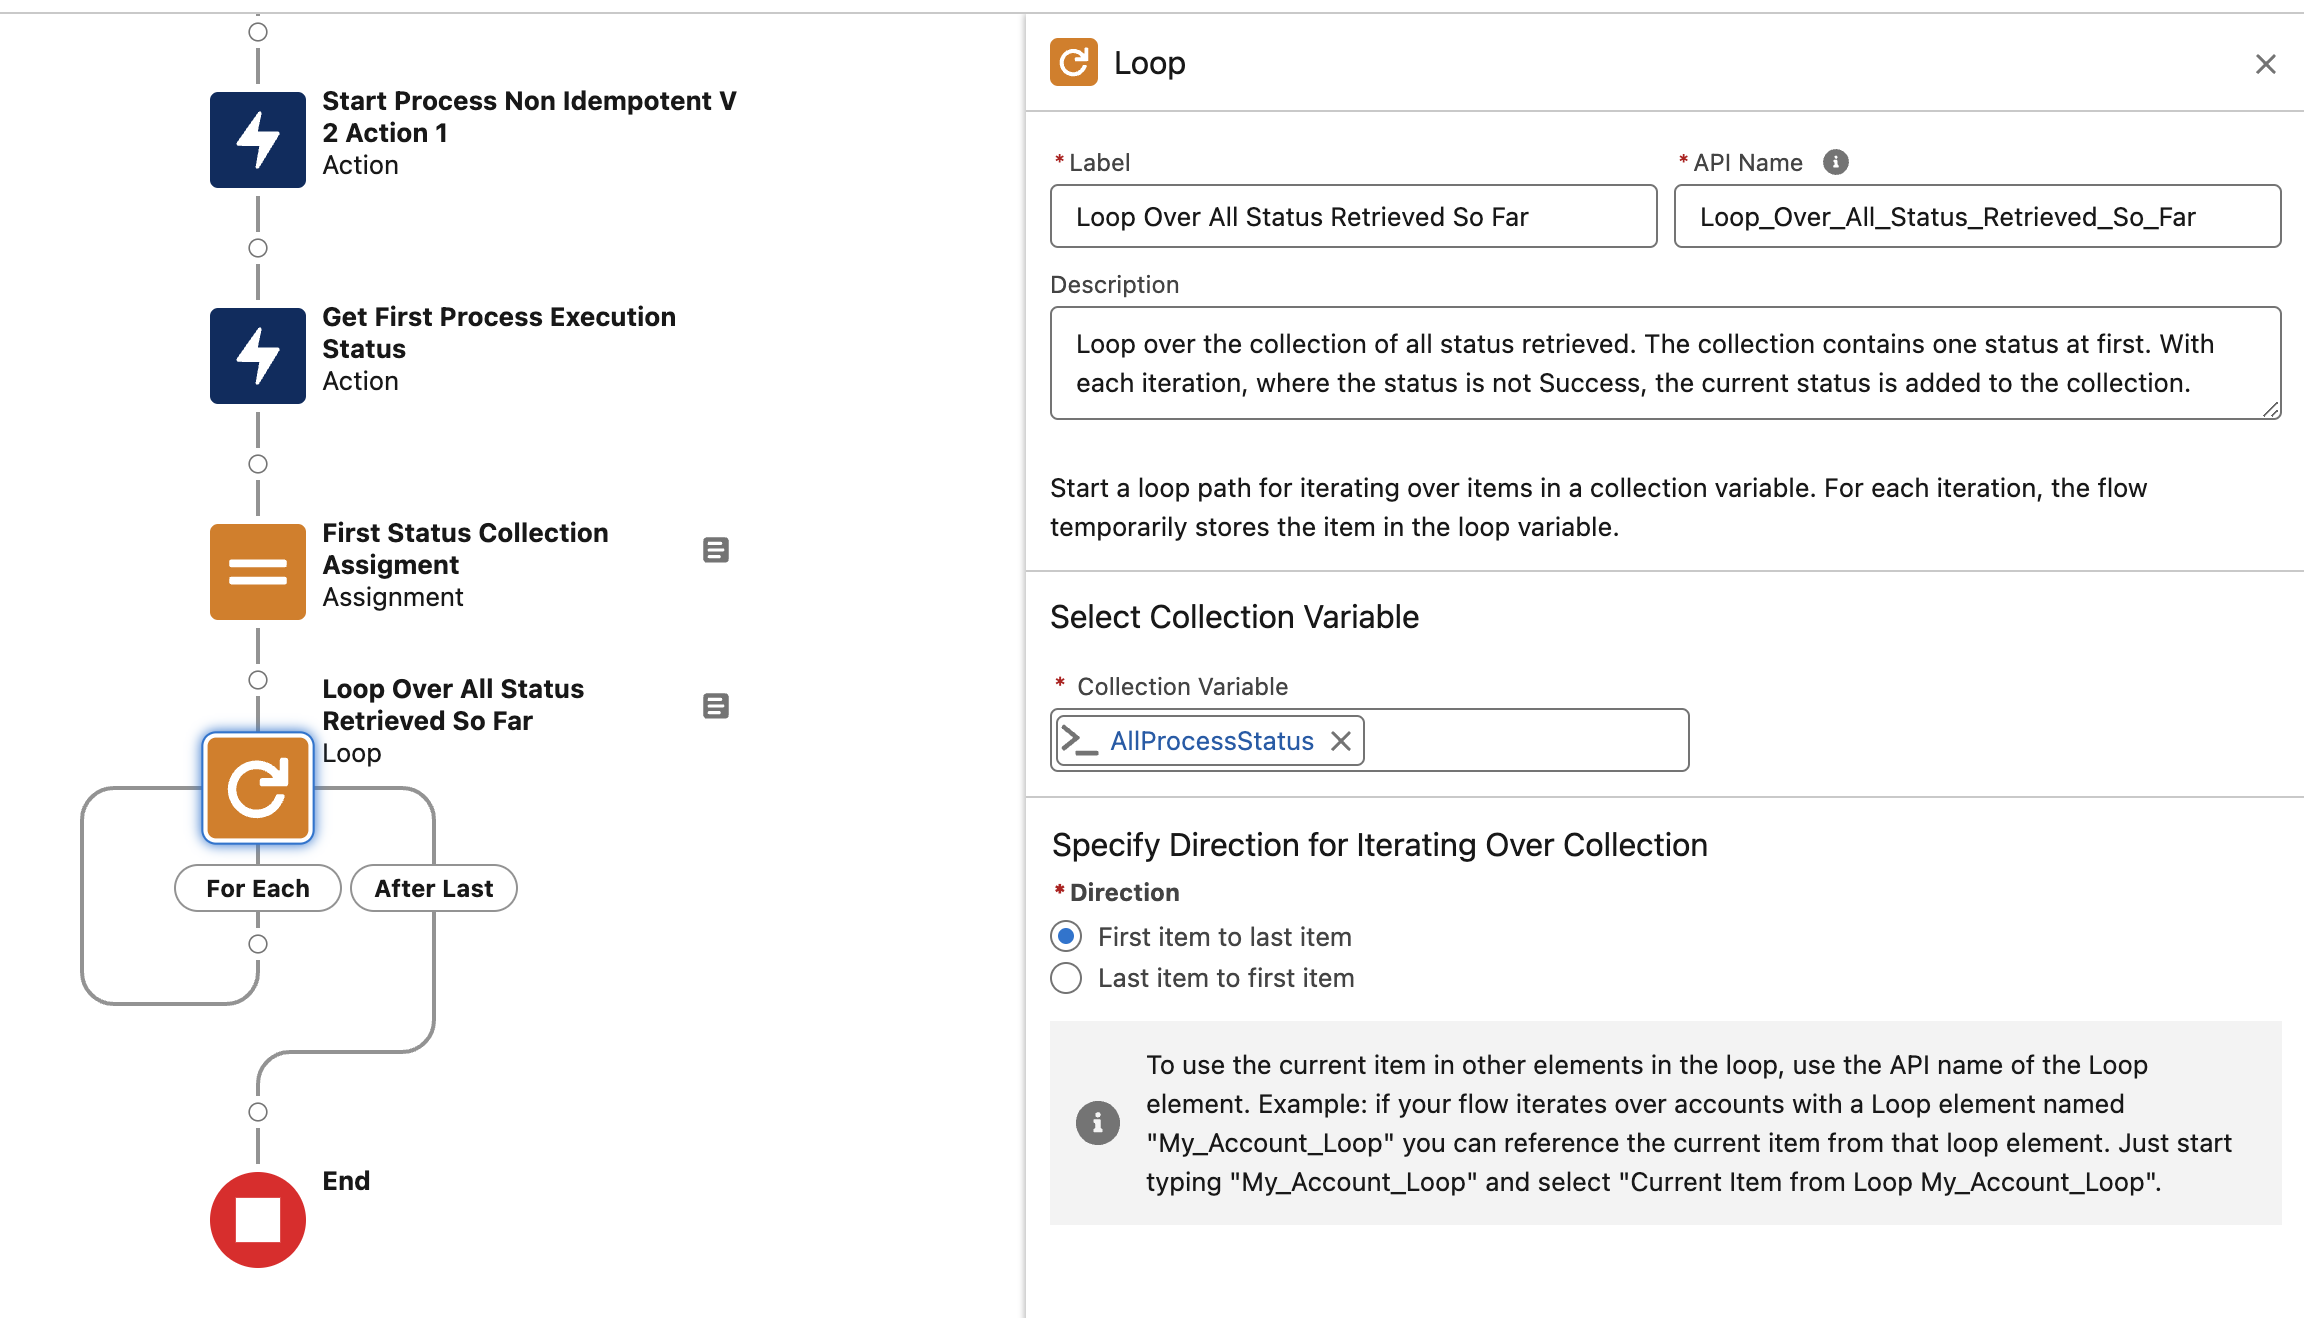
Since the run time of a process is not known, add a loop over all returned statuses:
-
To check for the current status, define three text constants:
ìsStarted,running,error. -
Add a decision element:
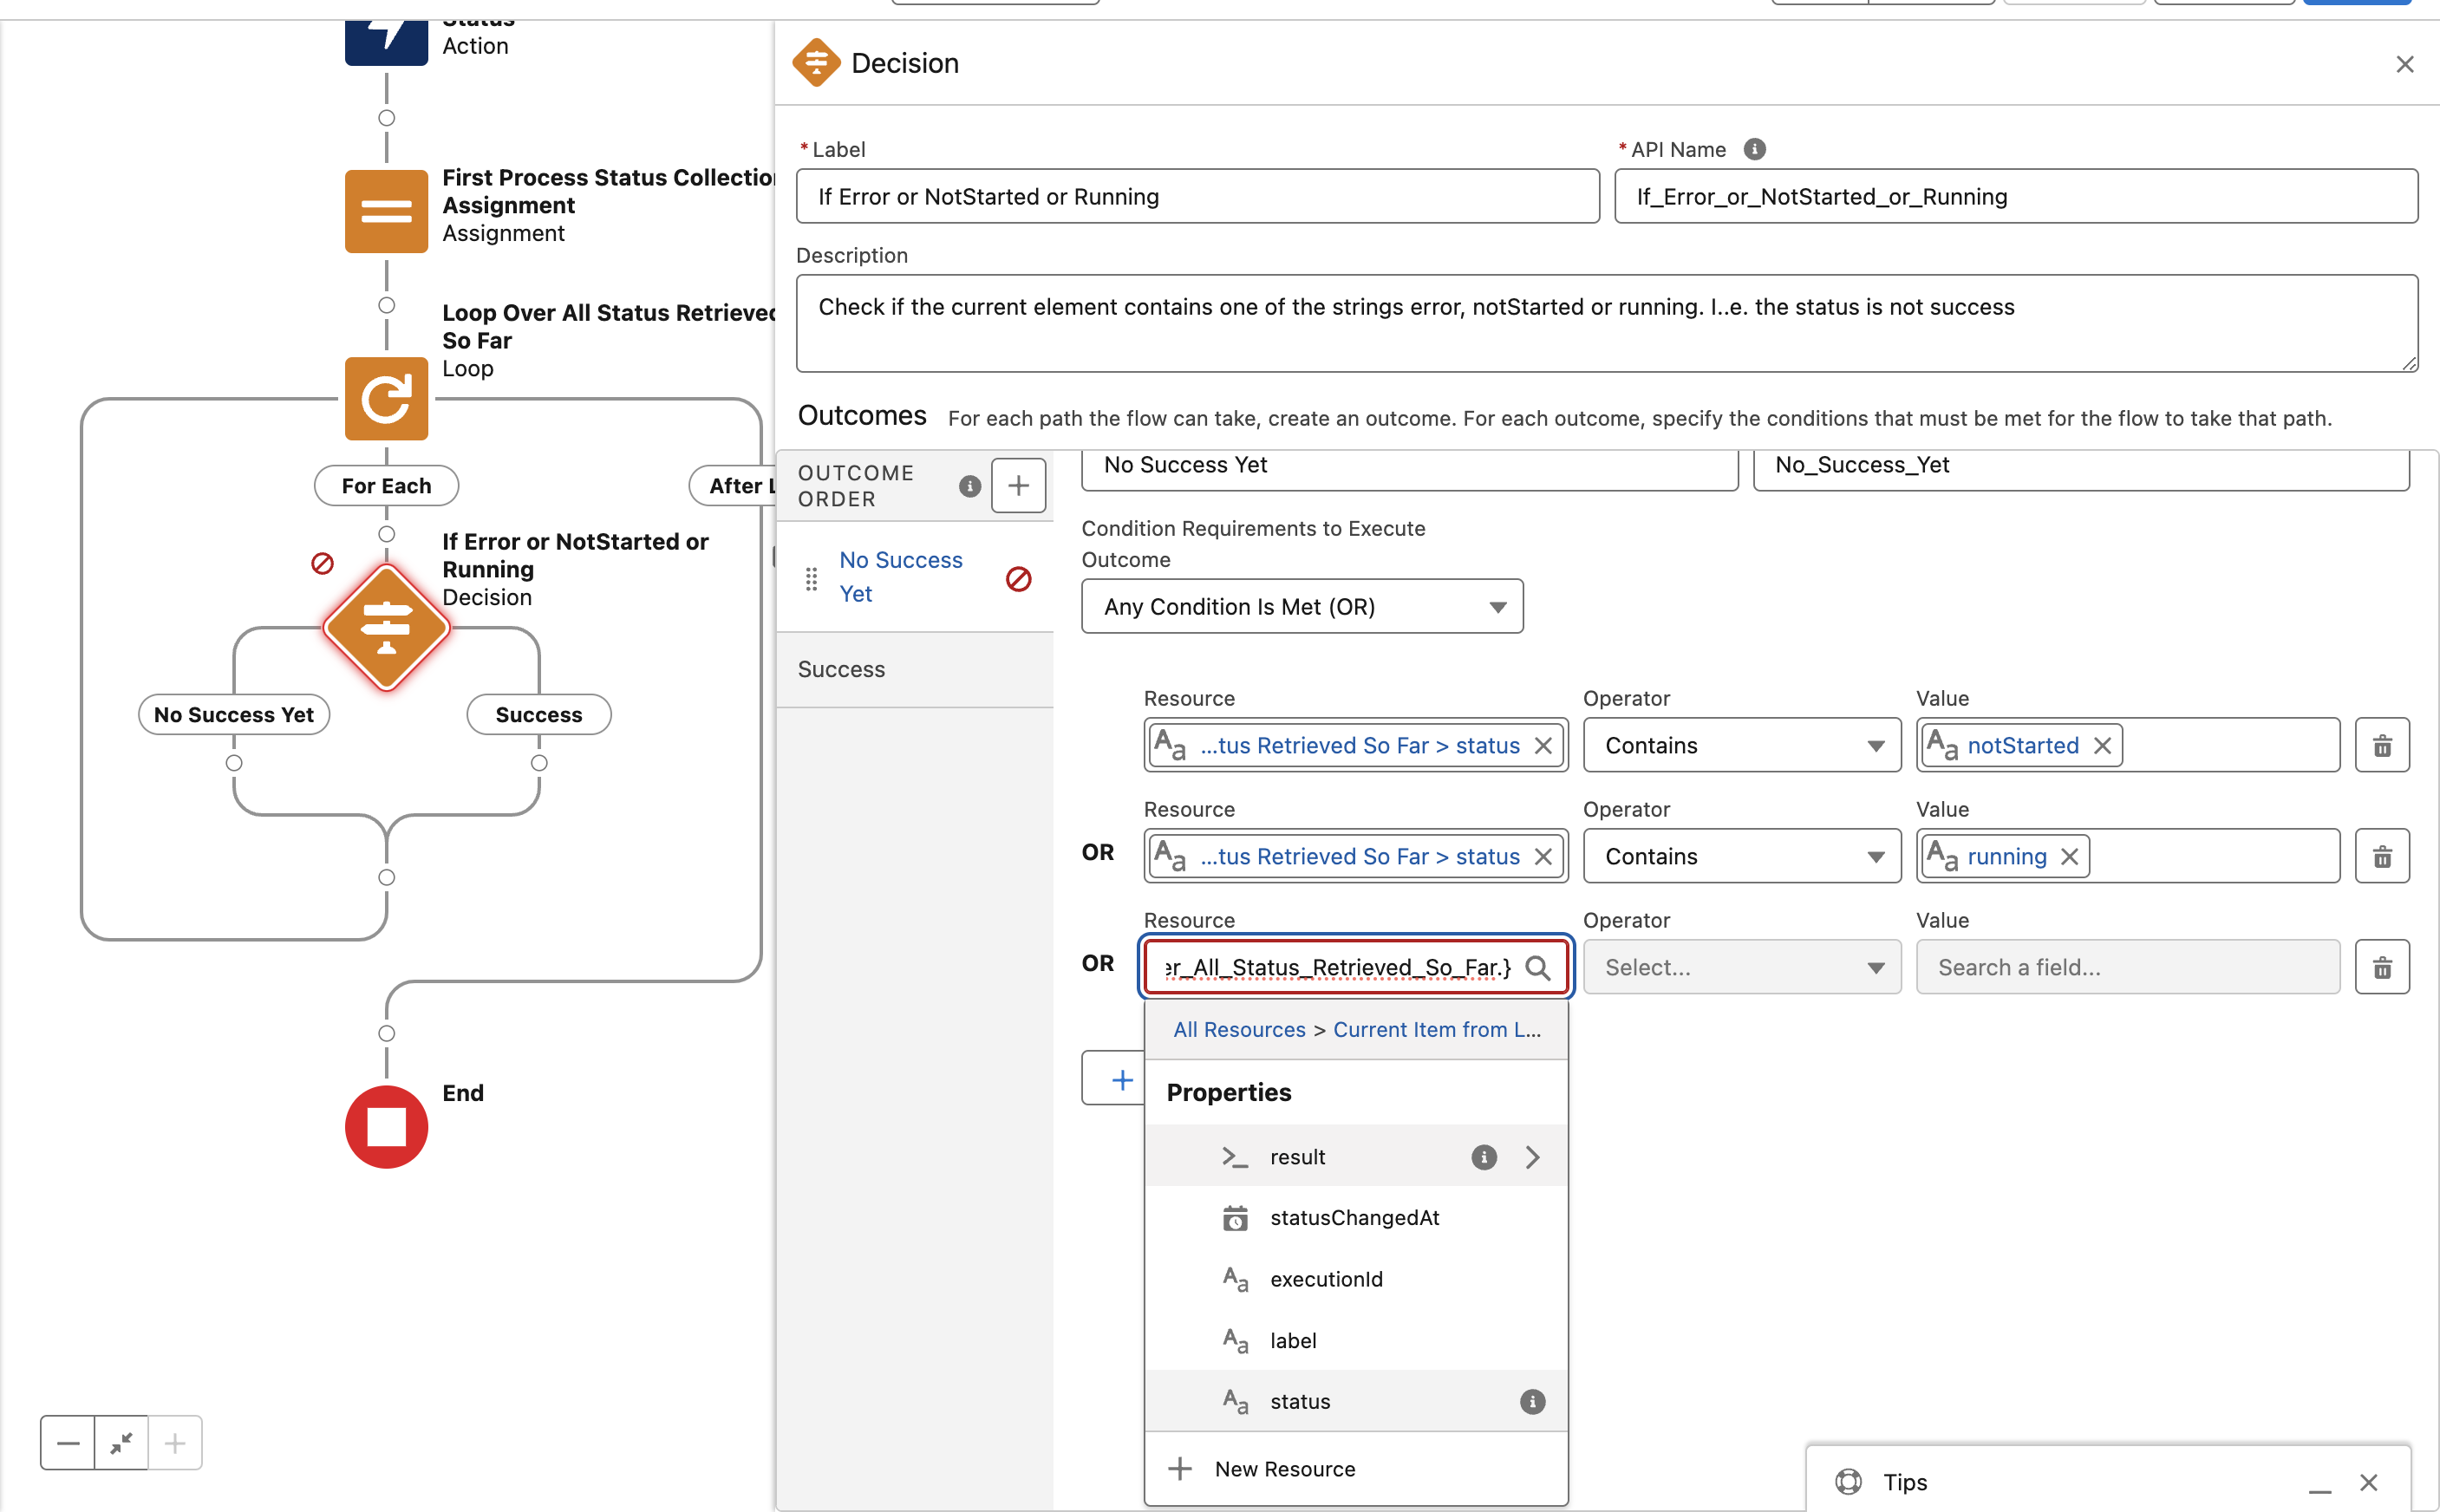
-
If the returned status is not
Success, add the current status to the loop collection: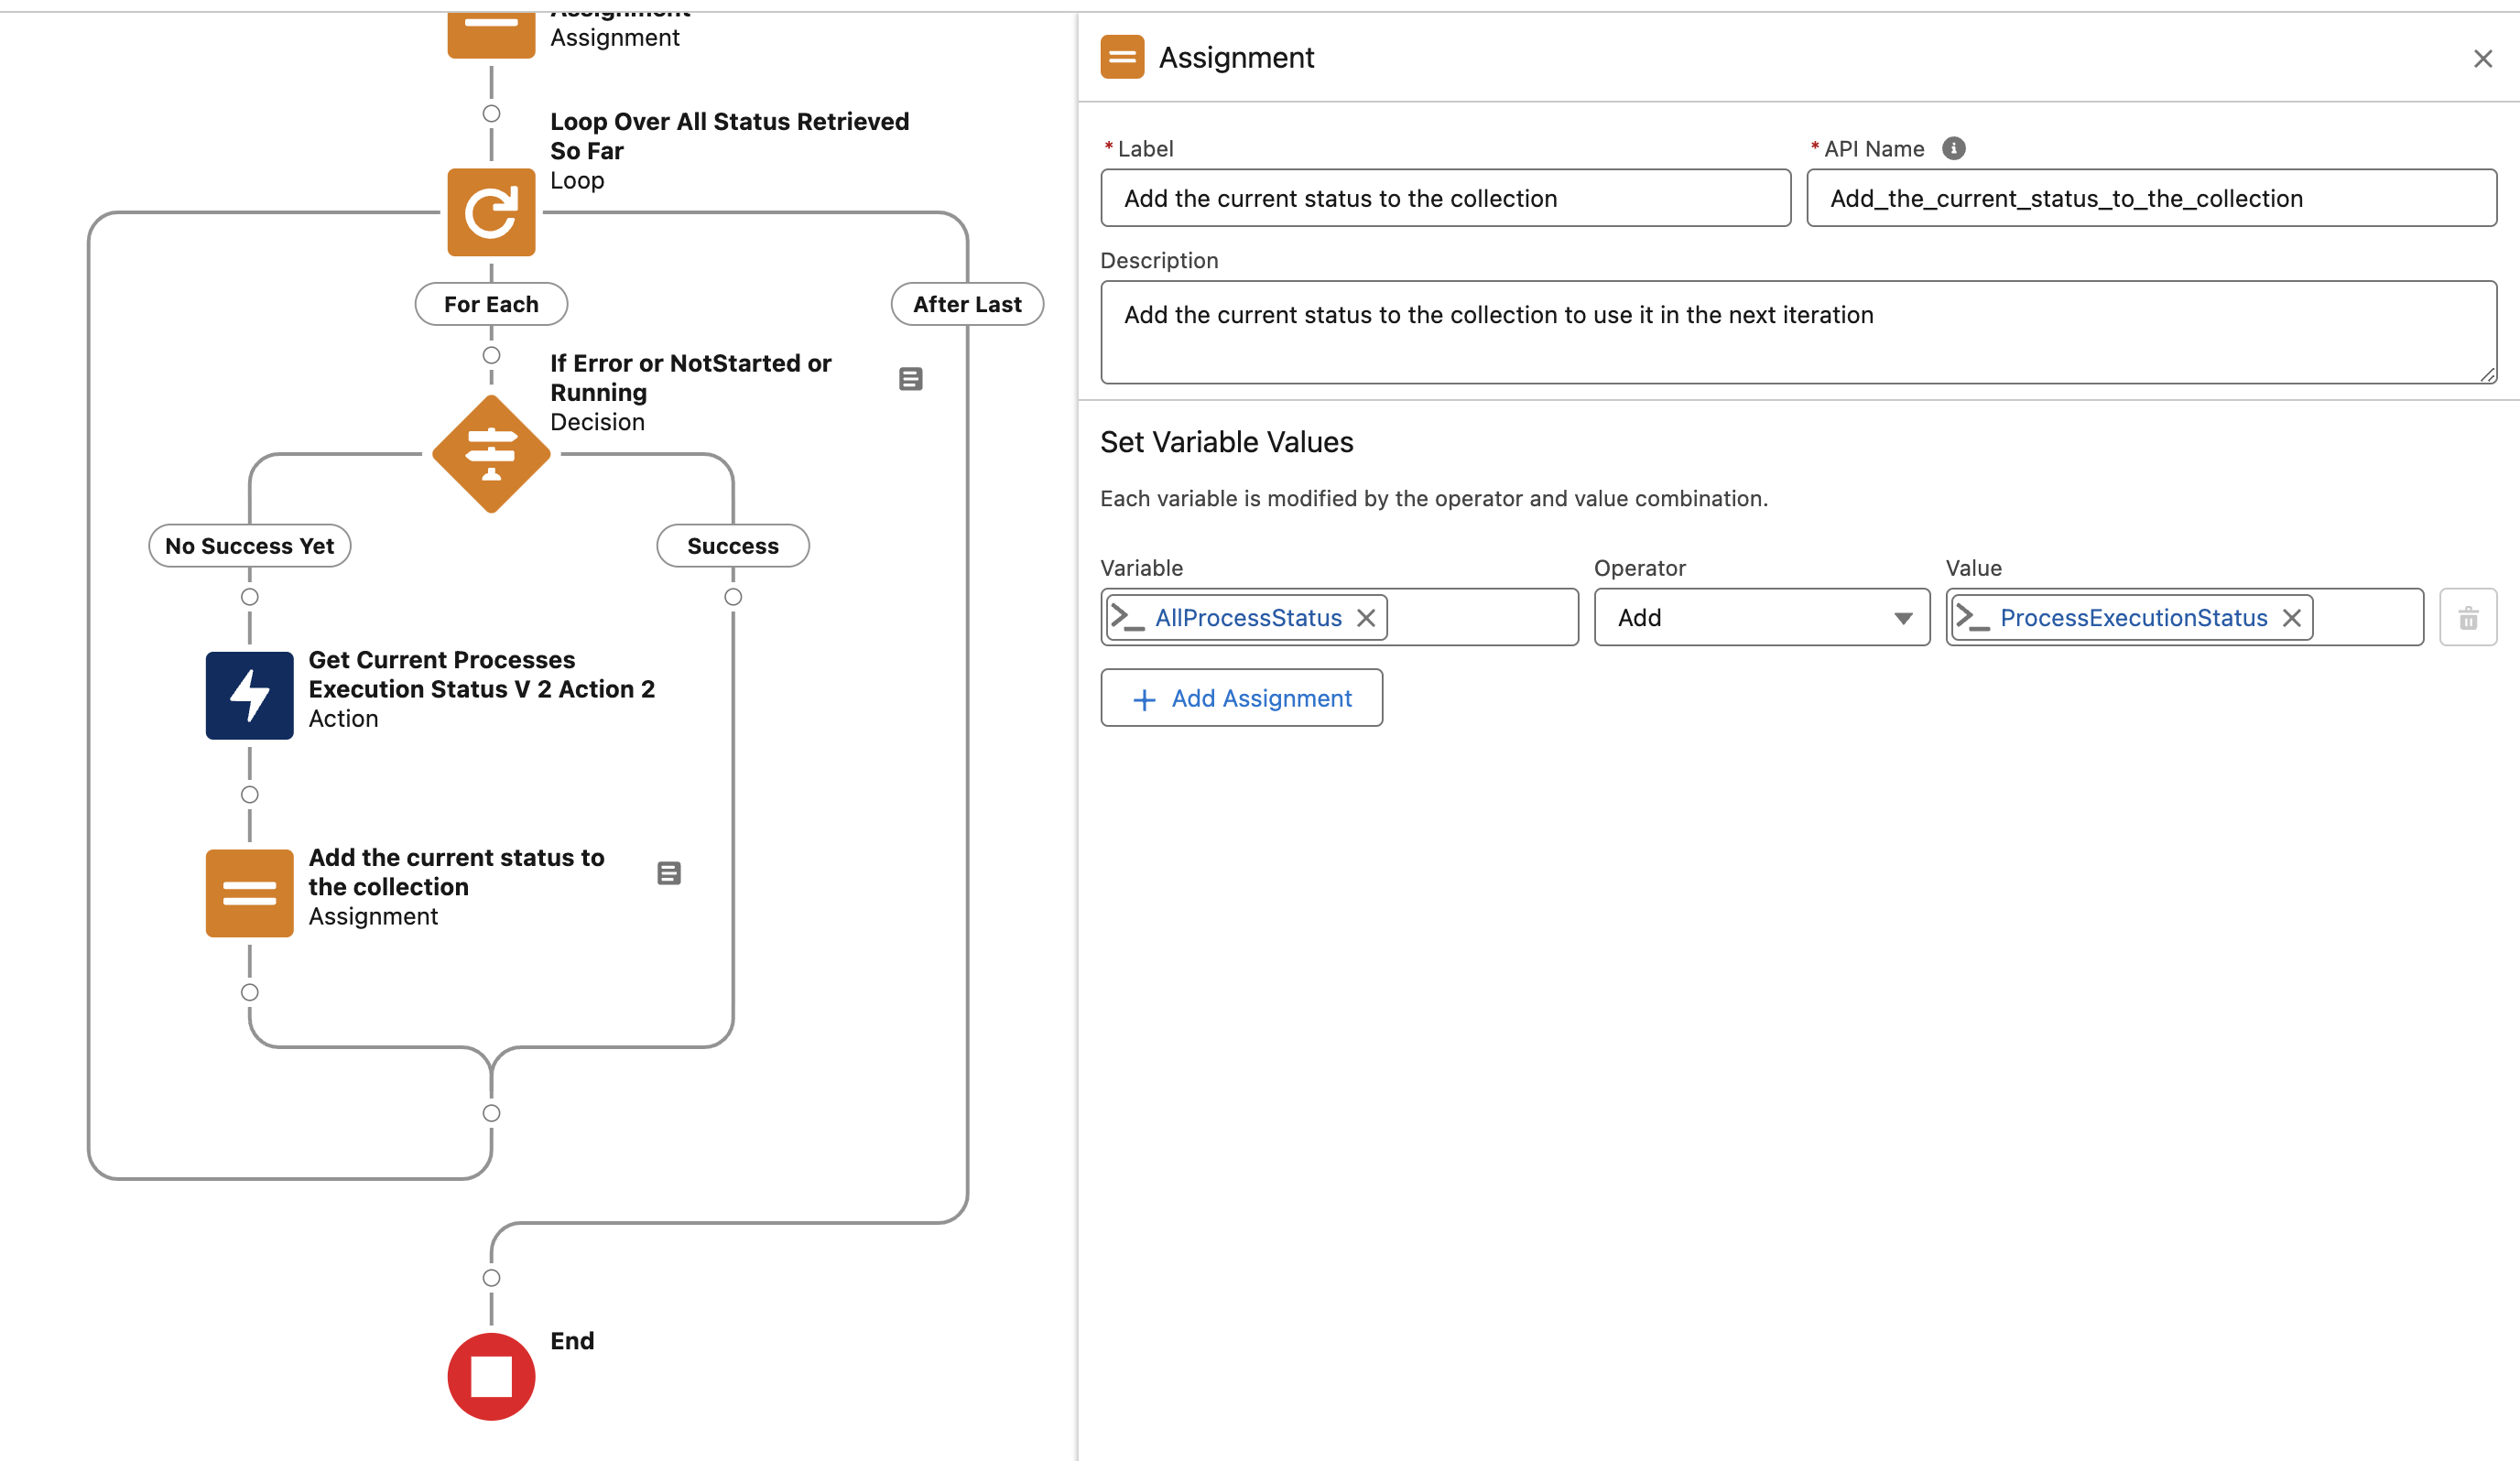
This repeats until the process finishes and the status is
Success. In this example, the error handling is omitted for the sake of simplicity. -
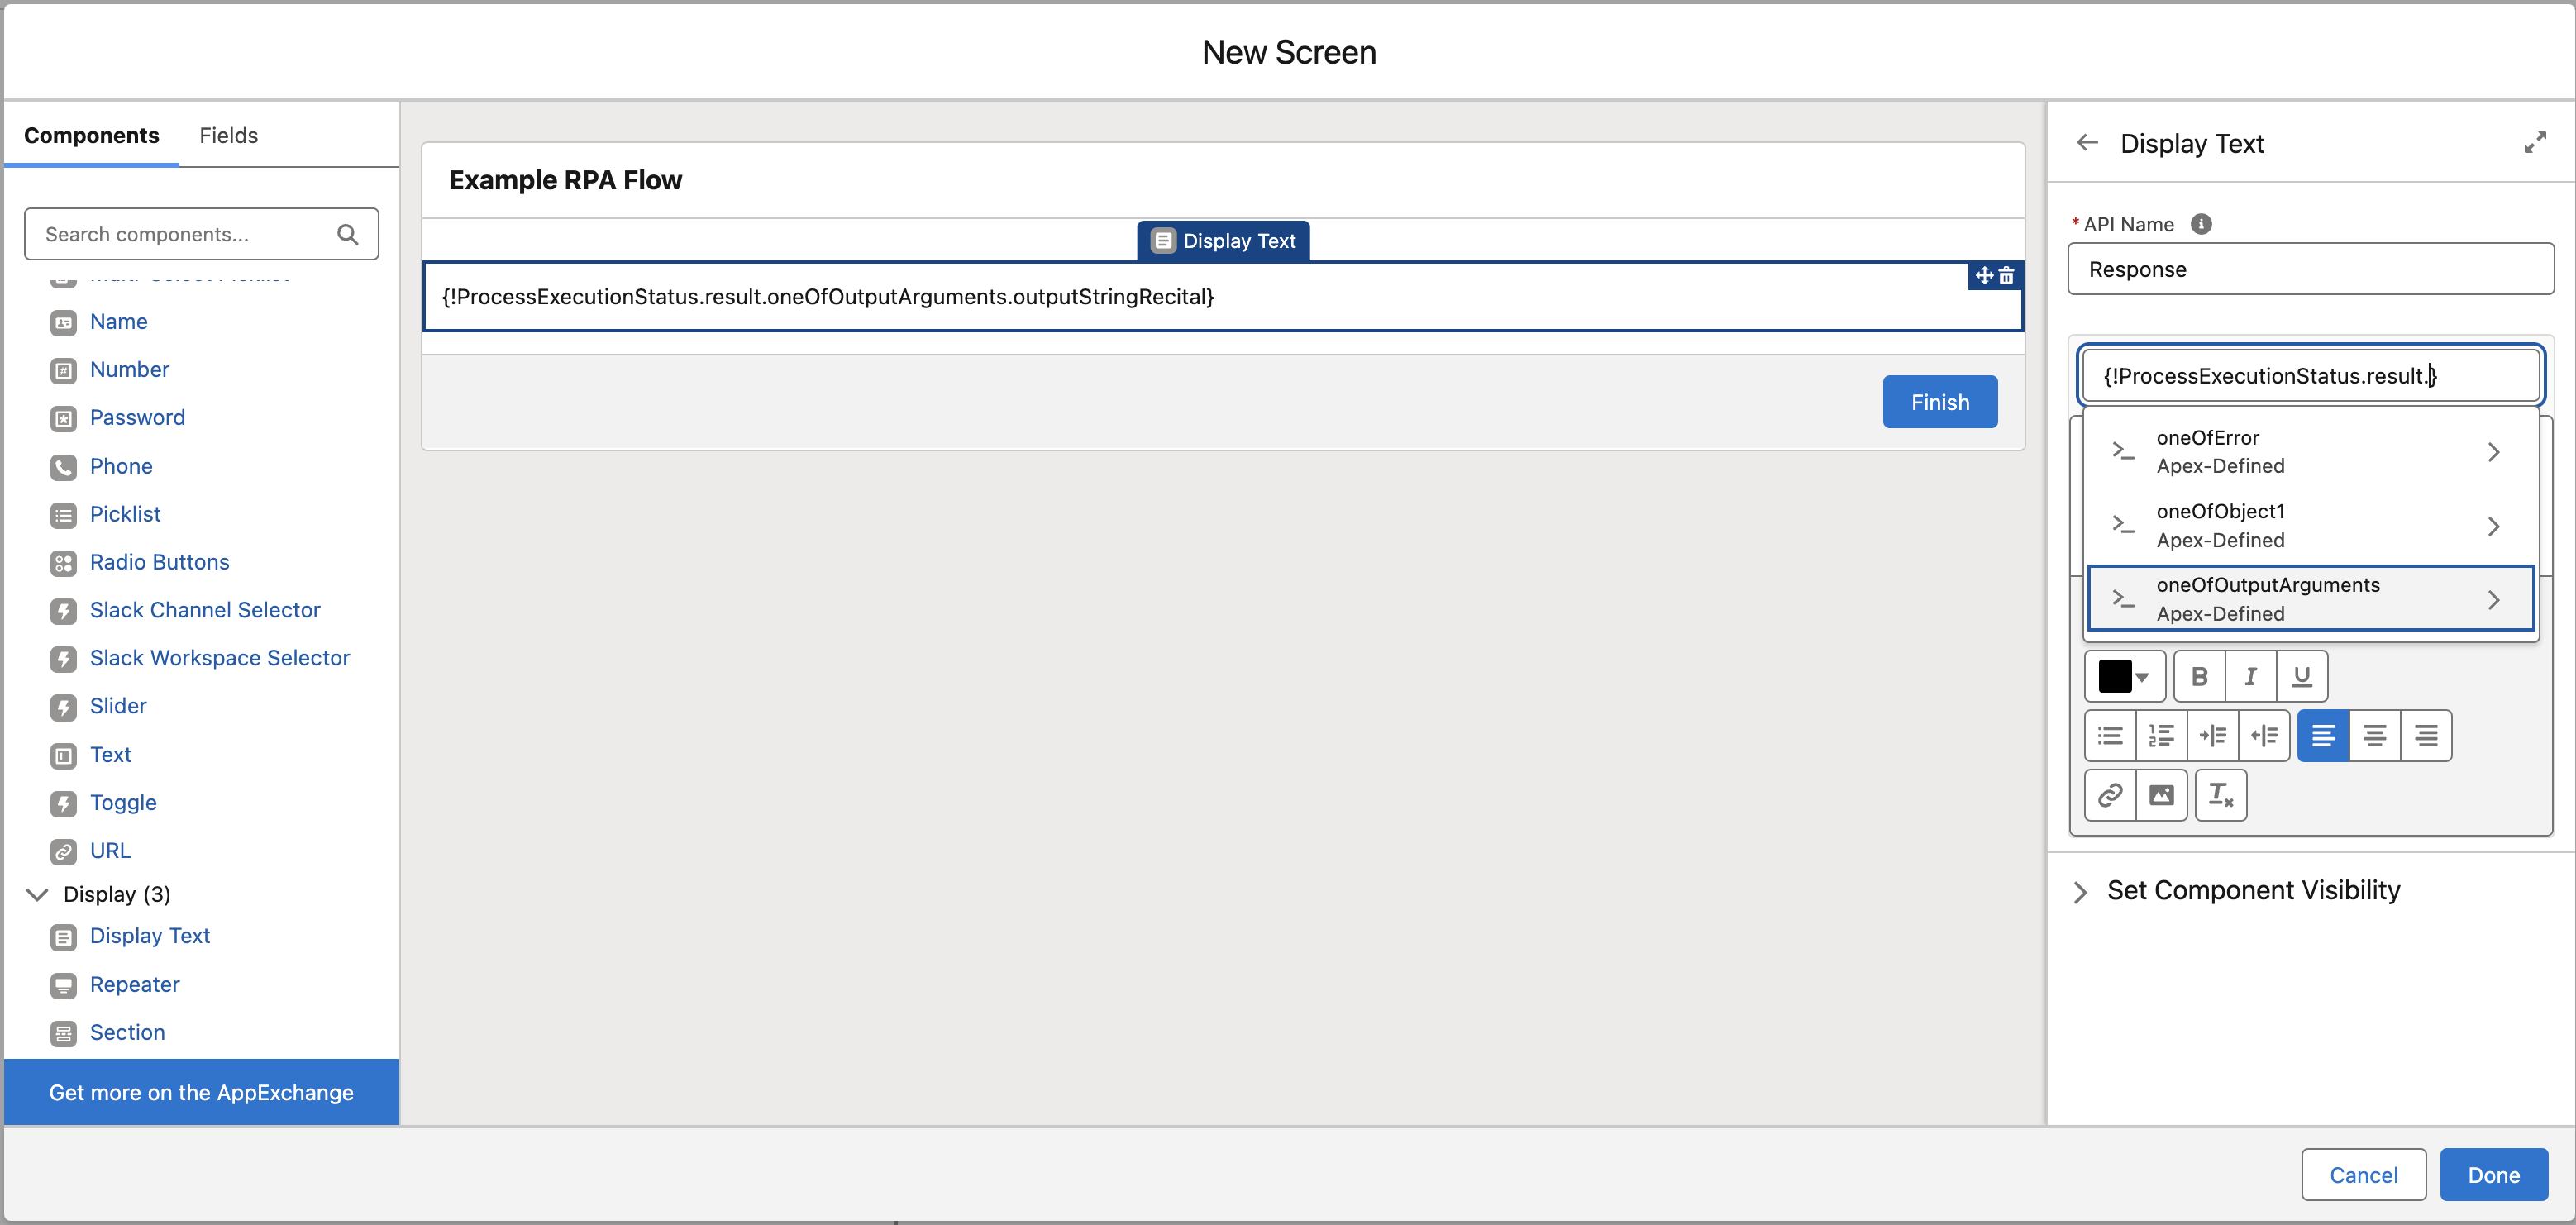
Get the final result and store the output values manually:
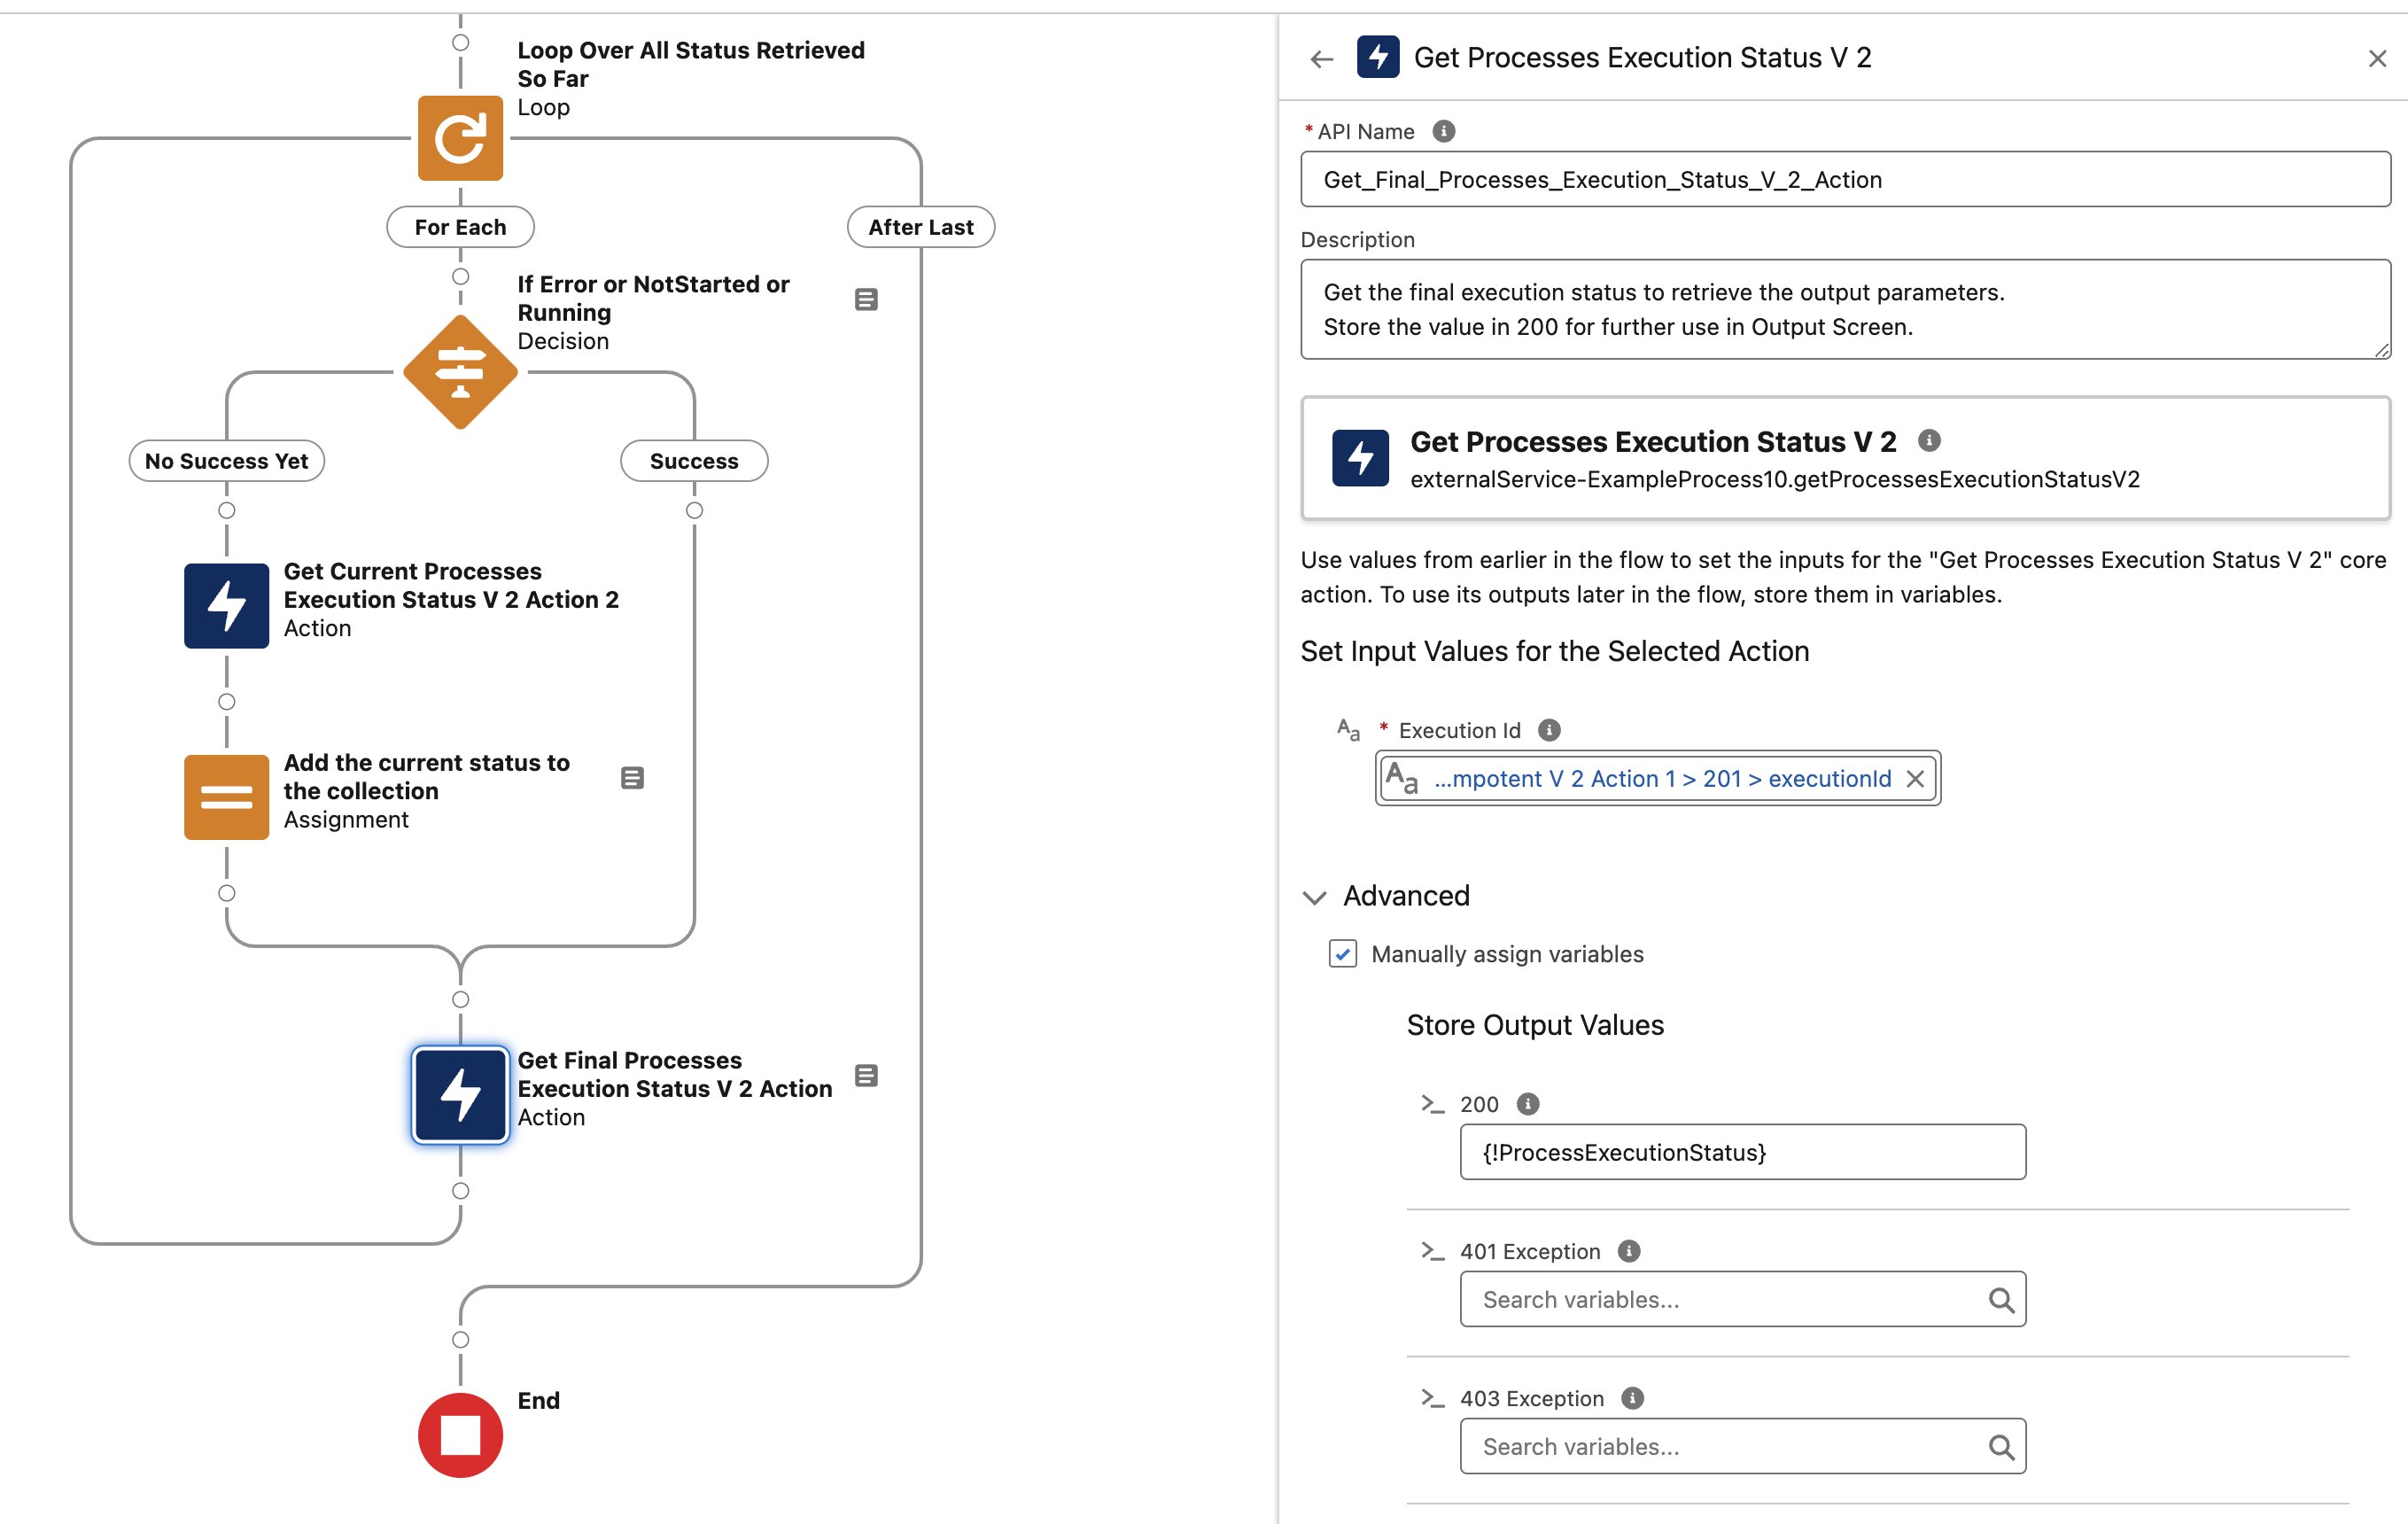
-
Add a screen to view the results for debugging purposes: