<dependency>
  <groupId>com.mulesoft.connectors</groupId>
  <artifactId>mule-sfdc-analytics-connector</artifactId>
  <version>x.x.x</version>
  <classifier>mule-plugin</classifier>
</dependency>Salesforce Einstein Analytics Cloud Connector 3.10 - Mule 4
Anypoint Connector for Salesforce Einstein Analytics Cloud (Salesforce Analytics Connector) enables you to connect to the Salesforce Analytics Cloud application using the Salesforce External Data API. The connector exposes convenient methods for creating, deleting, and populating datasets into the Salesforce Analytics Cloud system. Load data into Salesforce Einstein Analytics Cloud from many different data sources whether they are on-premise or on the cloud. Go beyond .csv files with this connector.
For software requirements and compatibility information, see Salesforce Einstein Analytics Connector Release Notes.
Before You Begin
To use this connector, you must be familiar with:
-
The Salesforce Einstein Analytics API
-
Anypoint connectors
-
Mule runtime engine (Mule)
-
Elements in a Mule flow
-
Global elements
-
How to create a Mule app using Anypoint Studio
Before creating an app, you must have login credentials to test your connection to your target resource.
POM File Information
The Apache Maven pom.xml file generated by Anypoint Studio contains dependencies for a Mule app. If you code a Mule app manually, include this XML snippet in your pom.xml file to enable access to this connector:
Replace x.x.x with the version that corresponds to the connector you are using.
To obtain the most up-to-date pom.xml file information:
-
Go to Anypoint Exchange.
-
In Exchange, click Login and supply your Anypoint Platform username and password.
-
In Exchange, search for
<connector-name>. -
Select the connector.
-
Click Dependency Snippets near the upper right of the screen.
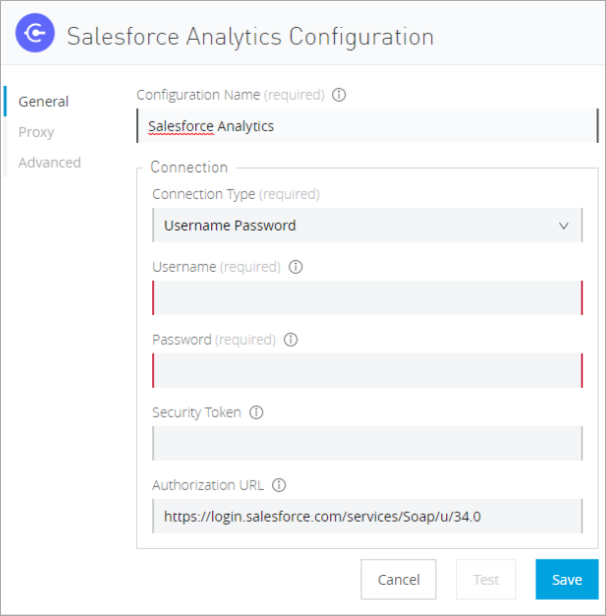
Required Parameters for Basic Username Password Authentication
-
Username
Salesforce Einstein Analytics username -
Password
Password that corresponds with the Salesforce Einstein Analytics username -
Security Token
Corresponding security token
Required Parameters for the OAuth 2.0 Configuration
-
Consumer Key
Consumer key for the Salesforce connected app. -
Consumer Secret
Consumer secret for the connector to access Salesforce.
Required Parameters for the OAuth 2.0 JWT Bearer Configuration
-
Consumer Key
Consumer key for the Salesforce connected app -
Keystore File
See Generating a Keystore File -
Store Password
Password for the keystore -
Principal
Salesforce username
Required Parameters for the OAuth 2.0 SAML Bearer Configuration
-
Consumer Key
Consumer key for the Salesforce connected app. -
Keystore File
Path to the keystore used to sign data during authentication. Note that only the Java keystore format is allowed. -
Store Password
Keystore password. -
Principal
Salesforce username.
Generating a Keystore File
The Keystore is the path to the keystore used to sign data during authentication. The following example shows how to generate a JKS file:
-
Go to your Mule workspace, and open the command prompt (for Windows) or Terminal (for Mac).
-
Type
keytool -genkeypair -alias salesforce-cert -keyalg RSA -keystore salesforce-cert.jksand press enter. -
Enter the following details:
-
Password for the keystore
-
Your first name and last name
-
Your organization unit
-
Name of your city, state, and the two letter code of your county
The system generates a Java keystore file containing a private or public key-pair in your workspace.
-
-
Provide the file path for the keystore in your connector configuration.
Type
keytool -exportcert -alias salesforce-cert -file salesforce-cert.crt -keystore salesforce-cert.jksand press enter.The system now exports the public key from the keystore into the workspace. This is the public key that you need to enter in your Salesforce instance.
-
Verify that you have both the keystore (
salesforce-cert.jks) and the public key (salesforce-cert.crt) files in your workspace.
Add the Connector in Studio
-
In Studio, create a Mule project.
-
In the Mule Palette view, click (X) Search in Exchange.
-
In Add Modules to Project, type "analytics" in the search field.
-
Click this connector’s name in Available modules.
-
Click Add.
-
Click Finish.
Configure the Connector in Studio
-
Drag the desired Salesforce Analytics operation to the Studio canvas.
-
To create a global element for the connector, on the General tab, configure the authentication as described in the authentication sections.
The following authentication connection types are available:
-
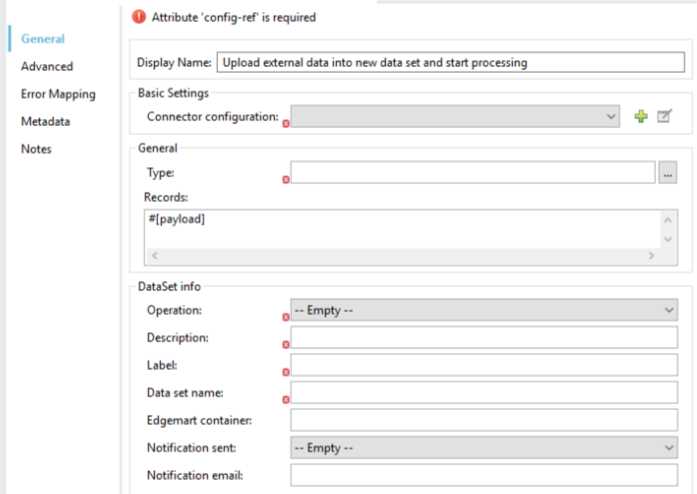
Configure these fields to upload external data into new dataset and start the processing operation:
-
Type
Type of the records to insert. Select a JSON file representing the schema of the dataset to create. -
Records
DataSense expression; the records to insert. -
Operation
Specify the operation to use when you’re loading data into a dataset. -
Description
-
Label
-
Data Set Name
-
Username Password
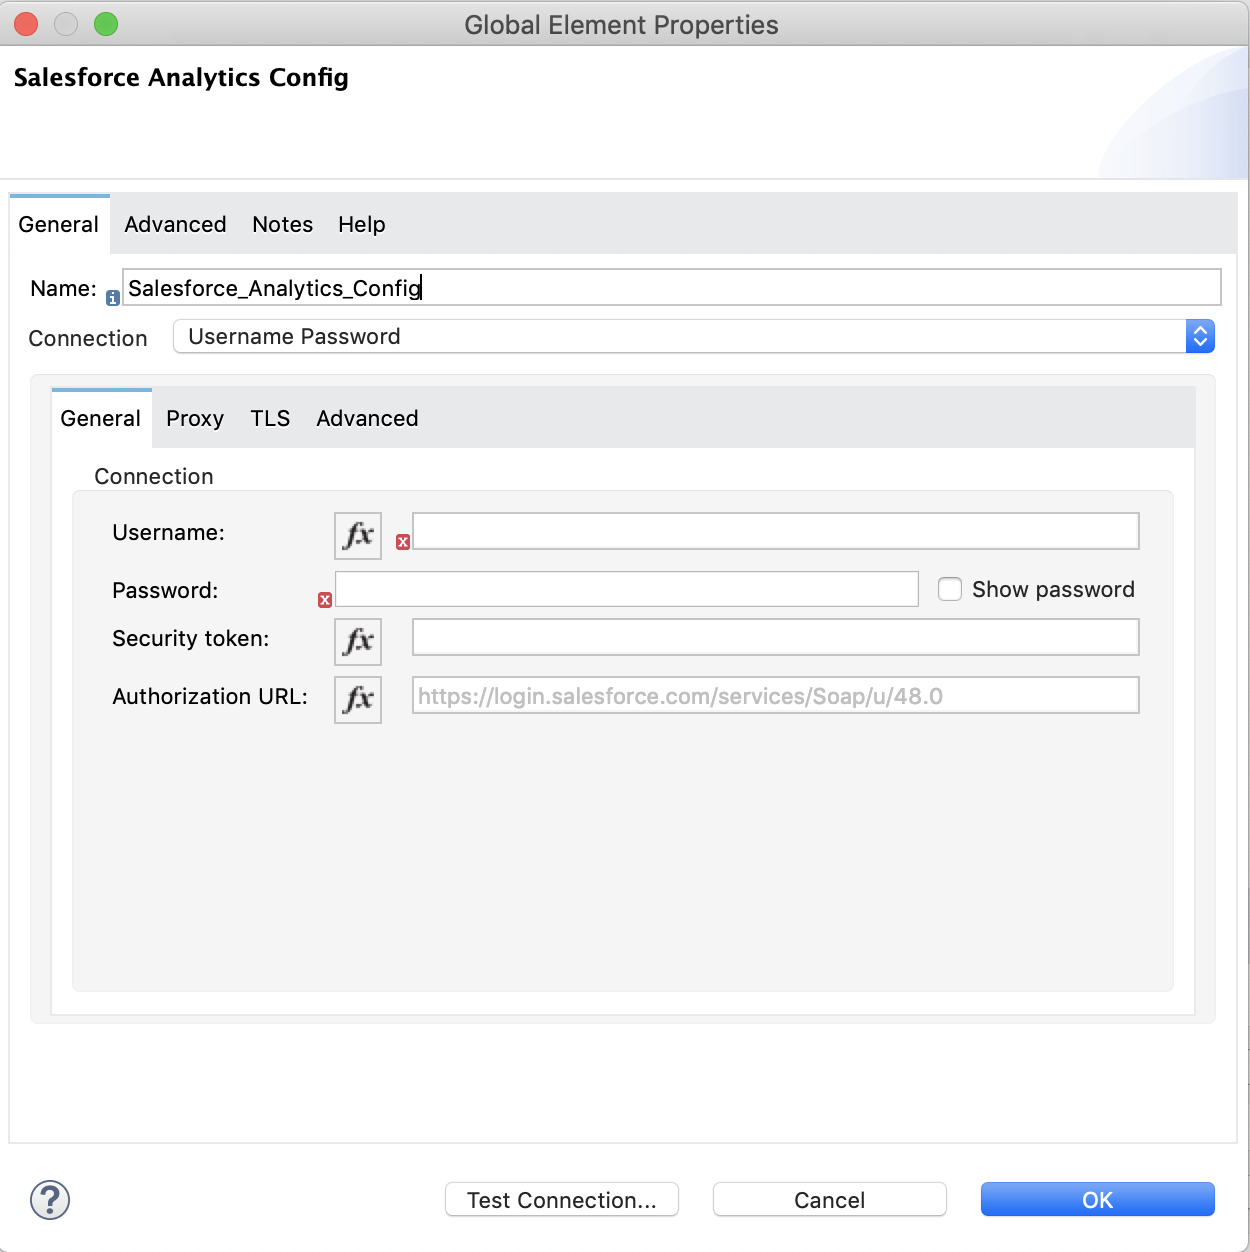
On the General tab of the Global Element Properties screen, enter the following information to configure Basic authentication:
-
Username
Enter the Salesforce username. -
Password
Enter the corresponding password. -
Security Token
Enter the corresponding security token.
The following screenshot shows an example of configuring Basic authentication:
OAuth 2.0
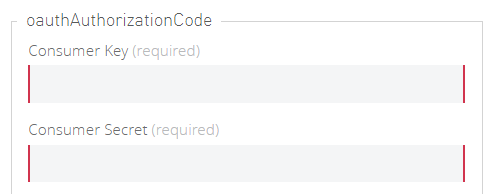
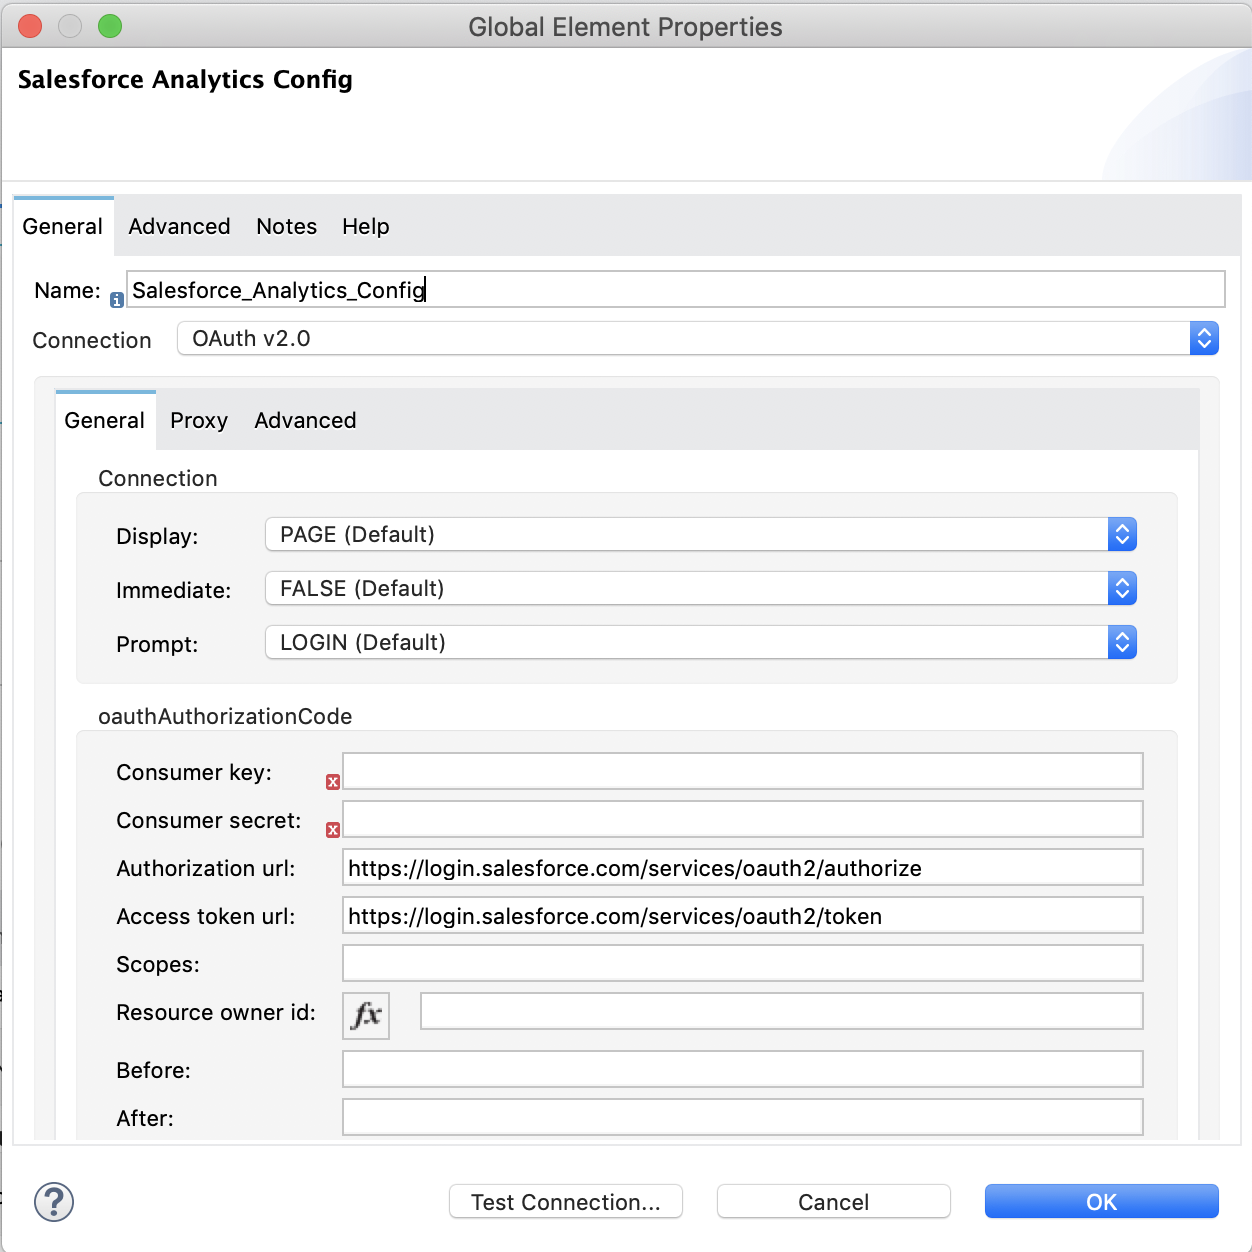
On the General tab of the Global Element Properties screen, enter the following information to configure OAuth 2.0 authentication:
-
Consumer Key
Consumer key for the Salesforce connected app. -
Consumer Secret
Consumer secret for the connector to access Salesforce.
The following screenshot shows an example of configuring the OAuth 2.0 authentication:
OAuth 2.0 JWT
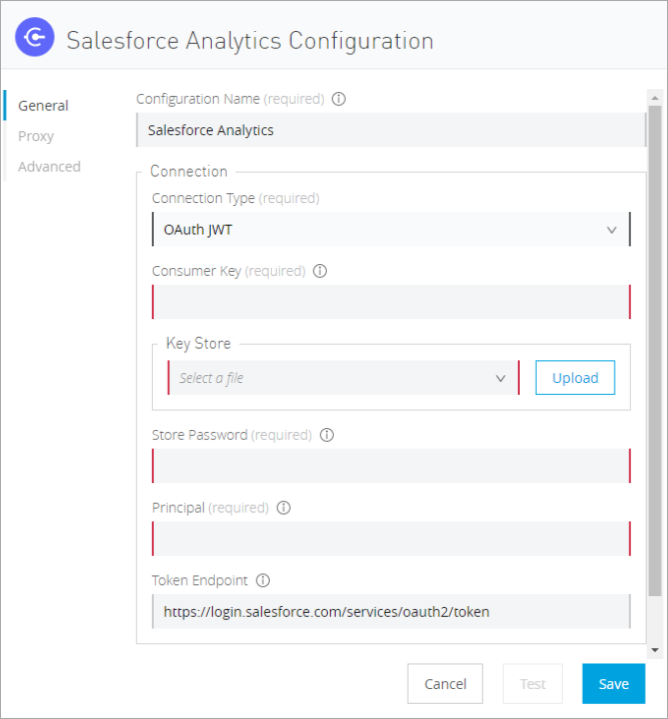
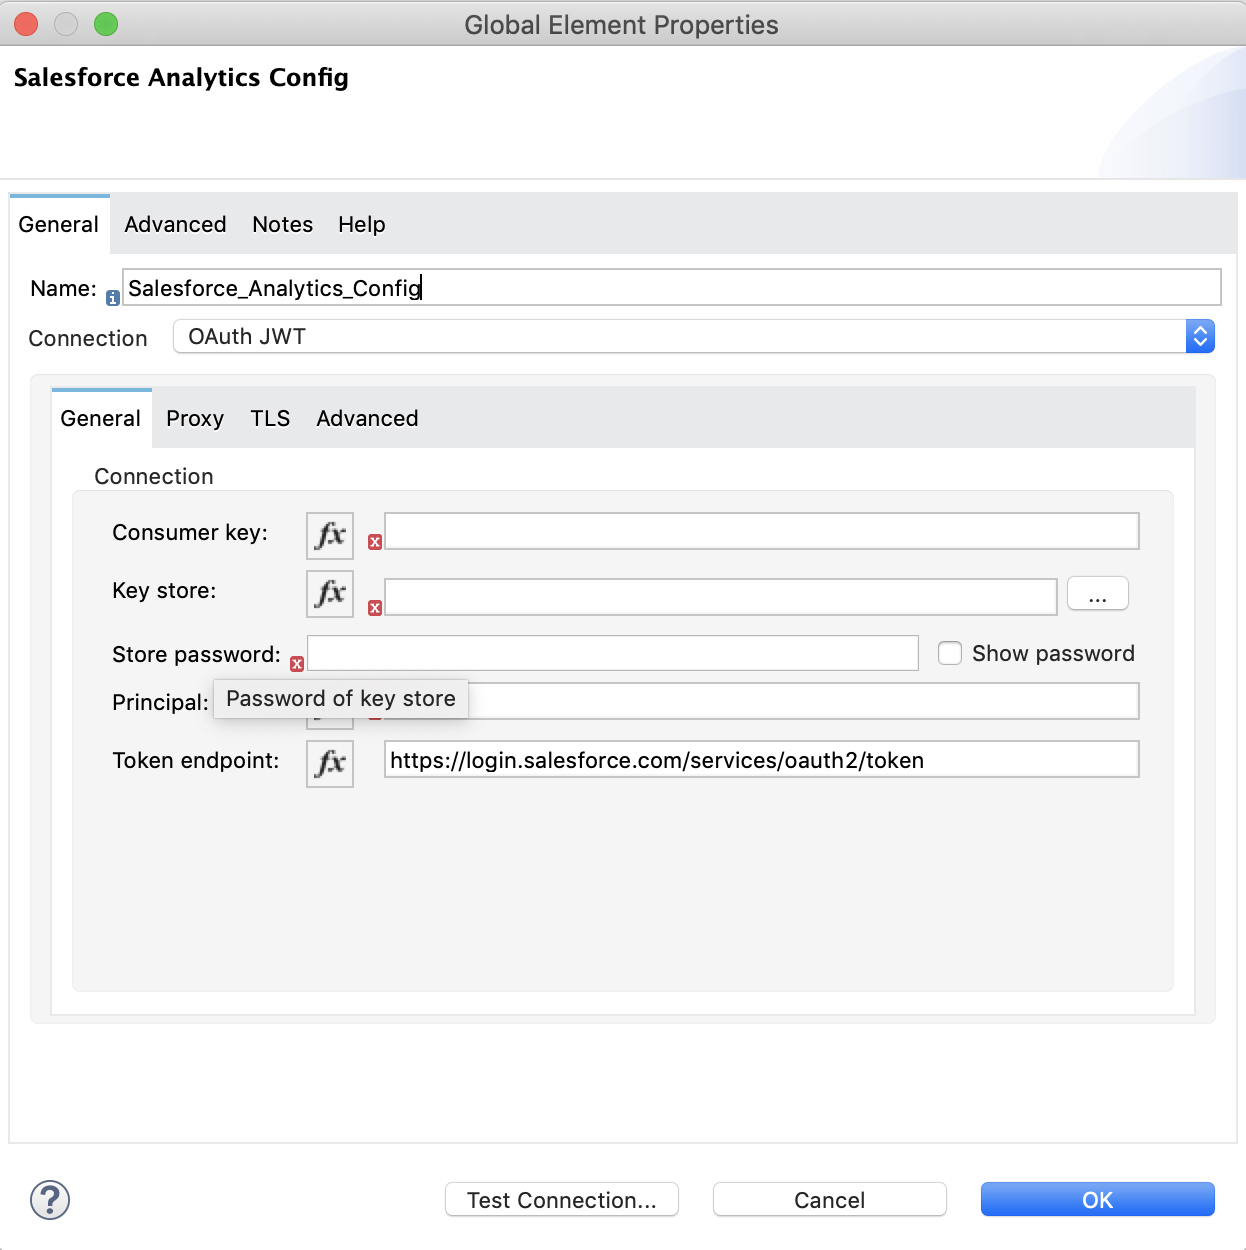
On the General tab of the Global Element Properties screen, enter the following information to configure OAuth 2.0 JWT authentication:
-
Consumer Key
Consumer key for the Salesforce connected app -
Keystore File
See Generating a Keystore File -
Store Password
Password for the keystore -
Principal
Salesforce username
OAuth 2.0 SAML Bearer
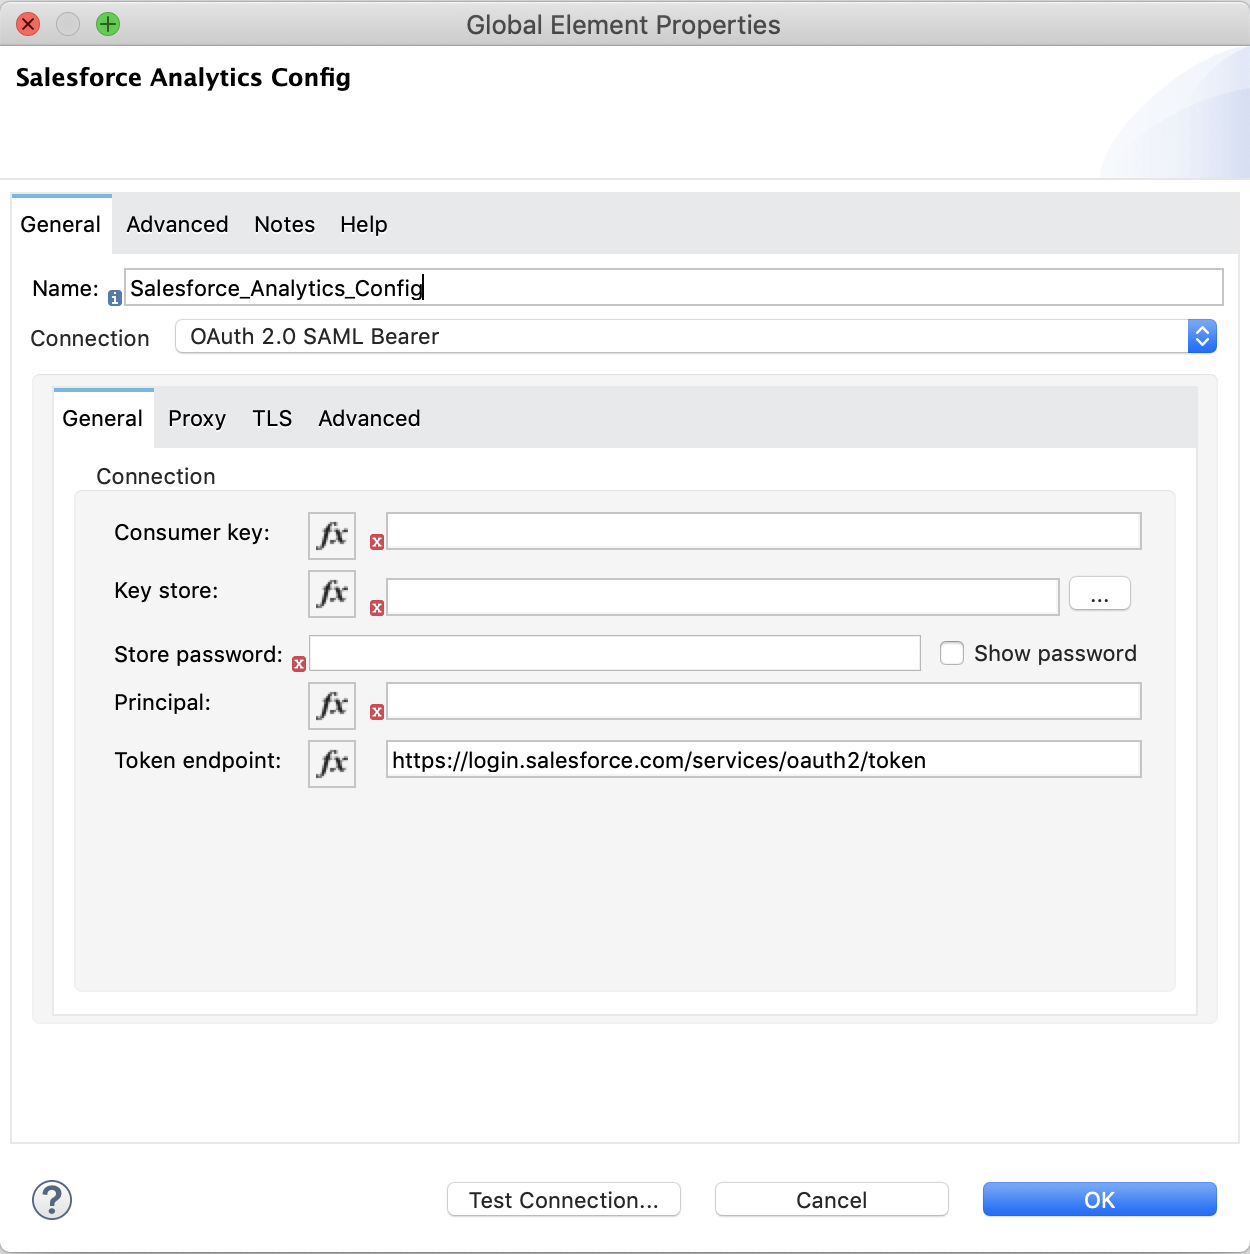
On the General tab of the Global Element Properties screen, enter the following information to configure OAuth 2.0 SAML Bearer authentication:
-
Consumer Key
Consumer key for the Salesforce connected app -
Keystore File
See Generating a Keystore File-
Store Password
Password for the keystore. -
Principal
Salesforce username
-

Use Case: Studio
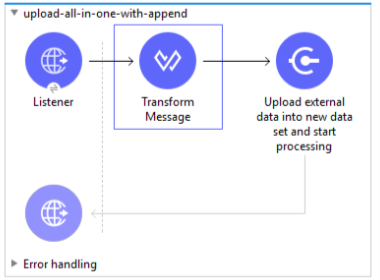
This use case provides an example of how to use the Salesforce Einstein Analytics Connector and contains this end to end flow:
-
Uses an HTTP Listener as the input source.
-
Configures a connection using a username, password, and the security token.
-
Uses a Salesforce Analytics operation with the parameters to use.
The example that follows contains these components:
-
HTTP Listener, which accepts data from HTTP requests.
-
Transform Message, which provides the records input data required by Salesforce Einstein Analytics connector.
%dw 2.0
output application/java
---
[
	{
		"Id": 1,
		"Country": "Country",
		"City": "City",
		"Year": 428742153,
		"Distance": 284644936,
		"Currencies":
		[
			"EUR",
			"USD"
		],
		"CreationDate": "20/12/2017" as Date {format: "dd/MM/yyyy"}
	},
	{
		"Id": 2,
		"Country": "Country",
		"City": "City",
		"Year": 1432651434,
		"Distance": 1336594394,
		"Currencies":
		[
			"EUR",
			"USD",
			"HUF"
		],
		"CreationDate": "20/12/2017" as Date {format: "dd/MM/yyyy"}
	}
]-
Salesforce Analytics Connector, which connects with Salesforce, and performs an operation to push data into Salesforce Einstein Analytics Cloud.
Use Case: XML
Paste the XML code provided in this example into the Configuration XML tab in Anypoint Studio to experiment with the flow described in the previous section.
Keep in mind that you must still provide the metadata.json file describing the schema of the dataset to be created.
<?xml version="1.0" encoding="UTF-8"?>

<mule xmlns:salesforce-analytics="http://www.mulesoft.org/schema/mule/salesforce-analytics"
xmlns:ee="http://www.mulesoft.org/schema/mule/ee/core"
xmlns:http="http://www.mulesoft.org/schema/mule/http"
xmlns:file="http://www.mulesoft.org/schema/mule/file"
xmlns="http://www.mulesoft.org/schema/mule/core"
xmlns:doc="http://www.mulesoft.org/schema/mule/documentation"
xmlns:xsi="http://www.w3.org/2001/XMLSchema-instance"
xsi:schemaLocation="http://www.mulesoft.org/schema/mule/core
http://www.mulesoft.org/schema/mule/core/current/mule.xsd
http://www.mulesoft.org/schema/mule/file
http://www.mulesoft.org/schema/mule/file/current/mule-file.xsd
http://www.mulesoft.org/schema/mule/http
http://www.mulesoft.org/schema/mule/http/current/mule-http.xsd
http://www.mulesoft.org/schema/mule/ee/core
http://www.mulesoft.org/schema/mule/ee/core/current/mule-ee.xsd
http://www.mulesoft.org/schema/mule/salesforce-analytics
http://www.mulesoft.org/schema/mule/salesforce-analytics/current/mule-salesforce-analytics.xsd">
 	<configuration-properties file="mule-app.properties" />
	<http:listener-config name="HTTP_Listener_config" doc:name="HTTP Listener config" >
		<http:listener-connection host="0.0.0.0" port="8081" />
	</http:listener-config>
	<salesforce-analytics:salesforce-analytics-config
	  name="Salesforce_Analytics_Salesforce_Analytics"
	  doc:name="Salesforce Analytics Salesforce Analytics" >
		<salesforce-analytics:basic-connection username="${salesforce.username}"
		   password="${salesforce.password}" securityToken="${salesforce.securityToken}"
		   url="${salesforce.url}"/>
	</salesforce-analytics:salesforce-analytics-config>
	<flow name="upload-all-in-one-with-append" >
		<http:listener doc:name="Listener" config-ref="HTTP_Listener_config" path="append"/>
		<ee:transform doc:name="Transform Message" >
			<ee:message >
				<ee:set-payload ><![CDATA[%dw 2.0
output application/java
---
[
	{
		"Id": 1,
		"Country": "Country",
		"City": "City",
		"Year": 428742153,
		"Distance": 284644936,
		"Currencies":
		[
			"EUR",
			"USD"
		],
		"CreationDate": "20/12/2017" as Date {format: "dd/MM/yyyy"}
	},
	{
		"Id": 2,
		"Country": "Country",
		"City": "City",
		"Year": 1432651434,
		"Distance": 1336594394,
		"Currencies":
		[
			"EUR",
			"USD",
			"HUF"
		],
		"CreationDate": "20/12/2017" as Date {format: "dd/MM/yyyy"}
	}
]]]></ee:set-payload>
			</ee:message>
		</ee:transform>
		<salesforce-analytics:upload-external-data-into-new-data-set-and-start-processing
		  doc:name="Upload external data into new data set and start processing"
		  config-ref="Salesforce_Analytics_Salesforce_Analytics" operation="APPEND"
		  description="${allInOne.dataSetDescription}" label="${allInOne.dataSetLabel}"
		  dataSetName="${allInOne.dataSetName}" edgemartContainer="${allInOne.dataSetContainerName}"
		  type="metadata.json" notificationSent="ALWAYS" notificationEmail="${notification.email}"/>
	</flow>
</mule>
See Also
-
For Required Parameters for Basic Username Password Authentication see Salesforce Basic Authentication
-
For Required Parameters for the OAuth 2.0 Configuration see Salesforce OAuth 2.0
-
For Required Parameters for the OAuth 2.0 JWT Bearer Configuration see Salesforce OAuth 2.0 JWT Bearer
-
For Required Parameters for the OAuth 2.0 SAML Bearer Configuration see Salesforce OAuth 2.0 SAML Bearer


