Salesforce Connector 10.16 Additional Configuration Information
Configure Anypoint Connector for Salesforce (Salesforce Connector) to:
-
Load data in batches
-
Specify a Lead ID for a Lead Convert Request operation
-
Update field values to
null -
Generate an OAuth 2.0 keystore file
-
Invoke an APEX Rest method
Load Data in Batches
The Salesforce Bulk API loads batches of your organization’s data into Salesforce. Salesforce Connector provides the Create and Create Bulk operations for working with the Bulk API.
For all bulk operations, Salesforce handles the creation process in the background. The connector replies with a BatchInfo object, which contains the ID of the batch and the ID of the job it creates to upload the batched objects.
In Salesforce, you can track the status of bulk data load jobs and their associated batches by using the job ID for Bulk Data Load Jobs:
-
Click <YOUR_NAME > Setup > Monitoring > Bulk Data Load Jobs.
-
Click the job ID to view the job detail page.
The job detail page includes a list of all the batches related to the job. The list provides View Request and View Response links for each batch. If the batch is a CSV file, the links return the request or response in CSV format. If the batch is an XML file, the links return the request or response in XML format.
Specify a Lead Convert Request ID
To specify a lead ID for a LeadConvertRequest operation, use a DataWeave transform message. When you use a transform message before the operation, you must add the leadId field, because the metadata for the operation doesn’t specify it:
<ee:transform doc:name="Transform Message" >
<ee:message >
<ee:set-payload ><![CDATA[%dw 2.0
output application/java
---
{
leadId: "LEAD_ID",
accountId: "ACCOUNT_ID",
convertedStatus: "Closed - Converted",
doNotCreateOpportunity: true
} as Object {
class : "org.mule.extension.salesforce.api.core.LeadConvertRequest"
}]]></ee:set-payload>
</ee:message>
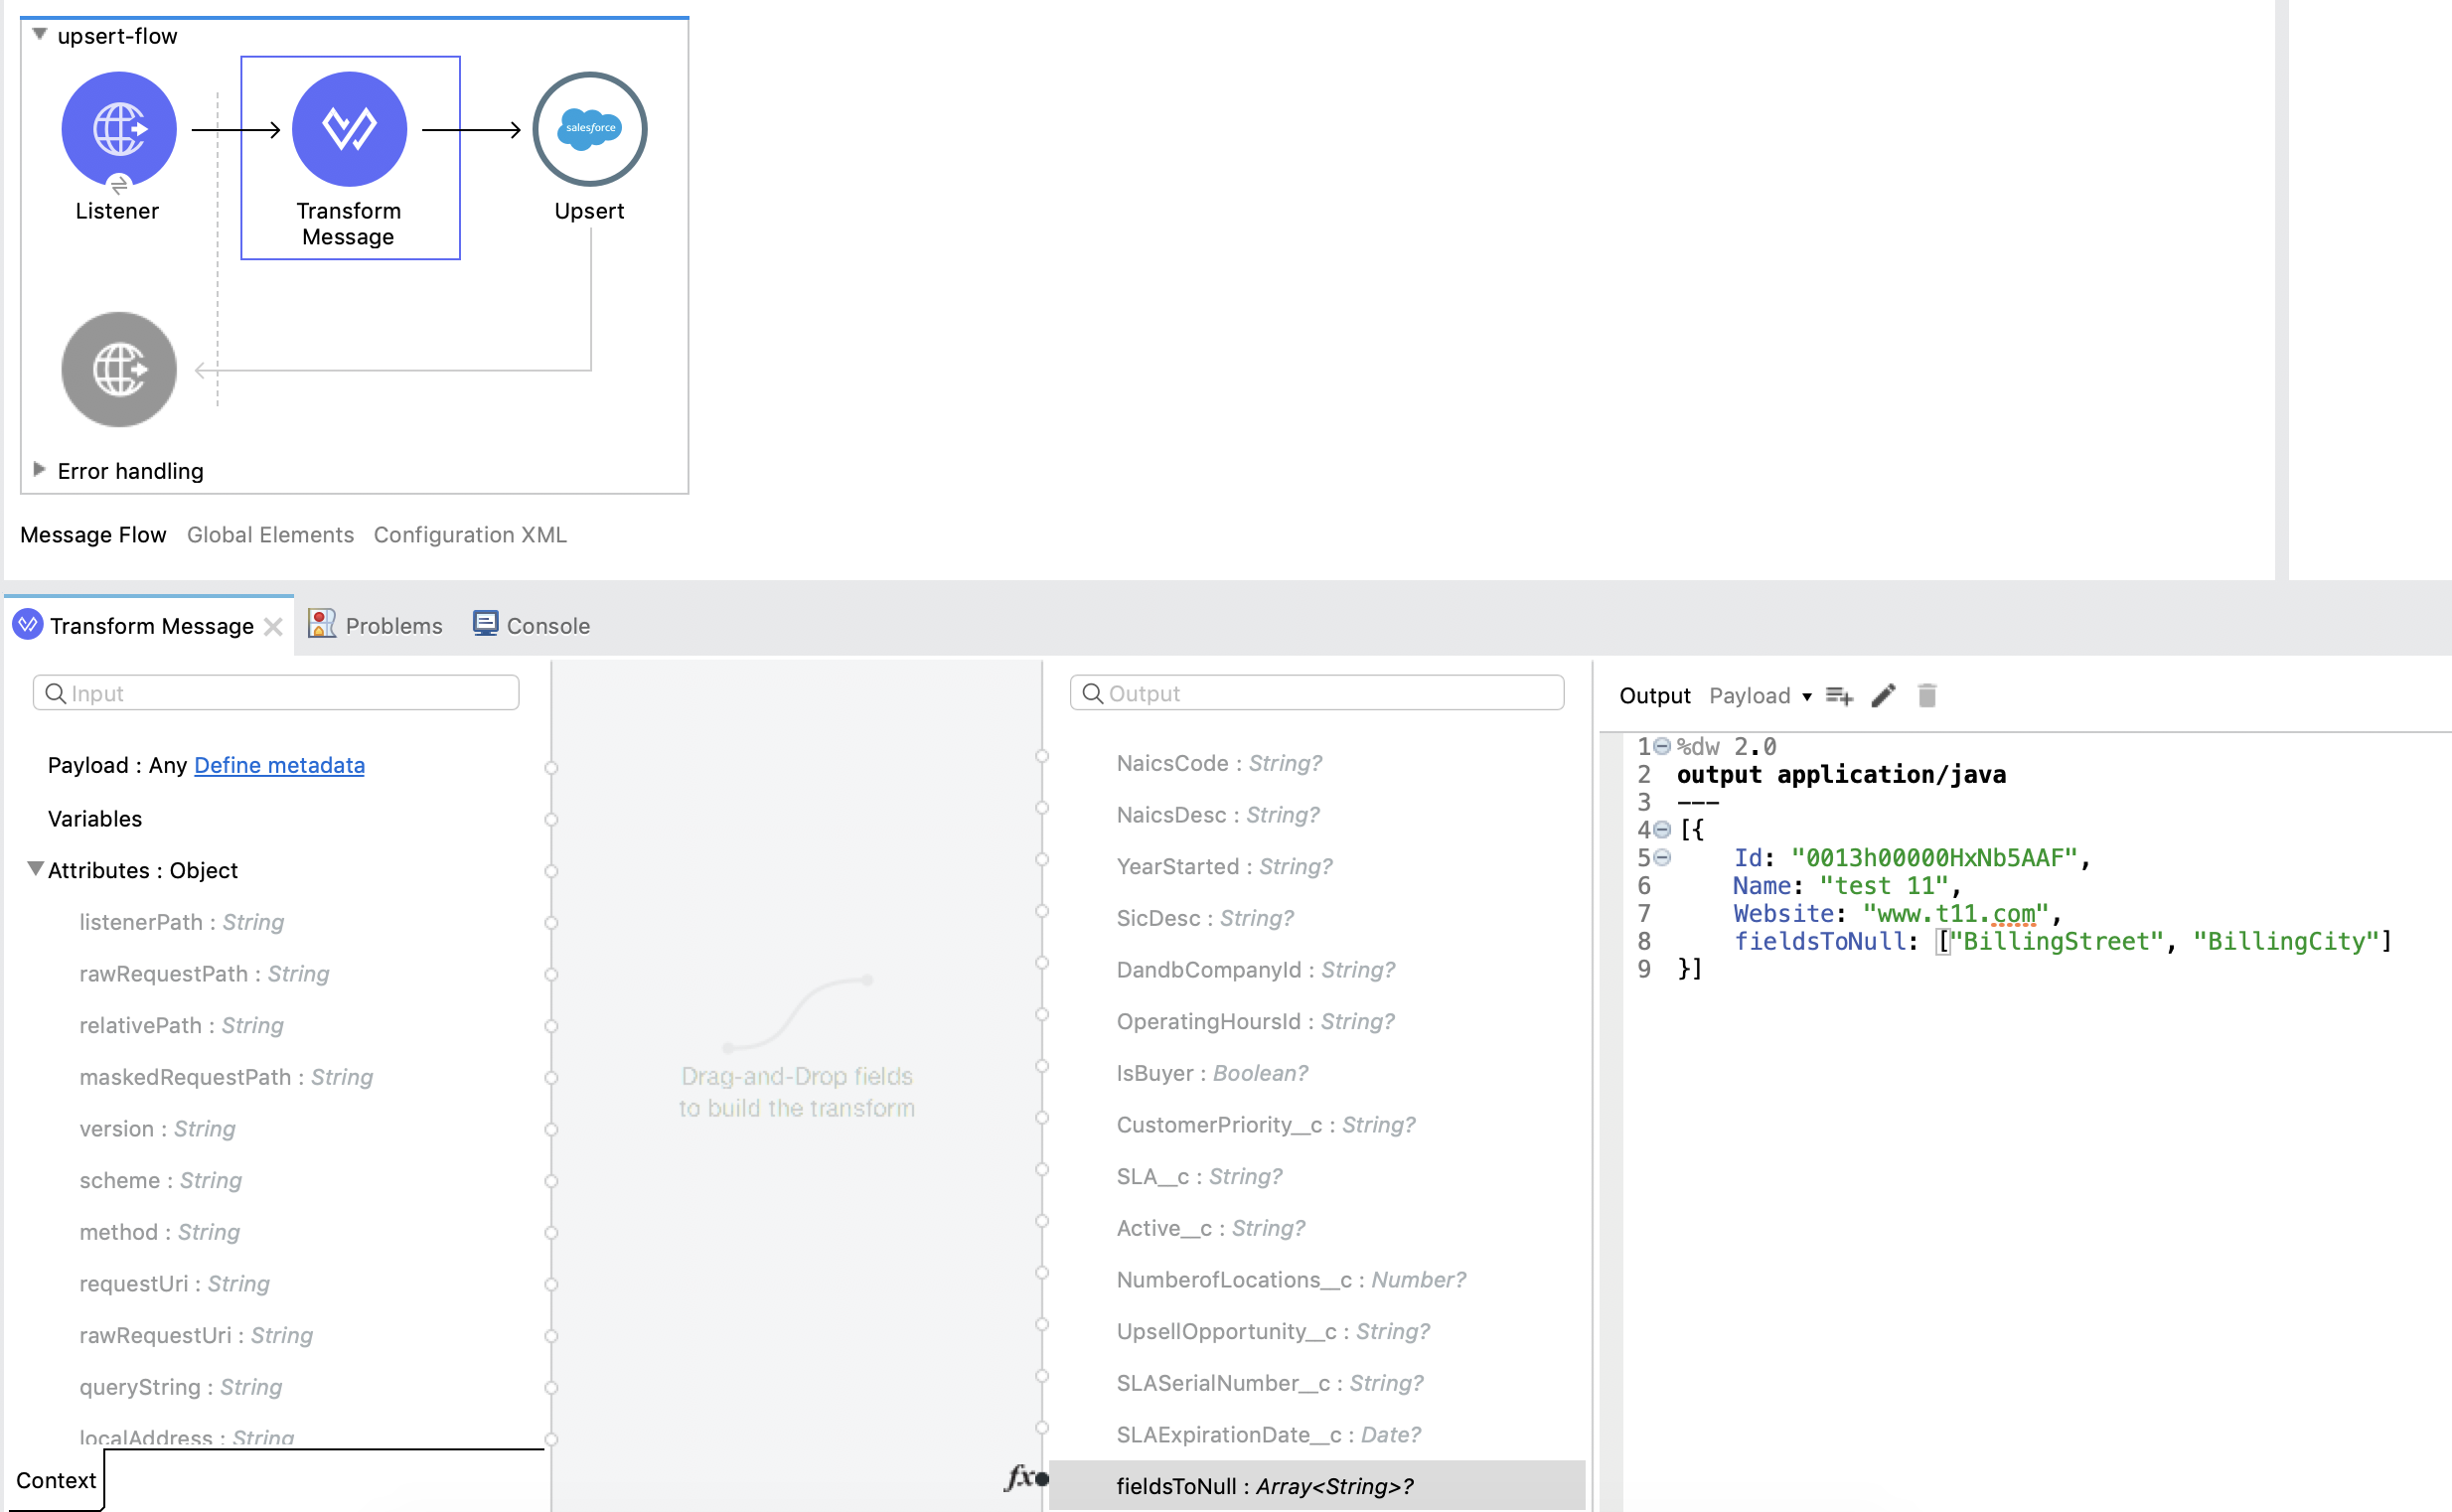
</ee:transform>Update Field Values to Null
To set field values to null, use an Update or Upsert request operation and insert the names of the fields you want to nullify in the Transform Message component’s fieldsToNull field:
Generate a Keystore File
Salesforce Connector uses the Bouncy Castle cryptographic library to load the certificate from the keystore and sign the payload for the authentication requests.
The library has a vulnerability (CVE-2018-5382) that relates to the BKS-V1 keystore file type. By default, Salesforce Connector uses JKS or PKCS12 keystores. Avoid using BKS-V1 keystore files, as documented in the Bouncy Castle proposed solution.
To generate a JKS keystore file:
-
Go to your Mule workspace and open the command prompt (for Windows) or Terminal (for Mac).
-
Enter this command:
keytool -genkeypair -alias salesforce-cert -keyalg RSA -keystore salesforce-cert.jks -
Enter the following information:
-
Password for the keystore
-
Your first name and last name
-
Your organization unit
-
Your city and state, and the two-letter code for your country
The system generates a Java keystore file (JKS format) that contains a private or public key pair in your workspace.
-
-
Provide the file path for the keystore in your connector configuration.
Enter this command:
keytool -exportcert -alias salesforce-cert -file salesforce-cert.crt -keystore salesforce-cert.jksThe system exports the public key from the keystore into the workspace. This is the public key to enter in your Salesforce instance.
-
Verify that you have both the keystore (
salesforce-cert.jks) and the public key (salesforce-cert.crt) files in your workspace.
Invoke APEX Rest Method
The Invoke APEX Rest operation enables users to invoke a method from an Apex class that is exposed as a REST service. The following example shows a payload for this operation:
<ee:transform doc:name="Transform Message">
			<ee:message >
				<ee:set-payload ><![CDATA[output application/java
---
{
	body: {
		URLParameters: {
			Parameter1: "parameter1Value",
			Parameter2: "parameter2Value"
		},
		account: {
			Name: "Example",
			AccountNumber: "55"
		}
	},
	headers: {
		header1:"header1Value"
	},
	cookies: {
		cookie1:"cookie1Value"
	},
	queryParameters: {
		queryParam1Name:"queryParam1Value",
		queryParam2Name:"queryParam2Value"
	}
}]]></ee:set-payload>
			</ee:message>
		</ee:transform>
In this example:
-
The
bodyelement containsURLParameters, which is a map containing the parameters that replace the wildcards in the path of the REST resource described in the Apex class.For example, if the REST resource is set to
@RestResource(urlMapping='/myResource/*/mySubResource/*'), the value ofParameter1replaces the first*, and the value ofParameter2replaces the second*. -
Key names must start with
Parameter, followed by a number that shows the position of the*to be replaced. -
After the
URLParametersblock, provide the content of thebodyvalue to send to the REST resource, as shown in the exampleaccountblock. -
The
headersandcookiesfields describe the headers and cookies to pass along with the HTTP request to the desired service. -
The
queryParametersfield describes the query parameters to use, and the keys and values in this map that the specified Apex Class must accept.