SAP Connector 5.9 Additional Configuration
After you complete basic SAP Connector configuration, you can perform additional configuration tasks, such as changing advanced settings and defining extended properties.
Configure General Settings
-
At the bottom of the canvas, click Global Elements.
-
Click Create.
-
Expand Connector Configuration, select either SAP Inbound or SAP Outbound, and click OK.
-
Click the Advanced tab at the top of the Global Element Properties screen:

-
In the General section, to set the Max Idle time parameter:
-
Select Expiration policy.
-
Enter a value in the Max Idle time, and then add the Time Unit.
-
Click OK
-
| Field | Type | Description | Default Value |
|---|---|---|---|
Expiration Policy |
ExpirationPolicy |
Configures the minimum amount of time that a dynamic configuration instance can remain idle before the runtime considers it eligible for expiration. This does not mean that the platform expires the instance at the exact moment that it becomes eligible. The runtime purges the instances when appropriate. |
|
Max Idle time |
Number |
A scalar time value for the maximum amount of time a dynamic configuration instance should be allowed to be idle before it’s considered eligible for expiration. |
|
Time unit |
Enumeration one of:
|
Configure Advanced Settings

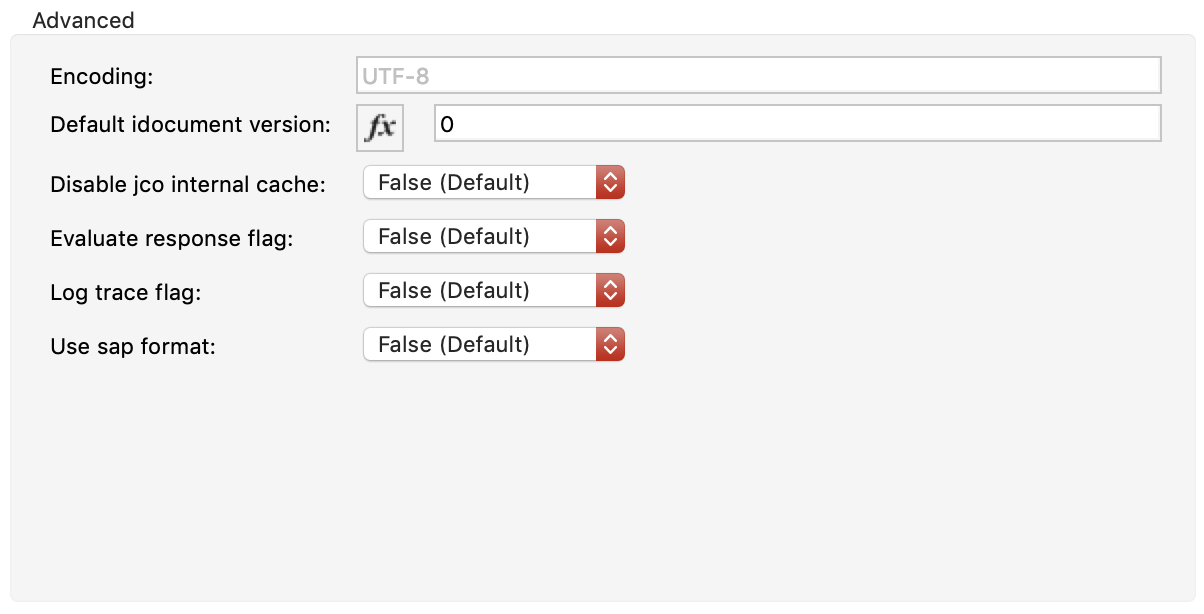
You can set encoding, version, flag, format, and timeout parameters in Advanced settings.
To change these field values, click the Advanced tab at the top of the Global Element Properties screen:
| Field | XML Attribute | Description | Default Value |
|---|---|---|---|
Display Name |
name |
Set a reference name for the endpoint used internally by the Mule configuration. |
|
Encoding |
|
Set a canonical name for an encoding. See Oracle’s supported encodings. |
|
Default IDocument Version |
|
Set the version when sending an intermediate document (IDoc). Values for the IDoc version correspond to |
|
Disable Function template cache flag |
|
Set to disable the function template cache. |
|
Evaluate response flag |
|
Set if an error response should throw an exception or let the user handle it with another result. |
|
Log trace flag |
|
Set if the trace should be logged on the Mule server. |
|
Use SAP format |
|
Set to use the SAP default format when working with business application programming interface (BAPI) functions using a synchronous remote function call (sRFC). |
false |
Define Extended Properties
Extended properties enable you to tune SAP outbound configuration parameters.
To define extended properties for the SAP connector global element:
-
Navigate to the Advanced tab on the General pane:

-
Locate the Extended Properties section at the top of the window.
-
Select the Edit inline option.
-
Click + to add a new extended property.
Use the same property name that SAP uses:
Configure the Client Environment
Configure the system variables that depend on the operating system you are using, and generate the PSE (personal security environment):
-
Use the following command to open your cmd or terminal and unpack the SAPCAR and SAP Cryptographic Library:
`SAPCAR -xvf <name_of_the_file.SAR>
This extracts files from the folder (which folder?)
-
Configure the following environment variables: (Do the variables vary by OS or are they the same and just configured differently?) * For this example, the path to the library is “C:\Users\Administrator\Desktop\SNC”:*
-
SNC_LIB
-
SECUDIR =
<Path_to_library> -
LD_LIBRARY_PATH =
<Path_to_library>\sapcrypto.dll -
SSF_LIBRARY_PATH =
<Path_to_library>\sapcrypto.dllFor Windows, the
sapcrypto.dll64bit version must be in another path and added to a new variable called SNC_LIB_64.In your cmd or terminal, use the following command to create the PSE:
sapgenpse gen_pse -v -p RFC.pseWhen you run this command, you must enter a password or PIN to use later and a distinguished name, which must be unique. You can check for names that are already used at STRUST.
-
-
Add the credentials that your session user needs to access the PSE which will create the file cred_v2 with this command: sapgenpse seclogin -p RFC -O you_user.
Next
Now that you have completed configuration, you can experiment with the SAP Examples.


