Configuring Environment Properties
You can configure your Mule application to automatically load property files based on the development environment (QA, preproduction, production, etc) you are working on, making it easier to deploy your app both on-premises and in the cloud. This configuration requires you to complete the following tasks:
-
Create a properties file for each development environment in your application.
-
Configure a properties placeholder in your app to look for the environment upon launch.
-
Set an environment variable to point to a specific development environment during application deployment.
Consider externalizing other aspects of your configuration, like time-out values, polling frequencies, and so on, even if these configurations don’t vary between environments. This configuration facilitates tuning and experimenting because the Mule application becomes fully configurable through a single properties file.
Considerations when Using Environment Properties
Consider the following guidelines when you configure environment properties:
-
Use a consistent naming strategy for your properties files and make them unique across applications.
This practice ensures that files are easy to reuse across teams. A good strategy is to add the application name or application ID to the properties file names.
-
If you are deploying multiple applications through a shared resources structure, do not set anything in the properties files.
Doing so can cause conflicts between the various apps that share a domain. Instead, you can set environment variables that span the scope of the deployed app, its domain, and other apps under that domain.
In Studio, you can create environment variables using the Environment tab of the Run Configurations menu. You can access the Environment tab from the drop-down menu to the right of the Play button.
Basic Architecture of an Environment Property Configuration
The following Mule configuration fragment defines a global property called env, a dynamic configuration properties file (based on the env property), and an HTTP connector with variable configuration:
<global-property doc:name="Global Property" name="env" value="qa" />
<configuration-properties doc:name="Configuration properties" file="${env}.yaml" />
<http:listener-config name="HttpListenerConfiguration"
                      doc:name="HTTP Listener Configuration"
                      host="${host}"
                      port="${port}"
                      basePath="${path}" />
This example uses Spring’s property placeholder resolution mechanism. The variable bits: the base path, host, and port are clearly visible and can vary for each environment where this connector gets deployed in.
When deploying your application, you can dynamically replace the env property with the particular environment to which you’re deploying, such as qa or prod. This causes the Mule application to load a different .yaml file with properties specific to the configured environment.
To provide values for these environment variables, we use a Yaml configuration file for each environment:
path: "test/products"
host: "localhost"
port: 8082
path: "products"
host: "www.acme.com"
port: 8081
Creating and Configuring Environment Properties
Create variable properties files and configure them in your application to look for the environment upon launch. Additionally, you can test environment properties in Studio. To complete these tasks review the following steps:
Using Studio Visual Editor
-
Define a list of environments you wish to support in your application. For example, one common use case involves configuring the application to support both Production and a QA environments.
We will define the variablevariablein the environmentsprodandqaand test it using a single application.
-
Right-click the
src/main/resourcesfolder, then select New > File to create a properties file for each environment you wish to support. For example:-
qa.yaml -
prod.yaml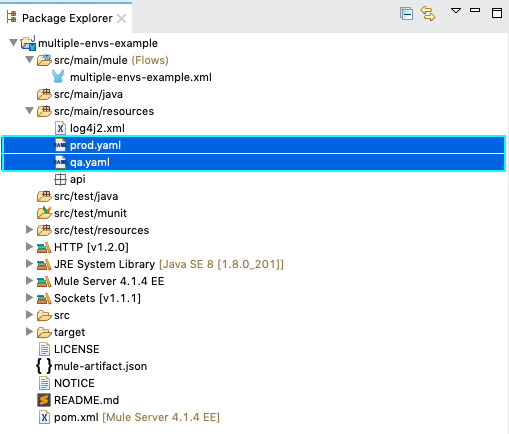
-
-
Double-click each of these new files to open them in new tabs in Studio. By editing them, you can configure the properties of the environment that correspond to the filename. For example, you may wish to add the properties as per the following images. Keep in mind that you can use these properties anywhere in your application.


-
Close the properties files.
-
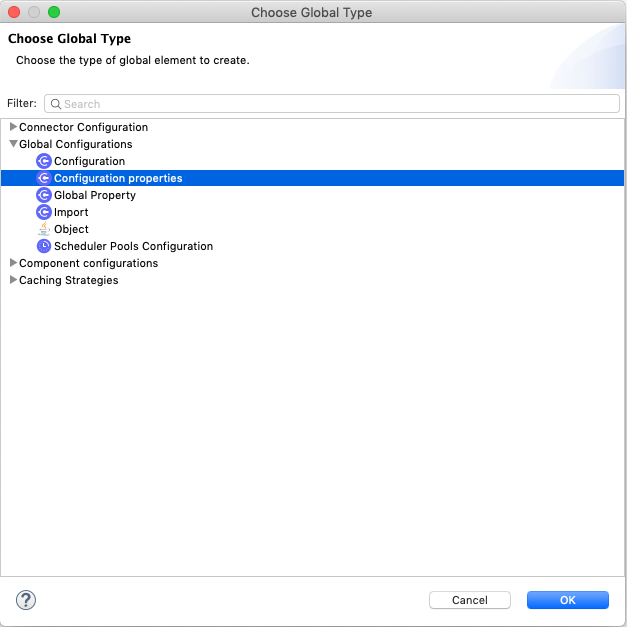
Click in the Global Elements tab of your Studio project, below the canvas.
-
Create a new global element. When selecting the element type, pick Configuration properties under Global Configurations.
-
Set the value of the File field to
${env}.yaml -
Create a new property to add a default environment. When selecting the element type, pick Global Property under Global Configurations.
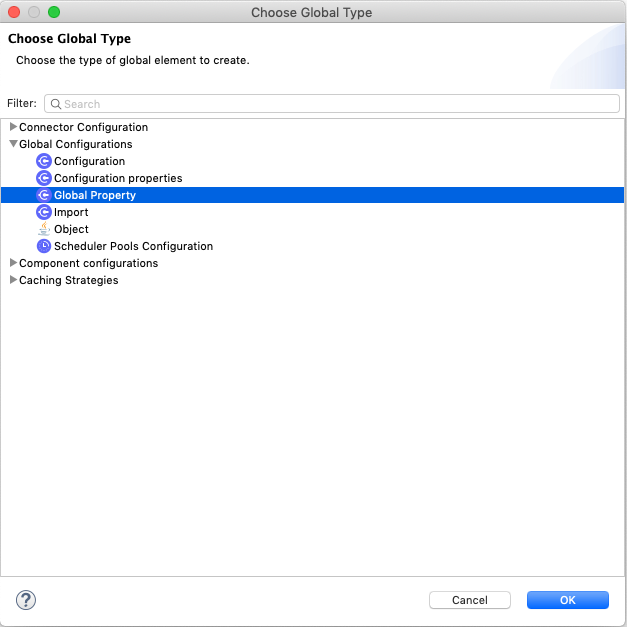
-
Set a value to the property.
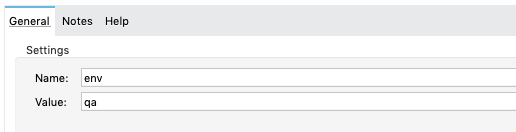
-
You can change the environment by editing the configured Global Property value.
Using XML Editor
-
Define a list of environments you wish to support in your application. For example, one common use case involves configuring the application to support both Production and a QA environments.
We will define the variablevariablein the environmentsprodandqaand test it using a single application.
-
Right-click the
src/main/resourcesfolder, then select New > File to create a properties file for each environment you wish to support. For example:-
qa.yaml -
prod.yaml
-
-
Double-click each of these new files to open them in new tabs in Studio. By editing them, you can configure the properties of the environment that correspond to the filename. For example, you may wish to add the properties as per the following images. Keep in mind that you can use these properties anywhere in your application.
-
Close the properties files.
-
Click in the Configuration XML tab of your Studio application, below the canvas.
-
Add a configuration-properties element to the XML file and let the file name configurable.
<configuration-properties doc:name="Configuration properties" file="${env}.yaml" />-
Add a Global Property element to set the default environment name.
<global-property doc:name="Global Property" name="env" value="qa" />-
You can change the environment by editing the configured Global Property value.
Testing Configured Environment Properties in Studio
You can test that your application uses the specific environment you configured in your variables properties file, by running the application in Mule embedded in Studio.
-
In the Package Explorer view, right-click the filename of the project you wish to deploy, then select Run As > Mule Application.
-
Studio automatically deploys your application according to the environment variable you specified in the Global Property from the previous procedure.
-
Again in the Package Explorer view, right-click the filename of the project you wish to deploy, then select Run As > Run Configurations….
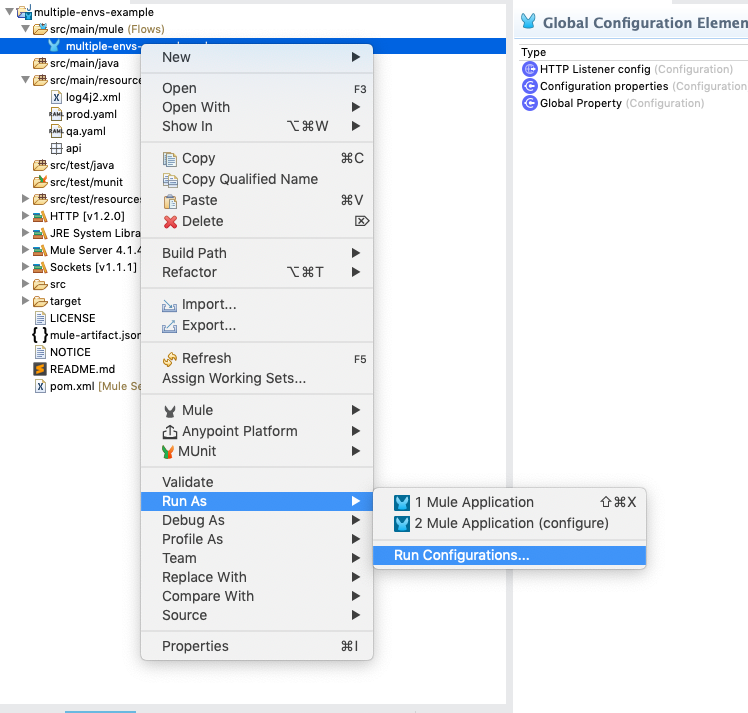
-
Define the System Property in the
Argumentstab.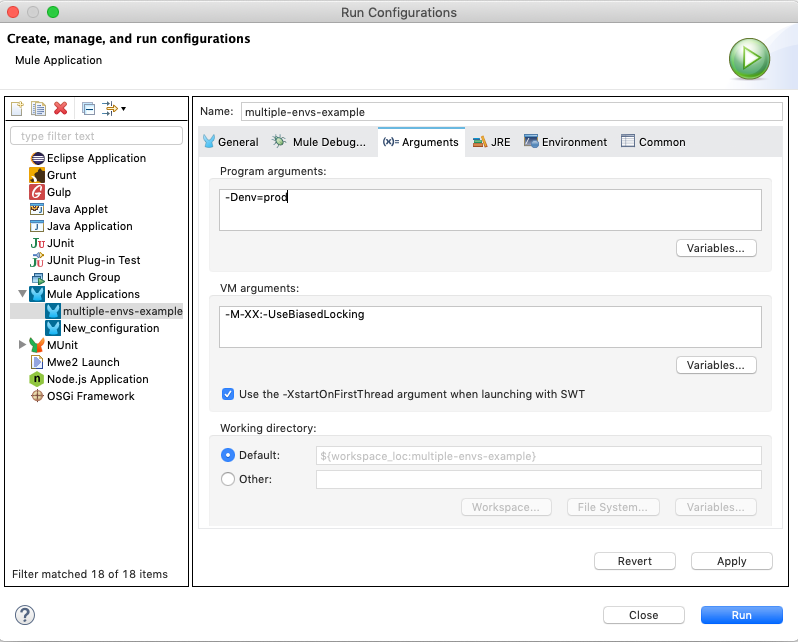
-
Click the
Runbutton to complete the procedure. The properties configured inprod.yamlwill be used instead of the ones defined inqa.yaml.
Setting Environment Variables for Application Deployment
Mule loads the environment variables when it starts, so depending on your deployment target (CloudHub or On-premises) you need to set the environment when you deploy the app (CloudHub) or when you start your Mule instance (On-premises).
Setting a Specific Environment when Starting Mule On-Premises
Using the command line
Identify the environment in which to deploy your application at runtime with an environment variable. Execute the command to run Mule in your environment as per the following example:
$ mule -M-Denv=prodOnce Mule starts with your configured environment, you can deploy the application with your desired deployment method.
Using Anypoint Runtime Manager
As a prerequisite you need to create a server in Anypoint Runtime Manager and link it to Mule. Then you can create a custom server property.
Setting a Specific Environment when Deploying to CloudHub
Deploying to CloudHub from Studio
From Studio you can initiate the process to set your properties environment variables and deploy your application to CloudHub :
-
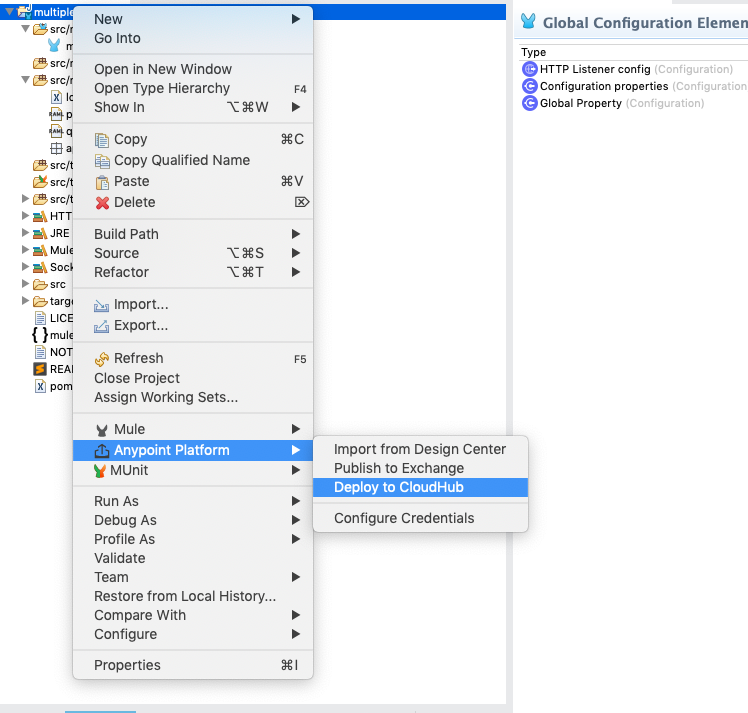
In the Package Explorer view, right-click the filename of the project you wish to deploy, then select Anypoint Platform → Deploy to Cloud.
-
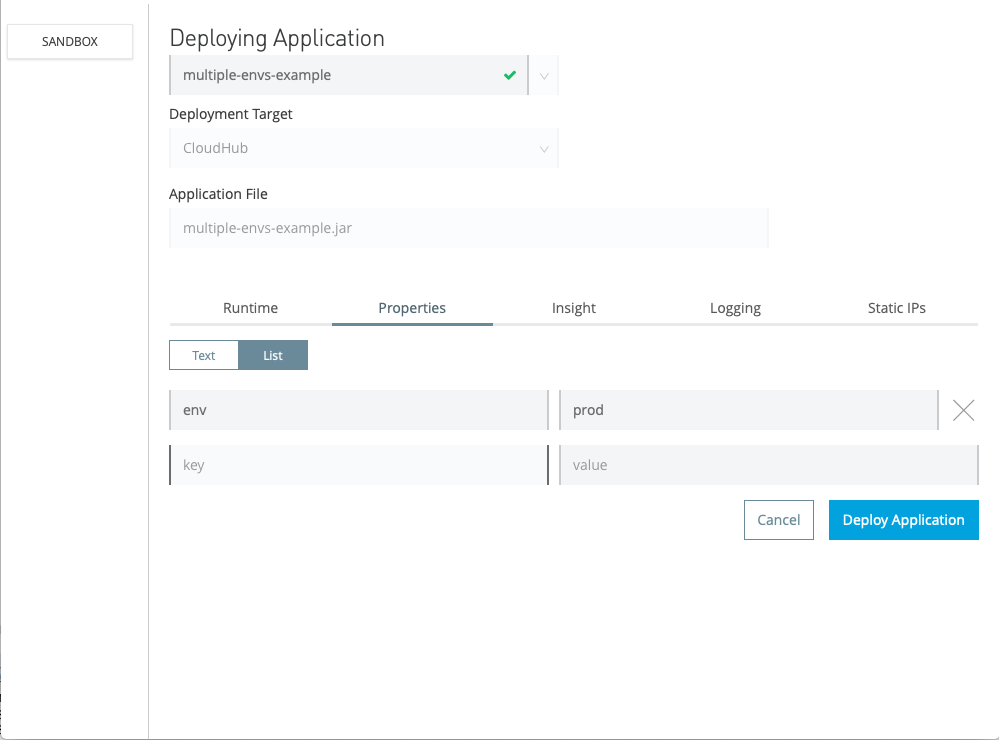
Complete the requested data, and click the Properties tab.
-
Add a new environment variable by setting Key to env and its value to prod.
-
Click Deploy Application.
Deploying to CloudHub from Runtime Manager
To deploy your application to CloudHub via Anypoint Runtime Manager, you can set properties values using Runtime Manager Console.