Using Anypoint Studio to Configure NetSuite Restlet Connector
Anypoint Studio (Studio) editors help you design and update your Mule applications, properties, and configuration files.
To add and configure a connector in Studio:
If you are new to configuring connectors in Studio, see Using Anypoint Studio to Configure a Connector. If, after reading this topic, you need additional information about the connector fields, see NetSuite Restlet Reference.
Create a Mule Project
In Studio, create a new Mule project in which to add and configure the connector:
-
In Studio, select File > New > Mule Project.
-
Enter a name for your Mule project and click Finish.
Add the Connector to Your Mule Project
Add NetSuite Restlet Connector to your Mule project to automatically populate the XML code with the connector’s namespace and schema location and add the required dependencies to the project’s pom.xml file:
-
In the Mule Palette view, click (X) Search in Exchange.
-
In Add Modules to Project, type
netsuite restletin the search field. -
Click the connector name in Available modules.
-
Click Add.
-
Click Finish.
Adding a connector to a Mule project in Studio does not make that connector available to other projects in your Studio workspace.
Configure an Input Source
An input source initiates a flow when a specified condition is met. You can configure one of these input sources to use with NetSuite Restlet Connector:
-
HTTP Listener, which initiates a flow each time it receives a request on the configured host and port -
Scheduler, which initiates a flow when a time-based condition is met
For example, to configure HTTP Listener, follow these steps:
-
In the Mule Palette view, select HTTP > Listener.
-
Drag Listener to the Studio canvas.
-
On the Listener configuration screen, optionally change the value of the Display Name field.
-
Specify a value for the Path field.
-
Click the plus sign (+) next to the Connector configuration field to configure a global element that can be used by all instances of
HTTP Listenerin the app. -
On the General tab, specify connection information.
-
On the TLS tab, optionally specify TLS information.
-
On the Advanced tab, optionally specify reconnection information, including a reconnection strategy.
-
Click Test Connection to confirm that Mule can connect with the specific server.
-
Click OK.
Add a Connector Operation to the Flow
When you add a connector operation to your flow, you immediately define a specific operation for that connector to perform.
To add an operation for NetSuite Restlet, follow these steps:
-
In the Mule Palette view, select NetSuite Restlet and then select the desired operation.
-
Drag the operation onto the Studio canvas to the right of the input source.
Configure a Global Element for the Connector
When you configure a connector, it’s best to configure a global element that all instances of that connector in the app can use. Configuring a global element requires you to provide the authentication credentials the connector uses to access the target NetSuite system.
To configure the global element for NetSuite Restlet Connector, follow these steps:
-
Select the name of the connector in the Studio canvas.
-
In the configuration screen for the operation, click the plus sign (+) next to the Connector configuration field to access the global element configuration fields.
-
On the General tab, select an authentication mechanism and configure it as described:
NetSuite Restlet Connector supports OAuth 1.0 only. -
To configure NetSuite authentication, you must have the account ID for SuiteTalk NetSuite Web Services, which you can find within the NetSuite sandbox UI under Setup > Integration > Web Service Preferences.
-
On the Advanced tab, optionally specify reconnection information, including a reconnection strategy.
-
Click Test Connection to confirm that Mule can connect with the specified server.
-
Click OK.
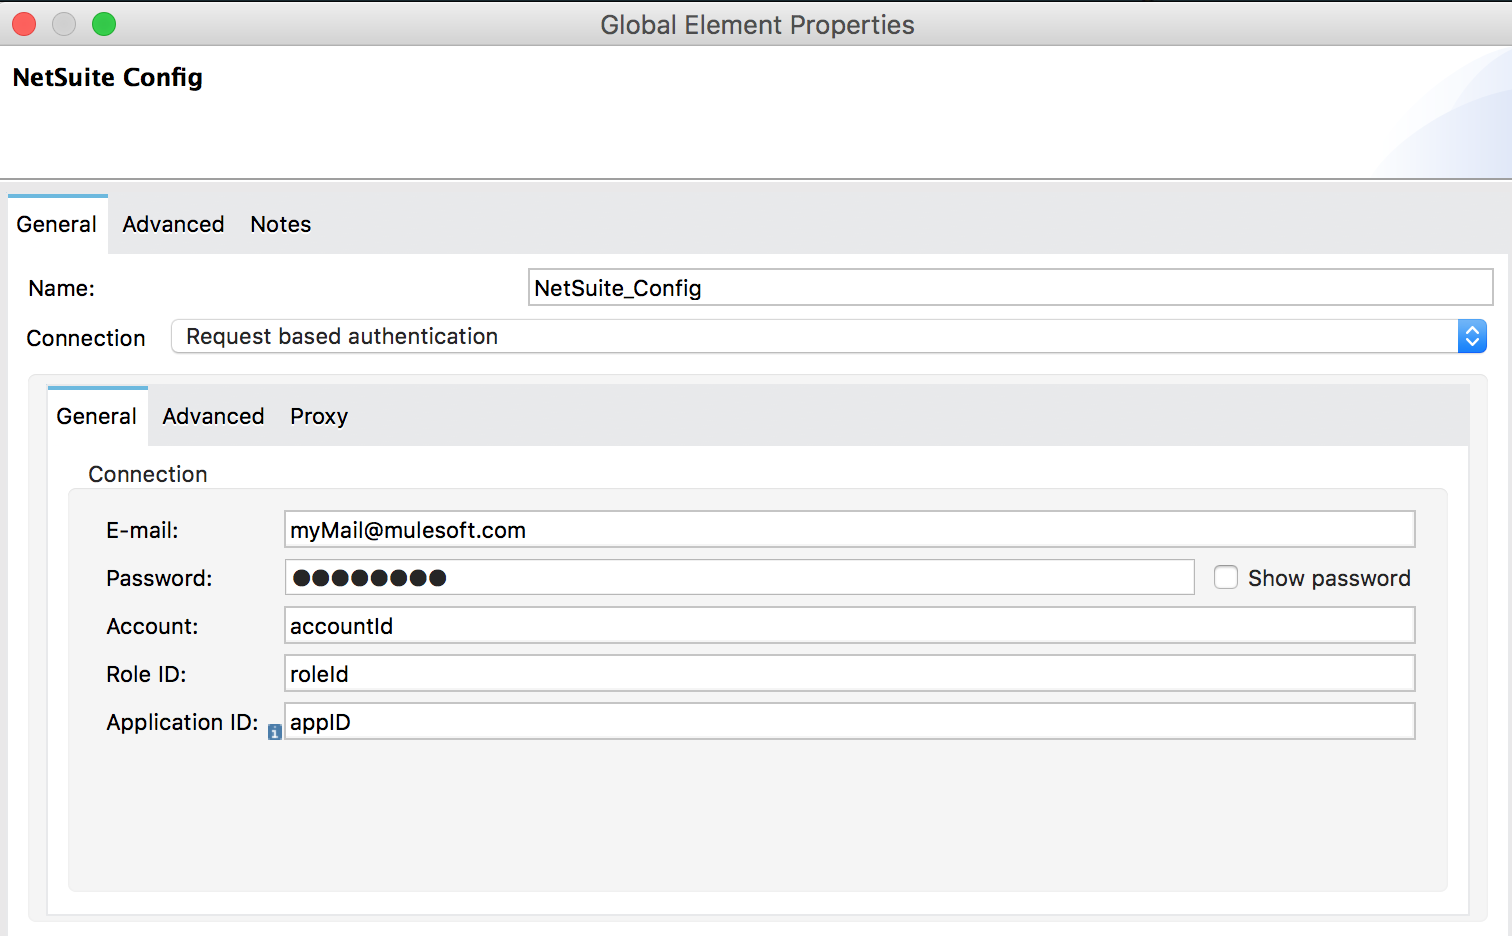
Restlet Login Authentication
Use this strategy to authenticate to NetSuite by invoking login.

+
| Parameter | Description |
|---|---|
Name |
Name for the configuration to reference in subsequent configurations of NetSuite Restlet Connector instances |
Email used to log in to the NetSuite UI |
|
Password |
Corresponding password to log in to the NetSuite UI |
Account |
Account ID for SuiteTalk NetSuite Web Services |
Role Id |
Role ID for the user in SuiteTalk, which determines the processor privileges |
Application Id |
Application ID corresponding to the integration record to use |
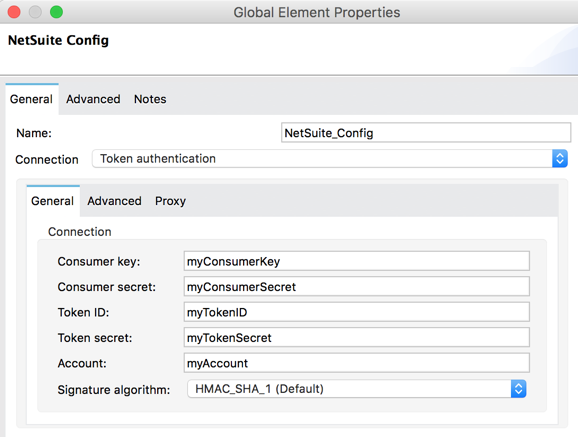
Restlet Token Authentication
This token-based authentication method uses either a consumer and token key or secret pairs, which are established within the NetSuite environment:

+
| Parameter | Description |
|---|---|
Consumer Key |
Consumer key value for the token-based authentication-enabled integration record to use |
Consumer Secret |
Consumer secret value for the token-based authentication-enabled integration record to use |
Token ID |
Token ID that represents the unique combination of a user and an integration record that is generated within the NetSuite environment |
Token Secret |
Respective token secret for the user and an integration record pair |
Account |
Account ID for SuiteTalk NetSuite Web Services |
Signature algorithm |
Type of HMAC signature algorithm |
Next Steps
After configuring Studio, see the Call NetSuite RESTlets Example topic for more configuration ideas.


