Developing a Custom Response Policy
When you are ready to develop your custom policy, follow the "Good Weather company" example to learn how to plan, develop, and implement your own policy later. Creating a policy involves the following steps:
-
Evaluate your use case based on the use case provided.
The Use Case
To better understand how to implement a custom policy, imagine an example "Good Weather" company that is in the business of forecasting weather for a given location and time. Good Weather collects quantitative data about the current state of the atmosphere at a given place and, using meteorology, predicts how that current state will change over time.
Based on the current weather patterns, Good Weather wants to provide the capability to add custom responses to the weather forecast in the consuming application. The application must be able to manipulate the status code and response message based on a series of conditions that are evaluated on each request.
Telstra is an IT company that develops operating systems and applications for mobile and home computing technologies. Telstra wants to integrate with Good Weather to display daily weather forecasts on mobiles and PCs.
Good Weather uses an HTTP proxy with a Basic Authentication policy applied to it. Each time a request arrives, the policy checks the bearer token and performs one of the following tasks:
-
Allow the request to reach the backend, or
-
Reject the request, if validation is not successful, with a 401 Unauthorized Status code.
But what if, in case of unauthorized access, Telstra wants to include a different message each time it receives a 401 error. Developing a custom response policy allows Telstra to change the response message and status code based on a series of different conditions. For example,Telstra can state that if the response contains an Unauthorized status code, they modify the response payload accordingly.
However, if Telstra requires the application to provide its users with a custom response in case of a failed validation based on specific conditions, no default policy can work. For example, imagine that Telstra wants its application to not just return an error code but also provide additional response payload. In such a scenario, Telstra needs to create a custom policy.
Setting Up the Project
Telstra starts developing a custom policy by first creating a custom policy archetype project. Then Telstra runs the archetype, replacing the parameters shown here in bold with their own parameters.
-
DgroupIdis Telstra Organization ID. -
DartifactIdis thecustom-response-policyvalue.You can set it to any other value as required.
-
Dversionis 1.0.0.Note that
DartifactIdandDversiondo not have any restrictions.
mvn -Parchetype-repository archetype:generate \
-DarchetypeGroupId=org.mule.tools \
-DarchetypeArtifactId=api-gateway-custom-policy-archetype \
-DarchetypeVersion=1.2.0 \
-DgroupId=<Telstra_organization_ID> \
-DartifactId=custom-response-policy \
-Dversion=1.0.0 \
-Dpackage=mule-policy
Creating the YAML Configuration File
After Telstra sets up a project, they start adding dependencies and components to customize it. They start by defining the input parameters of the policy to configure in API Manager:
-
Specify the conditions used to evaluate the request and response.
-
If conditions are parametric, then DataWeave expressions are created.
-
API Manager verifies whether the conditions are met at the same time.
-
If the conditions are met, the status code is set.
-
If the conditions are met, the payload is set.
The following code snippet shows an example YAML file for the policy UI:
  id: Custom Response
  name: Custom Response
  description: Modifies the payload and/or the status code when some condition is met.
  category: Custom
  type: custom
  resourceLevelSupported: true
  encryptionSupported: false
  standalone: true
  requiredCharacteristics: []
  providedCharacteristics: []
  configuration:
   - propertyName: evaluateInRequest
     name: Evaluate in the request
     description: If the condition should be evaluated in the request.
     type: boolean
     optional: true
     defaultValue: false
   - propertyName: requestCondition
     name: Request Condition
     description: Dataweave expression that will be evaluated to define if the request should be modified.
     type: expression
     optional: true
     sensitive: false
     allowMultiple: false
     dependsOnKey: evaluateInRequest
     dependsOnValue: true
   - propertyName: evaluateInResponse
     name: Evaluate in the response
     description: If the condition should be evaluated in the response.
     type: boolean
     optional: true
     defaultValue: false
   - propertyName: responseCondition
     name: Response Condition
     description: Dataweave expression that will be evaluated to define if the request should be modified.
     type: expression
     optional: true
     sensitive: false
     allowMultiple: false
     dependsOnKey: evaluateInResponse
     dependsOnValue: true
   - propertyName: mergeBothConditions
     name: Merge both conditions
     description: Check if both request and response conditions need to be met.
     type: boolean
     optional: true
     defaultValue: false
   - propertyName: statusCode
     name: Status Code
     type: int
     minimumValue: 0
     maximumValue: 999
     description: Status code to return when the condition is met.
     optional: true
     sensitive: false
     allowMultiple: false
   - propertyName: payload
     name: Payload
     type: expression
     description: Expression that sets the payload to return when the condition is met.
     optional: true
     sensitive: false
     allowMultiple: false
In the example, the dependsOnKey and dependsOnValue parameters specify that the key indicated in dependsOnKey must be set to the value indicated in dependsOnValue, to display the fields responseCondition or requestCondition.
Parameters using the dependsOnKey must be optional: true.
|
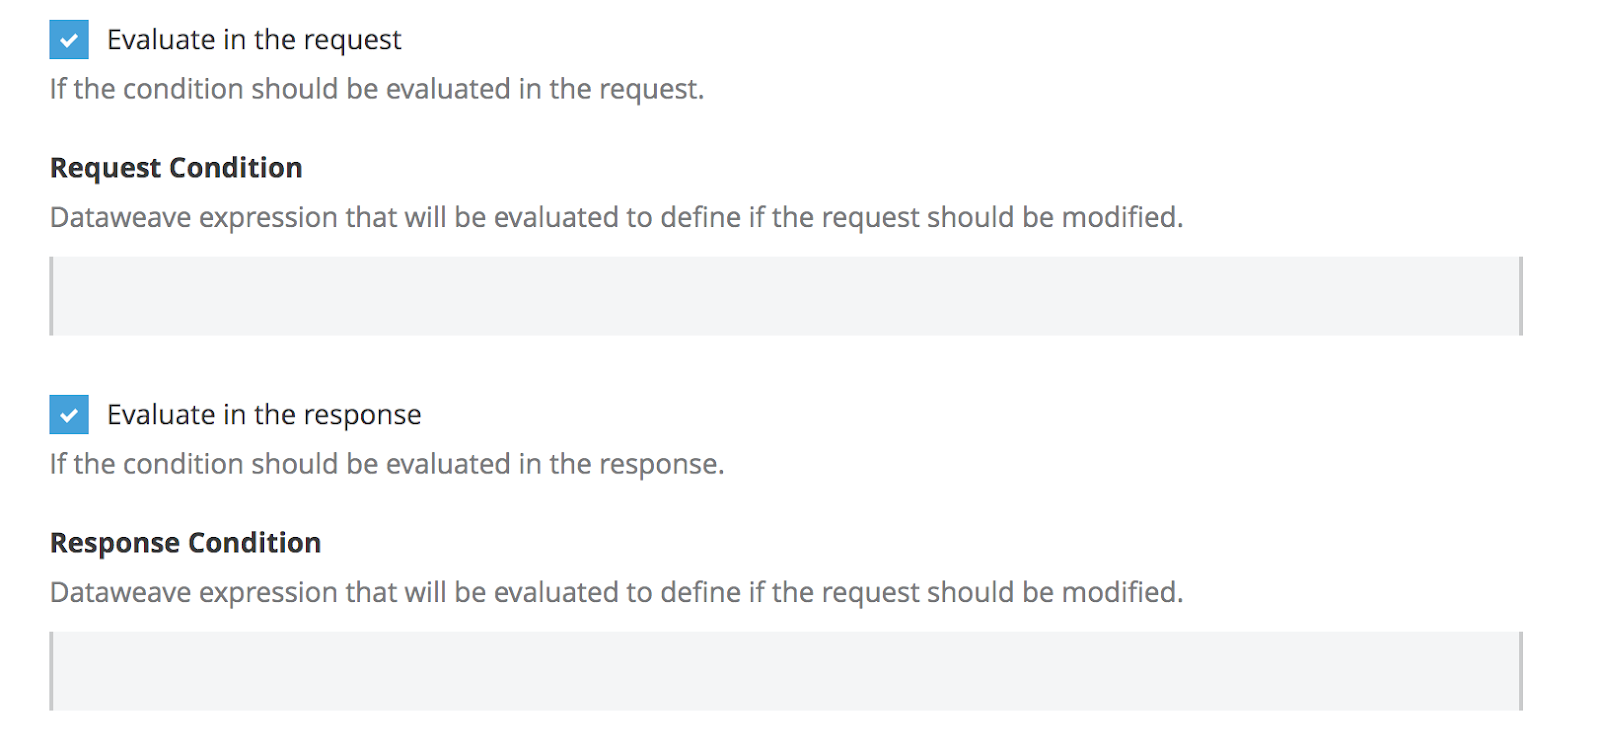
In the UI, this translates to a checkbox in evaluateInTheRequest or evaluateInTheResponse that causes either the requestCondition or the responseCondition field to appear, depending on the value of the checkbox.
For more information about how to set up of the YAML file, see YAML Configuration File.
Based on the example, the UI is generated as:

The following screenshot illustrates the dependsOnKey and dependsOnValue parameters:
Implementing the Policy
After Telstra has defined the input parameters for their policy, they can start implementing their policy as follows:
-
Add dependencies in the
pom.xmlfile. -
Add conditions in the
template.xmlfile.
Add Dependencies in pom.xml File
To transform the custom response with the new status code and payload, Telstra must create an extension. This helps them to avoid developing the boilerplate code to transform the response message:
-
In the
pom.xml, Telstra includes all the dependencies that they need to use.In this case, they need only the http-policy-transform-extension, which helps them to easily modify the response information.
-
In the
<dependencies>section of the policypom.xmlfile, Telstra includes the following dependencies:
<dependency>
   <groupId>com.mulesoft.anypoint</groupId>
   <artifactId>mule-http-policy-transform-extension</artifactId>
   <version>${httpPolicyTransformVersion}</version>
   <classifier>mule-plugin</classifier>
</dependency>
For more information about how to create your own connector in Java, see Getting Started with the Mule SDK for Java.
Add Conditions in template.xml File
Telstra must now associate the YAML file with the Handlebars. The YAML file, is used to complete the fields in the XML, for example, to create the expressions that will be used, or to add an entire block of code.
In the template.xml file, Telstra must include the following code:
{{#if evaluateInRequest}}
<set-variable variableName="requestConditionMet" value="{{{requestCondition}}}" />
{{/if}}
<http-policy:execute-next/>
{{#if evaluateInResponse}}
<set-variable variableName="responseConditionMet" value="{{{responseCondition}}}" />
{{/if}}
Note that the pieces of code in double braces ({{}}) correspond to Handlebars syntax, which uses a template engine to compose the policy template with the configuration defined in the YAML file. The values used to configure the template must be the keys defined earlier in the YAML configuration file. Both values must match. Misspelling in any of the parameters can generate errors.
In the previous example, the parameters evaluateInRequest and evaluateInResponse define elements that will hold the value of the condition to be evaluated, defined in requestCondition and responseCondition.
For example, when you configure your policy, you want to validate that a particular header is present in the request. However, you do not want to check anything in the response. In this case, your policy configuration looks like this:
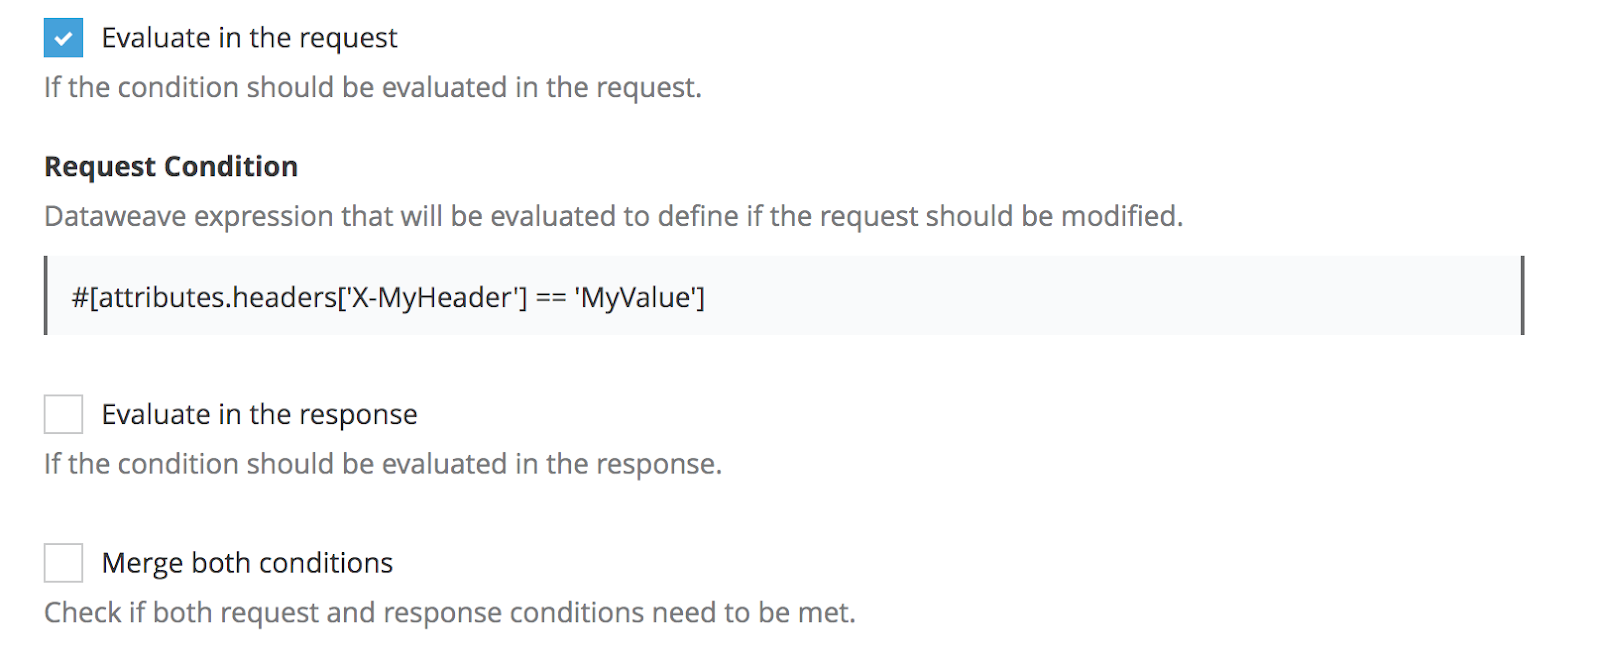
When deployed, the template is resolved as displayed in the following code example. Because you did not specify any response condition, the Handlebars do not include it in the resolved template.
<set-variable variableName="requestConditionMet" value="#[attributes.headers['X-MyHeader'] == 'MyValue']" />
<http-policy:execute-next/>
Telstra then completes the logic of their template file with the following code:
<choice>
   {{#if mergeBothConditions}}
   <when expression="#[(vars.requestConditionMet default false) and (vars.responseConditionMet default false)]" >
       {{#if statusCode}}
       <set-variable variableName="statusCode" value="{{statusCode}}" />
       {{/if}}

       {{#if payload}}
       <set-variable variableName="payload" value="{{{payload}}}" />
       {{/if}}

       <http-transform:set-response statusCode="#[vars.statusCode default attributes.statusCode]">
           <http-transform:body>#[vars.payload default payload]</http-transform:body>
           <http-transform:headers>#[attributes.headers]</http-transform:headers>
       </http-transform:set-response>
   </when>
   {{else}}
   <when expression="#[(vars.requestConditionMet default false) or (vars.responseConditionMet default false)]" >
       {{#if statusCode}}
       <set-variable variableName="statusCode" value="{{statusCode}}" />
       {{/if}}

       {{#if payload}}
       <set-variable variableName="payload" value="{{{payload}}}" />
       {{/if}}

       <http-transform:set-response statusCode="#[vars.statusCode default attributes.statusCode]">
           <http-transform:body>#[vars.payload default payload]</http-transform:body>
           <http-transform:headers>#[attributes.headers]</http-transform:headers>
       </http-transform:set-response>
   </when>
   {{/if}}
</choice>
To modify the payload and the status code, if set, Telstra uses the http-policy-transform-extension parameter that is included in the dependencies.
Notice how Handlebars is used to resolve pieces of the template, as described earlier.
Telstra’s Custom Response policy is now ready to be uploaded to Exchange and tested.
Uploading to Exchange
To upload a custom policy to Exchange, Telstra must verify that their pom.xml file is correctly configured for their organization.
Task Prerequisites
Before Telstra uploads their policy to Exchange, they verify that:
-
A new server is created in their Maven
settings.xmlfile. -
A unique ID is assigned, and the username and password of the Exchange credentials exist.
-
The URL matches their region.
Warning: When you perform similar actions to create your own custom policy, note that the template uses the URL that corresponds to the US region. If your account does not belong to this region, change this value.
-
The repository ID matches the one from the Maven settings.
Tip: You can define an alias to that repository using the name tag.
<servers>
      <server>
         <id>your_server_id</id>
         <username>your_username</username>
         <password>your_password</password>
       </server>
</servers>
Next, Telstra goes to their policy pom.xml file and locates the distributionManagement section:
<distributionManagement>
    <repository>
        <id>your_server_id</id>
        <name>My Repository</name>
        <url>${exchange.url}</url>
        <layout>default</layout>
    </repository>
</distributionManagement>
After Telstra checks the configuration of the servers, they begin uploading their policy to Exchange using the following command:
> mvn deployThe custom policy that Telstra developed is now uploaded to Exchange.
