
Zuora AQuA Connector Studio Configuration
To configure a connector in Anypoint Studio, follow this process:
-
Add the connector to your Mule project.
-
Configure the connector.
-
Configure an input source for the connector.
Add the Connector to Your project
Anypoint Studio provides two ways to add the connector to your Mule project:
-
From the Exchange button in the Studio taskbar
-
From the Mule Palette view
Add the Connector Using Exchange
-
In Studio, create a Mule Project.
-
Click the Exchange (X) icon in the upper-left of the Studio task bar.
-
In Exchange, click Login and supply your Anypoint Platform username and password.
-
In Exchange, search for Zuora AQuA.
-
Select the connector and click Add to project.
-
Follow the prompts to install the connector.
Configure an Input Source
Configure an input source for the connector, such as an operation for this connector, HTTP Listener, or Scheduler.
Configure the Connector
To configure this connector:
-
Drag a connector operation into the Studio canvas.
-
To create a global element for the connector, set these fields:
-
Username: Zuora username
-
Password: Zuora password
-
Base Uri: Base path of the AQuA API for your instance. For example:
https://rest.apisandbox.zuora.com:443/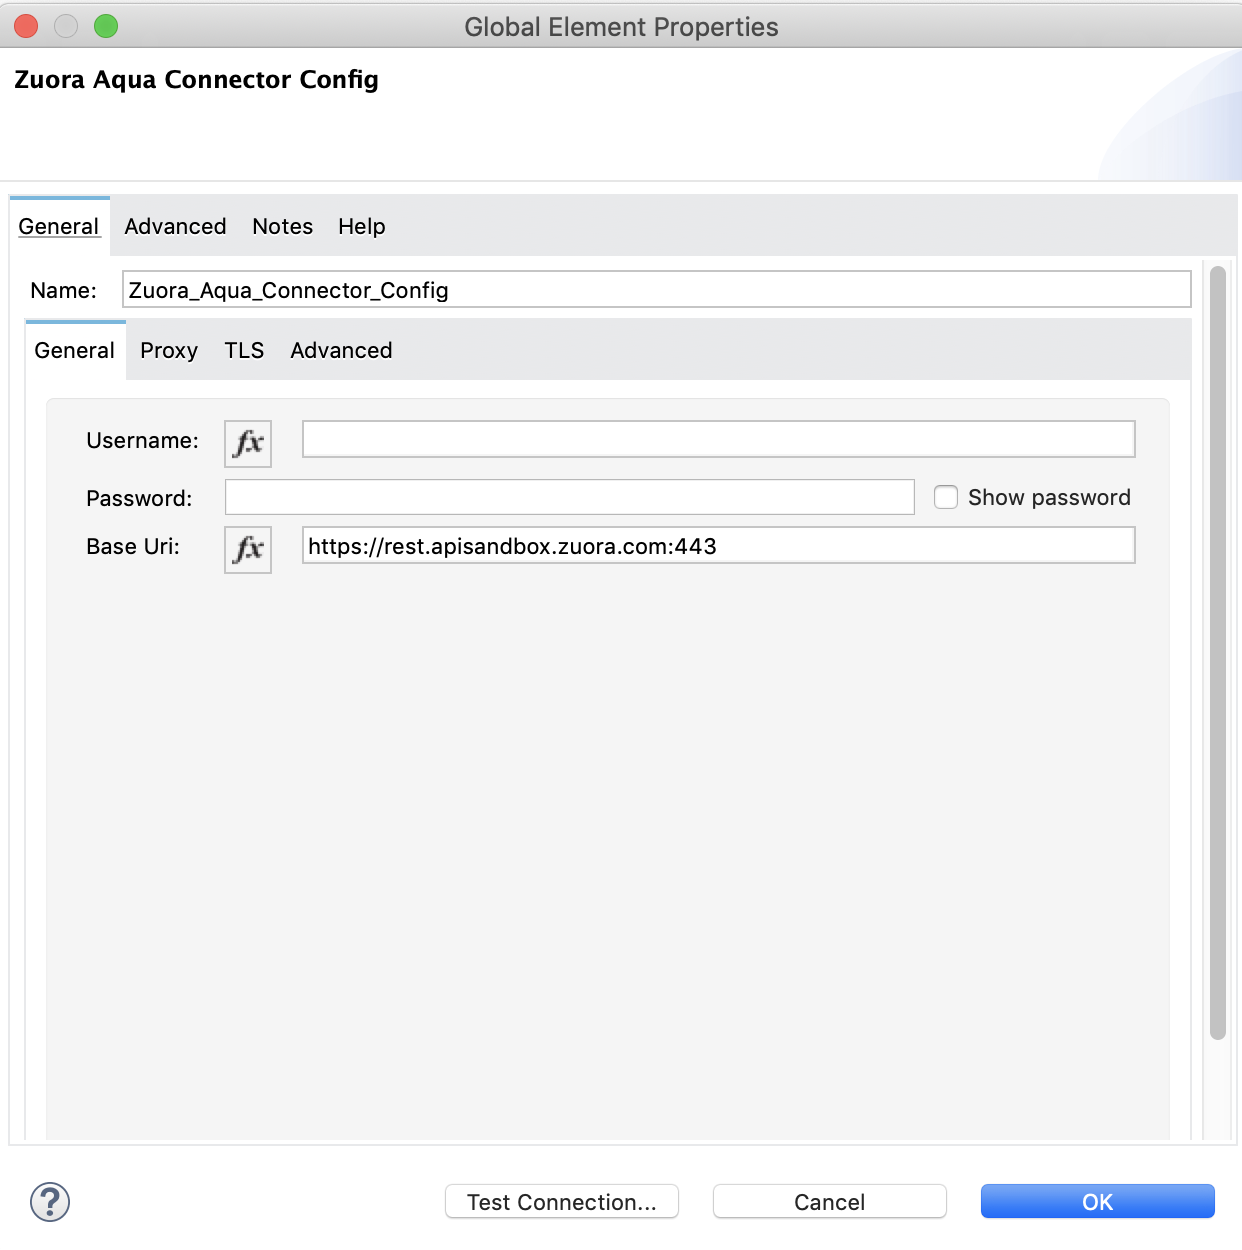
-
Next Step
After configuring this connector in Studio, see the Zuora AQuA Examples section to experiment with the Zuora AQuA connector.