
Pass Runtime Properties and Arguments to Mule Applications
Configure runtime behavior, secure sensitive data, and test different environments by passing properties and arguments to Mule applications running locally in Anypoint Code Builder.
Use command-line properties to switch between development, sandbox, and production configurations, provide encryption keys for secure properties, and override default values without modifying application code.
You can pass properties when running Mule applications locally through different methods.
-
Global default arguments: Apply the same arguments to all Mule applications
-
Project-specific launch configurations: Configure arguments for individual projects or create multiple configurations with different settings
Configure Global Default Arguments
Configure arguments that apply to all Mule application runs in Anypoint Code Builder. Use this approach when you consistently need the same encryption key or environment setting across all projects during local development.
To configure global default arguments:
-
Open Mule settings:
-
If an API specification is open in the Explorer panel, close the project to avoid a synchronization error when you switch clouds.
-
Click File > Close Folder.
-
-
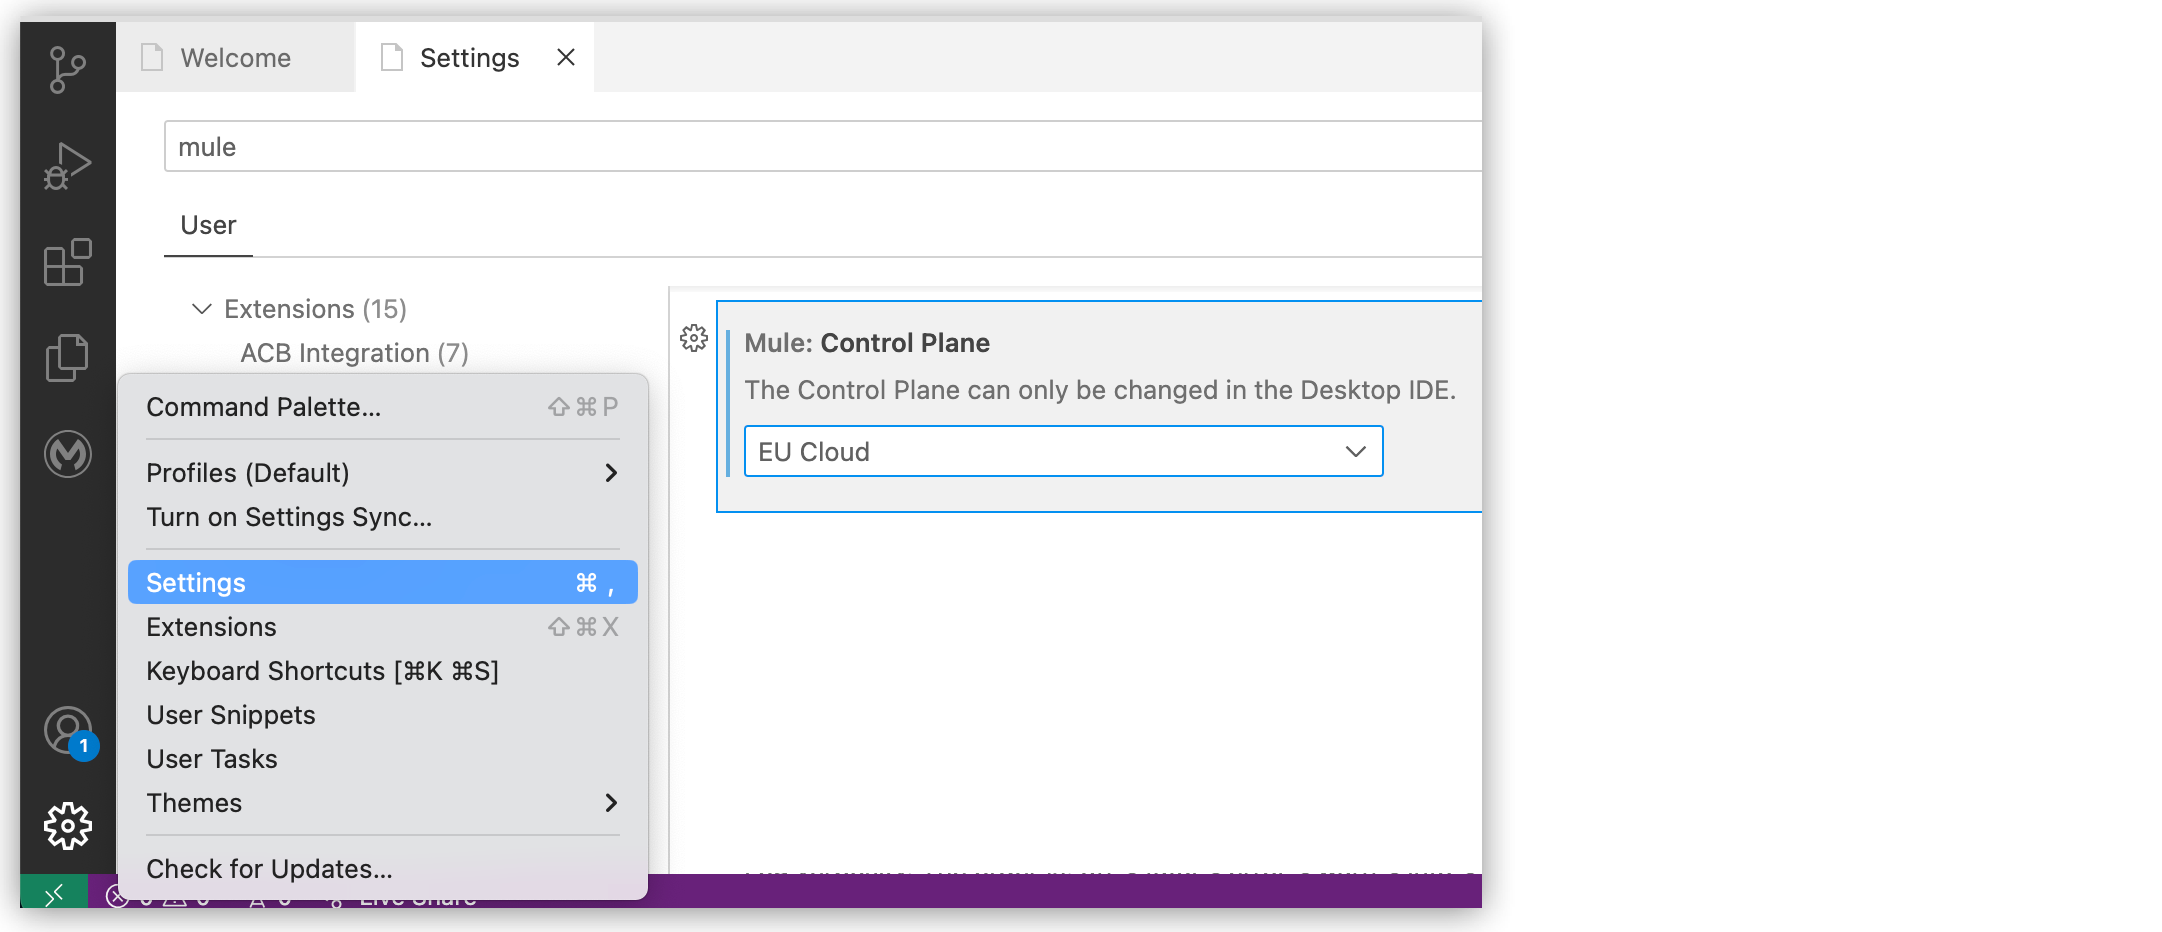
Open the Settings panel:
-
Find the Mule › Runtime: Default Arguments setting.
-
In the Runtime: Default Arguments field, append your arguments using the
-M-Dprefix followed by the property name and value:-M-Dencryption.key=myEncryptionKey123To add multiple arguments, separate them with spaces:
-M-Dencryption.key=myEncryptionKey123 -M-Denv=dev -M-Dhttp.port=8082 -
Run or debug your Mule application:
-
Open the Command Palette.
Show me how
-
Use the keyboard shortcuts:
-
Mac: Cmd+Shift+p
-
Windows: Ctrl+Shift+p
-
-
Select View > Command Palette.
Select View: Show Run and Debug, then click Run and Debug.
Mule Runtime engine receives the configured arguments each time you run any application.
-
Understand Property Syntax
The -M-D prefix passes system properties to the Java Virtual Machine (JVM) that runs Mule Runtime engine. These properties become available throughout your Mule application and can be referenced in configuration XML files.
When configuring properties in the Runtime: Default Arguments field:
-
Use the
-M-Dprefix followed by the property name and value:-M-Dname=value -
Separate multiple properties with spaces
-
Avoid quotes around values unless the value contains spaces
-
Property names are case-sensitive
-M-Dencryption.key=mySecretKey
-M-Denv=dev
-M-Dhttp.port=8081
-M-Ddatabase.host=localhost
-M-Dmule.env=development
Configure Project-Specific Launch Configurations
Configure arguments for individual projects or create multiple run configurations with different settings for the same project. Use this approach when different projects require different configurations, or to test the same project with different property values.
Launch configurations reside in the .vscode/launch.json file in your project directory and apply only to that project.
Create or Modify a Launch Configuration
To configure project-specific arguments:
-
Open the Command Palette.
Show me how
-
Use the keyboard shortcuts:
-
Mac: Cmd+Shift+p
-
Windows: Ctrl+Shift+p
-
-
Select View > Command Palette.
-
-
Enter and select Open 'launch.json'.
If the file doesn’t exist, VS Code creates it in the
.vscodefolder of your project. -
In the
launch.jsonfile, locate or create a configuration object within theconfigurationsarray. -
Add or modify the
mule.runtime.argsproperty to include your arguments:{ "version": "0.2.0", "configurations": [ { "type": "mule-xml-debugger", "request": "launch", "name": "Debug Mule Application", "mule.project": "${workspaceFolder}", "mule.home": "${config:mule.homeDirectory}", "mule.runtime.args": "${config:mule.runtime.defaultArguments} -M-Dencryption.key=myKey -M-Denv=dev" } ] } -
Save the
launch.jsonfile. -
Run or debug your application by selecting the configuration from the Run and Debug view.
Test the Same Project with Different Property Values
Create multiple launch configurations with different property values to test various environments without editing the configuration file each time. For conceptual information about creating and managing launch configurations, see Running Multiple Mule Applications Concurrently.
The key difference when configuring properties is to vary the mule.runtime.args values for each configuration:
{
  "version": "0.2.0",
  "configurations": [
    {
      "type": "mule-xml-debugger",
      "request": "launch",
      "name": "Debug - Development",
      "mule.project": "${workspaceFolder}",
      "mule.home": "${config:mule.homeDirectory}",
      "mule.runtime.args": "${config:mule.runtime.defaultArguments} -M-Denv=dev -M-Dhttp.port=8081"
    },
    {
      "type": "mule-xml-debugger",
      "request": "launch",
      "name": "Debug - Sandbox",
      "mule.project": "${workspaceFolder}",
      "mule.home": "${config:mule.homeDirectory}",
      "mule.runtime.args": "${config:mule.runtime.defaultArguments} -M-Denv=sandbox -M-Dhttp.port=8082"
    }
  ]
}
Switch between configurations using the dropdown in the Run and Debug view.
Use Environment Variables in Launch Configurations
Reference environment variables defined on your system to avoid hardcoding sensitive values in launch.json:
{
  "version": "0.2.0",
  "configurations": [
    {
      "type": "mule-xml-debugger",
      "request": "launch",
      "name": "Debug with Environment Variables",
      "mule.project": "${workspaceFolder}",
      "mule.home": "${config:mule.homeDirectory}",
      "mule.runtime.args": "${config:mule.runtime.defaultArguments} -M-Dencryption.key=${env:ENCRYPTION_KEY} -M-Denv=${env:MULE_ENV}"
    }
  ]
}
Reference environment variables using the ${env:VARIABLE_NAME} syntax. The example configuration references ENCRYPTION_KEY and MULE_ENV from your system environment.
Common Use Cases and Examples
These examples demonstrate common scenarios for passing runtime properties and arguments, such as configuring HTTP listener ports and database connection parameters.
For examples of passing encryption keys and switching between environment-specific property files, see Defining and Securing Properties for a Mule Application.
Example: Set HTTP Listener Port Dynamically
Set the HTTP listener port at runtime without modifying your configuration XML:
-M-Dhttp.port=8082{
"version": "0.2.0",
"configurations": [
{
"type": "mule-xml-debugger",
"request": "launch",
"name": "Debug on Port 8082",
"mule.project": "${workspaceFolder}",
"mule.home": "${config:mule.homeDirectory}",
"mule.runtime.args": "${config:mule.runtime.defaultArguments} -M-Dhttp.port=8082"
}
]
}Reference the property in your HTTP listener configuration:
<http:listener-config name="HTTP_Listener_config" >
  <http:listener-connection host="0.0.0.0" port="${http.port}" />
</http:listener-config>
Example: Increase JVM Heap Size
Increase the maximum JVM heap size when running memory-intensive Mule applications locally. Use the -M-Xmx flag to set the maximum heap and -M-Xms to set the initial heap.
-M-Xms512m -M-Xmx2g{
"version": "0.2.0",
"configurations": [
{
"type": "mule-xml-debugger",
"request": "launch",
"name": "Debug with Increased Heap",
"mule.project": "${workspaceFolder}",
"mule.home": "${config:mule.homeDirectory}",
"mule.runtime.args": "${config:mule.runtime.defaultArguments} -M-Xms512m -M-Xmx2g"
}
]
}You can combine heap size flags with other arguments, such as environment properties or encryption keys:
-M-Xmx2g -M-Denv=dev -M-Dencryption.key=myKeyExample: Provide Database Connection Parameters
Provide database connection parameters at runtime to switch between local and remote databases:
-M-Ddb.host=localhost -M-Ddb.port=3306 -M-Ddb.name=mydb{
"version": "0.2.0",
"configurations": [
{
"type": "mule-xml-debugger",
"request": "launch",
"name": "Debug with Local Database",
"mule.project": "${workspaceFolder}",
"mule.home": "${config:mule.homeDirectory}",
"mule.runtime.args": "${config:mule.runtime.defaultArguments} -M-Ddb.host=localhost -M-Ddb.port=3306 -M-Ddb.name=mydb"
},
{
"type": "mule-xml-debugger",
"request": "launch",
"name": "Debug with Remote Database",
"mule.project": "${workspaceFolder}",
"mule.home": "${config:mule.homeDirectory}",
"mule.runtime.args": "${config:mule.runtime.defaultArguments} -M-Ddb.host=remote-db.example.com -M-Ddb.port=3306 -M-Ddb.name=proddb"
}
]
}Reference these properties in your database configuration:
<db:config name="Database_Config" >
  <db:my-sql-connection
    host="${db.host}"
    port="${db.port}"
    database="${db.name}"
    user="${db.user}"
    password="${secure::db.password}" />
</db:config>
Configure Shared Encryption Keys Across a Workspace
When you have multiple Mule projects in the same workspace that use the same encryption key, configure it once at the workspace level instead of duplicating it in each project’s launch.json.
Use the approach that better applies to your workflow and security requirements.
-
Workspace Settings: Configure the encryption key in your workspace settings.json. All projects inherit the setting automatically.
-
Environment Variable: Store the key as an OS environment variable in your shell profile. Use this method to keep encryption keys completely out of version-controlled files or if you need machine-specific configuration.
-
Multi-Root Workspace: Configure the encryption key directly in a .code-workspace file. Use this approach when working with multiple Mule projects open simultaneously in a multi-root workspace.
Use Workspace Settings
Add the encryption key to your workspace settings.json so all projects inherit it.
-
In your
.code-workspacefile or.vscode/settings.jsonat the workspace root, add the key.{ "settings": { "mule.runtime.defaultArguments": "-M-Dencryption.key=MuleSecureKey024" } } -
Reference the shared setting in each project’s
launch.json.{ "mule.runtime.args": "${config:mule.runtime.defaultArguments}" }
Use an Environment Variable
Set the key as an OS environment variable in your shell profile (~/.zshrc or ~/.bash_profile)
-
Run this command.
export MULE_ENCRYPTION_KEY="MuleSecureKey024" -
Reference the key in the workspace
launch.json:{ "version": "0.2.0", "configurations": [ { "type": "mule-xml-debugger", "request": "launch", "name": "Debug with Environment Variable", "mule.project": "${workspaceFolder}", "mule.home": "${config:mule.homeDirectory}", "mule.runtime.args": "${config:mule.runtime.defaultArguments} -M-Dencryption.key=${env:MULE_ENCRYPTION_KEY}" } ] }
Use a Shared Launch Configuration in Multi-Root Workspaces
To configure a shared encryption key in a multi-root workspace:
-
Open or create your
.code-workspacefile. -
Add a
launchsection to the workspace configuration with the encryption key:{ "folders": [ (1) { "path": "salesforce-sync" }, { "path": "netsuite-integration" }, { "path": "slack-notifications" } ], "launch": { (2) "configurations": [ { "type": "mule-xml-debugger", "request": "launch", "name": "Run Mule App (Shared Key)", (3) "noDebug": true, "mule.projects": ["${workspaceFolder}"], "mule.runtime.args": "${config:mule.runtime.defaultArguments} -M-Dencryption.key=MuleSecureKey024" (4) } ] } }1 List the relative paths to each Mule project in your workspace 2 Add the launch configuration section with the shared encryption key 3 Name that appears in the Run and Debug dropdown 4 Replace MuleSecureKey024with your encryption key -
Save the workspace file.
When you select Run Mule App (Shared Key) from the Run and Debug dropdown, Code Builder applies the shared encryption key to whichever project is active.
Protect Workspace Configuration in .gitignore
If your workspace settings contain sensitive values, add them to .gitignore:
# Workspace config (may contain encryption key)
*.code-workspace
.vscode/settings.json
Re-encrypt All Projects After Key Rotation
When you rotate the shared key, re-encrypt every secure properties file across all projects:
NEW_KEY="NewSharedKey2025!"

# For each project in the workspace:
for project in salesforce-sync netsuite-integration slack-notifications; do
  FILE="$project/src/main/resources/prod.secure.properties"
  if [ -f "$FILE" ]; then
    echo "Re-encrypting: $FILE"
    # Decrypt each value with old key, re-encrypt with new key
    # (or use a local backup file with plaintext to re-encrypt)
  fi
done
Then update the single workspace-level key reference and all projects work immediately.