Step 8: Integrate the Automation with Composer Flows
After successfully publishing the process automation, you can connect your MuleSoft RPA account with MuleSoft Composer and start the automated process from a Composer flow. During this step, you create a new MuleSoft Composer flow, configure a trigger, connect your Composer account with your MuleSoft RPA account, and start the execution of an RPA Process.
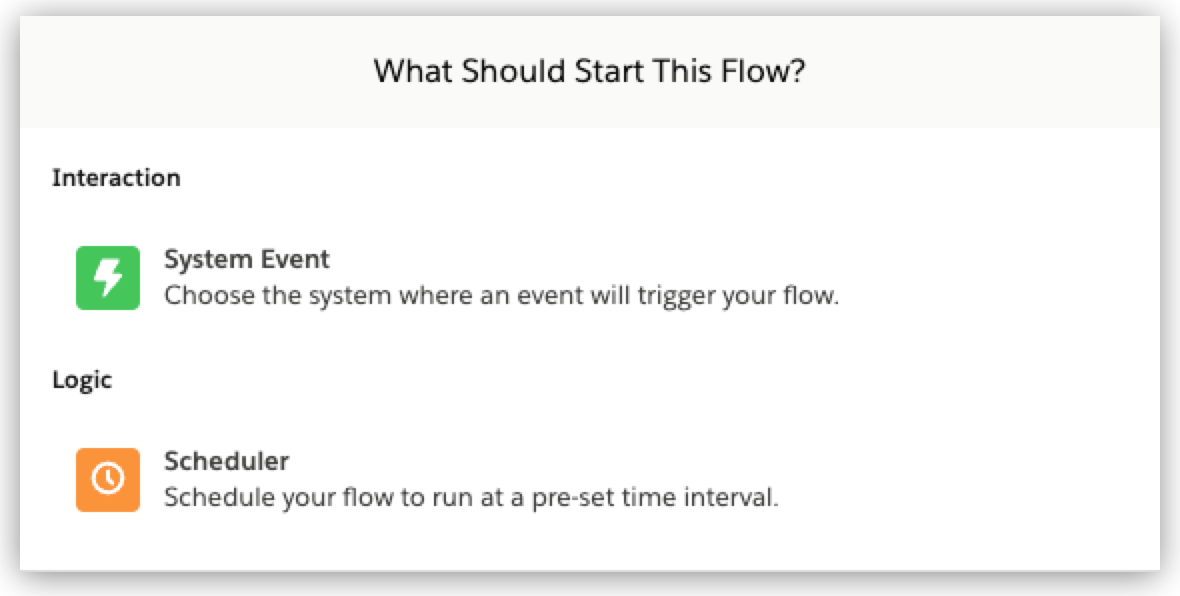
Different triggers can start a Composer flow, including interactions with Salesforce and other systems. This tutorial uses the Scheduler event because it is a simple way to start the execution of the flow without configuring connections to other systems.
Step 8.1: Create a New Composer Flow
To create a new Composer flow:
-
Open MuleSoft Composer.
If you don’t know your organization’s MuleSoft Composer instance URL, contact your organization administrator.
-
In the menu bar, click Composer Flows.
-
Click New Flow.
-
Click the edit button next to Untitled Flow and provide a name for this flow, for example, Trigger RPA Automation.
Step 8.2: Add a Start Event for the Flow
Every Composer flow needs a start event to trigger the execution. To add a starting action:
-
In the What Should Start This Flow? window, click Scheduler.
The Scheduler triggers the flow execution on a configured schedule, such as every 15 minutes.
-
Leave the Every field set to the default value of 15 minutes.
Step 8.3: Connect Composer with MuleSoft RPA
Before you can call an RPA process from Composer, you must configure the connection between the two systems.
To configure the connection between Composer and MuleSoft RPA:
-
Click Add (
 ) next to the Scheduler event you previously created.
 -
Select System Action.
-
Select MuleSoft RPA.
Because this is the first time you are interacting with a new system (MuleSoft RPA), Composer opens the connection panel.
-
Provide the following details to connect with your MuleSoft RPA account:
-
Connection Display Name: A name for the connection, for example, My RPA Account.
-
RPA API URL: The RPA API URL of your RPA Manager instance. Construct this URL by appending
/rpa/api/v1to the URL of RPA Manager, for example:https://<tenant-name>.rpa.mulesoft.com/rpa/api/v1. -
User API Key: An API key to connect MuleSoft RPA with Composer. Use the same API key you created as part of the tutorial prerequisites. You can create a new user API key by following the steps in Create an API Key for a User.
-
-
Click Connect.
If you see an error message while creating the connection, verify the configuration details and try again.
Step 8.4: Add an Action to Invoke the RPA Process
After successfully configuring the connection to MuleSoft RPA, follow these steps to invoke the RPA process:
-
In the MuleSoft RPA action card, select Action > Invoke RPA Process.
-
In RPA Process, select the invocable run configuration that you created in Step 7.1: Create an Invocable Run Configuration.
-
In Output, select Use response in this flow.
-
Click Save.
-
Click Test to test the Composer flow, including the call to the RPA process.
After the test finishes successfully, you see additional details in the RPA process card, such as RPA Execution ID and RPA Execution Status, which shows
SUCCEEDto confirm the proper execution of the RPA process.
Next Steps
Now that you created a Composer flow that triggers the execution of an RPA process, it’s time to monitor the deployment.
Continue with Step 9: Monitor the Automation