CloudHub Connector 1.1 - Mule 4
CloudHub 用 Anypoint Connector (CloudHub Connector) を使用すると、Mule アプリケーションから CloudHub API に接続できます。
互換性と修正された問題については、「CloudHub Connector リリースノート」を参照してください。
CloudHub 設定の作成
CloudHub Connector 接続では、次の認証種別を使用します。
-
基本認証
ユーザー名とパスワードを使用して認証を行います。 -
OAuth Client Credentials (OAuth クライアントログイン情報)
ユーザーアカウントをホストするサービスにユーザー認証を委任します。
基本の CloudHub 設定には次のプロパティが含まれます。
-
接続プロバイダー
いずれかの認証種別 ([Basic Authentication (基本認証)] または [OAuth Client Credentials (OAuth クライアントログイン情報)]) -
ログイン情報
選択した認証種別に応じて、ユーザー名とパスワード、またはクライアント ID とクライアントシークレットを指定する必要があります。 -
環境
使用する CloudHub 環境。Anypoint Platform でデフォルトとして定義された環境になります。
<cloudhub:config name="CloudHub_Config_Basic_Auth" >
  <cloudhub:connection username="${ch.username}" password="${ch.password}" />
</cloudhub:config><cloudhub:config name="CloudHub_Config_OAuth_Client_Credentials" >
<cloudhub:oauth-client-credentials-connection clientId="${ch.clientId}" clientSecret="${ch.clientSecret}" />
</cloudhub:config>POM ファイル情報
Anypoint Studio 外でアプリケーションを作成する場合は、POM ファイルを次のように更新します。
<dependency>
  <groupId>com.mulesoft.connectors</groupId>
  <artifactId>mule-cloudhub-connector</artifactId>
  <version>x.x.x</version>
  <classifier>mule-plugin</classifier>
</dependency>
x.x.x を使用しているコネクタに対応するバージョンに置き換えます。
最新の pom.xml ファイル情報を取得する手順は、次のとおりです。
-
Anypoint Exchange に移動します。
-
Exchange で、[Login (ログイン)] をクリックし、Anypoint Platform のユーザー名とパスワードを指定します。
-
Exchange で、「
cloudhub」を検索します。 -
[Dependency Snippets (連動関係スニペット)] をクリックします。
CloudHub 環境の使用
アプリケーションのデプロイメント環境を指定するには、environment.id システムプロパティを使用します。
<cloudhub:config name="CloudHub_Config" >
  <cloudhub:connection
  username="${ch.username}"
  password="${ch.password}"
  environment="${environment.id}"/>
</cloudhub:config>
通知の作成
ユーザーが通知を作成するには、指定された環境に対する Runtime Manager の Read application 権限が必要です。
ユーザーへの権限の割り当てについては、「ユーザーへの権限とロールの付与」を参照してください。
通知を作成するには、Create Notification 操作を使用します。
この操作には、通知メッセージと関連ドメインが必要です。
domain システムプロパティを使用して、ドメインを指定できます。
以下を設定することもできます。
-
Custom properties (カスタムプロパティ)
作成した通知に追加の情報を提供するオープンオブジェクト
-
Priority (優先度)
通知の優先度を指定します。
-
ERROR
-
INFO
-
WARN
-
-
トランザクション ID
作成した通知に関連付けられたトランザクション ID
<flow name="cloudhub-connector-flows" >
  <cloudhub:create-notification domain="some-application-name" config-ref="CloudHub_Config"
  transactionId="#[uuid()]" priority="WARN">
   <cloudhub:message >
     <![CDATA[#["Problem occurred trying to process customer data"]]]>
   </cloudhub:message>
   <cloudhub:custom-properties >
     <![CDATA[#[output application/java
---
{
 "customer-id" : "ASD-123",
 "date" : now()
}]]]></cloudhub:custom-properties>
  </cloudhub:create-notification>
 </flow>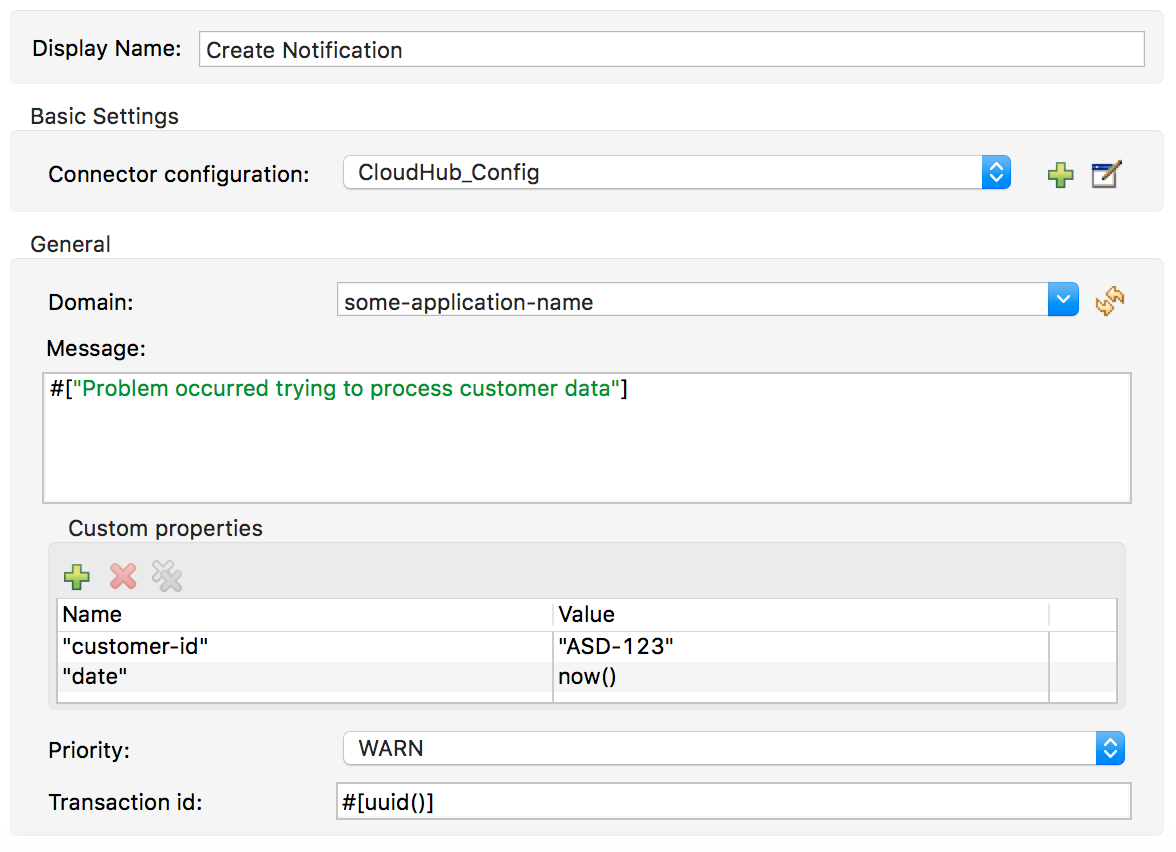
List Notifications
通知をコンシュームするには、List Notifications 操作を使用します。
この操作で必要なことは、通知の取得元のドメインを指定することのみです。
domain システムプロパティを使用して、ドメインを指定できます。
以下を設定することもできます。
-
Limit (制限)
取得する通知数を指定します (デフォルトは
-1 です。この値は使用可能な通知すべてを示します)。 -
Status (状況)
通知を絞り込み、未読、既読、またはすべてを取得します (デフォルトは
unread です。この値は、未読としてマークされた通知のみを取得します)。 -
Search (検索)
指定したテキストを含む通知のみを取得します。
<cloudhub:list-notifications config-ref="CloudHub_Config" domain="some-application-name"/>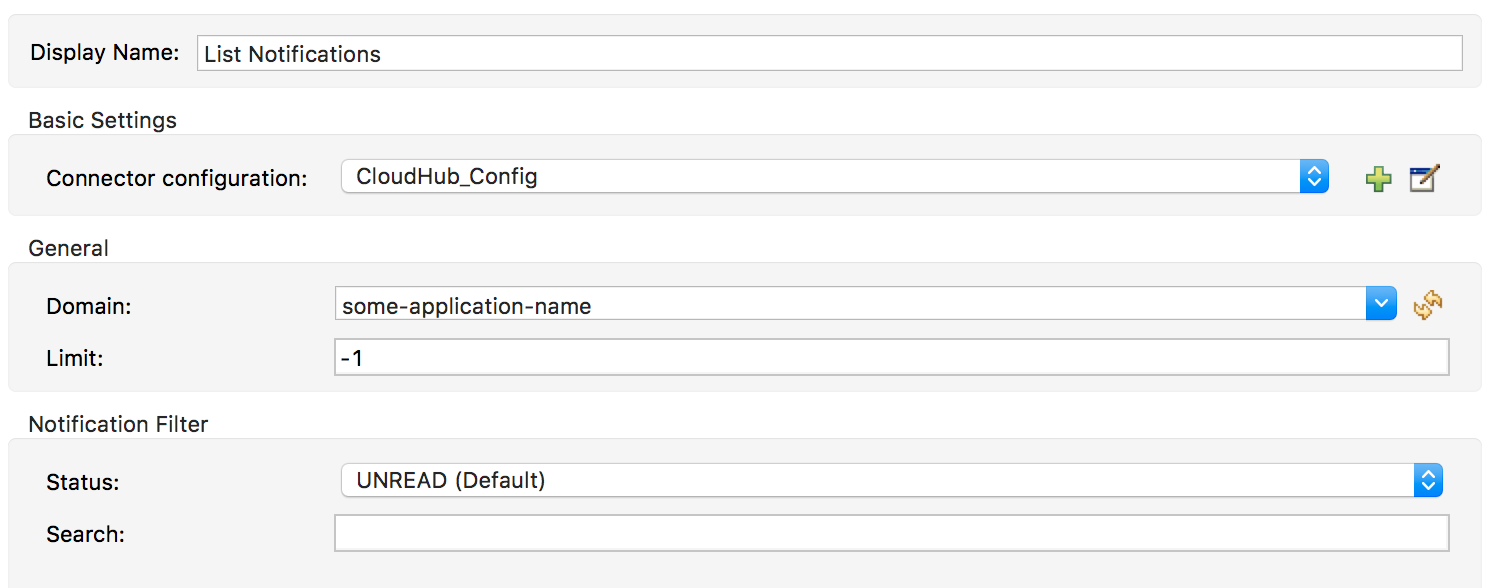
この操作では、次の構造を持つ通知のリストが返されます。
  Notification:
    type: object
    properties:
      id: string
      domain: string
      priority?: string
      read: boolean
      readOn?: datetime
      createdAt: datetime
      href: string
      properties: object
通知を既読としてマーク
Mark Notification 操作を使用して、通知を既読としてマークします。
コンシュームされた通知は既読としてマークされるため、次に通知が読み取られるときに未読の通知のみが取得されます。
Mark Notification 操作には通知 ID のみが必要です。これは、通知オブジェクトの id プロパティから取得できます。
<cloudhub:list-notifications config-ref="CloudHub_Config" domain="some-application-name"/>
<foreach>
  <cloudhub:mark-notification markAs="READ" config-ref="CloudHub_Config" notificationId="#[payload.id]"/>
</foreach>
List Applications
コネクタを使用すると、特定の環境で使用可能なすべてのアプリケーションを取得できます。設定は必要ありません。
<cloudhub:list-applications config-ref="CloudHub_Config"/>情報の取得方法をカスタマイズし、アプリケーションに関するより少ない情報またはより多くの情報を取得できます。
アプリケーションの取得
コネクタでアプリケーションのデプロイに関する情報を取得します。
必要な唯一の設定は、ドメインとアプリケーション名を指定することです。
domain システムプロパティを使用して、ドメインを指定できます。
<cloudhub:get-application domain="some-application-name" config-ref="CloudHub_Config"/>この操作は、アプリケーションのデプロイメントに関するすべての情報を返します。