
Using Anypoint Code Builder to Configure A2A Connector 2.0
To use Anypoint Code Builder to configure a connector or module, create a basic integration project in Anypoint Code Builder, add connectors and other components to your Mule application to process your business logic, and configure the attributes.
Before You Begin
Before creating an integration project, you must:
-
Set up and access the Anypoint Code Builder web or desktop IDE
-
Have credentials to access the connector’s API
-
Ensure that the Visual Studio Code Extension Pack for Java is installed.
To use this connector, you must be familiar with:
-
The connector’s API
-
Anypoint Connectors
-
Mule runtime engine (Mule)
Create a New Integration Project
To create a new integration project:
-
In the activity bar of the IDE, click the
 (Anypoint Code Builder) icon.
 -
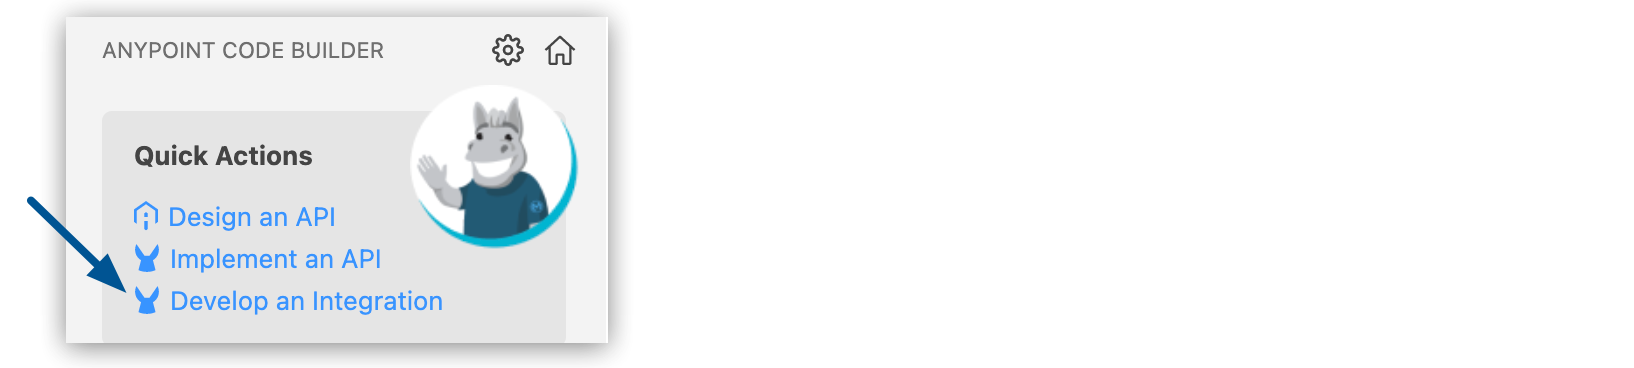
From Quick Actions, click Develop an Integration:
-
Complete the following in the Develop an Integration form:
Attribute Value Project Name
Unique name for your project.
This name is used as the title and name of the integration project file. For example, if the project name is "Salesforce Integration," the project file name is
salesforce-integration.Project Location
Your home directory or another directory you create. Click Browse to select a different directory for the integration project.
Don’t create the project within another project directory.
-
Select the type of project to create by selecting either the Empty Project or Template or Example card.
-
Select the Mule runtime and Java Version for your app.
-
Click Create Project.
Add the Connector to Your Integration Project
Anypoint Connectors provide operations for retrieving, modifying, and sending data to and from systems.
In addition to the built-in connectors that Anypoint Code Builder provides, you can download many other connectors from Anypoint Exchange.
To import a connector from Exchange and add it to your configuration:
-
In the Explorer view, open the configuration XML file for your project, such as
my-project-name.xml. -
Click the
 (Show Mule graphical mode) icon in the activity bar to open the canvas UI if it doesn’t open automatically.
 -
Add the connector the same way you added other components from the canvas UI:
-
In the canvas UI, click the
 (Add component) icon.
 -
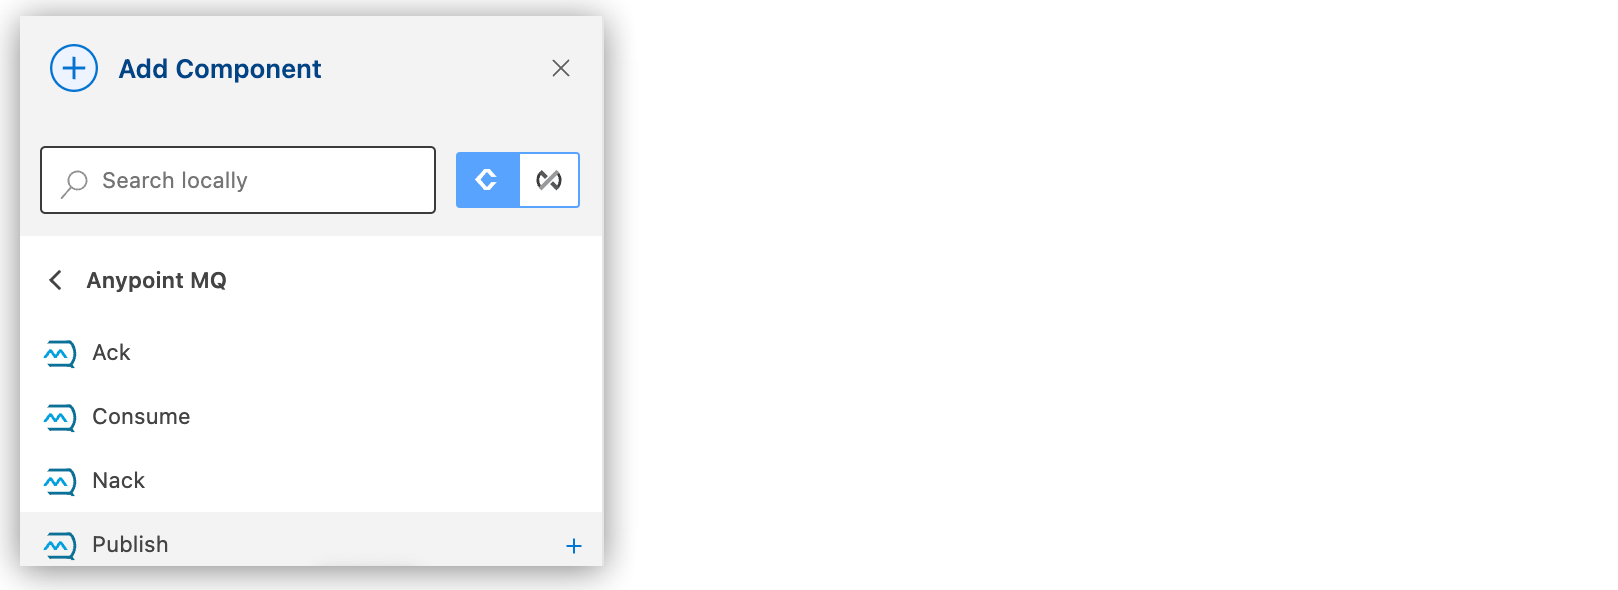
In the Add Component panel, click Connectors.
-
Click the connector name and then click the operation to add, such as Publish:
If the connector is not available locally, click the
 (Search in Exchange) toggle: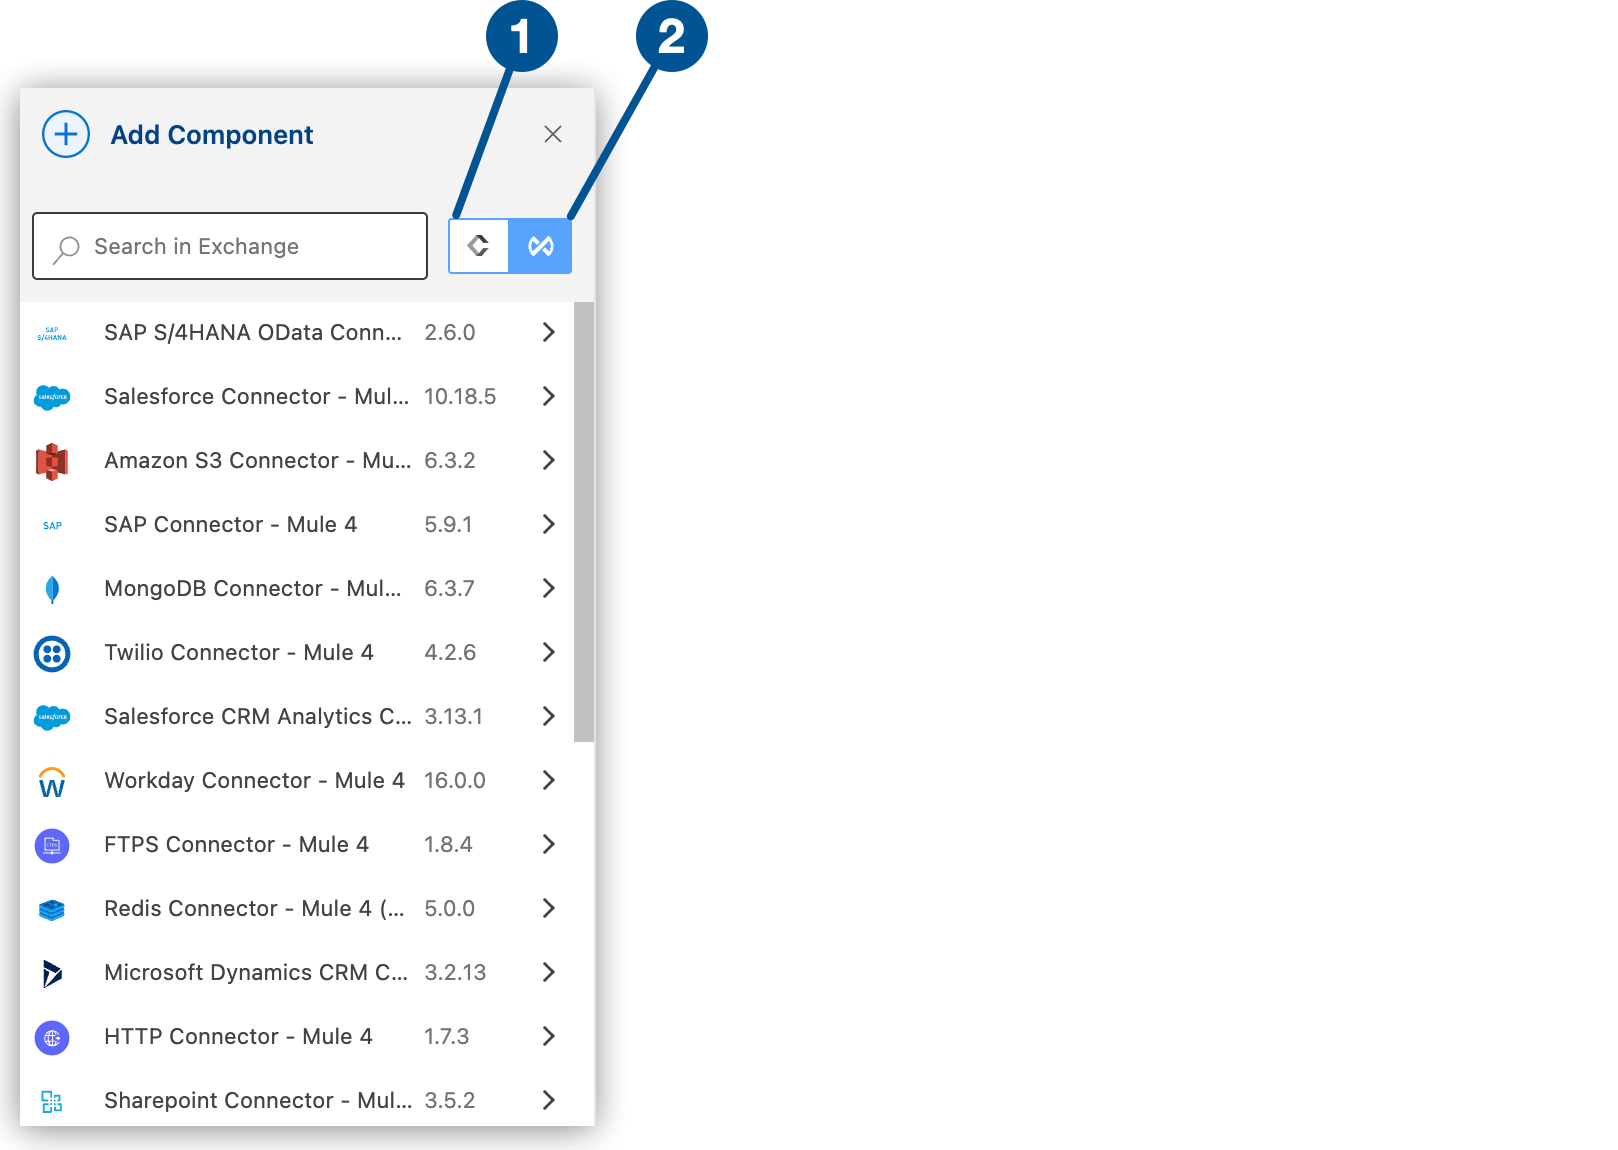
1 Search locally 2 Search in Exchange -
Select the connector to add to your project.
-
Select the operation from the Add Component panel.
-
Adding a connector to an integration project does not make that connector available to other projects in your Anypoint Code Builder workspace.
Configure the Source For the Flow
A source (trigger) starts the flow when specified conditions are met. You can configure these sources for A2A Connector:
-
A2A Server - Task Authorizer Listener
A2A Server authorization listener that gates auth-required operations before they execute. It runs for both the JSON-RPC and HTTP+JSON transport bindings. If the flow completes successfully, the request is authorized. If the flow raises an error, the request is denied and an
A2A:UNAUTHORIZEDerror is returned to the caller. The current operation name is available onattributes.operationNameso a single listener can gate multiple operations. This source supersedes the A2A Server - Authorization Listener from earlier versions. -
A2A Server - Task Listener
Listens for and receives incoming A2A protocol-compliant requests from other AI agents, enabling the Mule-based agent to act as an A2A server and respond to tasks. This unified source serves blocking, non-blocking, and streaming
SendMessagerequests over both transport bindings; there is no separate stream listener. -
A2A Server - On Async Request Listener
Server-side listener that customizes the initial
Taskreturned for streaming (SendStreamingMessage) and non-blocking (SendMessagewithreturnImmediately=true) requests. Use this source in conjunction with A2A Server - Task Listener. -
A2A Server - On Push Notification Set Listener
Validates the push notification configuration before routing the request to the A2A Server - Task Listener source.
For example, to configure an A2A Server - Task Listener source, follow these steps:
-
Click the A2A Server - Task Listener component on the canvas.
-
(Optional) Click the edit icon to change the name of the A2A Server - Task Listener component.
-
In the General tab, configure the connection for the A2A Server. See A2A Server Configuration.
-
Select the Advanced tab to configure these attributes:
Attribute Description Required Primary node only
Select this option to execute the A2A Server - Task Listener source on the primary node only when running in a cluster.
No
Redelivery policy
Configures the redelivery policy for executing requests that generate errors. You can add a redelivery policy to any source in a flow.
No
Reconnection strategy
Retry strategy in case of connectivity errors. When an operation in a Mule application fails to connect to an external server, the default behavior is for the operation to fail immediately and return a connectivity error. You can modify the default behavior by configuring the reconnection strategy for the operation.
No
Add Components to Your Project
Add components to your integration project to build a flow:
-
In the Explorer view, open the XML file for your project, such as
my-project-name.xml. -
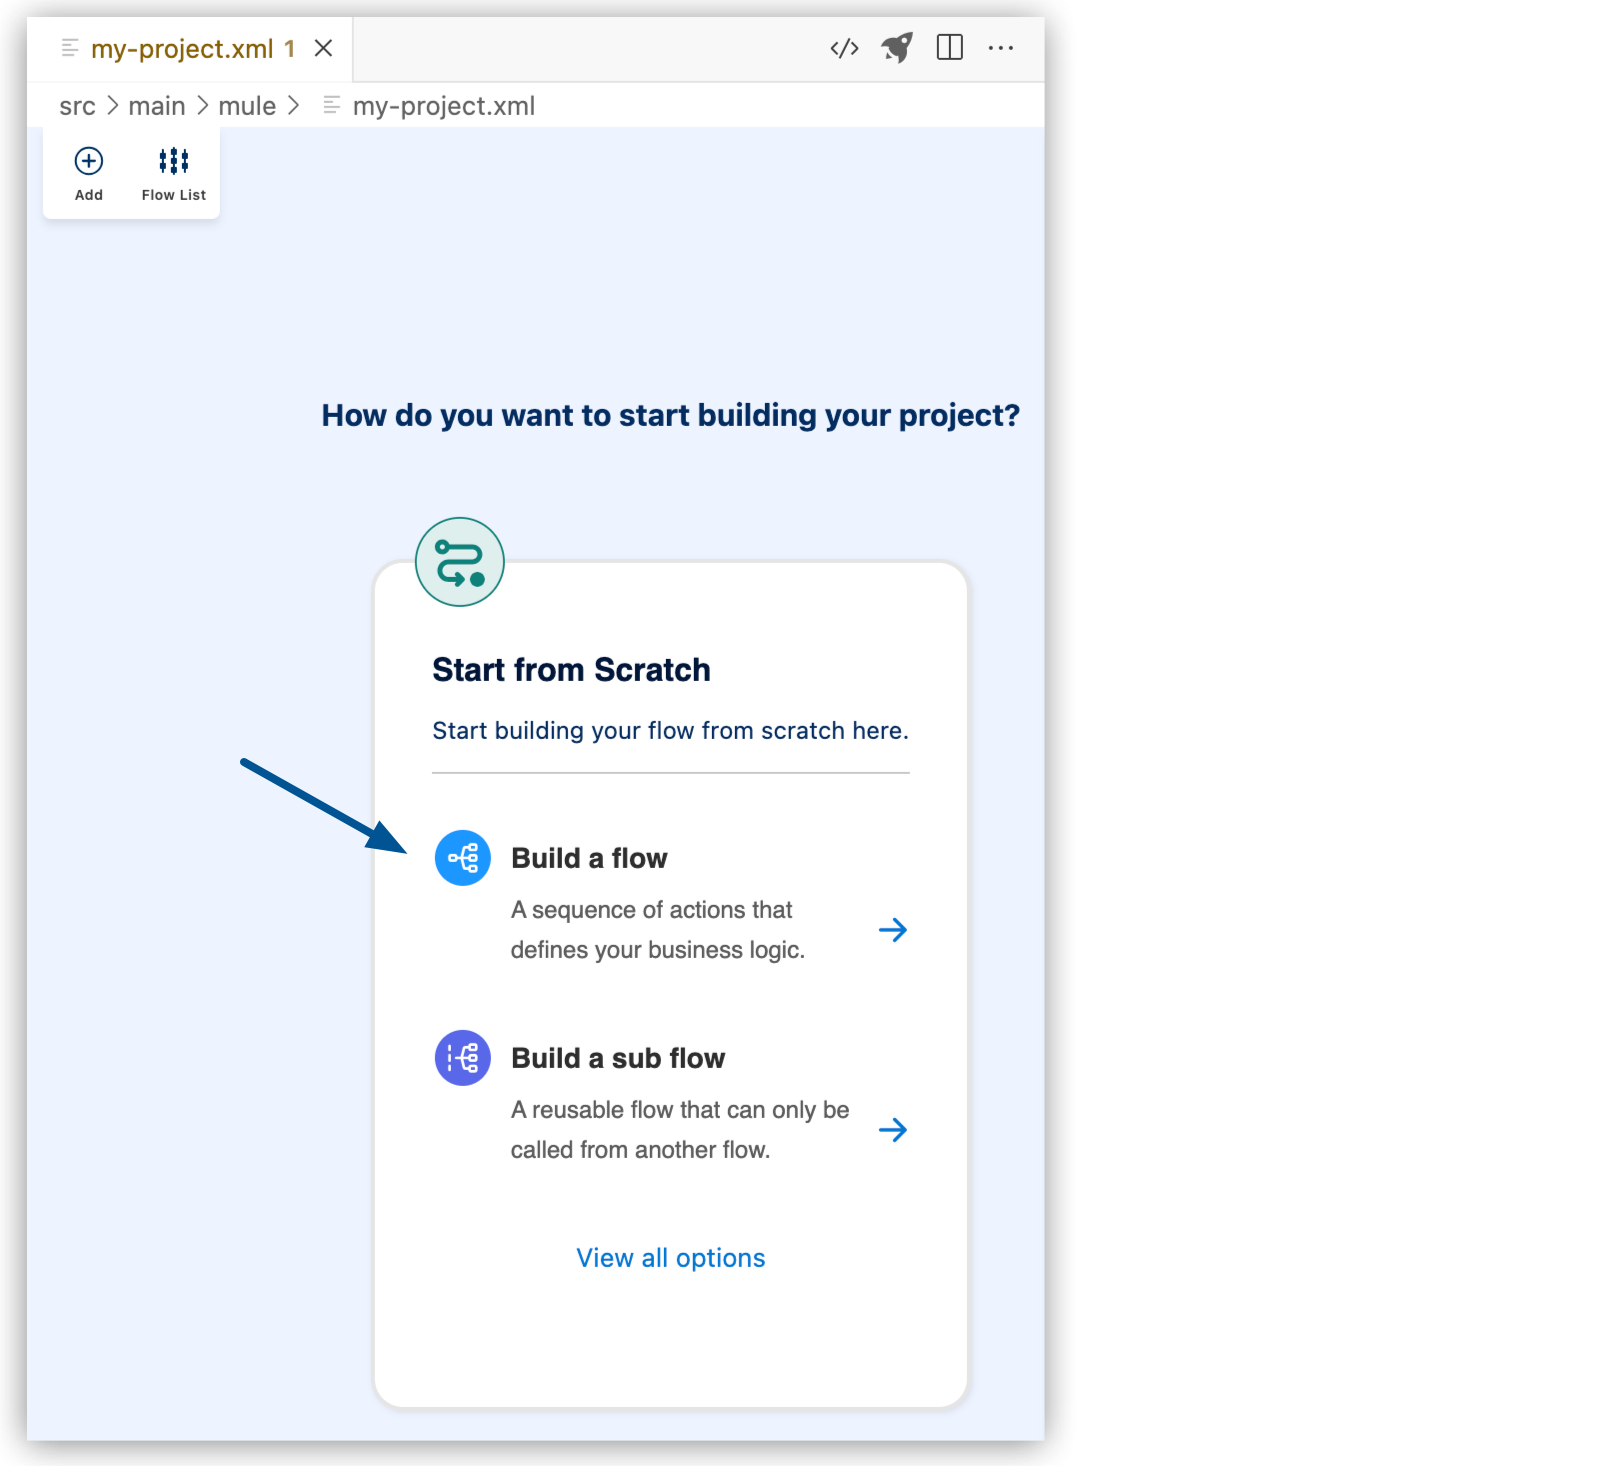
Select Build a Flow from the start card to create an empty flow:
-
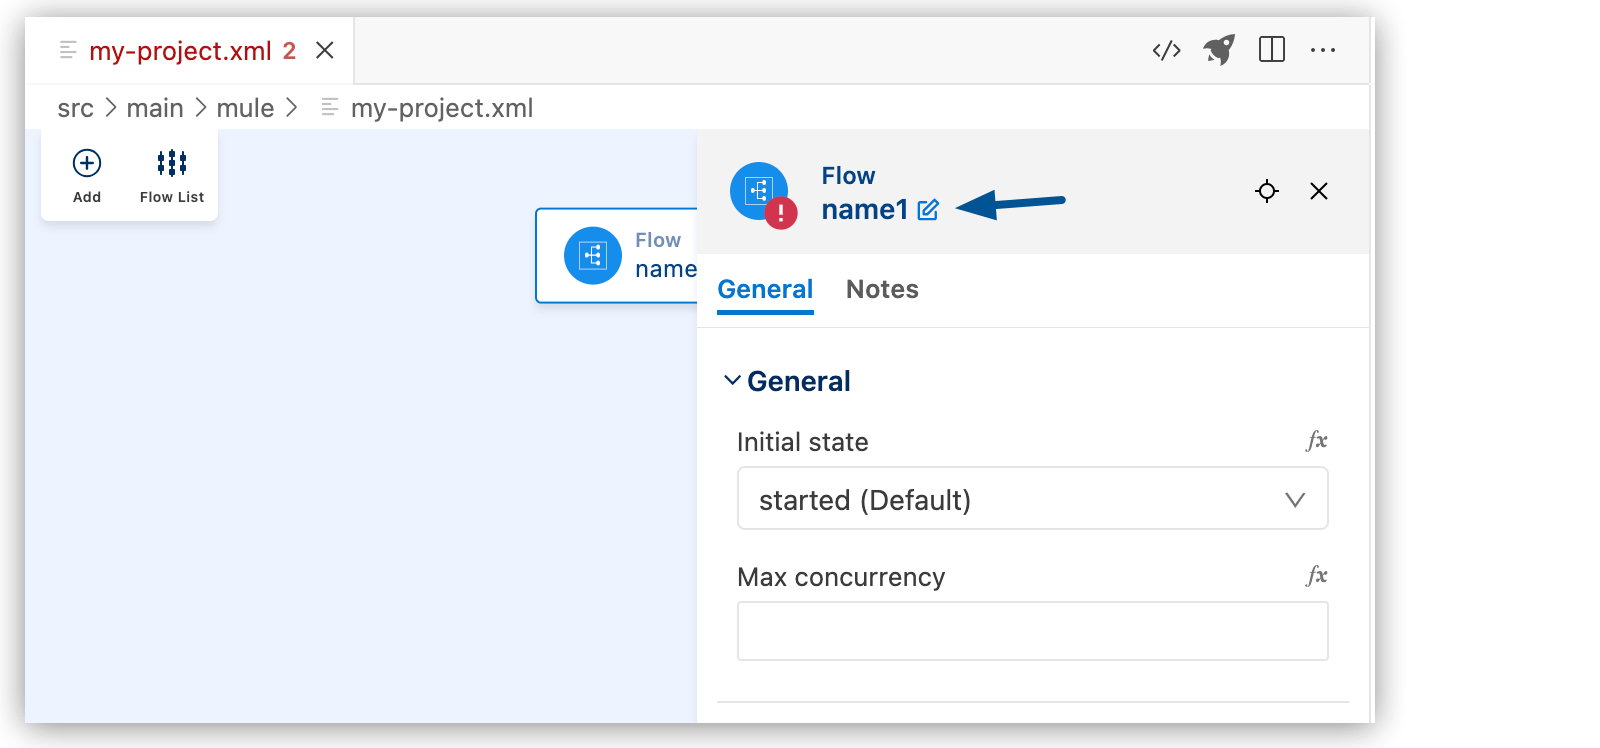
Change the name of the flow:
-
Click Flow.
-
Click the edit icon.
-
Enter the flow name, and click the checkmark.
-
In the canvas UI, click the
(Add component) icon. -
In the Add Component panel, search for and select your component from the results. The following example shows the Listener component from the HTTP search results:
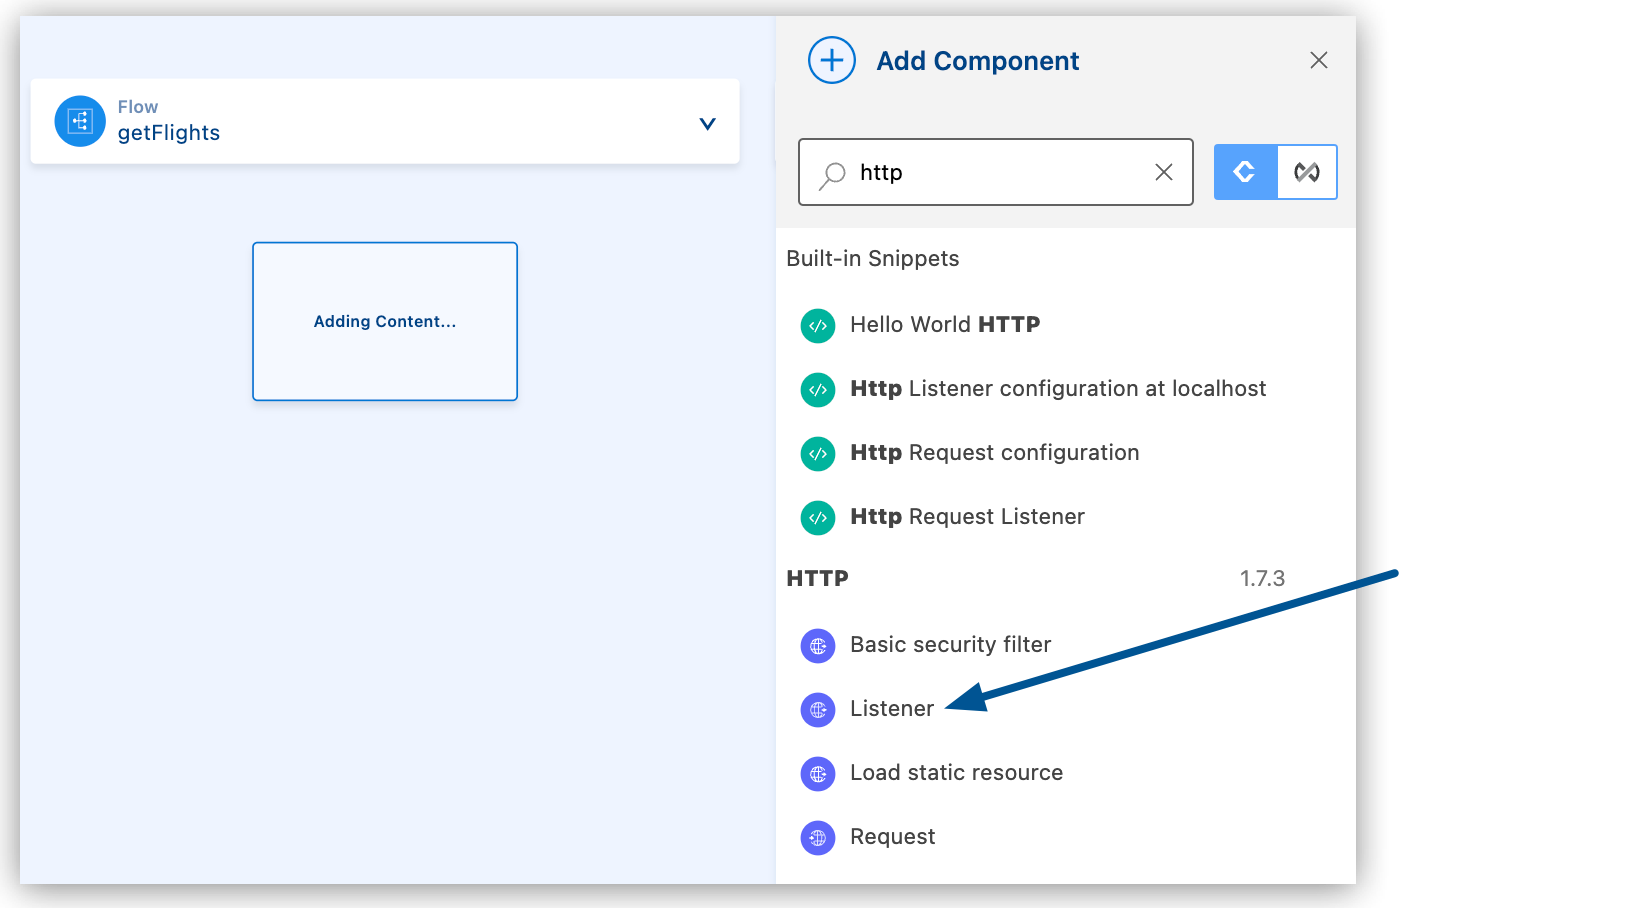
The configuration XML file now includes the XML for the HTTP Listener into the
<flow/>element, for example:<flow name="getFlights" > <http:listener path="" config-ref="" doc:name="Listener" doc:id="ojzfry" /> </flow>
-
Configure the Component Attributes
After you add components to your integration project, configure the attributes in the component UI, or configure the attributes directly in the XML code editor.
Connector XML tags start with a namespace followed by an operation, following the syntax namespace:operation, such as <db:select/> for a Select operation in Anypoint Connector for Database (Database Connector).
You can use autocomplete from an expression (fx) field for a component to select DataWeave functions from the Core module and other values accepted in this field.
Create a New Configuration XML File
Anypoint Code Builder creates the initial Mule configuration XML file in src/main/mule
within the Mule project.
This file contains global configurations and flow structures.
You can create additional configuration files, for example, to store global configurations.
To create a new XML configuration file:
-
In the Explorer view, right-click the mule folder (
src/main/mule) and select New File.Alternatively, use the menu.
Show me how
Select the
mulefolder, and then:-
In the desktop IDE, select File > New Mule Configuration File.
-
In the cloud IDE, click the
 (menu) icon, and select File > New File.
-
-
Enter a name for the new file with the
.xmlextension. -
In the Editor view for the new file, press Ctrl+Space to display available options.
-
Select Empty mule configuration:
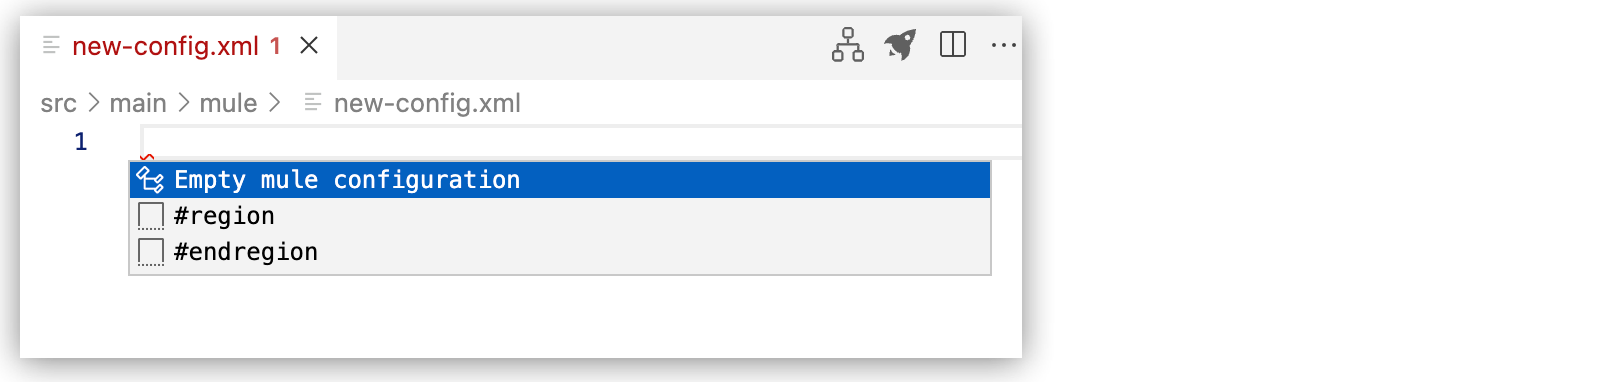
This command adds the following code to the file:
<?xml version="1.0" encoding="UTF-8"?>
<mule xmlns="http://www.mulesoft.org/schema/mule/core" xmlns:doc="http://www.mulesoft.org/schema/mule/documentation"
    xmlns:ee="http://www.mulesoft.org/schema/mule/ee/core"
    xmlns:xsi="http://www.w3.org/2001/XMLSchema-instance"
    xsi:schemaLocation="http://www.mulesoft.org/schema/mule/core http://www.mulesoft.org/schema/mule/core/current/mule.xsd
    http://www.mulesoft.org/schema/mule/ee/core http://www.mulesoft.org/schema/mule/ee/core/current/mule-ee.xsd">

</mule>