Contact Us 1-800-596-4880

Creating Integrations

logo cloud IDE Cloud IDE

logo desktop IDE Desktop IDE

Open Beta Release: The cloud IDE is in open beta. Any use of Anypoint Code Builder in its beta state is subject to the applicable beta services terms and conditions, available from the IDE.

Create a basic integration, add connectors and other components to your Mule application to process your business logic, and configure attributes:

  1. Create an integration project.

    Create the integration from scratch, or start from a project template or integration example that you import from Anypoint Exchange. For information about templates and examples in Exchange, see Asset Types.

  2. Add components to your project.

  3. Import connectors from Exchange.

  4. Configure attributes for a component.

  5. Test an HTTP Listener connection.

  6. Create a new XML configuration file.

Create an Integration Project

To create an integration project:

  1. In the activity bar of the IDE, click the (Anypoint Code Builder) icon.

  2. From Quick Actions, click Develop an Integration:

    Develop an Integration link highlighted in the Getting started section
  3. Complete the Develop an Integration form.

    Field Name Field Value

    Project Name

    Unique name for your project.

    This name is used as the title and name of the integration project file. For example, if the project name is "OAS Integration," the project file name is oas-integration.

    Project Location

    Your home directory or another directory you create. Click Browse to select a different directory for the integration.

    Don’t create the project within another project directory.

  4. Create a project from scratch, or start with an asset from Anypoint Exchange.

    • Start with an Empty Project

    • Start with a Project Template or Example

    Click Empty Project to start an integration project from scratch, without any preconfigured components.
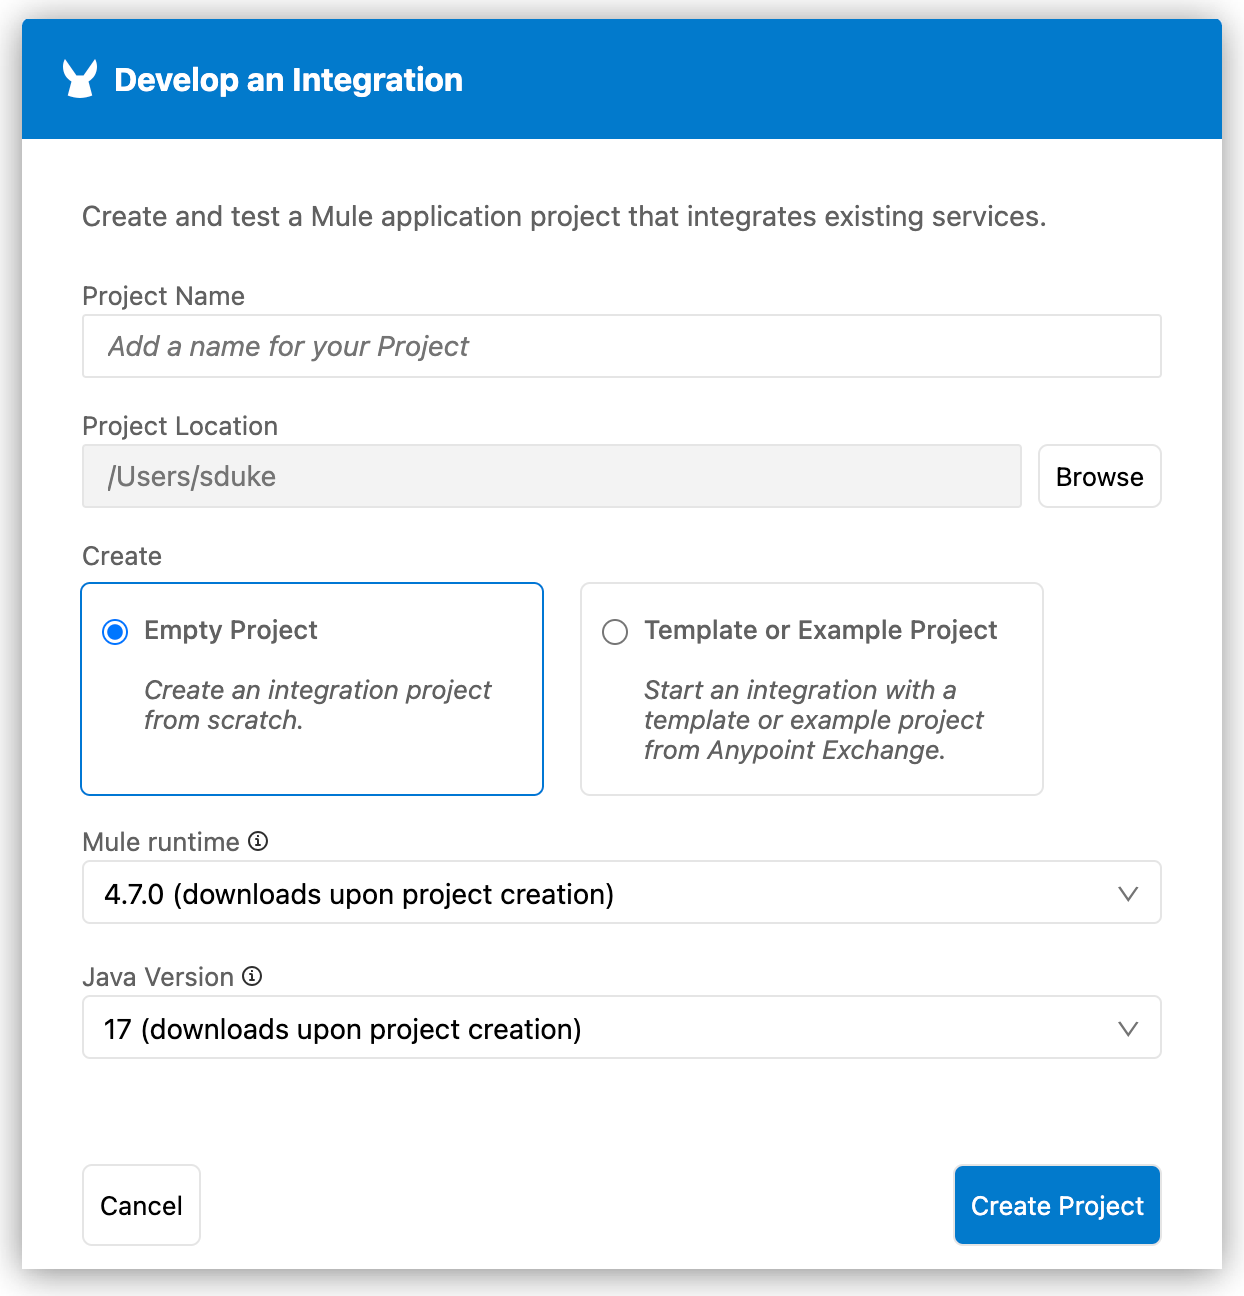
    Create integration project from scratch.

    To import an existing integration template or example from Anypoint Exchange:

    1. Click Template or Example Project to import an existing integration template or example from Anypoint Exchange.
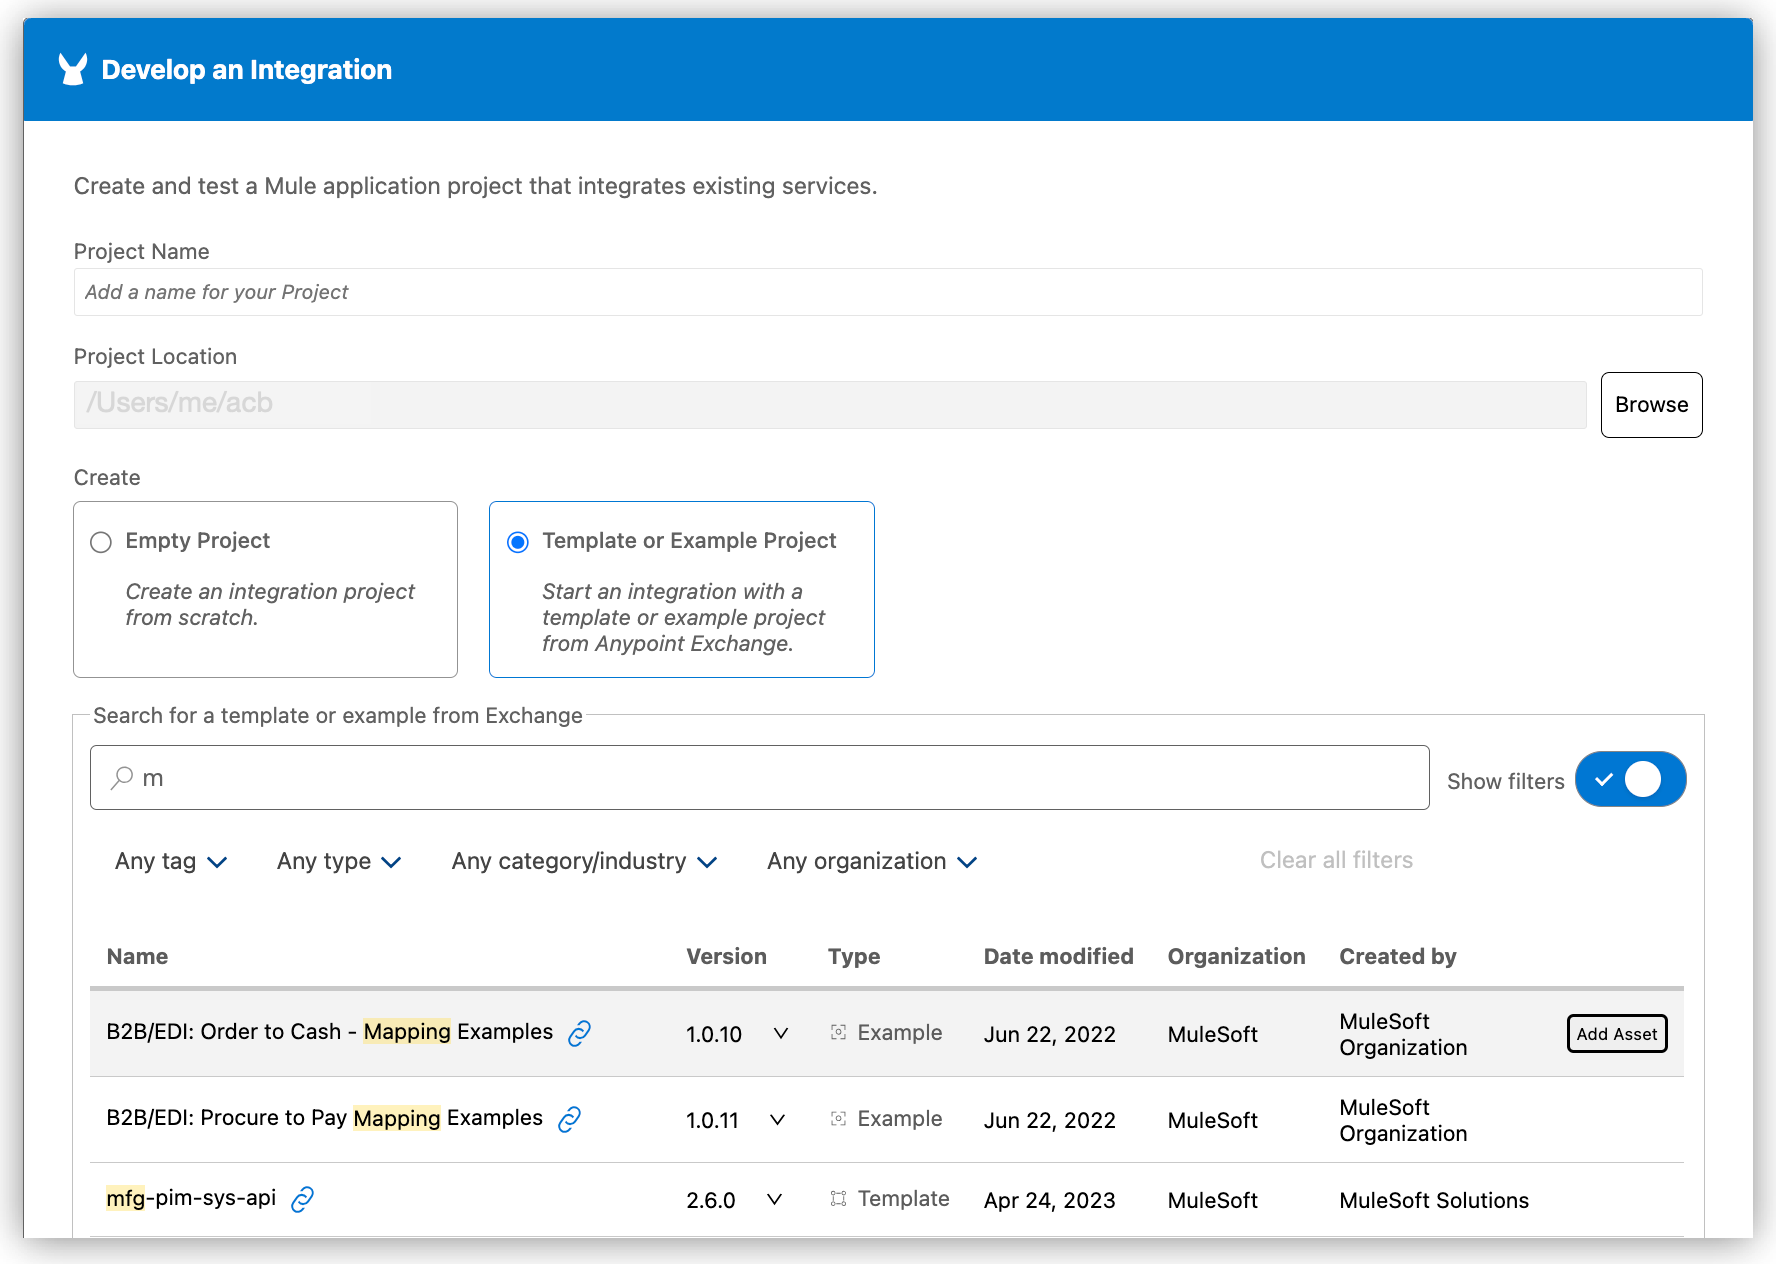
      Create integration project from an Exchange asset.
    2. If you intend to import a private asset associated with your business organization, log in to Anypoint Platform from the IDE to list the template or example in the search results.

      Searches for public assets do not require login.

    3. From the IDE, search for a template or for an example.

      Partial searches are accepted.

    4. Mouse over the asset that you want to add.

    5. Click Add Asset.

  5. Click Create Project.

When you create an integration project from scratch or if your project from Exchange does not contain a flow structure (Flow, Subflow, or Error handling component), the canvas UI provides the option to create one. Otherwise, the canvas UI generates a graphical representation of the imported asset’s components that you can use to start your configuration.

Add a Component to Your Project

Add components to your project from the canvas UI.

This example assumes that you are starting from an empty integration project to which you add a Flow component with an HTTP listener from Anypoint Connector for HTTP (HTTP Connector), Set Payload, and a Logger component. When you add the listener, Anypoint Code Builder adds a dependency for the HTTP Connector to the project’s pom.xml and a namespace for the connector to the configuration XML.

  1. In the Explorer view, select the XML file for your project, such as my-project-name.xml.

    Canvas showing visual representation of Mule flow and the Mule configuration file
    1 The canvas provides space for a visual representation of your Mule flows or subflows.
    2 The configuration XML editor displays the configuration file for your Mule application.
  2. Select Build a Flow from the canvas to create an empty flow within a Mule integration application.

  3. Change the default name of the flow from the canvas UI or from the configuration XML.

    • From the canvas UI

    • From the configuration XML

    Click Flow name1 to open the configuration panel for the Flow component, change the flow name, and click the check mark to set the new name.

    Change name of flow through canvas UI.

    Replace the default name of the flow (name1) with your flow name, such as getFlights. For example:

    <flow name="getFlights" >
    
    </flow>
  4. Add a component to your project from the canvas, for example, add the HTTP Listener component:

    1. In the canvas, click the (Add component) icon.

    2. In the Add Component panel, search for and select Listener from the HTTP results:

      Listener component highlighted in the Add Component section

      The configuration XML file now includes the XML for the HTTP Listener into the <flow/> element, for example:

      <flow name="getFlights" >
        <http:listener path="path" config-ref="config-ref" doc:name="Listener" doc:id="rrjiqa" />
      
      </flow>
  5. Add another component, this time using the XML configuration menu. For example, add the <http:listener-config/> component from a snippet.

    For more information about snippets, see Working with Code Snippets.

    1. In the configuration XML, place your cursor before the opening <flow> tag, and type http.

      Ensure that the cursor is not inside the <flow/> element.

    2. Type http, and select the http:listener-config snippet:

      http:listener-config snippet highlighted in the configuration XML menu

      The snippet adds the following code:

      <http:listener-config name="HTTP_Listener_config" >
        <http:listener-connection host="0.0.0.0" port="8081" />
      </http:listener-config>
  6. Add another component to your flow.

    For example, add a Set Payload component to your HTTP Listener operation:

    1. In the canvas, click the (Add component) icon.

    2. In the Add Component panel, search for and select Set payload from the Transformer results.

    3. In the canvas, click Set payload to open its configuration panel, and add a string value, DataWeave expression, Mule variable, or configuration property.

      • To add a string, type a value such as my value. For example:

        Adding string to Set Payload
      • To add a DataWeave expression or a Mule variable as a value, such as payload, click fx (located before the field), and provide the value, for example:

        Adding expression to Set Payload
      • To add a configuration property as a value, type a value such as ${secure::mysensitiveprop}. For example:

        Adding configuration property to Set Payload

        For more information about configuration properties, see Defining and Securing Properties for a Mule Application.

Your configuration XML file now looks similar to the following:

<http:listener-config name="HTTP_Listener_config" >
  <http:listener-connection host="0.0.0.0" port="8081" />
</http:listener-config>

<flow name="getFlights" >
  <http:listener path="path" config-ref="config-ref" doc:name="Listener" doc:id="rrjiqa" />
  <set-payload value="my value" doc:name="Set payload" doc:id="gecykt" />

</flow>

Notice that the Listener component in the canvas now shows an error:

Listener error in the canvas

To determine where the error is, select the processor in the canvas. Anypoint Code Builder highlights its location within the configuration XML, and you can mouse over the issue for more information. For example:

Selecting configuration reference from configuration panel

To fix the error, configure the attributes properly. For example, to correct the mismatched config-ref value for the HTTP listener, select the reference name from the drop-down menu in the component’s configuration panel, or type the correct attribute value directly within the XML.

For more information about debugging, see Debugging Mule Applications.

Import a Connector from Exchange

Anypoint Connectors provide operations for retrieving, modifying, and sending data to and from systems. In addition to the built-in connectors that Anypoint Code Builder provides, you can download many other connectors from Anypoint Exchange.

To import a connector from Exchange and add it to your configuration:

  1. In the Explorer view, open the configuration XML file for your project, such as my-project-name.xml.

  2. Click the (Show Mule graphical mode) icon in the activity bar to open the UI canvas if it doesn’t open automatically.

  3. Add the connector the same way you added other components from the canvas:

    1. In the canvas, click the (Add component) icon.

    2. In the Add Component panel, click Connectors.

    3. Click the connector name and then click the operation to add, such as Publish:

      Add Publish operation from the Anypoint MQ Connector

      If the connector is not available locally, click the (Search in Exchange) toggle:

      Search in Exchange toggle
      1 Search locally
      2 Search in Exchange
    4. Select the connector to add to your project.

    5. Select the operation from the Add Component panel.

To import a connector from Exchange to use later in your project:

  1. In the Explorer view, open the configuration XML file for your project, such as my-project-name.xml.

  2. Click the (Show Mule graphical mode) icon in the activity bar to open the canvas UI if it doesn’t open automatically.

  3. Open the Command Palette.

    Show me how
    • Use the keyboard shortcuts:

      • Mac: Cmd+Shift+p

      • Windows: Ctrl+Shift+p

    • In the desktop IDE, select View > Command Palette.

    • In the cloud IDE, click the (menu) icon, and select View > Command Palette.

  4. Select the following command:

    MuleSoft: Import Asset from Exchange
  5. Select Connector.

  6. Search for the connector name to import, such as "MQ," for example:

    "Import Anypoint MQ Connector from Exchange
  7. Select the connector.

  8. At the prompt, select the version of the connector to import, such as v4.0.3.

    Anypoint Code Builder imports the connector and makes it available in the Components list.

For more information about the connectors available on Exchange, see Connectors. For more information about Exchange, see Exchange (US) or Exchange (EU) and Anypoint Exchange Overview.

Configure Attributes for a Component

After you add the components to the project, configure the attributes.

For example, configure these attributes for the <http:listener-config/>, <http:listener/>, and <set-payload/> elements:

<http:listener-config name="inbound-request" doc:name="Listener Config" doc:id="b5c62f-a84a3a">
  <http:listener-connection host="0.0.0.0" port="8081"/>
</http:listener-config>

<flow name="getFlights">
    <http:listener path="flights" config-ref="inbound-request" doc:name="HTTP /flights" doc:id="htprur" />
    <set-payload value="Flight info" doc:name="Set Response" doc:id="e43e98-1a9a01"/>
</flow>

Test an HTTP Listener Connection

To test an HTTP Listener connection, click Test Connection in the configuration XML:

HTTP Listener Test Connection link in the configuration XML

The status bar shows the progress:

  • Verifying connection inbound-request indicates that the test is in progress.

  • Connection is valid indicates a successful connection.

  • Invalid Connection Got status code: 500 when trying to resolve a Mule Runtime operation indicates a connection error.

    A common code 500 error is port 8081: Address already in use. For port conflicts, configure a different port, such as 8082, and retest the connection.

Before publishing, run your application in debug mode.

Create an Additional Configuration XML File

Anypoint Code Builder creates the initial Mule configuration XML file in src/main/mule within the Mule project.

You can create additional configuration files, for example, for an implementation file for a scaffolded interface or for global configurations that you can reference from an XML file.

To create a new configuration XML file:

  1. In the Explorer view, right-click the mule folder (src/main/mule) and select New Mule Configuration File…​.

  2. In the New Mule Configuration File…​ field that opens, provide a name for the new file without an extension.

    Provide name of Mule configuration XML file

    The name must be unique within the project. Permitted special characters are _ (underscore), - (hyphen), ., @, (, and ).

    The process automatically appends an xml extension to the file name and opens the new configuration XML file and its canvas UI within the IDE. The new configuration XML file contains the <mule/> element with default namespaces:

    <?xml version="1.0" encoding="UTF-8"?>
    <mule xmlns="http://www.mulesoft.org/schema/mule/core"
          xmlns:doc="http://www.mulesoft.org/schema/mule/documentation"
          xmlns:xsi="http://www.w3.org/2001/XMLSchema-instance"
          xsi:schemaLocation="http://www.mulesoft.org/schema/mule/core http://www.mulesoft.org/schema/mule/core/current/mule.xsd">
    
    </mule>

    The file’s canvas UI provides the same options for building your project file that appear when you create an integration project. For an example and to get started with your configuration, see Add a Component to Your Project.

Open a Component in the Canvas from the XML Editor

From the configuration XML, open a component and its configuration panel in the canvas. This feature is helpful, for example, if you want to configure a component from the UI, if a component is in another flow than the flow currently displayed in the canvas, or if the canvas is not open.

  1. From the configuration XML, place your cursor within the component’s XML.

  2. Right-click and select Show Component in Canvas UI.

    This action displays the component in the canvas and opens its configuration panel, for example:

    Opening a component in the canvas from the XML