Implementing OAS, RAML, AsyncAPI, and GraphQL APIs
 Cloud IDE
 Desktop IDE
After you create your API spec, use Anypoint Code Builder to scaffold your API into a Mule project for your implementation or integration.
Anypoint Code Builder supports scaffolding these schema fragment files if they’re referenced from API specs:
| Avro | JSON | RAML | |
|---|---|---|---|
AsyncAPI |
Yes |
Yes |
No |
GraphQL |
No |
No |
Yes |
OData |
No |
No |
Yes |
REST |
No |
Yes |
Yes |
SOAP |
No |
No |
Yes |
If you add a fragment that isn’t supported, the scaffolder doesn’t add these fragments as project dependencies when you import the spec from Exchange. However, you can scaffold schemas that are specified inline within the spec.
For OAS and JSON schema, you can also specify fragment files that you create manually within the implementation or integration project directory.
Anypoint Code Builder uses the configuration defined in the spec to autogenerate a basic interface in your implementation project. This interface includes flows for each endpoint or operation, a built-in XML-based router, and error handlers, which you then implement within a Mule application.
The process you use to implement your API depends on whether you already created a project for your integration or implementation, or published the spec to Exchange:
-
To scaffold an API using a spec from Exchange into:
-
A new project, see Scaffold an API into a New Project.
-
An existing project, see Import an API Spec into a Project.
-
-
To update your project with the latest changes to a spec in Exchange, see Re-scaffold an API Specification into a Project.
-
To scaffold and re-scaffold an API into a project without publishing the spec to Exchange, see Iteratively Design and Implement APIs.
Scaffold an API into a New Project
If you have not already created a project, use Anypoint Code Builder to scaffold the API in a new Mule project:
-
In the activity bar of the IDE, click the
 (Anypoint Code Builder) icon.
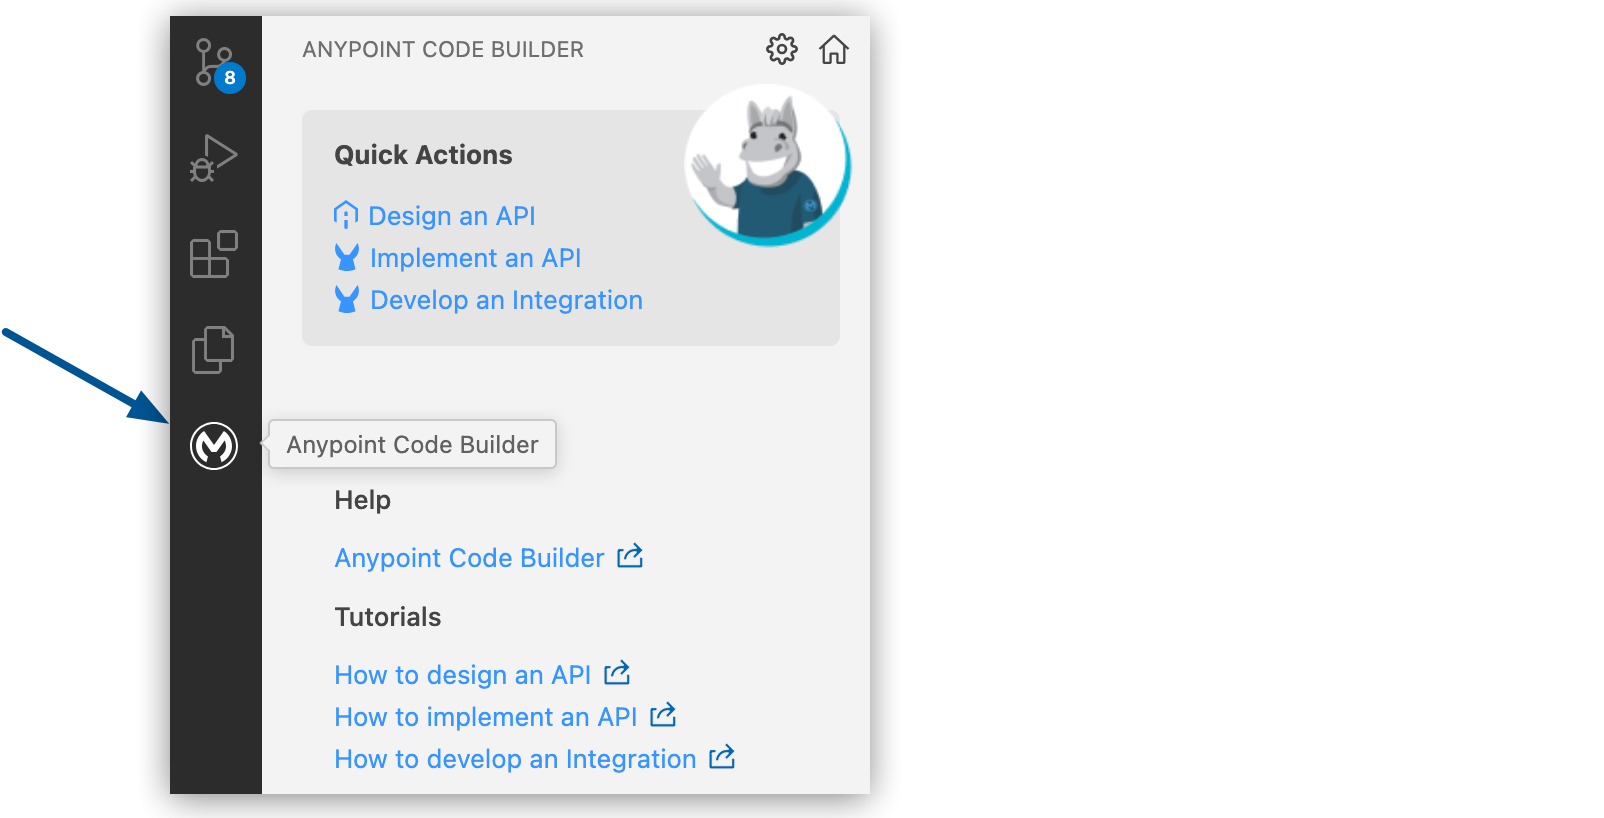
-
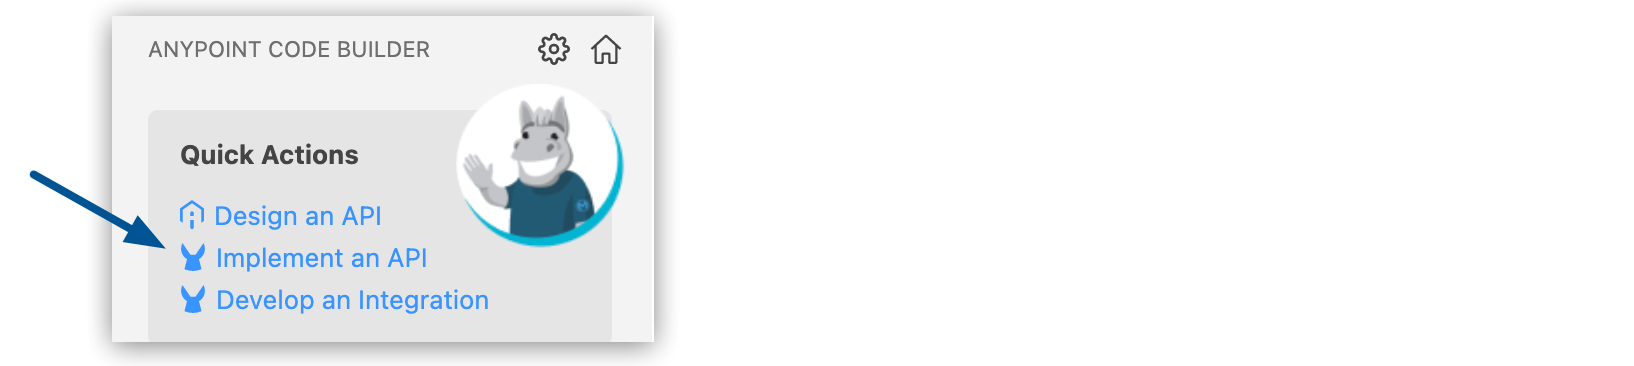
From Create, click Implement an API:
-
Complete the Implement an API Specification form:
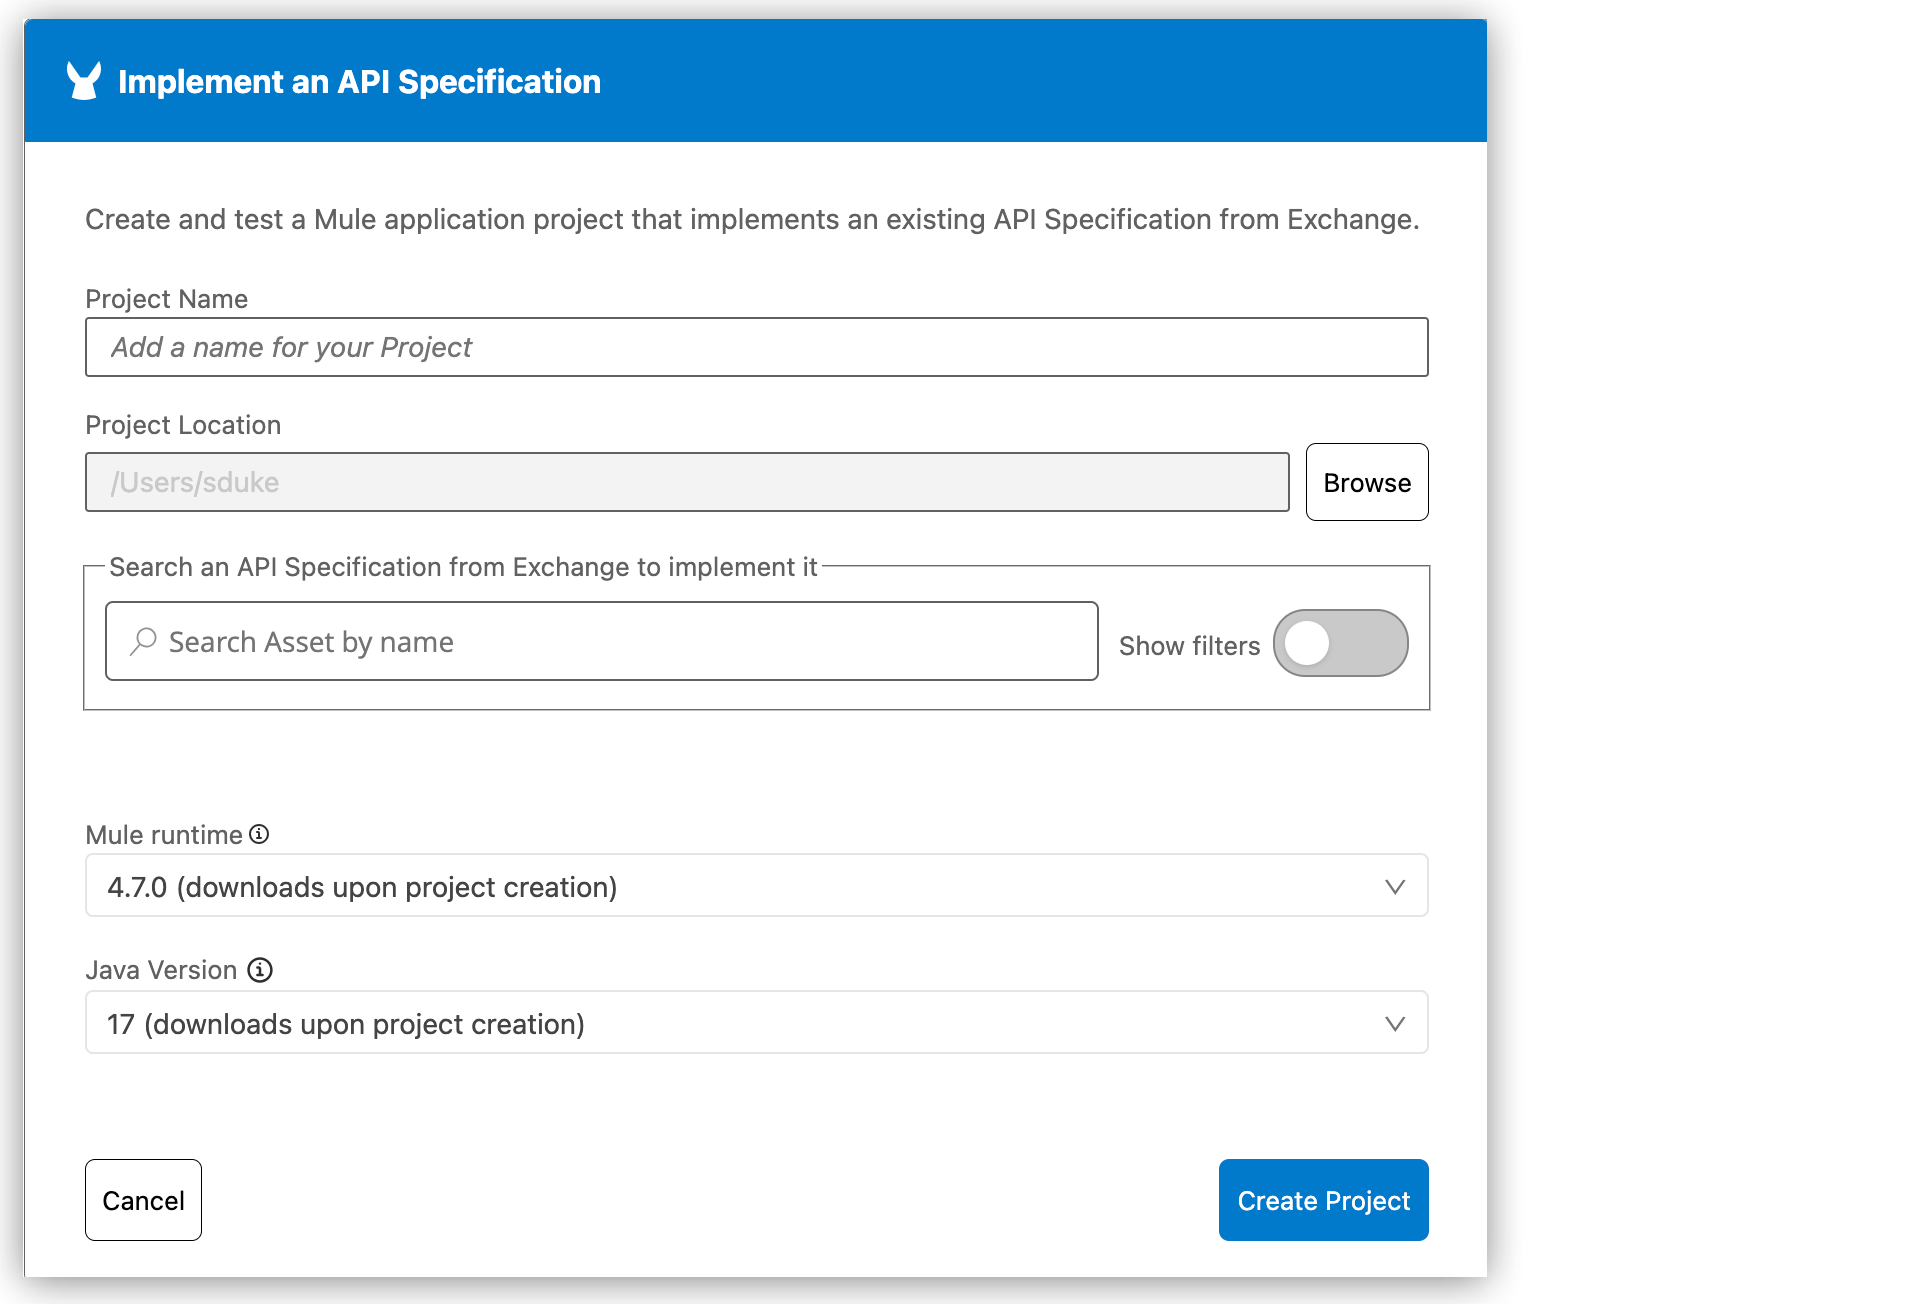
Field Name Field Value Project Name
Unique name for your project.
This name is used as the title and name of the project file. For example, if the project name is My Project, the project file name is
my-project.Project Location
Your home directory or another directory you create.
Don’t create the project within another project directory.
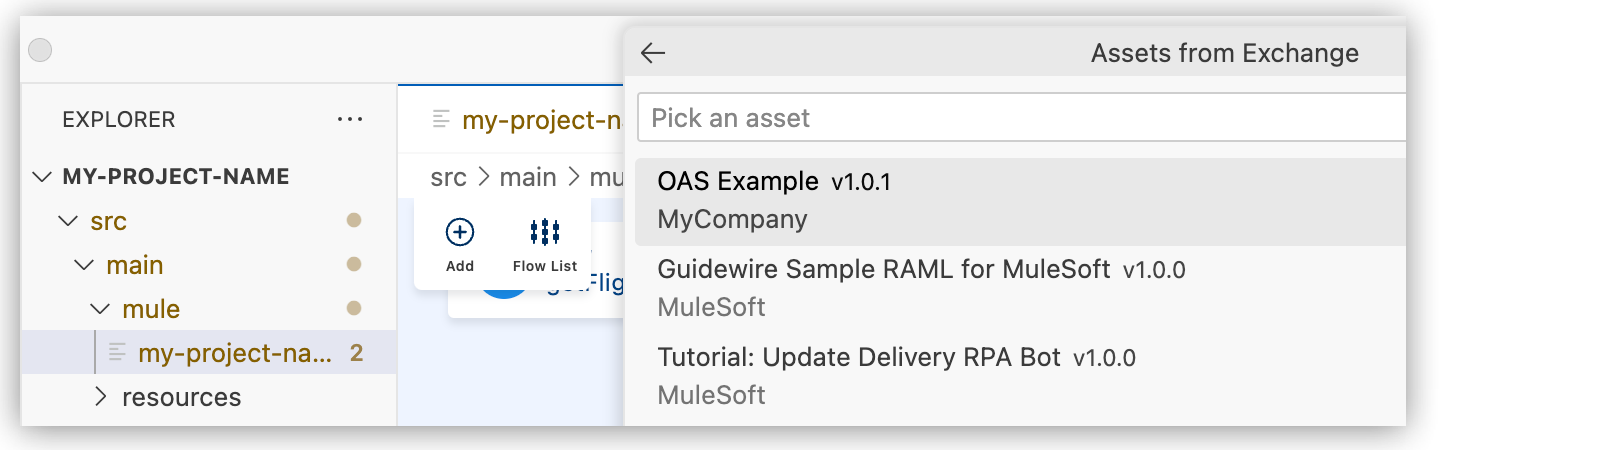
Search an API Specification from Exchange
Name of the specification in Exchange. Search results can include OAS, RAML, AsyncAPI, and GraphQL specifications. Activate Show filters to narrow your search results. See Filtering Search Results for more information. To implement a gRPC API spec, see Implementing a gRPC API Specification with Anypoint Code Builder.
Mule runtime
Mule runtime version to use for your project.
Java Version
Java version to use for Mule.
You can select from locally available Mule runtime and Java versions. The dropdown shows only the Mule runtime versions that are installed on your local disk, including bundled Mule runtime versions that are available immediately after installation. The IDE saves your version settings to the project’s
mule-artifact.jsonfile. Bundled Mule runtime versions enable instant project opening and design. To install additional Mule runtime versions, use theMuleSoft: Install Runtimecommand.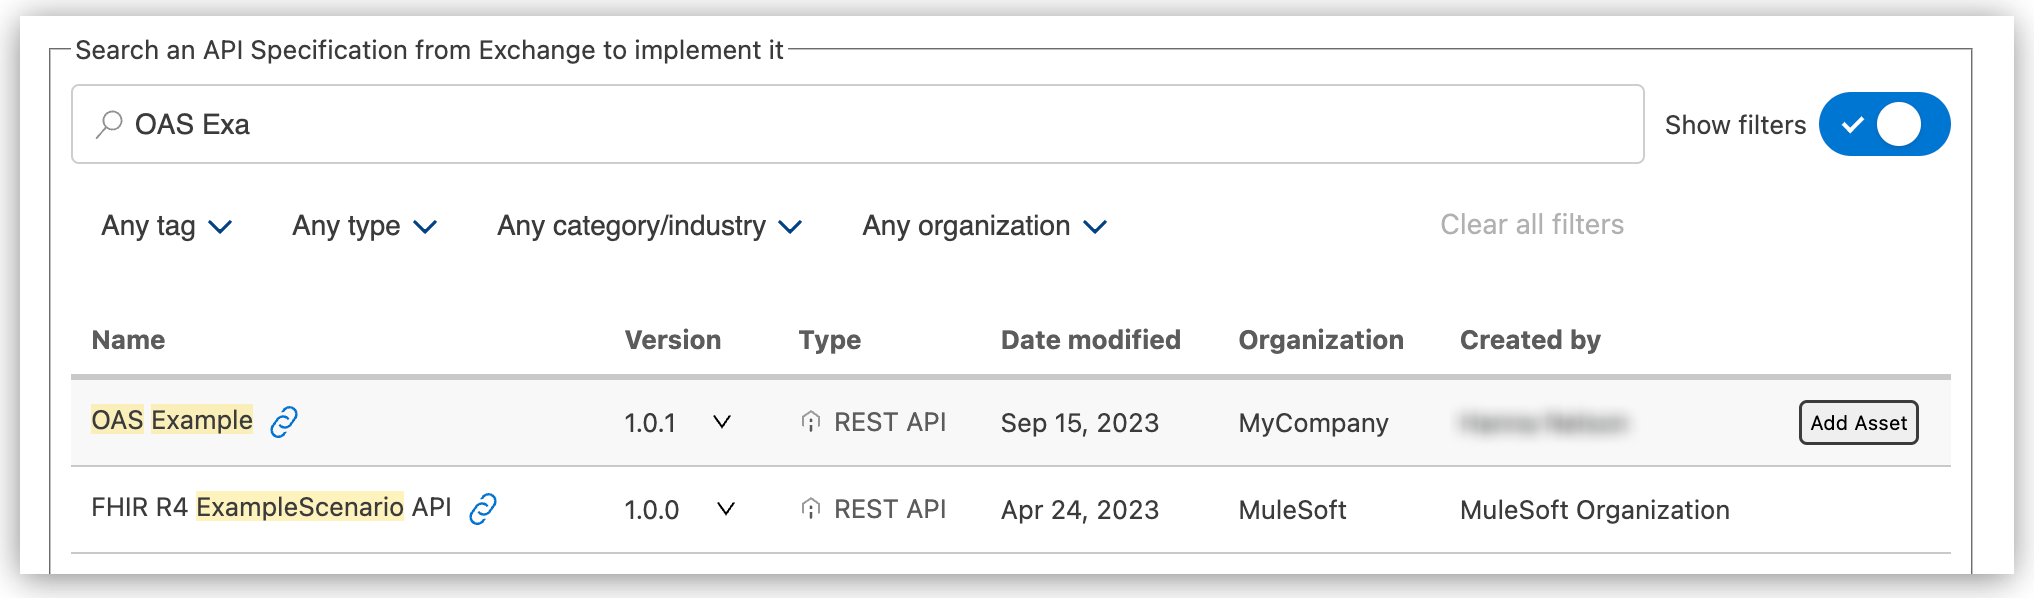
The form shows the selected API spec, for example:

-
Click Create Project.
When you create the project, Anypoint Code Builder:
-
Adds the API spec as a dependency in your project’s
pom.xmlfile:<dependency> <groupId>e91cab06-650b-4634-9c6f-5bc4f4fc4d17</groupId> <artifactId>OAS-Example</artifactId> <version>1.0.1</version> <classifier>oas</classifier> <type>zip</type> </dependency> -
Adds the Mule and Java versions to the project’s
mule-artifact.jsonfile. -
Scaffolds your API into the new Mule project and opens the configuration XML file.
The configuration XML file includes the interface for your implementation project, with flows for each endpoint in the spec, error handlers, and a built-in router, for example:
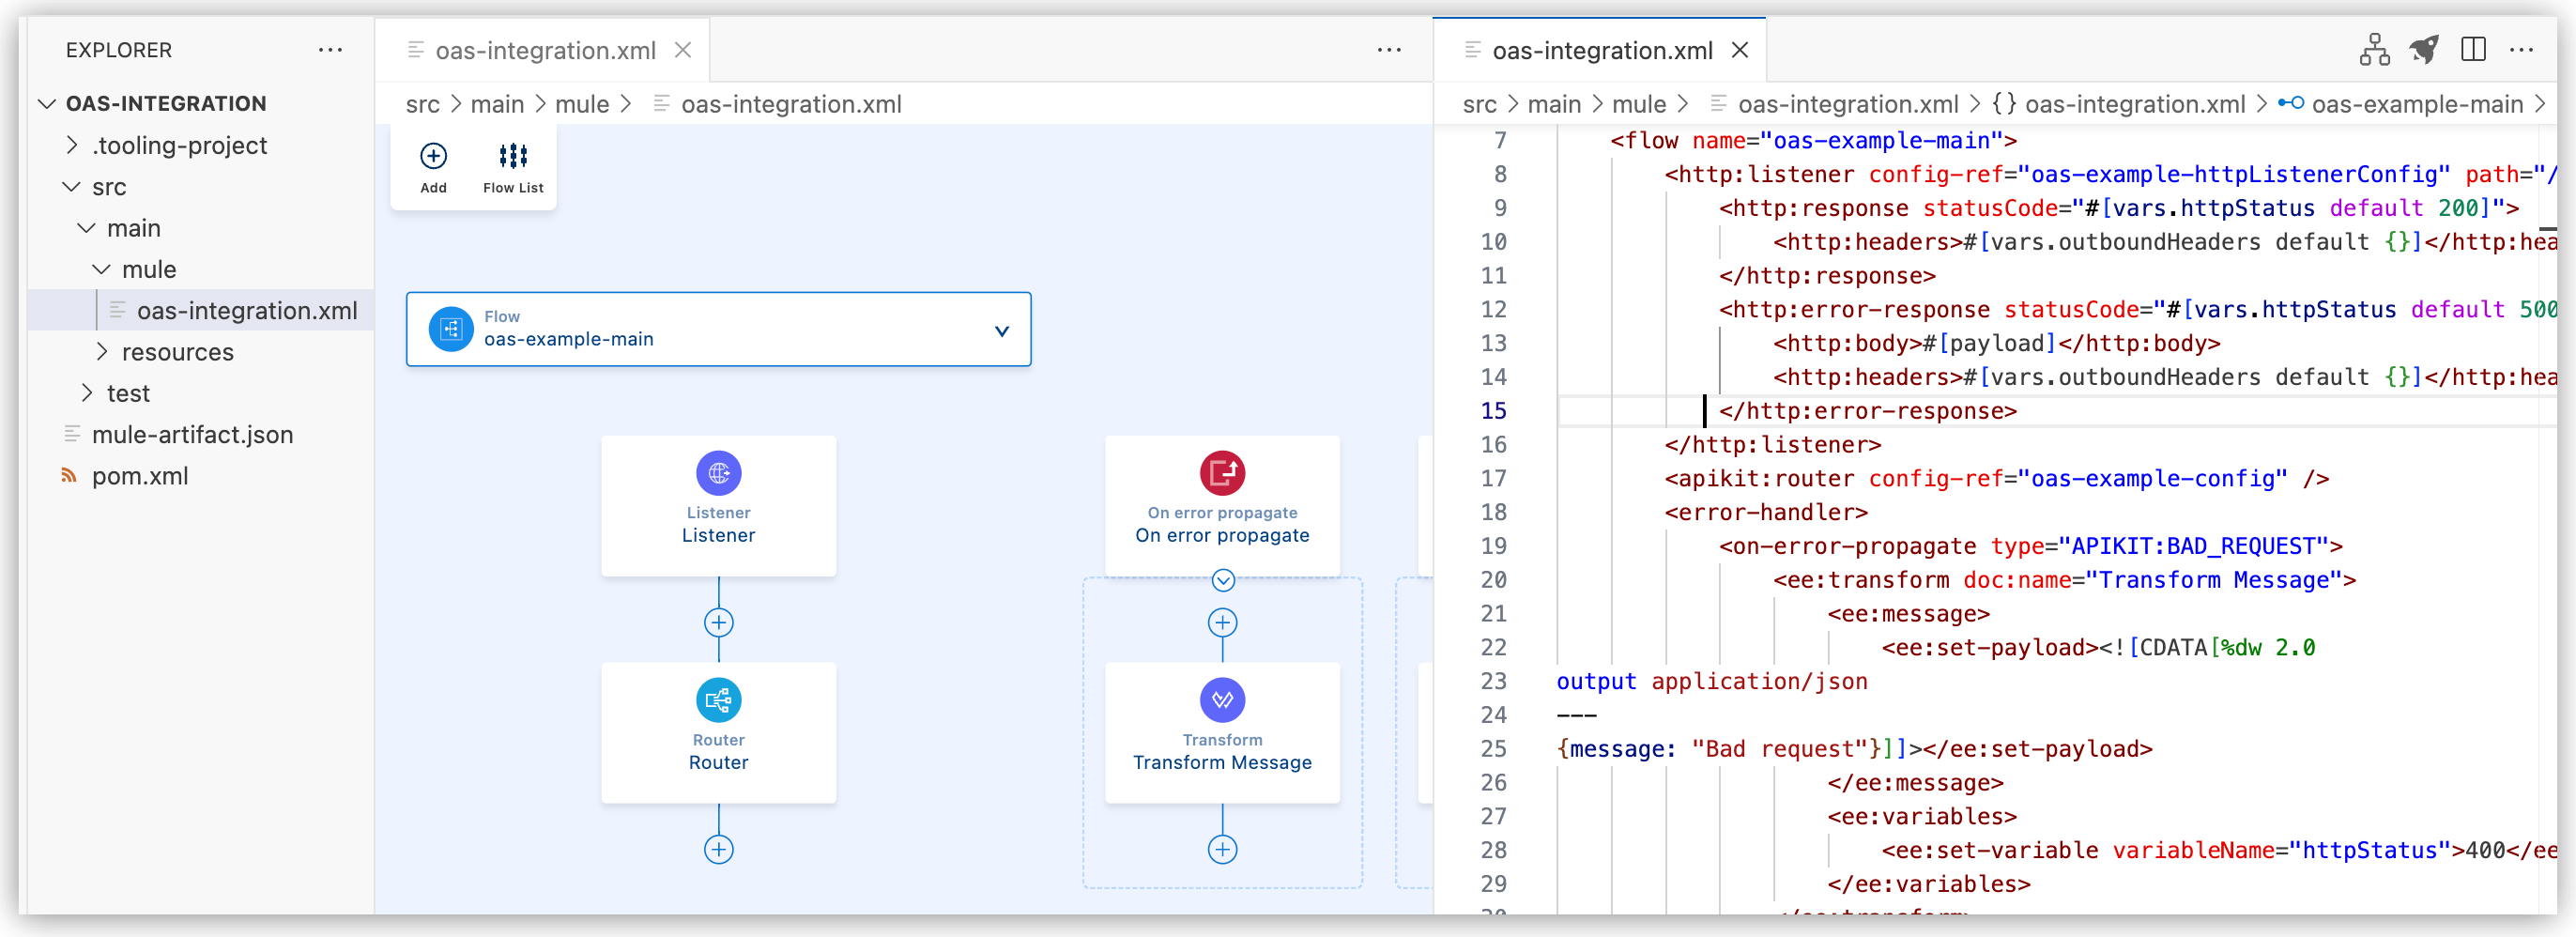 This example includes:
-
The main flow
-
An HTTP Listener with a built-in router
-
Several error handlers
For GraphQL APIs, Anypoint Code Builder also creates a data fetcher (
<graphql-router:data-fetcher>) as a source for each Mule flow. See the Implement a GraphQL API tutorial for an example GraphQL API and Mapping a GraphQL API to Your Data Sources for more information about data fetchers. -
-
You can now implement the interface within the Mule app.
Import an API Spec into a Project
If you have created an integration project, you can scaffold an interface into the project by importing an API spec from Exchange. In this case, Anypoint Code Builder creates a separate configuration XML file for the interface in your integration project.
-
In Anypoint Code Builder, open your integration project in the Explorer view, for example,
my-project-name. -
Open the Command Palette.
Show me how
-
Use the keyboard shortcuts:
-
Mac: Cmd+Shift+p
-
Windows: Ctrl+Shift+p
-
-
In the desktop IDE, select View > Command Palette.
-
In the cloud IDE, click the
 (menu) icon, and select View > Command Palette.
-
-
Provide the following command:
MuleSoft: Import Asset from Exchange -
Depending on the language of your API spec, select one of these options:
-
Rest API for OAS or RAML
-
GraphQL API
-
-
If prompted, click Allow to allow sign in using Anypoint Platform and select the business group.
-
Type the name of the API spec, and press Enter.
-
Wait for the IDE to load a list of matches to the name.
-
Select the API spec to import.
-
At the prompt, select the version of the API spec, such as
v1.0.1. -
When prompted to scaffold the API dependency, select Yes.
When you scaffold the API dependency, Anypoint Code Builder:
-
Adds the API spec as a dependency in your project’s
pom.xmlfile:<dependency> <groupId>e91cab06-650b-4634-9c6f-5bc4f4fc4d17</groupId> <artifactId>OAS-Example</artifactId> <version>1.0.1</version> <classifier>oas</classifier> <type>zip</type> </dependency> -
Adds the Mule and Java versions to the
mule-artifact.jsonfile:{ "minMuleVersion": "4.6.2", "javaSpecificationVersions": [ "11" ] } -
Adds a new configuration XML file, such as
oas-example.xml, to the project: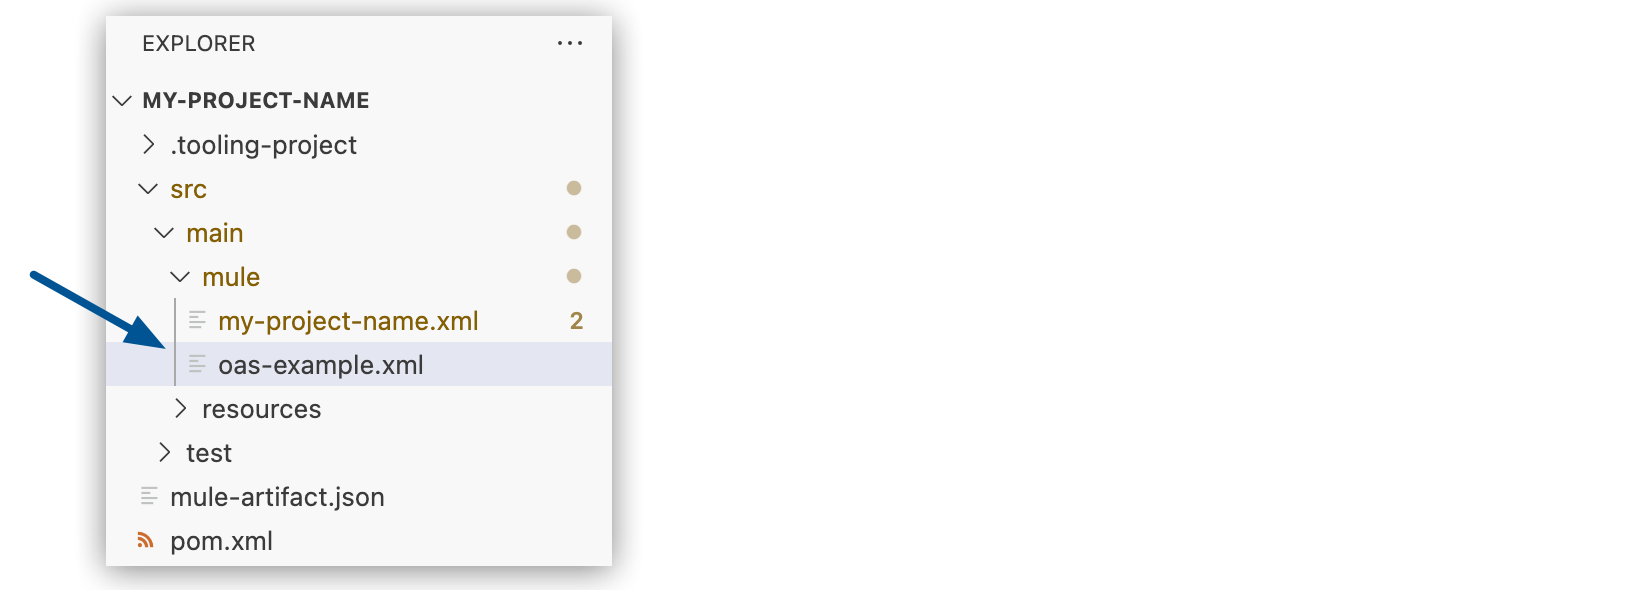
The new configuration XML file includes the interface for your integration project, with flows for each endpoint in the spec, error handlers, and a built-in router, for example:

This example includes:
-
The main flow
-
An HTTP Listener with a built-in router
-
Several error handlers
For GraphQL APIs, Anypoint Code Builder also creates a data fetcher (
<graphql-router:data-fetcher>) as a source for each Mule flow. See the Implement a GraphQL API tutorial for an example GraphQL API and Mapping a GraphQL API to Your Data Sources for more information about data fetchers.
-
-
You can now implement the interface within the Mule app.
Re-scaffold an API Specification into a Project
Re-scaffolding enables you to update a project in the IDE with the latest changes and version of an API spec in Anypoint Exchange. Re-scaffolding updates the configuration XML and pom.xml in your project. To re-scaffold a spec defined in a local API design project that is not published to Exchange, see Iteratively Design and Implement APIs, instead.
This procedure assumes that an updated version of the spec is available from Exchange, for example, a 2.0.0 version:

-
In Anypoint Code Builder, open your implementation project in the Explorer view, for example,
my-implementation-project. -
Open the Command Palette.
Show me how
-
Use the keyboard shortcuts:
-
Mac: Cmd+Shift+p
-
Windows: Ctrl+Shift+p
-
-
In the desktop IDE, select View > Command Palette.
-
In the cloud IDE, click the
(menu) icon, and select View > Command Palette.
-
-
Provide the following command:
MuleSoft: Import Asset from Exchange -
Depending on the language of your API spec, select one of these options:
-
Rest API for OAS or RAML
-
GraphQL API
-
-
If prompted, click Allow to allow sign in using Anypoint Platform and select the business group.
-
Type the name of the API spec, and press Enter.
-
Wait for the IDE to load a list of matches to the name.
-
At the prompt, select the version of the API spec, such as
v2.0.0. -
When prompted to scaffold the API dependency, select Yes.
When you scaffold the API dependency, Anypoint Code Builder:
-
Adds the API spec as a dependency in your project’s
pom.xmlfile:<dependency> <groupId>e91cab06-650b-4634-9c6f-5bc4f4fc4d17</groupId> <artifactId>phoneSync1005</artifactId> <version>2.0.0</version> <classifier>oas</classifier> <type>zip</type> </dependency> -
Updates the configuration XML file that contains the interface for your project with the changes to the imported spec.
-
-
Check for the changes to your implementation project.
For example, if the updated spec adds a new endpoint, the configuration XML for the implementation project has a new flow for the endpoint.
-
If the spec introduced a new version number, open the
pom.xml, and search for the new version of the dependency for theartifactIDof the re-scaffolded spec.
Tour the Interface File
After you scaffold your API spec into an interface, examine the scaffolded flows and error handlers for your interface in the UI canvas and code editor.
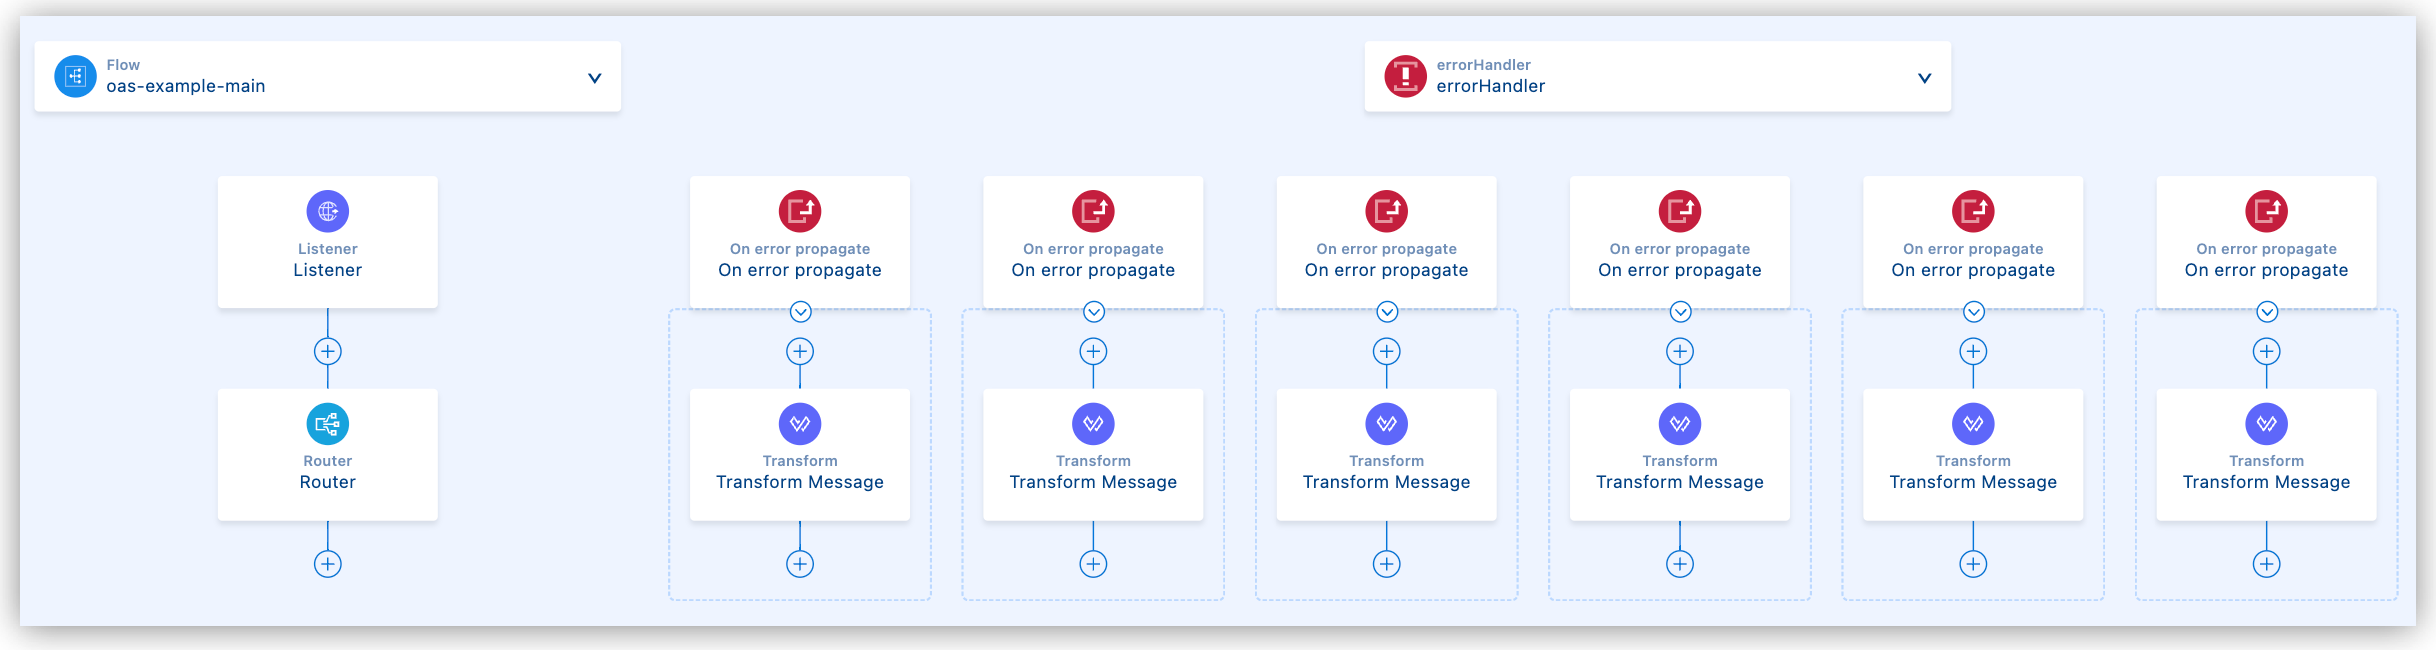
-
In the Explorer view, open the configuration XML file for your interface.
-
Click the
 (Show Mule graphical mode) icon in the activity bar to open the canvas if it doesn’t open automatically.
 -
Click Flow List to navigate through flows:

-
In the code editor, locate the flows created for the endpoints in your API spec.
Example Flow
<flow name="oas-example-console"> <http:listener config-ref="oas-example-httpListenerConfig" path="/console/*"> <http:response statusCode="#[vars.httpStatus default 200]"> <http:headers>#[vars.outboundHeaders default {}]</http:headers> </http:response> <http:error-response statusCode="#[vars.httpStatus default 500]"> <http:body>#[payload]</http:body> <http:headers>#[vars.outboundHeaders default {}]</http:headers> </http:error-response> </http:listener> <apikit:console config-ref="oas-example-config" /> <error-handler> <on-error-propagate type="APIKIT:NOT_FOUND"> <ee:transform doc:name="Transform Message"> <ee:message> <ee:set-payload><![CDATA[%dw 2.0 output application/json --- {message: "Resource not found"}]]></ee:set-payload> </ee:message> <ee:variables> <ee:set-variable variableName="httpStatus">404</ee:set-variable> </ee:variables> </ee:transform> </on-error-propagate> </error-handler> </flow> -
Review the automatically generated Error Handler components.
Example Error Handler Component
<apikit:console config-ref="oas-example-config" />
    <error-handler>
        <on-error-propagate type="APIKIT:NOT_FOUND">
            <ee:transform doc:name="Transform Message">
                <ee:message>
                    <ee:set-payload><![CDATA[%dw 2.0
output application/json
---
{message: "Resource not found"}]]></ee:set-payload>
                </ee:message>
                <ee:variables>
                    <ee:set-variable variableName="httpStatus">404</ee:set-variable>
                </ee:variables>
            </ee:transform>
        </on-error-propagate>
    </error-handler>
Name Your Interface and Implementation Files
When you import an API spec into an existing integration, Anypoint Code Builder automatically names the configuration XML file based on the API spec name. You can change the file names to something more descriptive, such as based on their function, for example:
-
interface.xmlreceives all incoming requests to your application and scaffolded flows validate and route requests. -
implementation.xmlprovides the backend logic for calls to the interface.
To rename a file, right-click on the file, select Rename, and provide a new name.