-
Use the keyboard shortcuts:
-
Mac: Cmd+Shift+p
-
Windows: Ctrl+Shift+p
-
-
In the desktop IDE, select View > Command Palette.
-
In the cloud IDE, click the
 (menu) icon, and select View > Command Palette.
Adding Folders to Your Home Directory
When you create a project, Anypoint Code Builder stores it in your home directory by default. You can create other folders for your projects in the IDE.
Don’t create the project within another project directory.
Create Project Folders in the Cloud IDE
To a folder for storing your Mule projects under your home directory:
-
Open the Command Palette.
Show me how
-
Select the following command:
File: Open Folder...
-
Select your Anypoint Code Builder home directory:

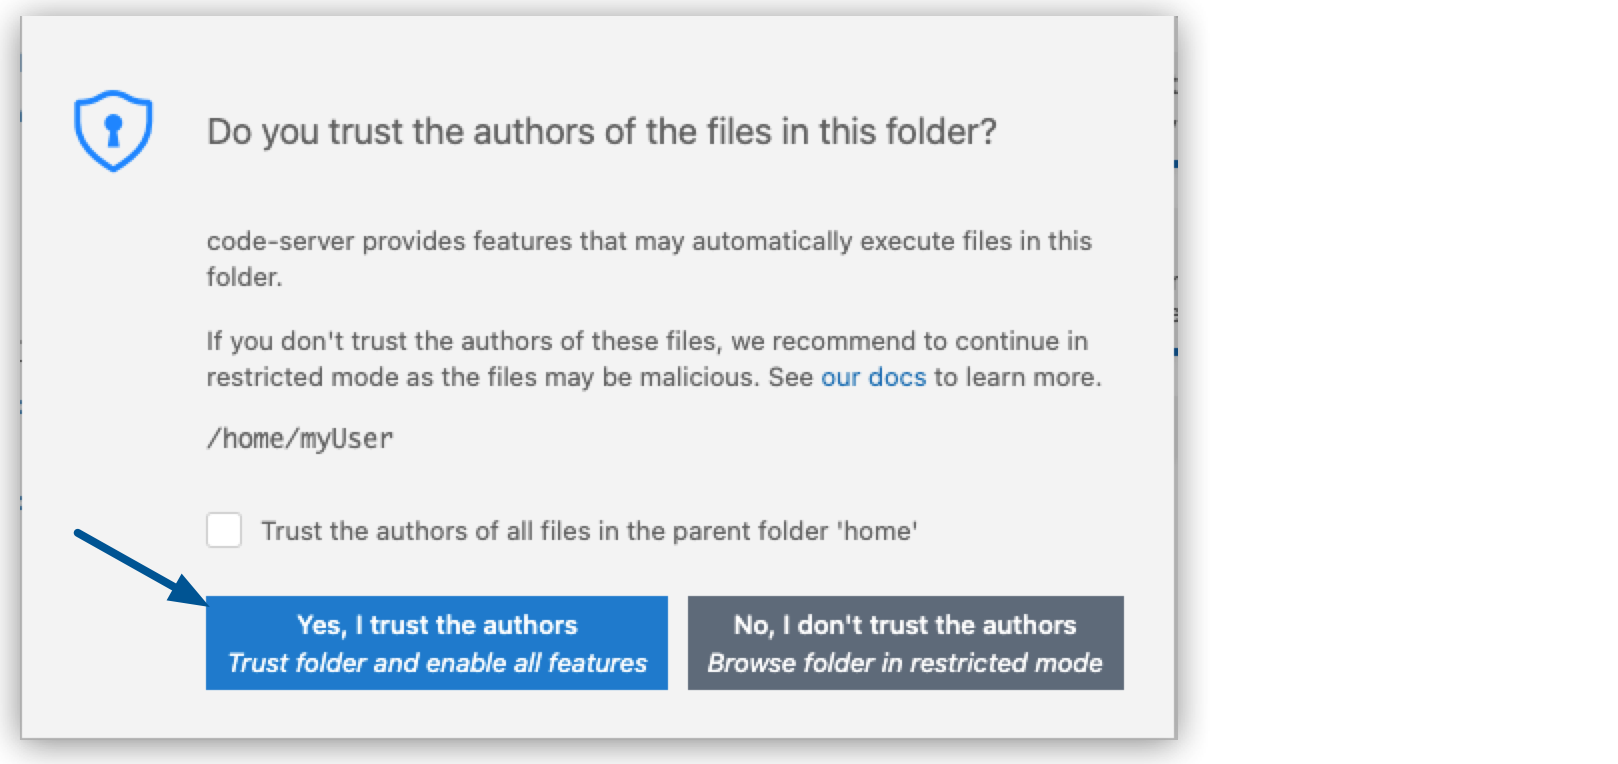
If prompted, trust the authors of the files in the directory:

-
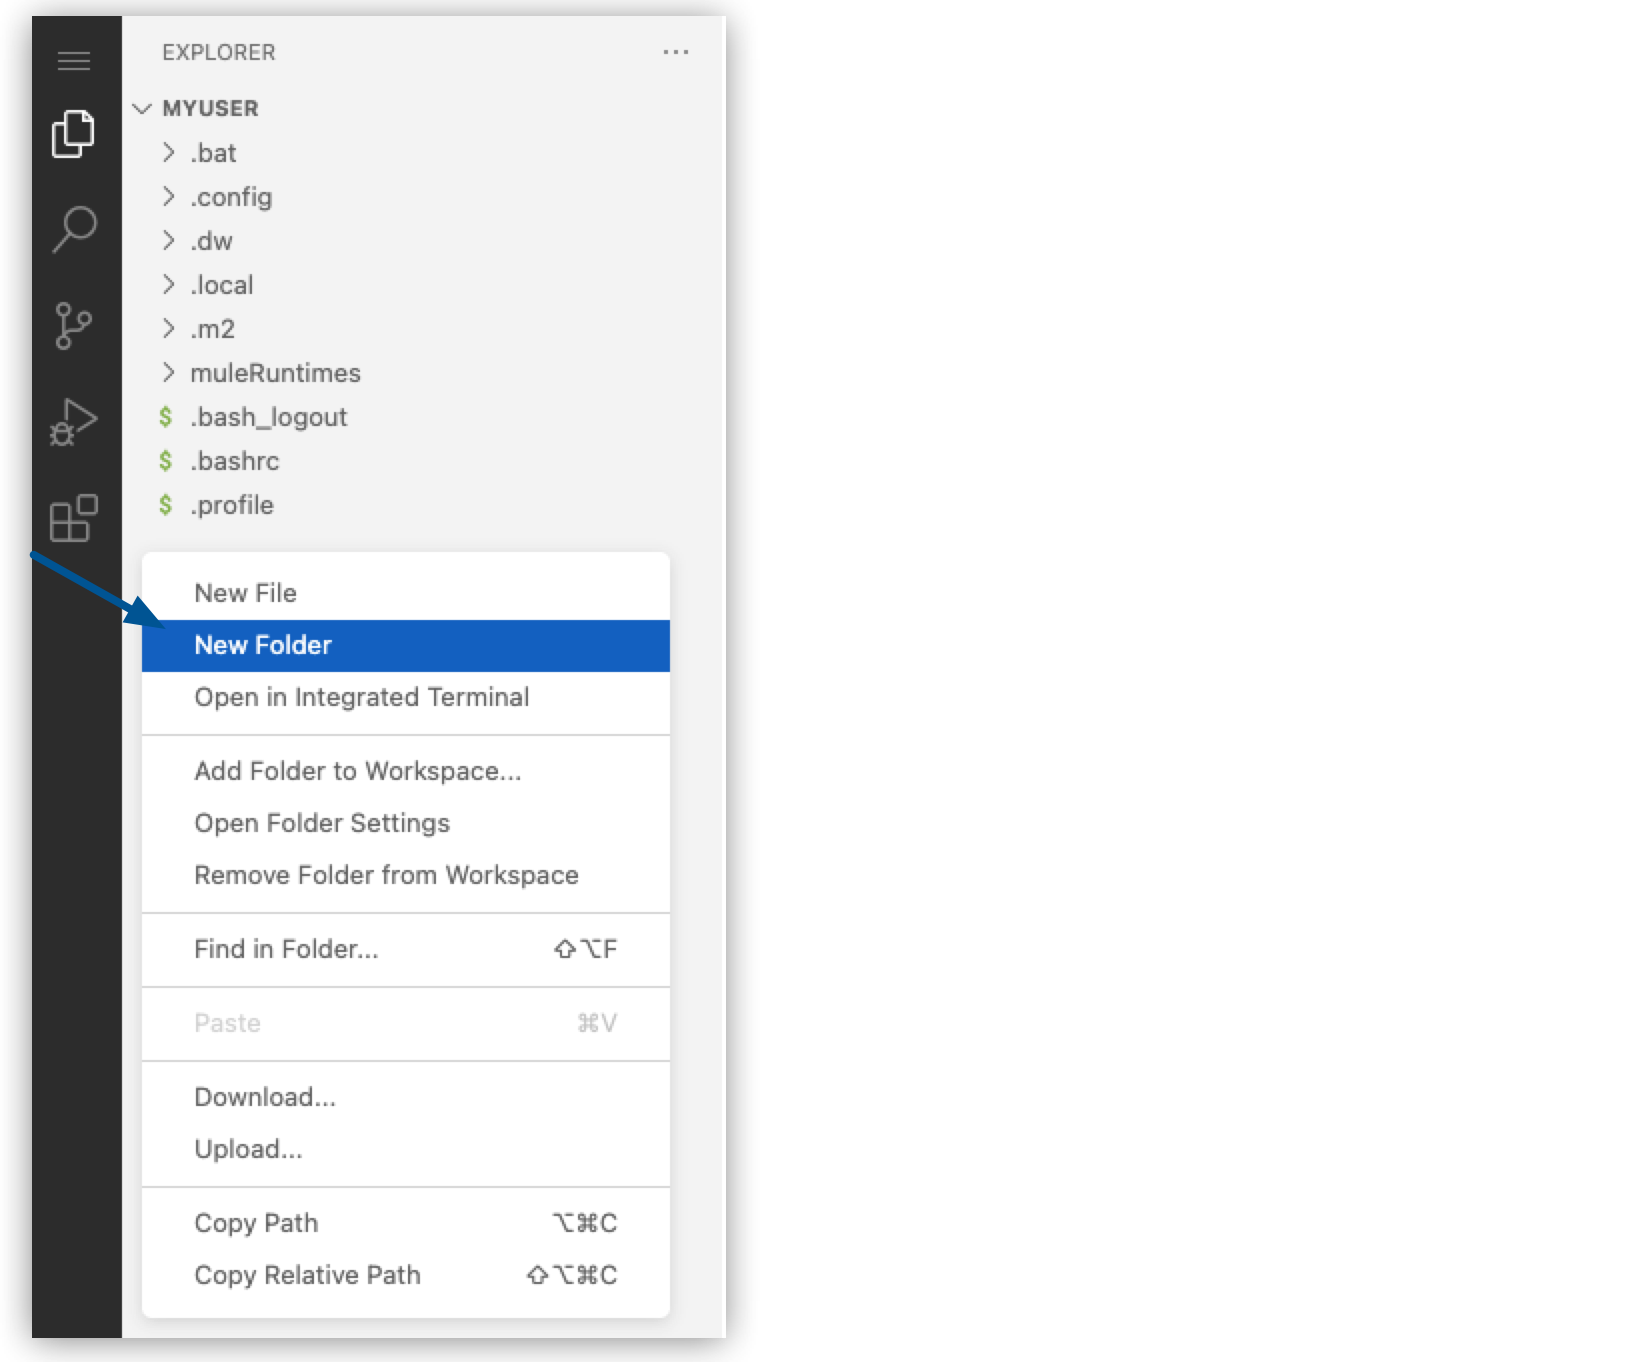
After Anypoint Code Builder loads your home directory, right-click your Explorer view, and select New Folder.

-
Name your new directory and press Enter.
-
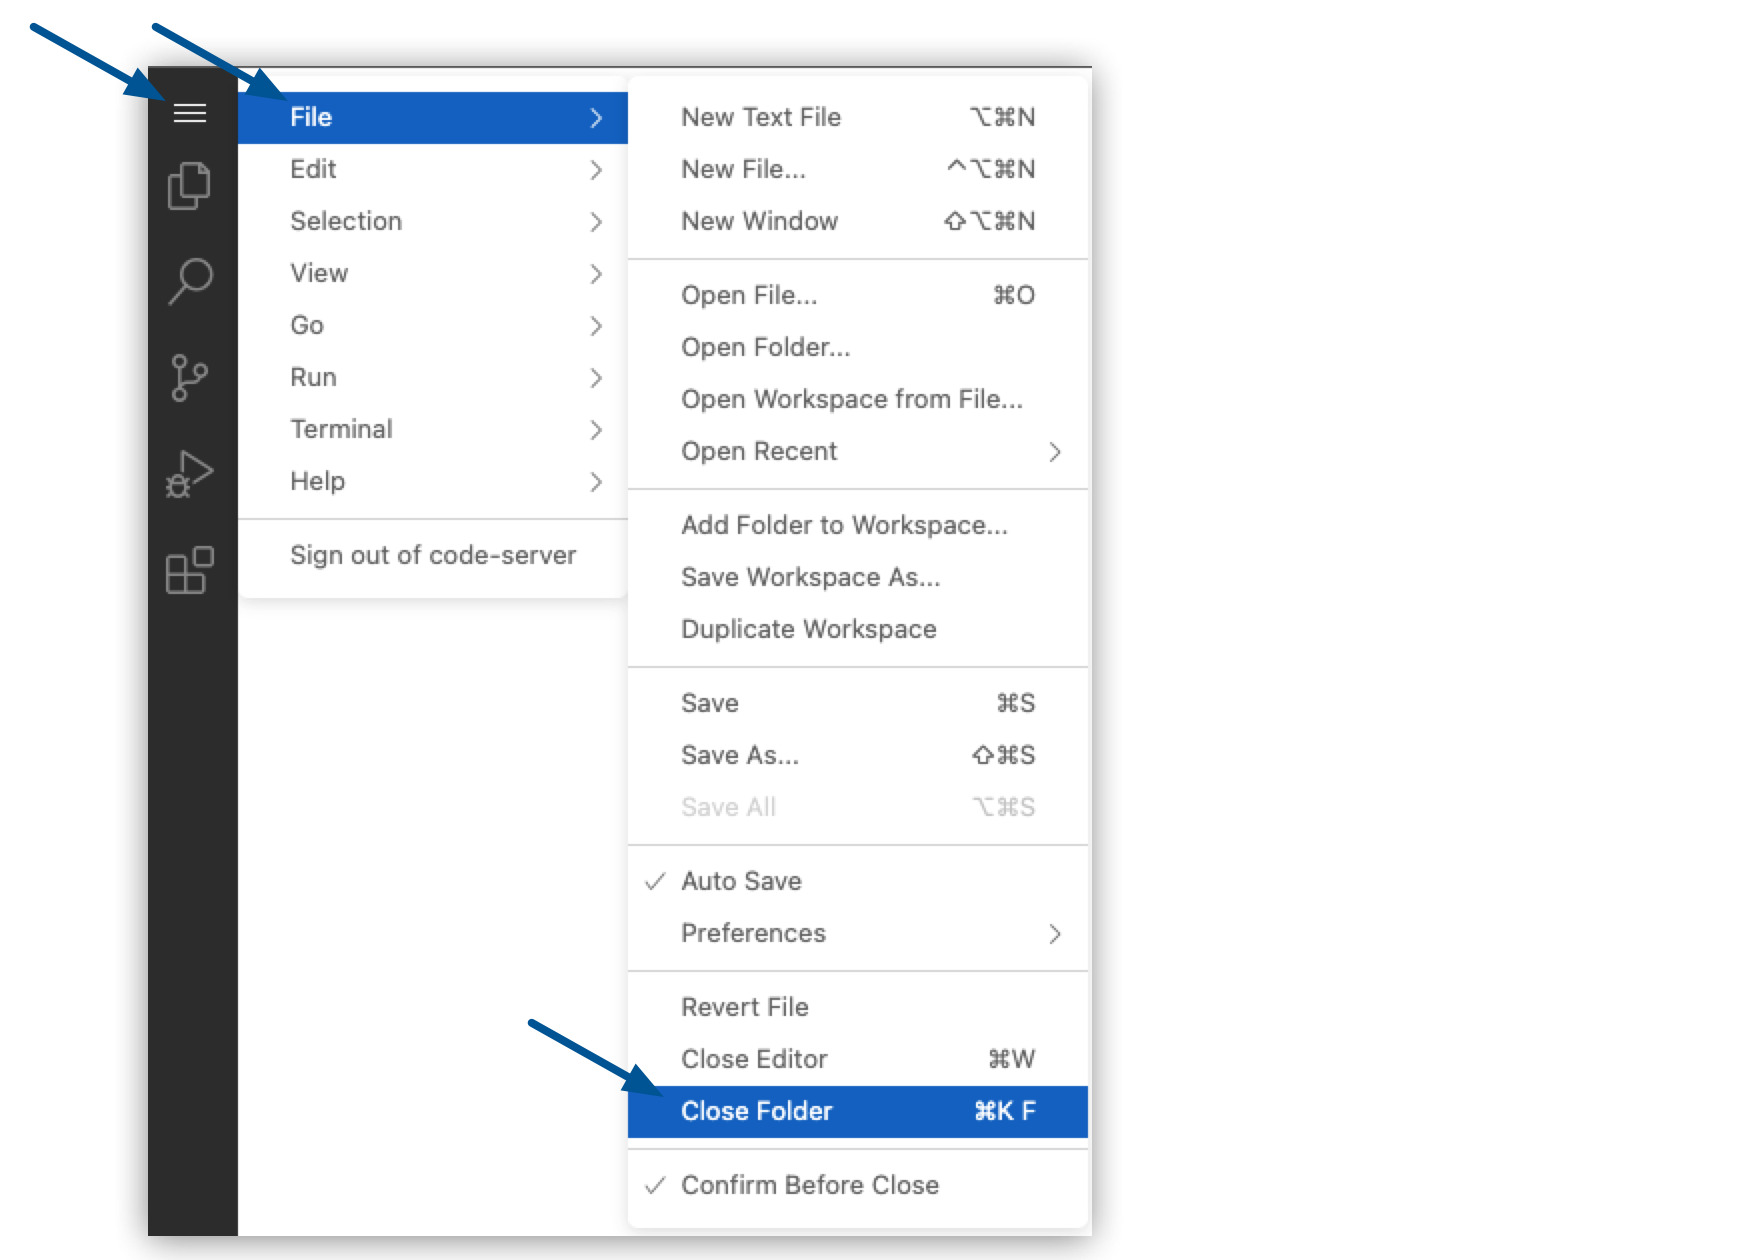
Close your home directory by clicking the
 (menu) icon and selecting File > Close Folder.
Create a Project Folder in the Desktop IDE
To create a local folder for your projects from the desktop IDE:
-
Open the Command Palette.
Show me how
-
Use the keyboard shortcuts:
-
Mac: Cmd+Shift+p
-
Windows: Ctrl+Shift+p
-
-
In the desktop IDE, select View > Command Palette.
-
In the cloud IDE, click the
 (menu) icon, and select View > Command Palette.
-
-
Select the following command:
File: Open Folder...
-
Use your local directory to create a new folder.
Create a Project Folder from the Desktop or Cloud IDE
Use the terminal in the IDE to create folders.
-
Ensure that no projects are open.
-
From your IDE, open the Terminal window in the console:
-
In the desktop IDE, select View > Terminal.
-
In the cloud IDE, click the
 (menu) icon, and select Terminal > New Terminal.
 -
For either IDE: Press Ctrl and then press the backtick key (`).
-
-
Provide this command to create a folder:
mkdir <name-of-your-folder>Replace
<name-of-your-folder>with a name of your choice for the directory.


 Cloud IDE
 Desktop IDE