Discovering the UI
 Cloud IDE
 Desktop IDE
Get familiar with the Anypoint Code Builder UI and elements to design, develop, and deploy APIs and integrations.
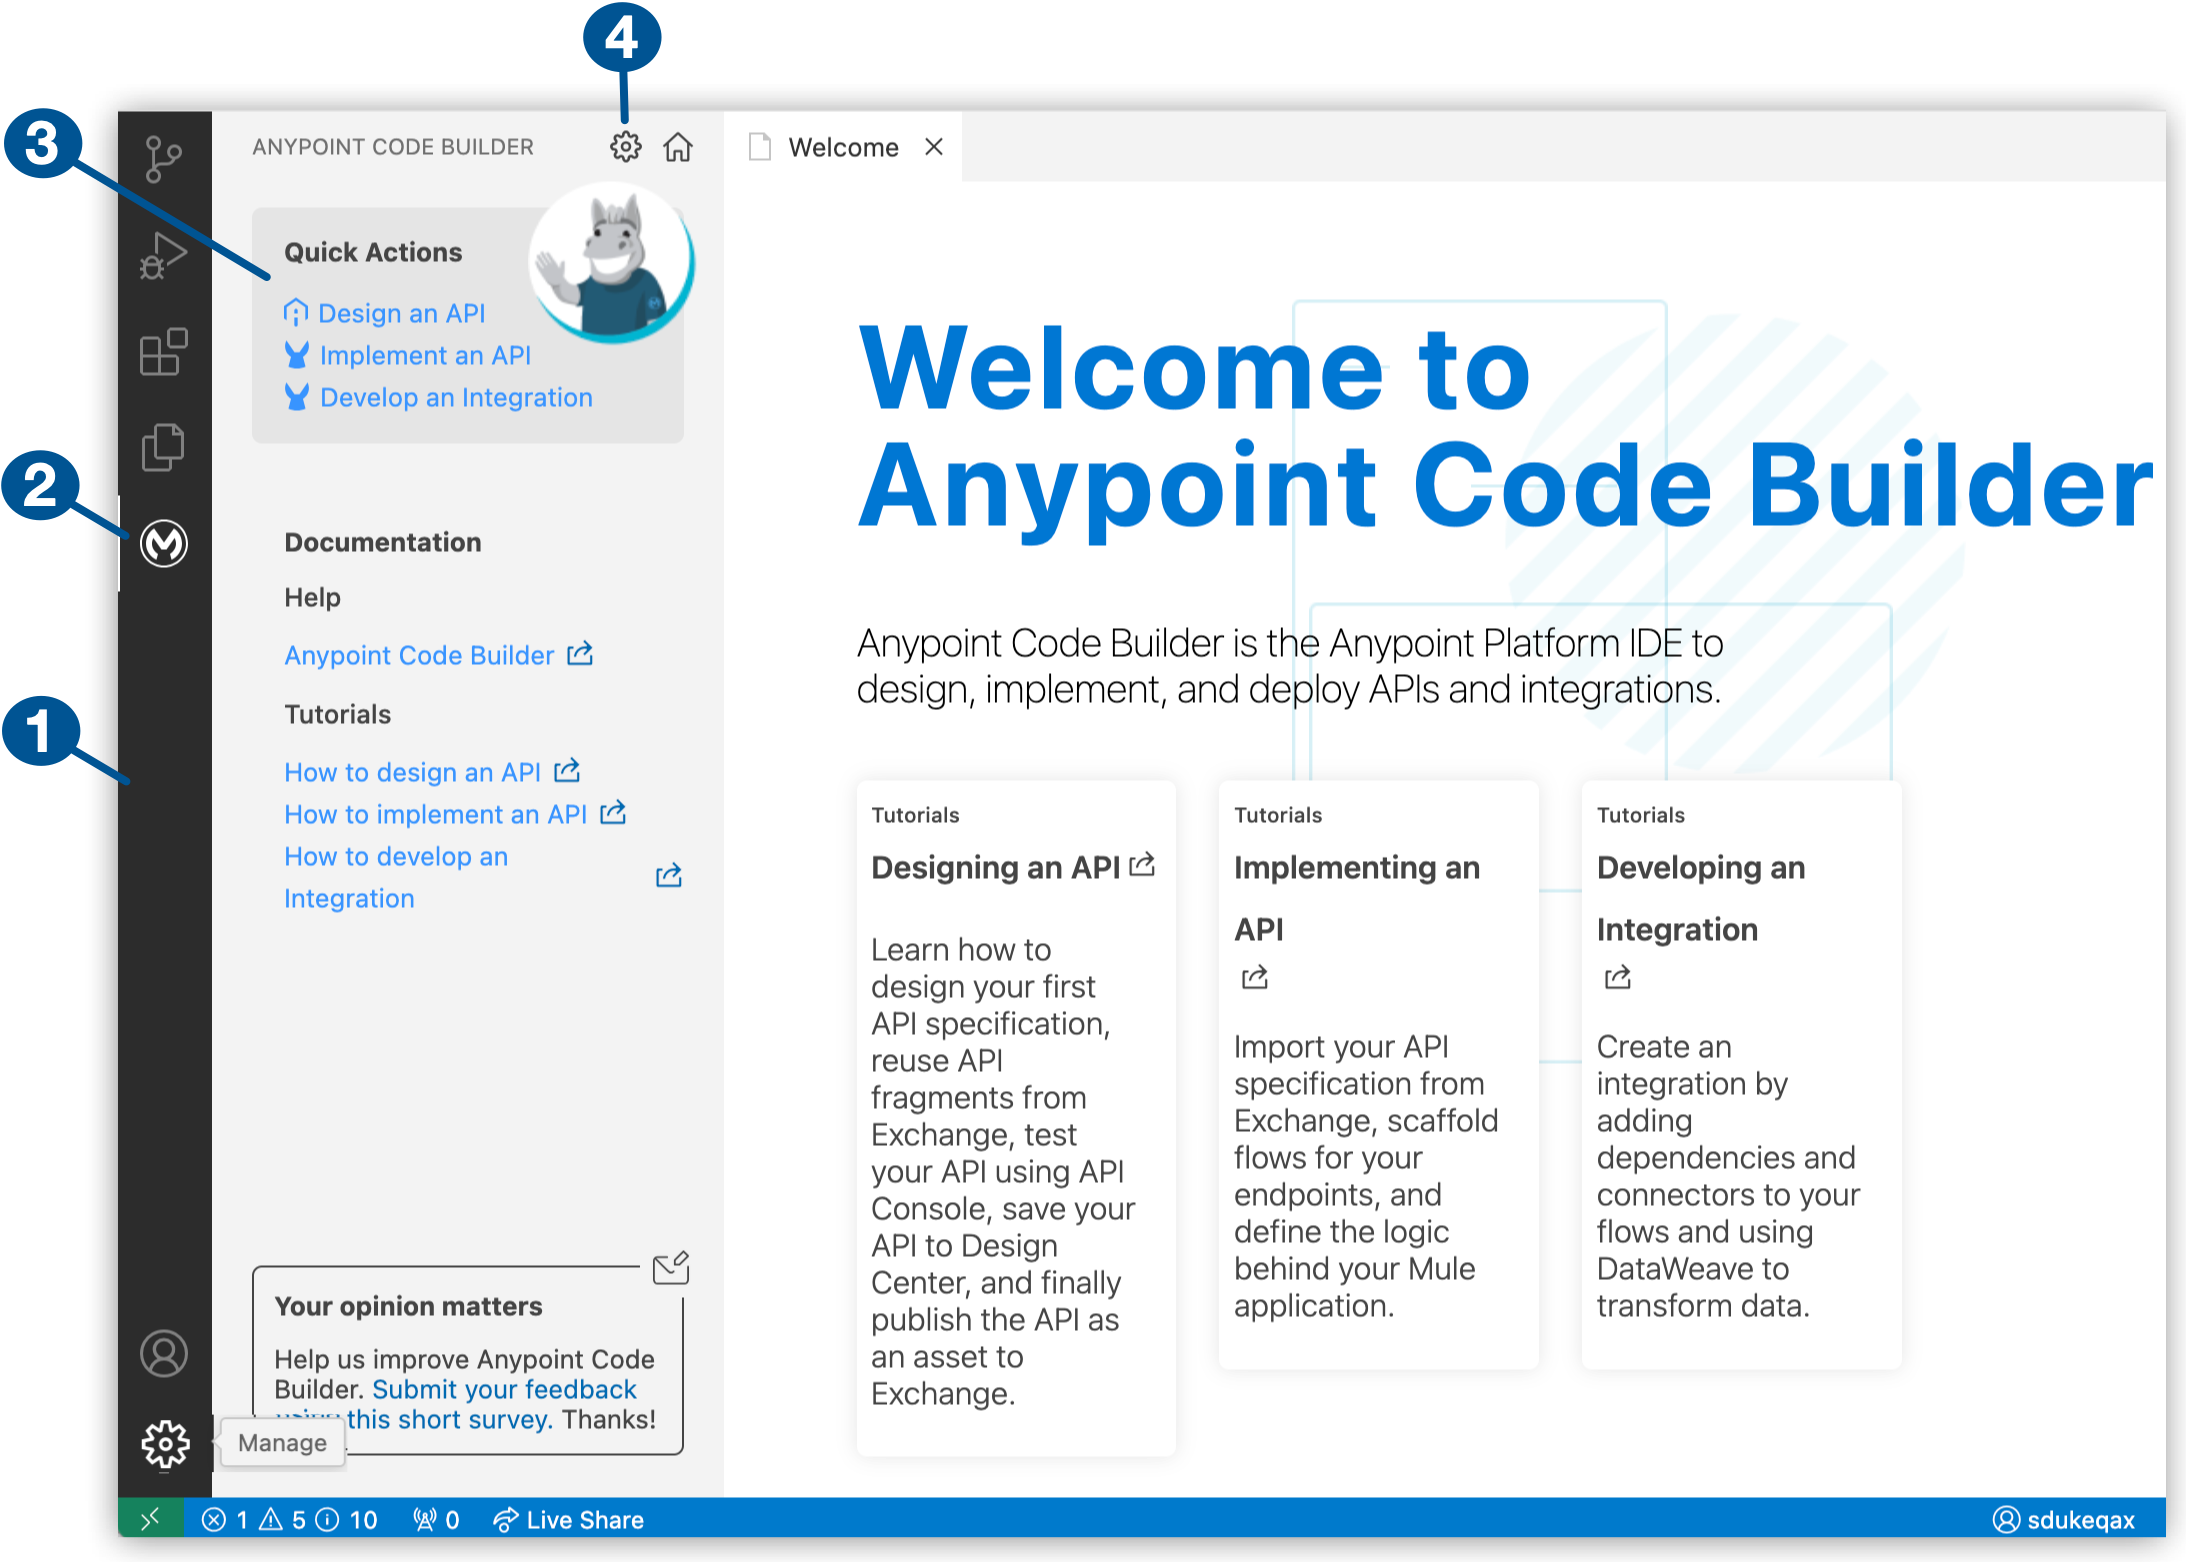
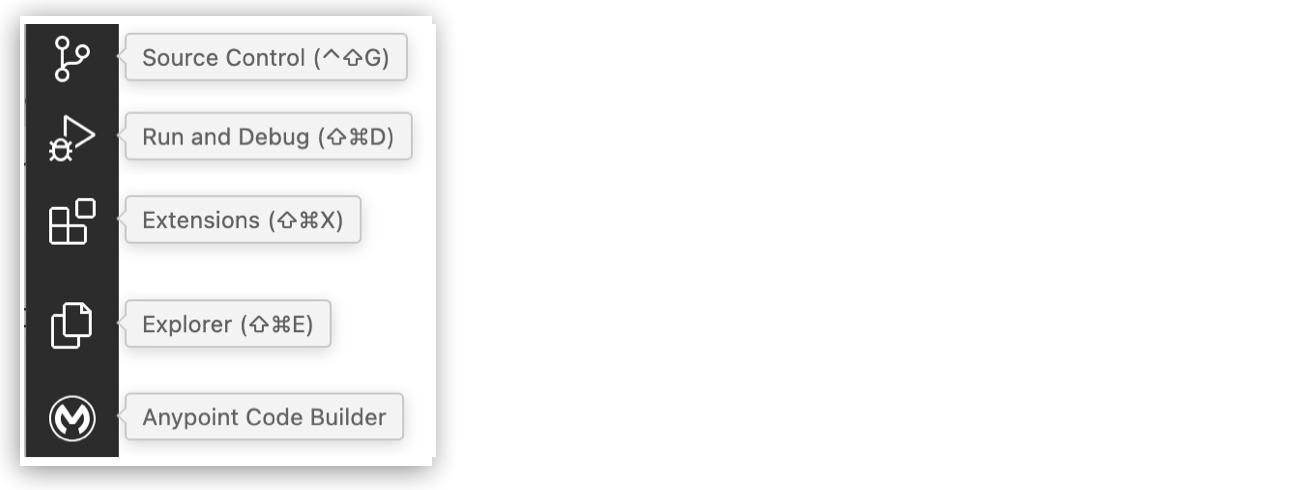
| 1 | Activity Bar: Use VS Code Activity Bar items as you work on your projects. Mouse over the items to find their names:
In addition to Anypoint Code Builder (MuleSoft icon), commonly used items in the Activity Bar include:
|
| 2 | Anypoint Code Builder (MuleSoft icon): Open the Anypoint Code Builder panel to start a project. Follow the tutorials to get started with API specification design, implementation, and integration development in Anypoint Code Builder. |
| 3 | Create: Start an API specification, implementation, or integration project. |
| 4 | Settings: Set Anypoint Code Builder configurations, including the US or EU cloud for your IDE. Select the cloud where your Anypoint Platform user account resides. |
Compare Project UIs in the IDE
The UIs of the web and desktop IDEs share the same structure.
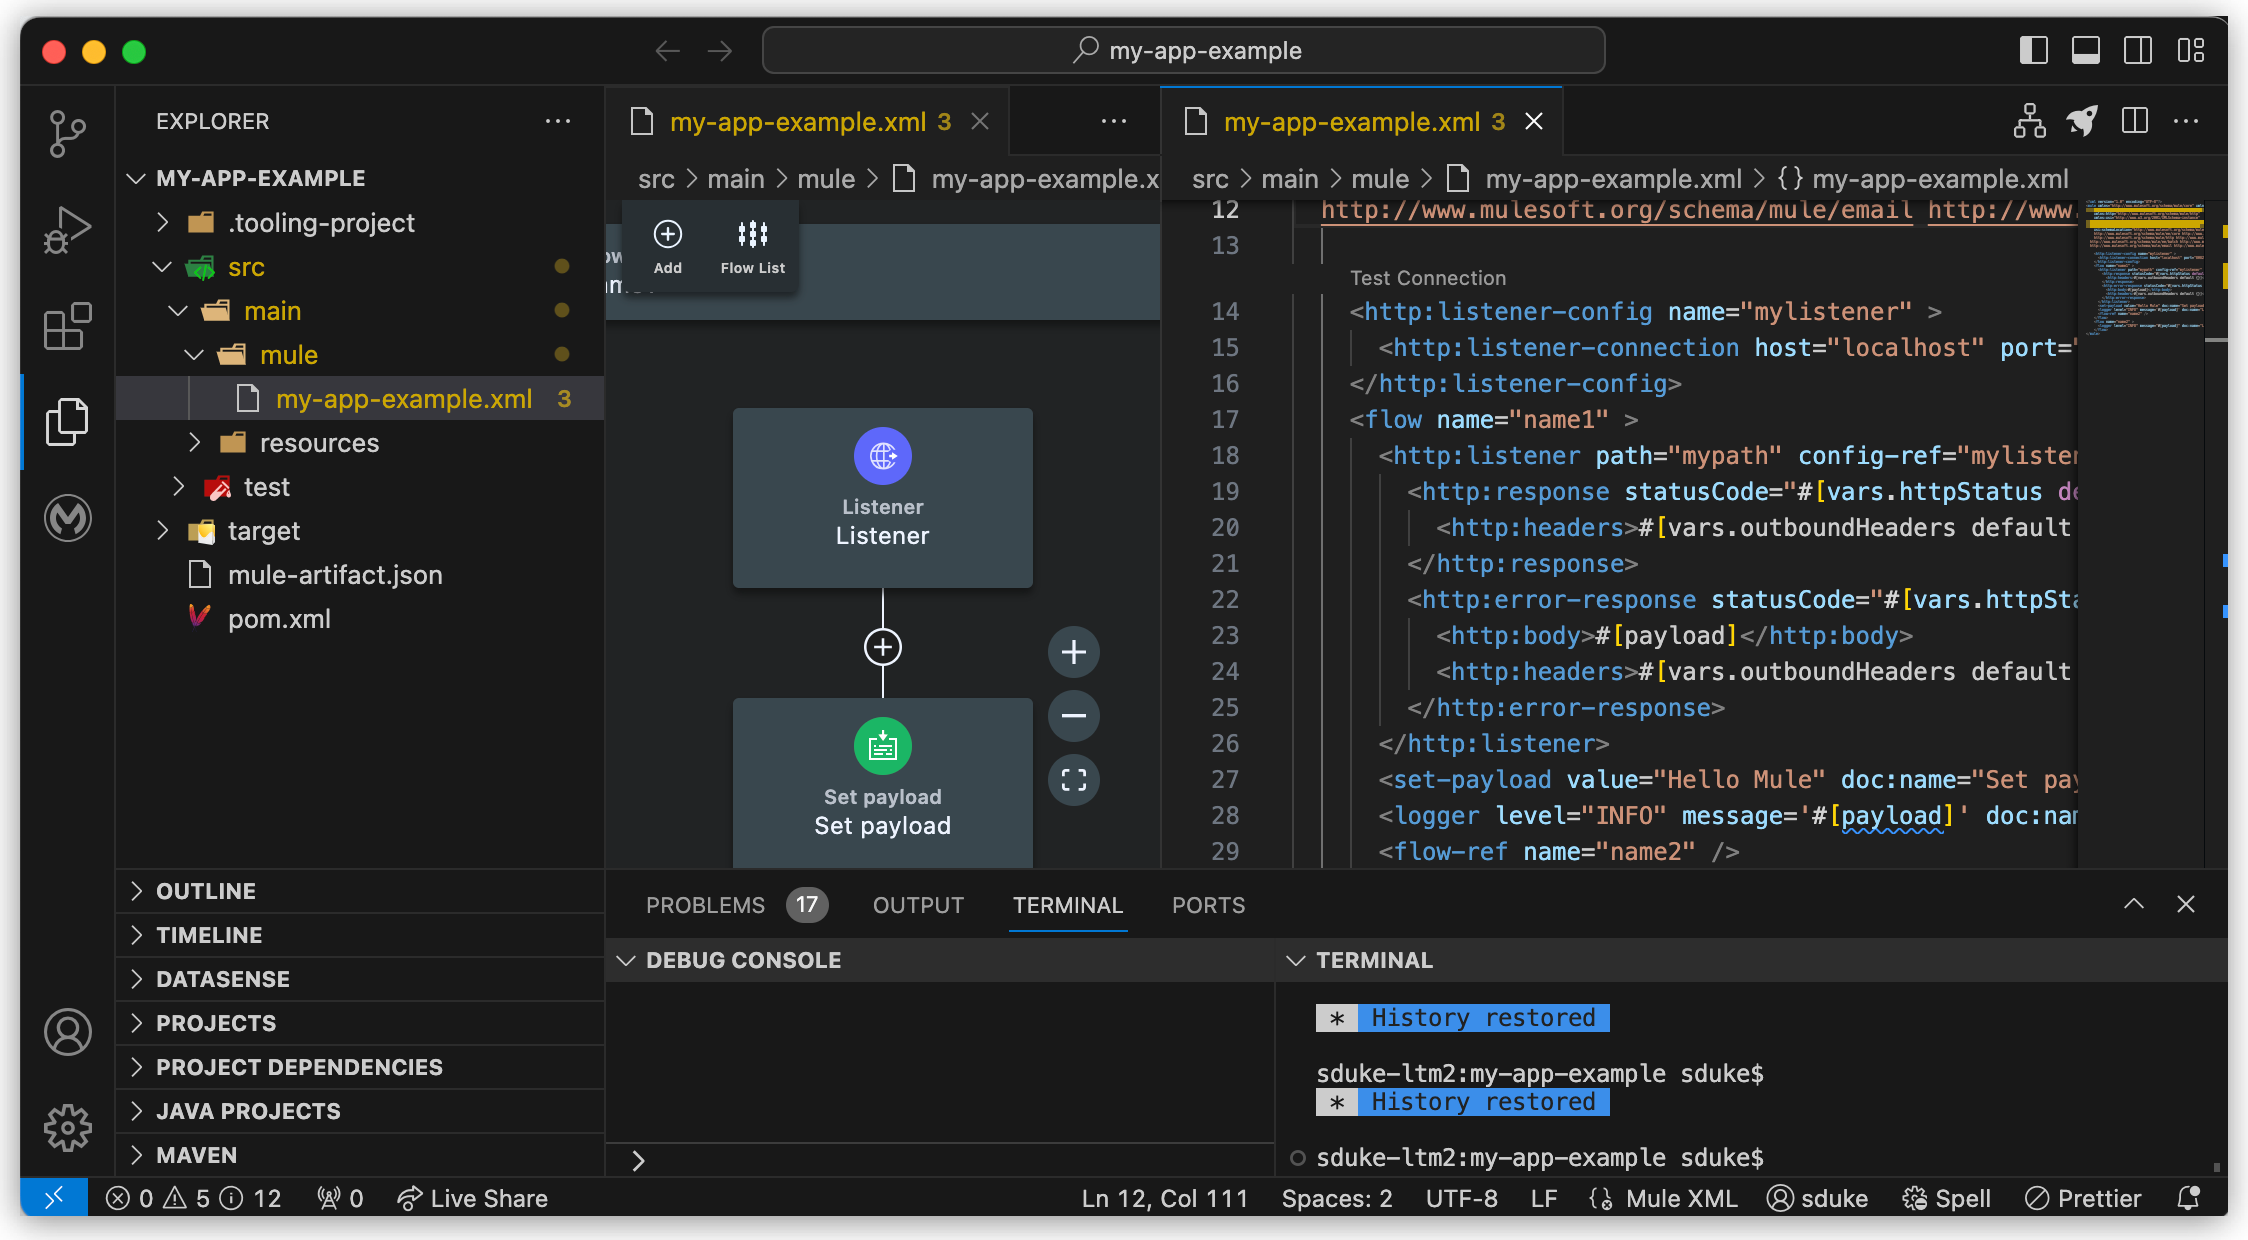
Integration and implementation projects are Mule applications with similar UIs:
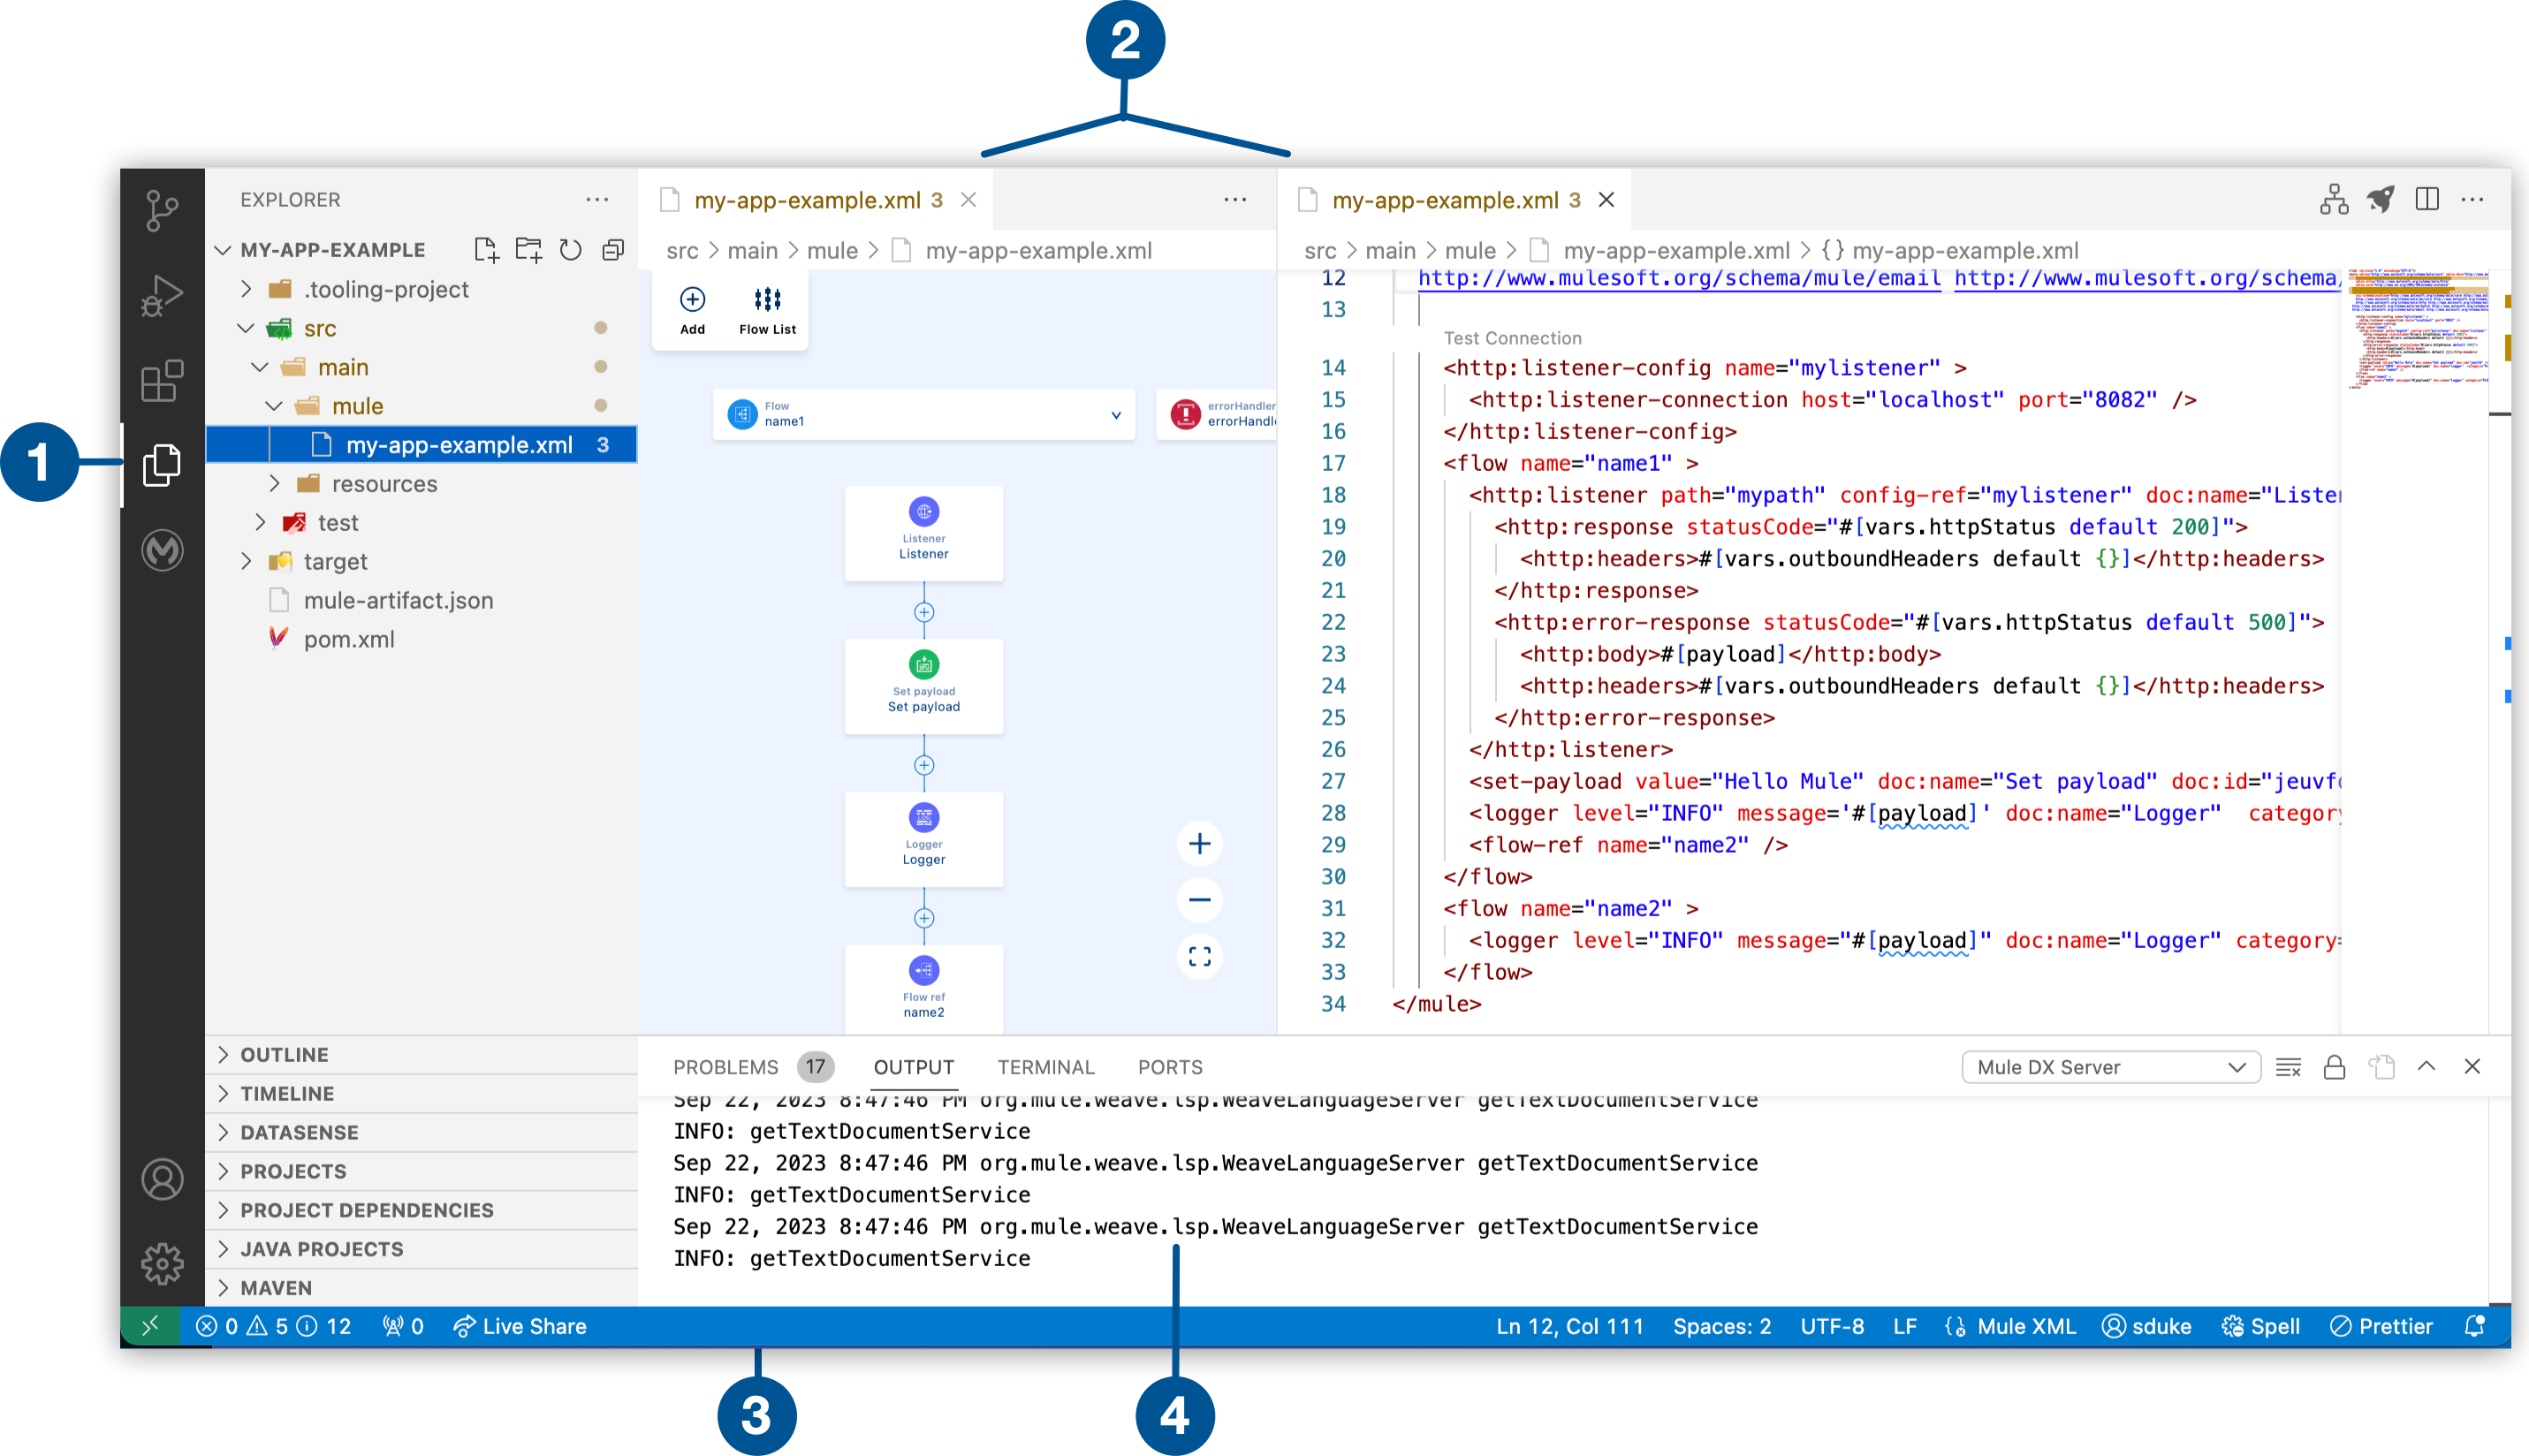
| 1 | Explorer: Open a workspace for your project. |
| 2 | Editors: Develop your project in the canvas and configuration XML files. Configuration XML files support auto-completion. |
| 3 | Status Bar: Check for your user name to learn if you are logged in to Anypoint Platform. |
| 4 | Output Panel: As your projects run in Anypoint Code Builder, view output and logs from Mule DX Server or Mule DX Server: Scaffolding. Open the built-in command terminal. View problems and ports.
See Developing Integrations and Implementing APIs for more detail. |
API design projects include a service for mocking endpoints in the API Console:
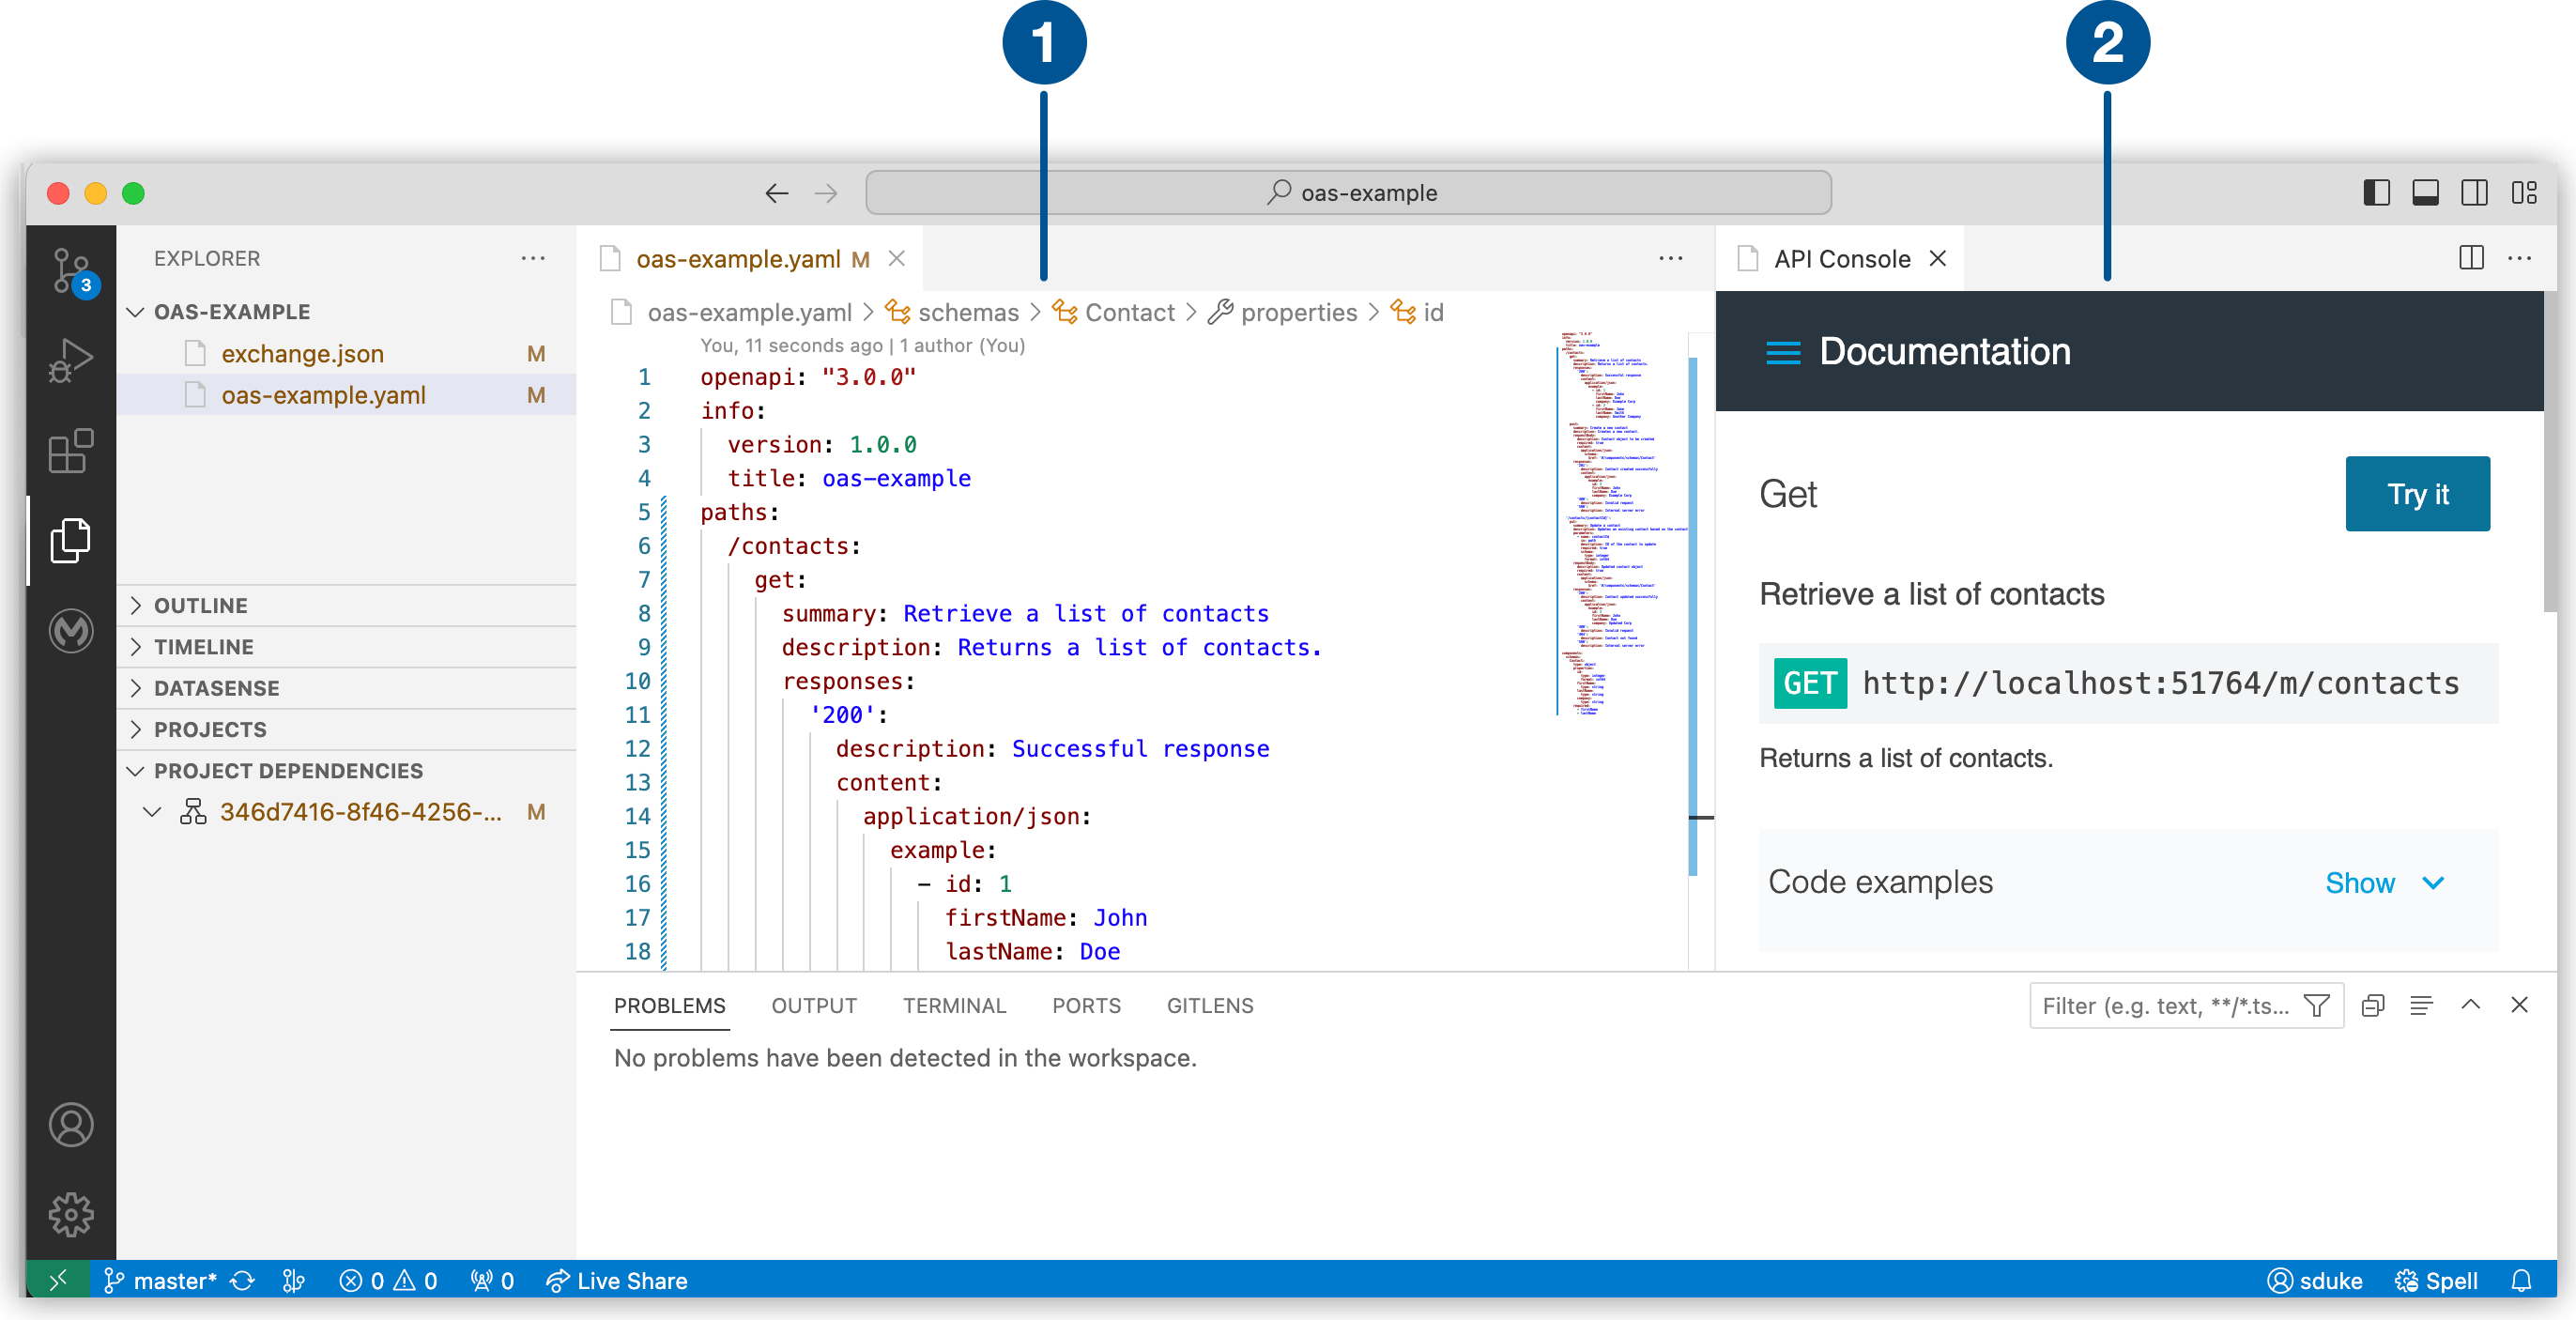
| 1 | Editor: Configure API specification project files. This editor supports auto-completion. |
| 2 | API Console: Test endpoints on your examples.
See Designing API Specs and Fragments for more detail. |
Use Auto-Completion Menus
The IDE supports auto-completion through the Anypoint Code Builder extensions and through IntelliSense, a built-in code-completion feature of VS Code, to provide auto-completion in Editor views.
-
Open auto-completion options from the Editor view using one of the following options:
-
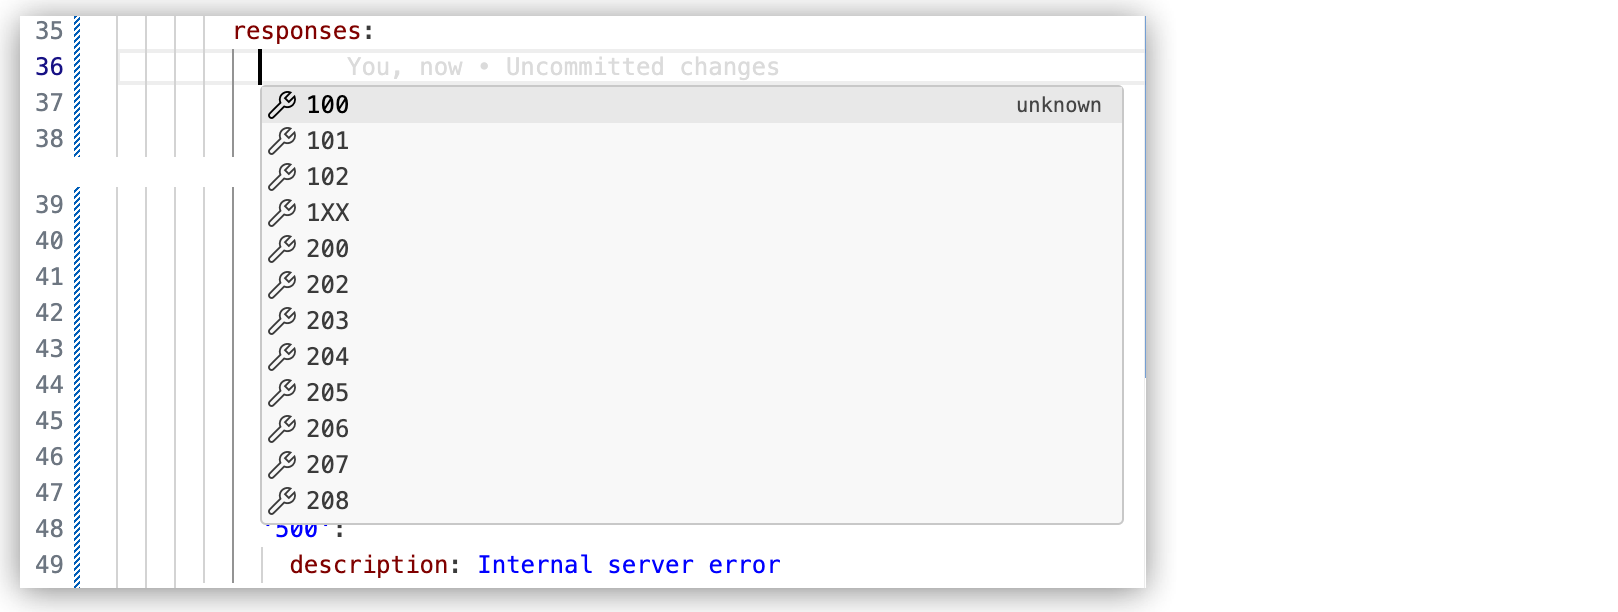
Using IntelliSense: Press Ctrl+Space to display a list of available options, and enter a search term to narrow the results, for example:
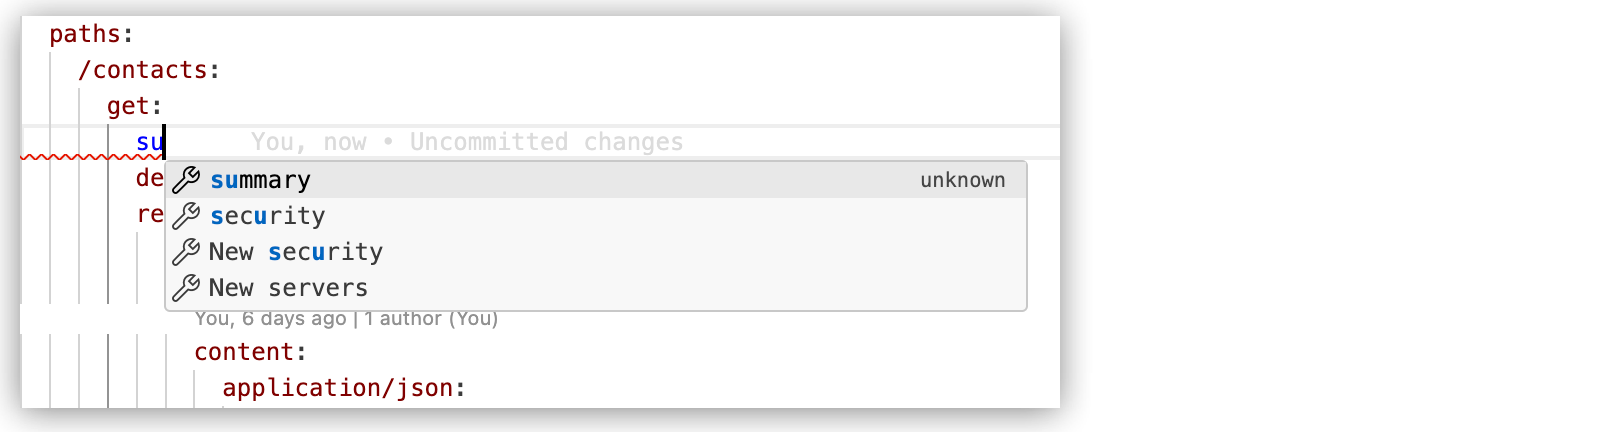
IntelliSense shows different options, depending on the context, for example:
-
Using the extensions: Place your cursor at the location where you intend to use the auto-suggestion menu, and optionally, start typing to narrow the list of suggested options to return. If the line has some content, click Tab, provide a space, or start typing after the content on the line. To close the auto-suggestion menu, click Escape.
For API design, you can enable or disable auto-completion:
Show me how
-
Open the Extensions panel from the activity bar by clicking the
 (Extensions) icon.
 -
Right-click the extension Anypoint Code Builder - API Extension, and select Extensions Settings.
This action opens the Settings tab to the configuration for the extension, @ext:salesforce.mule-dx-api-component.
-
In the Settings tab, enable the API design editor to suggest auto-completion options.
-
Optionally, set a time in milliseconds to wait before listing auto-completion options.
-
-
-
Use the arrow keys to navigate the list.
-
Press Enter or Tab to insert the selected element.
Auto-complete adds the element to the code and places the cursor for you to add values.
For more information, see IntelliSense in the VS Code documentation.
Change the Look and Feel of the IDE
Select a theme to change the look and feel of the desktop or cloud IDE.
-
Select the Manage (gear) icon from the activity bar.
-
Select Themes > Color Themes, and select a theme, for example, Dark Modern:
Explore the Canvas View
By default, when you open a project in Anypoint Code Builder, the canvas view opens first. This allows you to begin building and editing your flows visually, without switching to the code editor.
Switch Views
You can use the toolbar to switch between the canvas and the code editor:
-
Click the </> icon in the toolbar to toggle between canvas and code.
-
To open both views side by side, right-click the canvas tab and select Open in Canvas and Code Editor.
| A dot (•) on a canvas tab indicates that the file contains unsaved changes. |