
Getting Started with Anypoint Code Builder
Anypoint Code Builder is built from the Anypoint Extension Pack for Visual Studio Code. You must load the extension pack to your local Visual Studio Code installation.
Set up Anypoint Code Builder
The extensions in Anypoint Extension Pack are available from the Visual Studio Marketplace.
Before You Begin Anypoint Code Builder Setup
Before installing the Anypoint Code Builder extensions to VS Code, make sure you have an Anypoint Platform account with the required permissions:
-
An administrator with an Anypoint Platform organization account must provide you with the necessary permissions. See Configuring Permissions.
-
Anypoint Platform requires a user account. You can use an existing account or create one from Anypoint Platform (see supported Cloud Hosts).
For information about OS and system compatibility, see Anypoint Code Builder Release Notes.
Hardware and Storage Requirements
Anypoint Code Builder relies on Visual Studio Code (VS Code), Java, Node.js, Maven, and local build artifacts. To avoid timeouts, slow dependency resolution, and poor responsiveness, your environment must meet the following minimum specifications. Recommended values improve performance for larger workspaces and frequent local runs.
For supported operating systems and extension compatibility, see Anypoint Code Builder Release Notes.
To check whether your machine meets these specifications and apply available optimizations automatically, ask MuleSoft Vibes or Claude Code to run the run-system-diagnostics skill.
Hardware Requirements
| Component | Minimum | Recommended |
|---|---|---|
CPU |
8 cores or 8 vCPUs |
More cores for parallel builds and multiple large projects |
RAM |
32 GB |
Additional memory for multiple VS Code windows and heavy local testing |
Primary storage type |
NVMe SSD (PCIe 3.0 or higher) |
Same; avoid network-only or heavily virtualized disks for the OS, user profile, and project roots |
Free disk space |
50 GB |
100 GB |
Network |
1 Gbps |
10 Gbps (for large dependency downloads and corporate artifact repositories) |
Storage Performance
Local disks that can’t sustain the following metrics often show slow indexing, Maven repository access, and Mule application startup.
Confirm values with your storage vendor or disk benchmark tooling on the volume that hosts your user profile, local Maven repository, VS Code data, and project directories. Consider input/output operations per second (IOPS) as well; higher IOPS generally improve responsiveness for random small-file access.
Antivirus, endpoint detection, and real-time scanning can reduce effective IOPS below these targets. Apply the exclusions in Configure Antivirus and Endpoint Protection Exclusions.
| Metric | Minimum Requirement |
|---|---|
Random read IOPS (4 KB) |
10,000 IOPS |
Random write IOPS (4 KB) |
8,000 IOPS |
Sequential read |
1,250 MB/s |
Sequential write |
1,000 MB/s |
Configure Antivirus and Endpoint Protection Exclusions
On managed devices, add exclusions for the processes and directories that Anypoint Code Builder and its toolchain use most intensively. Exclusions reduce file locking, false positives, and severe I/O latency during builds. They also reduce the scan surface for specific paths and processes, but your organization’s security policy decides whether exclusions are allowed and how they’re deployed.
Use the checklist with your security team. Adjust paths for your environment.
Processes (executables)
-
Windows:
java.exeorjavaw.exe— Java runtime used by Mule and tooling -
macOS:
java— same as on Windows, using the resolved path from your JDK install -
Windows:
node.exe— Node.js used by VS Code extensions and scripts -
macOS:
node— same as on Windows -
Windows:
Code.exe— Visual Studio Code -
macOS: Visual Studio Code application bundle — for example,
Visual Studio Code.app
Directories
-
User profile Anypoint Code Builder data:
Windows:%USERPROFILE%\AnypointCodeBuilder
macOS:~/AnypointCodeBuilder -
VS Code user data:
Windows:%USERPROFILE%\.vscode
macOS:~/.vscode -
Local Maven repository:
Windows:%USERPROFILE%\.m2
macOS:~/.m2 -
System temporary directory used by Anypoint Code Builder and build tools:
Windows:%USERPROFILE%\AppData\Local\Temp
macOS:$TMPDIR(or/tmpwhen that is your temp location) -
Projects directory — the root folder where you clone or store Mule and API projects (your
ProjectsDirectory); exclude the entire tree, not single files
Windows Performance
On Windows, avoid running projects from network-mapped drives, because remote file access adds latency to project loading and canvas responsiveness. Store projects on local storage that meets the requirements in Storage Performance, and keep Anypoint Extension Pack updated to the latest version to benefit from ongoing file read and write optimizations for Windows.
Power Settings
Power management can throttle CPU and disk performance during long builds or local runs.
-
Windows: Prefer a High performance or Balanced power plan while you work; avoid battery saver or aggressive power saving when the machine is on AC power.
-
macOS: On notebooks, reduce battery-focused throttling where your org allows it—for example, adjust System Settings under Battery or Energy when plugged in.
For more information about hardware and storage requirements, see Hardware and Storage Requirements.
Install, Update, or Uninstall Anypoint Extension Pack
Use of Anypoint Code Builder in VS Code on your computer requires the Anypoint Extension Pack.
Install Anypoint Extension Pack
To install the Anypoint Extension Pack into VS Code:
-
Open VS Code.
-
Find Anypoint Extension Pack from within VS Code or from Visual Studio Marketplace.
To avoid installation errors:Do not install the individual Anypoint Code Builder extensions that are also available separately from Anypoint Extension Pack in Visual Studio Marketplace.
-
To install from within VS Code, launch the Extensions menu by clicking the Extensions icon from the activity bar or pressing Cmd+Shift+x (Mac) or Ctrl+Shift+x (Windows), and search for the extension pack.
Select Install Release Version.
-
To install from the Visual Studio Marketplace website, find the extension pack, and install:
Select Install Release Version.
For additional guidance, see the Visual Studio Code website.
-
-
Open the Extensions menu, and review the extensions in Anypoint Extension Pack:
Anypoint Extension Pack contains these extensions:
-
Anypoint Code Builder - API Extension
-
Anypoint Code Builder - APIkit Extension
-
Anypoint Code Builder - DataWeave Extension
-
Anypoint Code Builder - Dependencies Extension
-
Anypoint Code Builder - Integration Extension
-
Anypoint Code Builder - MUnit Extension
-
Anypoint Code Builder - Platform Extension
For versioning information about extensions in Anypoint Extension Pack, see the Change Log.
-
-
Recommended: Ensure that the Anypoint extensions update automatically by right-clicking each extension to see if Auto Update All (From Publisher) is checked. If it’s not, select Auto Update for each extension, for example:
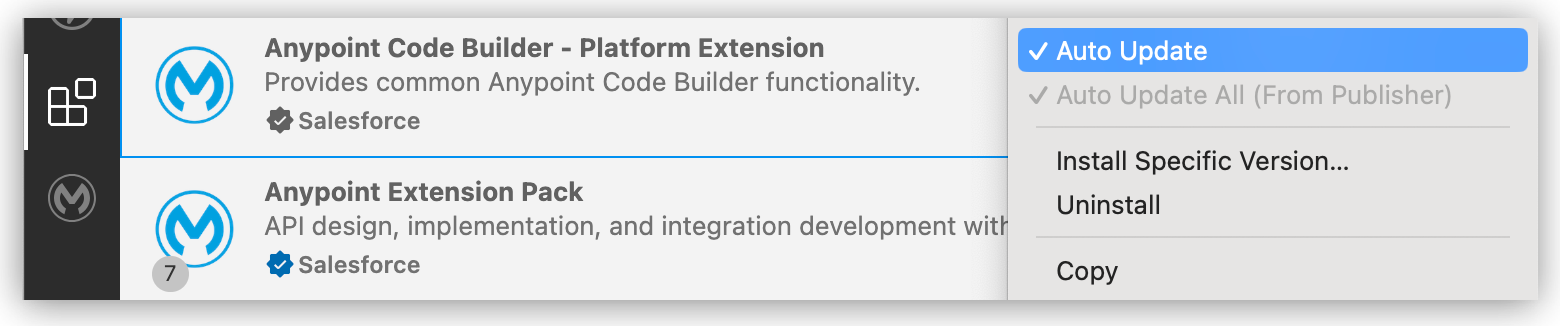
Ensure this option is checked.
-
Click the MuleSoft icon in the activity bar to access and use Anypoint Code Builder features.
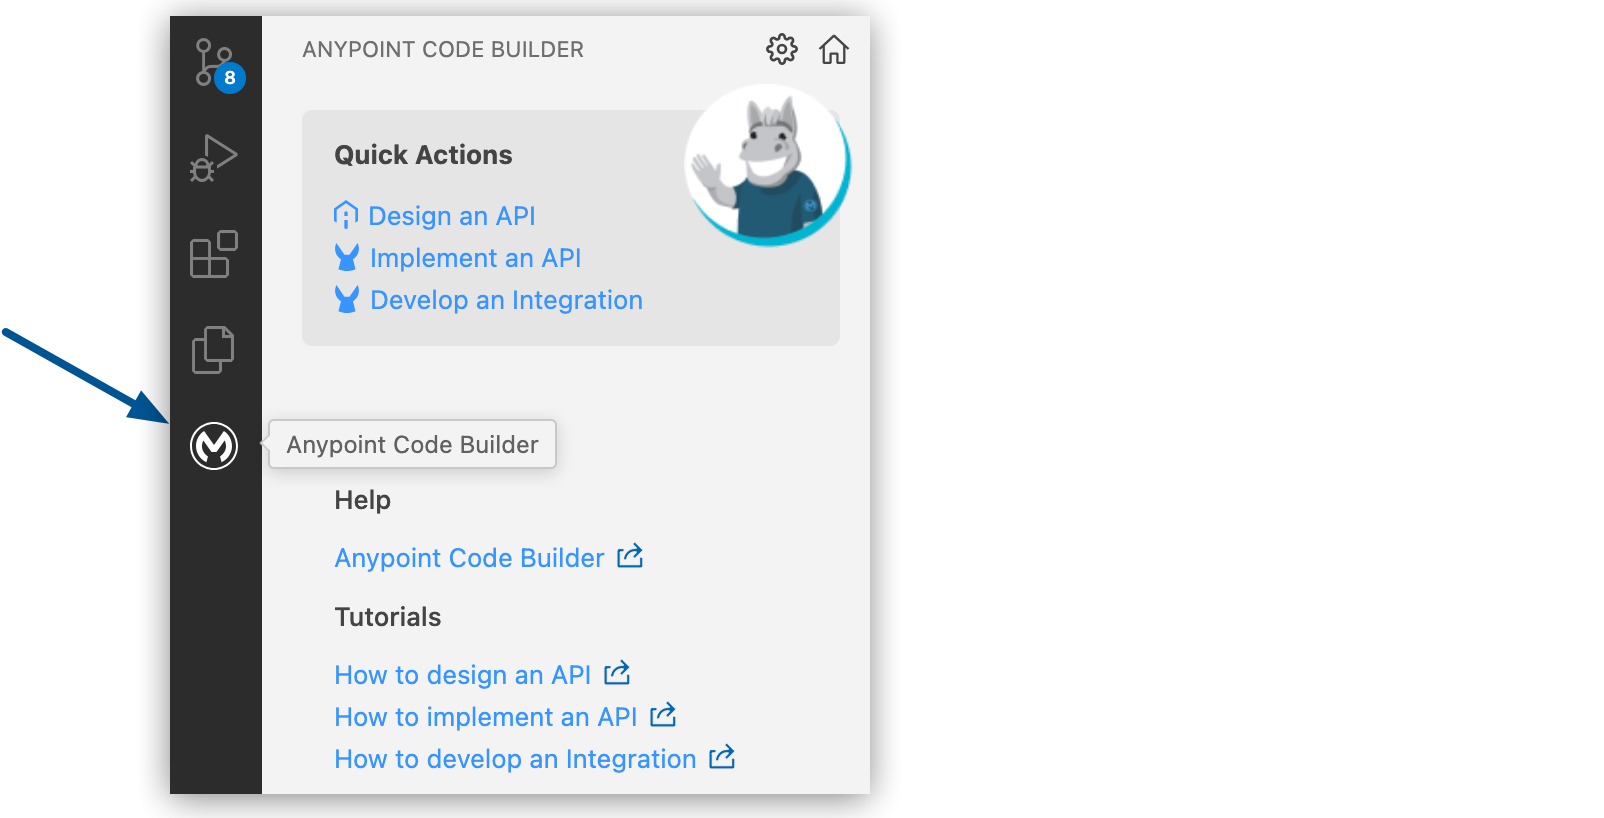
-
Confirm that the Anypoint Code Builder menu loads.
-
Disable other VS Code extensions that you don’t need for Mule development.
Java-based extensions, such as a Java Language Server, Java debugger, or Spring Boot tools, run background processes that compete with Anypoint Code Builder for the same JVM resources, which can slow down canvas loading, DataSense resolution, and debugging.
-
If you have an Anypoint Platform account running in the EU cloud, change the Mule: Control Plane setting to EU cloud.
For guidance, see Set Anypoint Code Builder to the EU or US Cloud.
-
Follow the steps in Log in to Anypoint Platform.
Install Anypoint Extension Pack in Cursor, Trae, or Devin
Cursor, Trae, and Devin use the OpenVSX marketplace by default. Before you can search for and install Anypoint Extension Pack in these IDEs, configure Visual Studio Marketplace as the gallery service URL.
Anypoint Extension Pack is also compatible with Windsurf. See Configuring an MCP Server for more about using the Anypoint Extension Pack, including MuleSoft MCP Servers, across compatible IDEs.
-
Cursor
-
Trae
-
Devin
-
Open Cursor.
-
Go to Cursor > Preferences > VS Code Settings.
-
Search for Extensions › Gallery: Service Url.
-
Replace the existing value with this URL:
https://marketplace.visualstudio.com/_apis/public/gallery -
Restart Cursor to apply the change.
-
After restarting, search for Anypoint Extension Pack in the Extensions panel and install it.
-
Open Trae.
-
Go to TRAE > Settings.
-
Search for Extension Market Url.
-
Replace the existing value with this URL:
https://marketplace.visualstudio.com/_apis/public/gallery -
Restart Trae to apply the change.
-
After restarting, search for Anypoint Extension Pack in the Extensions panel and install it.
-
Open Devin.
-
Go to Devin > Devin Settings > Plugins.
-
In the Marketplace extension gallery service URL field, replace the existing value with this URL:
https://marketplace.visualstudio.com/_apis/public/gallery -
Restart Devin to apply the change.
-
After restarting, search for Anypoint Extension Pack in the Extensions panel and install it.
Update Anypoint Extension Pack
If Anypoint Extension Pack is installed, update to the latest version of the extension pack by following VS Code instructions in Update an extension manually.
Uninstall Anypoint Extension Pack
Typically, it is unnecessary to uninstall the extension pack or individual Anypoint Code Builder extensions from VS Code. For example, you can update to a new version without uninstalling first.
If you decide to uninstall Anypoint Extension Pack, follow the same procedure that you use for other VS Code extensions. Uninstalling the extension pack also uninstalls the individual Anypoint Code Builder extensions that are bundled within the extension pack, such as the DataWeave and APIkit extensions.
To uninstall:
-
Open VS Code.
-
From the activity bar, open the Extensions panel.
-
Find and select Anypoint Extension Pack.
-
In the Anypoint Extension Pack tab that opens, click Uninstall.
-
To remove the Anypoint Code Builder extensions from the Extensions panel, click Reload on one of the extensions.
For additional guidance, see the VS Code documentation, Manage extensions.
You can reinstall at any time.
Sign in to Anypoint Platform from Anypoint Code Builder
Some Anypoint Code Builder features require you to sign in directly to Anypoint Platform. Anypoint Code Builder prompts you when login is necessary and guides you through the login process. However, it is a good practice to sign in after opening MuleSoft features.
-
An administrator with an Anypoint Platform organization account must provide you with the necessary permissions. See Configuring Permissions.
-
Anypoint Platform requires a user account. You can use an existing account or create one from Anypoint Platform (see supported Cloud Hosts).
You can sign in from the status bar or through a command, and you can log out from the status bar:
Sign in to Anypoint Platform from the Status Bar
The status bar shows your login status:
-
Not logged in to Anypoint Platform indicates that you must sign in to perform tasks that require a connection to Anypoint Platform.

You can sign in by clicking this notification and following the prompts to sign in.
-
A link to your user name indicates that you are signed in.
You can log out by clicking your user name and following the prompts.
Sign in to Anypoint Platform from the Command Palette
You can use the Command Palette to sign in to Anypoint Platform.
To sign in from the Command Palette:
-
Open the Command Palette.
Show me how
-
Use the keyboard shortcuts:
-
Mac: Cmd+Shift+p
-
Windows: Ctrl+Shift+p
-
-
Select View > Command Palette.
-
-
Select the following command:
MuleSoft: Login to Anypoint Platform
You can type
loginand use the filter in the results to select the command you want. -
Select Allow when prompted to sign in to the platform.

After logging you in, Anypoint Platform displays a You can close this page now message.
-
To verify your login, ensure that <your-username> replaces Not logged in to Anypoint Platform.
Log Out from Anypoint Platform from Anypoint Code Builder
Log out by:
-
Clicking your username in the status bar
-
Clicking Yes when asked Logout from Anypoint?
Sign in to a Different Anypoint Platform Account from Anypoint Code Builder
To use a different Anypoint Platform user account:
-
Log out from the status bar.
For guidance, see Log Out from Anypoint Platform from Anypoint Code Builder.
-
Sign in from the status bar.
For more guidance, see Sign in to Anypoint Platform from the Status Bar.
Set Anypoint Code Builder to a Different Control Plane
In Anypoint Code Builder, you can change your Anypoint Platform control plane to one of these clouds:
-
US Cloud (default)
-
EU Cloud
-
Canada Cloud
-
Japan Cloud
Anypoint Platform instances do not share user accounts, projects, or other data. For more information, see Cloud Hosts.
To change the control plane:
-
If an API specification is open in the Explorer panel, close the project to avoid a synchronization error when you switch clouds.
-
Click File > Close Folder.
-
-
Open the Settings panel:
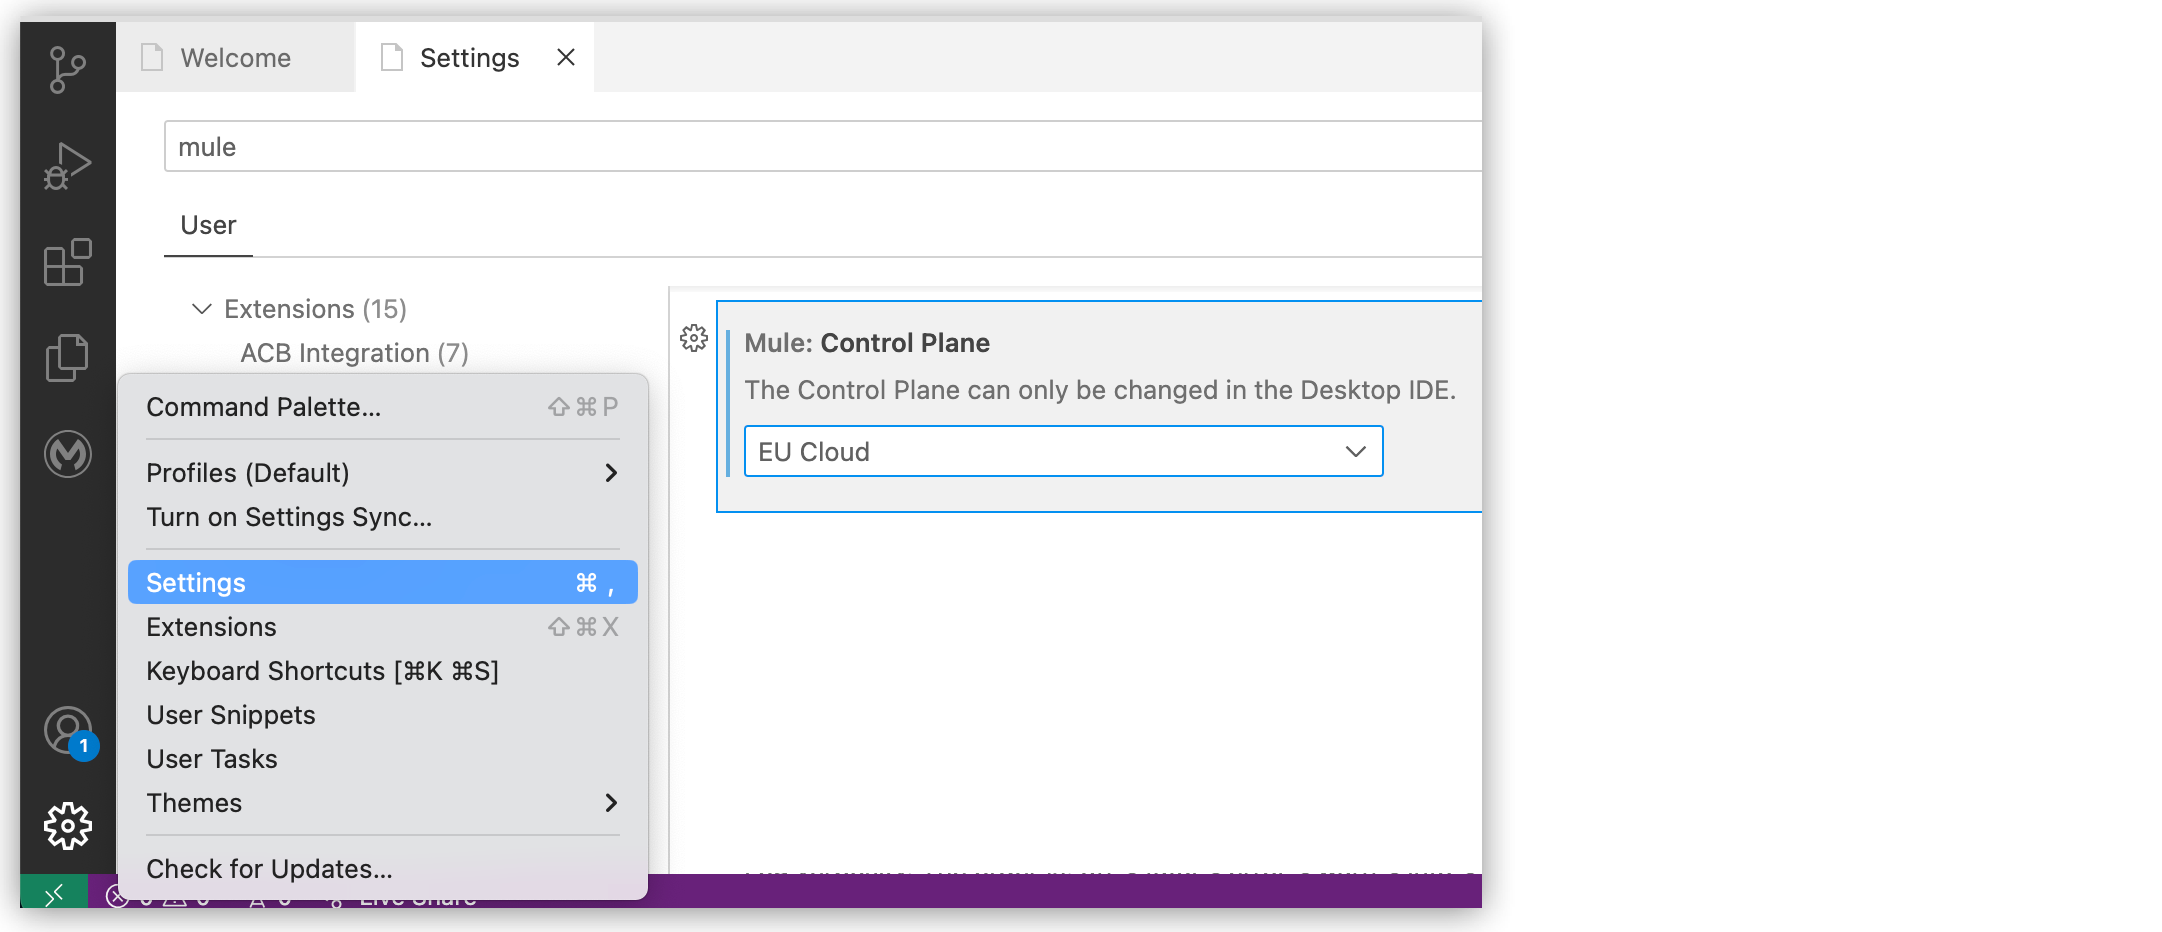
Show me how
-
From the Anypoint Code Builder panel, click the
 (gear) icon.
 -
From the activity bar, click the
(gear) icon, select Settings, and search for mulein the Settings tab. -
Provide the command
MuleSoft: Open ACB Settingsin the Command Palette.
-
-
Scroll to Mule: Control Plane.
-
Select the desired cloud.
-
Restart Anypoint Code Builder to load all your changes.
-
Follow the steps in Sign in to Anypoint Platform from Anypoint Code Builder.