Upgrading Mule Runtime Engine (Versions 4.x to 4.n)
To upgrade your current Mule instance to a later release of Mule runtime engine (version 4.x), you must follow some best practices. The following steps and recommendations help you to:
-
Upgrade your standalone Mule instances.
-
Upgrade your on-premises Mule instances managed through Runtime Manager.
-
Change the Mule version used to build your Mule applications, if necessary.
To change the Mule runtime engine version of your CloudHub workers, you need to use the runtime version drop-down box in the application settings deployment configuration page.
Ensuring Mule Application Compatibility
When you create a Mule application, you select the Mule runtime engine version that your application is intended to run on. This is the target Mule version of an application.
Because Mule runtime engine uses semantic versioning (MAJOR.MINOR.PATCH), Mule applications are:
-
Rarely compatible between major releases (3.9.3 to 4.1.0, for example).
-
Potentially compatible between minor releases (4.1.0 to 4.2.0, for example).
-
Fully compatible between patch releases (4.1.4 to 4.1.5 for example).
Note that Mule provides a feature flagging mechanism that enables Mule applications to change the behavior of the Mule instance depending on the minimum Mule version (minMuleVersion). This feature ensures backward compatibility because it enables Mule applications to continue working on later Mule runtime versions, while new Mule applications can benefit from the latest bug fixes implemented in the Mule instance. For details, see Feature Flagging Mechanism.
Read the release notes for the Mule runtime engine version that you want to upgrade to and verify if you must make any compatibility changes to your Mule applications.
MuleSoft recommends executing a regression test cycle to validate compatibility between minor releases.
For Mule 4.5 and later, the version naming convention for CloudHub, CloudHub 2.0, and Runtime Fabric changes following the schema for the new release channels, Edge and Long-term Support (LTS).
Major[numeric] . Minor[numeric] . Patch[numeric] : Build[numeric] Channel[e for edge, nothing for LTS]
Here are examples of the version numbers:
-
Edge: 4.5.0:1e
-
Edge: 4.6.0:1e
-
LTS: 4.6.0:1
In the case of Standalone (On-Premises), the Mule runtime versioning changes from date-based, for example, 4.4.0-20230317 to semVer as:
Major[numeric] . Minor[numeric] . Patch[numeric]
Here are examples of the version numbers:
-
4.5.1
-
4.5.2
-
4.5.3
Changing the Target Mule Version of your Mule Application
In case you need to change your Mule application’s target Mule version, follow these steps:
-
Download the desired Mule runtime engine in Anypoint Studio so that you can select that version in the IDE.
-
For every application that you upgrade:
-
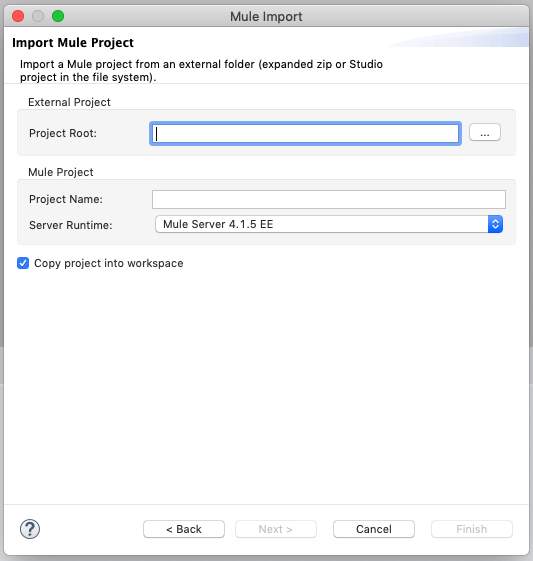
Import the application to Anypoint Studio as a Mule project.
-
During the import process remember to change the target Mule version by selecting it from the Server Runtime menu.
-
Make any other changes necessary to ensure compatibility with the Mule version you are transitioning to.
-
Export your project as a Mule Deployable Archive (
.jarfile). -
Edit the
pom.xmlfile to make themuleVersionproperty value match the target Mule version.
-
After you have successfully built the Mule Deployable Archives (.jar files) with the new target Mule version, and you have applied any other necessary changes to ensure compatibility, you can move on to upgrading the corresponding Mule runtime engine instances.
Upgrading a Standalone Mule Instance
Use the Mule upgrade tool to automate the upgrade process of your local Mule instances. Visit Mule upgrade tool for installation and usage instructions.
Optionally, you can also perform a completely manual update of your Mule instances. To ensure less downtime and easier backups during manual upgrades, first install the new Mule runtime engine on a separate server from that on which your current Mule runtime engine is installed. That way you can set everything up and only then initiate the new Mule instance and decouple the previous one.
|
If you are upgrading Mule in the same server or virtual machine, ensure that you remove the Mule service or daemon before you install the new Mule runtime engine as a service. |
Steps to Manually Upgrade the Mule Instance
-
From the Customer Portal, download the Mule runtime engine version you want to upgrade to.
-
If you run Mule as a service, install the new Mule version on a different server or virtual machine:
-
$MULE_HOME\bin\mule.bat installon Windows systems -
$MULE_HOME/bin/mule installon Linux/Unix systems
-
-
Download a new copy of your license from the Customer Portal and install it on the new Mule instance (see Installing an Enterprise License for instructions).
-
If you have custom configurations in your previous Mule instance (for example, if you defined a different maximum heap size in the
wrapper.conffile), replicate these settings in the new Mule instance. -
Run your new Mule instance to verify that your installation is working as expected.
-
After considering possible negative impact, you can shut down your previous Mule instance at this point.
-
If you set environment variables such as
MULE_HOMEorPATH, verify that they point to the new Mule runtime engine’s installation path. -
Deploy your applications to your new Mule instance.
Upgrading an On-Premises Mule Instance Managed Through Runtime Manager
Use the Mule upgrade tool to automate the upgrade process of your local Mule instances. Visit Mule upgrade tool for installation and usage instructions.
Optionally, you can also perform a completely manual update of your on-premises Mule instances. To ensure less downtime and easier backups, first install the new Mule runtime engine on a separate server from that on which your current Mule runtime engine is installed. That way you can set everything up. Shut down the previous Mule instance and only then initiate the new Mule instance.
To manually migrate following these steps, you must have the Runtime Manager Agent installed.
Steps to Manually Upgrade the Mule Instance
-
Go through steps 1 through to 5 of the previous section, Upgrading a Standalone Mule Instance.
-
Copy the following three files from
<MULE_HOME>/conffrom your previous Mule instance into the same folder on the new Mule instance:-
mule-agent.yml -
mule-agent.jks -
truststore.jksand/oranypoint-truststore.jks
-
-
Copy the
mule-agent-pluginfolder from<MULE_HOME>/server-pluginsfrom your previous Mule instance into the same folder on the new Mule instance. -
Shut down the previous Mule instance.
-
Open a terminal window and navigate to the
<MULE_HOME>/bindirectory of your new Mule instance. -
Run the following command:
amc_setup -U
This command installs the latest version of the Runtime Manager Agent on your new Mule instance, ensuring compatibility. The files you copied from your previous Mule instance hold all of the configuration information to register the new Mule instance on Runtime Manager.
Even when you’re installing your new Mule version on another server or VM, the copied configuration files should suffice to smoothly transition the Mule instance’s identity on Runtime Manager.
If your previous Mule instance has apps deployed through Runtime Manager, there’s no need to manually copy them, as they automatically upload to your new Mule instance. This process automatically redeploys the applications to the new instance.
If your previous Mule instance has apps that were manually deployed, you need to manually redeploy them.
Applications must be running and showing as
Startedin Runtime Manager. This process does not migrate stopped Applications. -
At this point, your Mule instance is upgraded to the desired Mule version. Updating the target Mule version of your deployed applications is optional. If you decide to do so, then you must also:
-
Follow the steps in Changing the Target Mule Version of your Mule Application.
-
Find the application on the Applications tab on Runtime Manager and click Choose File to upload the new Mule Deployable Archive (
.jarfile).
-
Considerations About Clusters
After you complete the manual upgrade steps for your on-premises Mule instance, copy the mule-cluster.properties file from folder <MULE_HOME>/.mule in the previous Mule instance to the same folder in the new Mule instance. If the .mule folder does not exist in the new Mule instance, create the folder and then copy the file.
Zero downtime cannot be guaranteed when upgrading the Mule runtime engine version of your Runtime Manager clusters. At some point during the upgrade, the cluster is in a mixed state, with coexisting nodes running two different Mule versions. This might lead to incompatible communication protocols between Hazelcast instances. When such errors occur, every node in the cluster must be shut down to proceed with the upgrade.
Upgrade the Mule Runtime Version in a Runtime Manager Server Group
Follow these steps to upgrade the Mule version in a Runtime Manager server group:
-
Go to Anypoint Runtime Manager.
-
Switch to the corresponding environment.
-
Select Servers in the navigation menu.
-
Select the server group to update.
-
In the server group dashboard, select the Servers tab and select the server to upgrade.
-
In the actions dropdown menu, select Shutdown.
-
Repeat the previous two steps for each server in your server group.
-
-
Open a terminal in the local machine that hosts your Mule instance.
-
If your Runtime Manager agent version is earlier than 2.2.0, upgrade to the latest version.
Go to the current Mule Home directory and run the following commands:
cd ${MULE-4.1.5_HOME}/bincp ~/Downloads/agent-setup-2.4.20.zip .unzip agent-setup-2.4.20.zip./amc_setup -U -
Go to the target directory for the new Mule runtime version and install it:
cd ${MULE-4.3.0_DIRECTORY}cp ~/Downloads/mule-ee-distribution-standalone-4.3.0.zip .unzip mule-ee-distribution-standalone-4.3.0.zip -
Install the latest agent version:
cd mule-enterprise-standalone-4.3.0/bincp ~/Downloads/agent-setup-2.4.20.zip .unzip agent-setup-2.4.20.zip./amc_setup -Irm ../conf/mule-agent.yml -
Copy the following files from the previous Mule runtime
/confdirectory to the new Mule runtime/confdirectory:-
All YAML files (
*.yml) -
All keystore files (
*.jks)
-
-
Confirm that the DNS configured in
mule-agent.ymlhas the following values:websocket.transport: consoleUri: wss://runtime-manager.anypoint.mulesoft.com:443/mule authenticationProxy: endpoint: https://data-authenticator.anypoint.mulesoft.com
-
If you installed domains in your previous Mule instance, copy those domains to your new Mule instance:
cp -R ${MULE-4.1.5_HOME}/domains${MULE-4.3.0_HOME}/domains -
Start Mule:
cd ${MULE-4.3.0_HOME}/bin./mule start -
Go to Runtime Manager to confirm that your Mule applications are deployed and displayed as Running.
Upgrading from Mule 4.2 or 4.1 to Mule 4.3 or Later
If you are upgrading from Mule 4.2.x or 4.1.x to Mule 4.3.x or later Mule 4 releases, take the following actions:
-
If no custom threading settings are applied (either through
scheduler-pools.confor directly in the Mule app), then no action is required. -
If custom threading configurations are applied, test your Mule applications using the default configuration.
Because of the UBER pool strategy and other performance updates implemented in Mule 4.3, you might not need custom threading configurations. -
If tests confirm that a custom configuration is still necessary, a problem might exist with resource management in the application, one of the application dependencies, or the Mule instance.