Amazon EC2 Connector 2.4 Example
This example creates an Amazon EBS (Elastic Block Store) volume that you can attach to an Amazon EC2 instance that is in the same availability zone as the volume.
The example includes configuring global elements for Anypoint Connector for Amazon EC2 (Amazon EC2 Connector), configuring additional properties such as volume size and type, configuring the Set Payload component, adding and configuring the Logger component, and testing your application’s use of the connector.
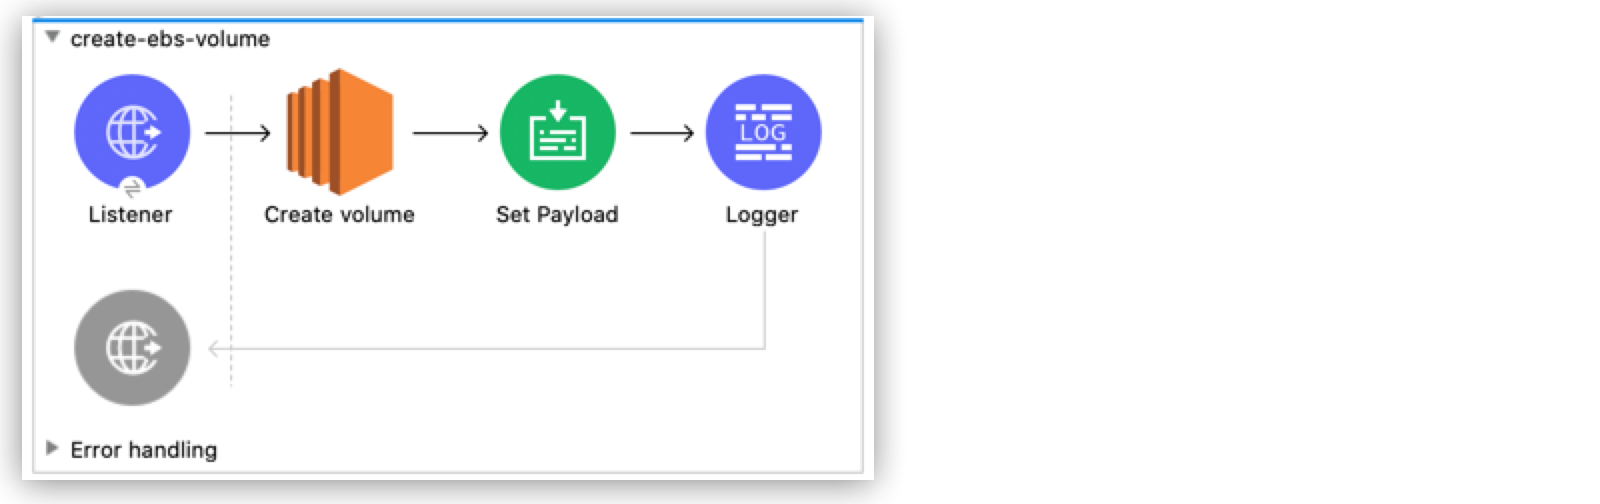
The following image shows the Mule flow for this example:
This example uses variables for some field values. You can either:
-
Replace the variables with their values in the code.
-
Provide the values for each variable in a properties file and then refer to that file from the connector configuration.
If you don’t know how to use a properties file, see Configuring Property Placeholders.
Configure Global Elements for the Connector
-
Create a new Mule project in Anypoint Studio.
-
Create a file named
mule-artifact.propertiesto store your Amazon credentials. -
Add the following properties to the
mule-artifact.propertiesfile:amazon.accesskey=<Access Key> amazon.secretkey=<Secret Key> amazon.region=<Region> amazon.sessionToken=<Session Token>text -
Save the
mule-artifact.propertiesfile in the project’ssrc/main/resourcesdirectory. -
Drag the HTTP Listener component to the canvas.
-
Add a global element for HTTP Listener:
-
Select Listener on the canvas.
-
In the configuration screen for the operation, click the plus sign (+) next to the Connector configuration field to access the global element configuration fields.
-
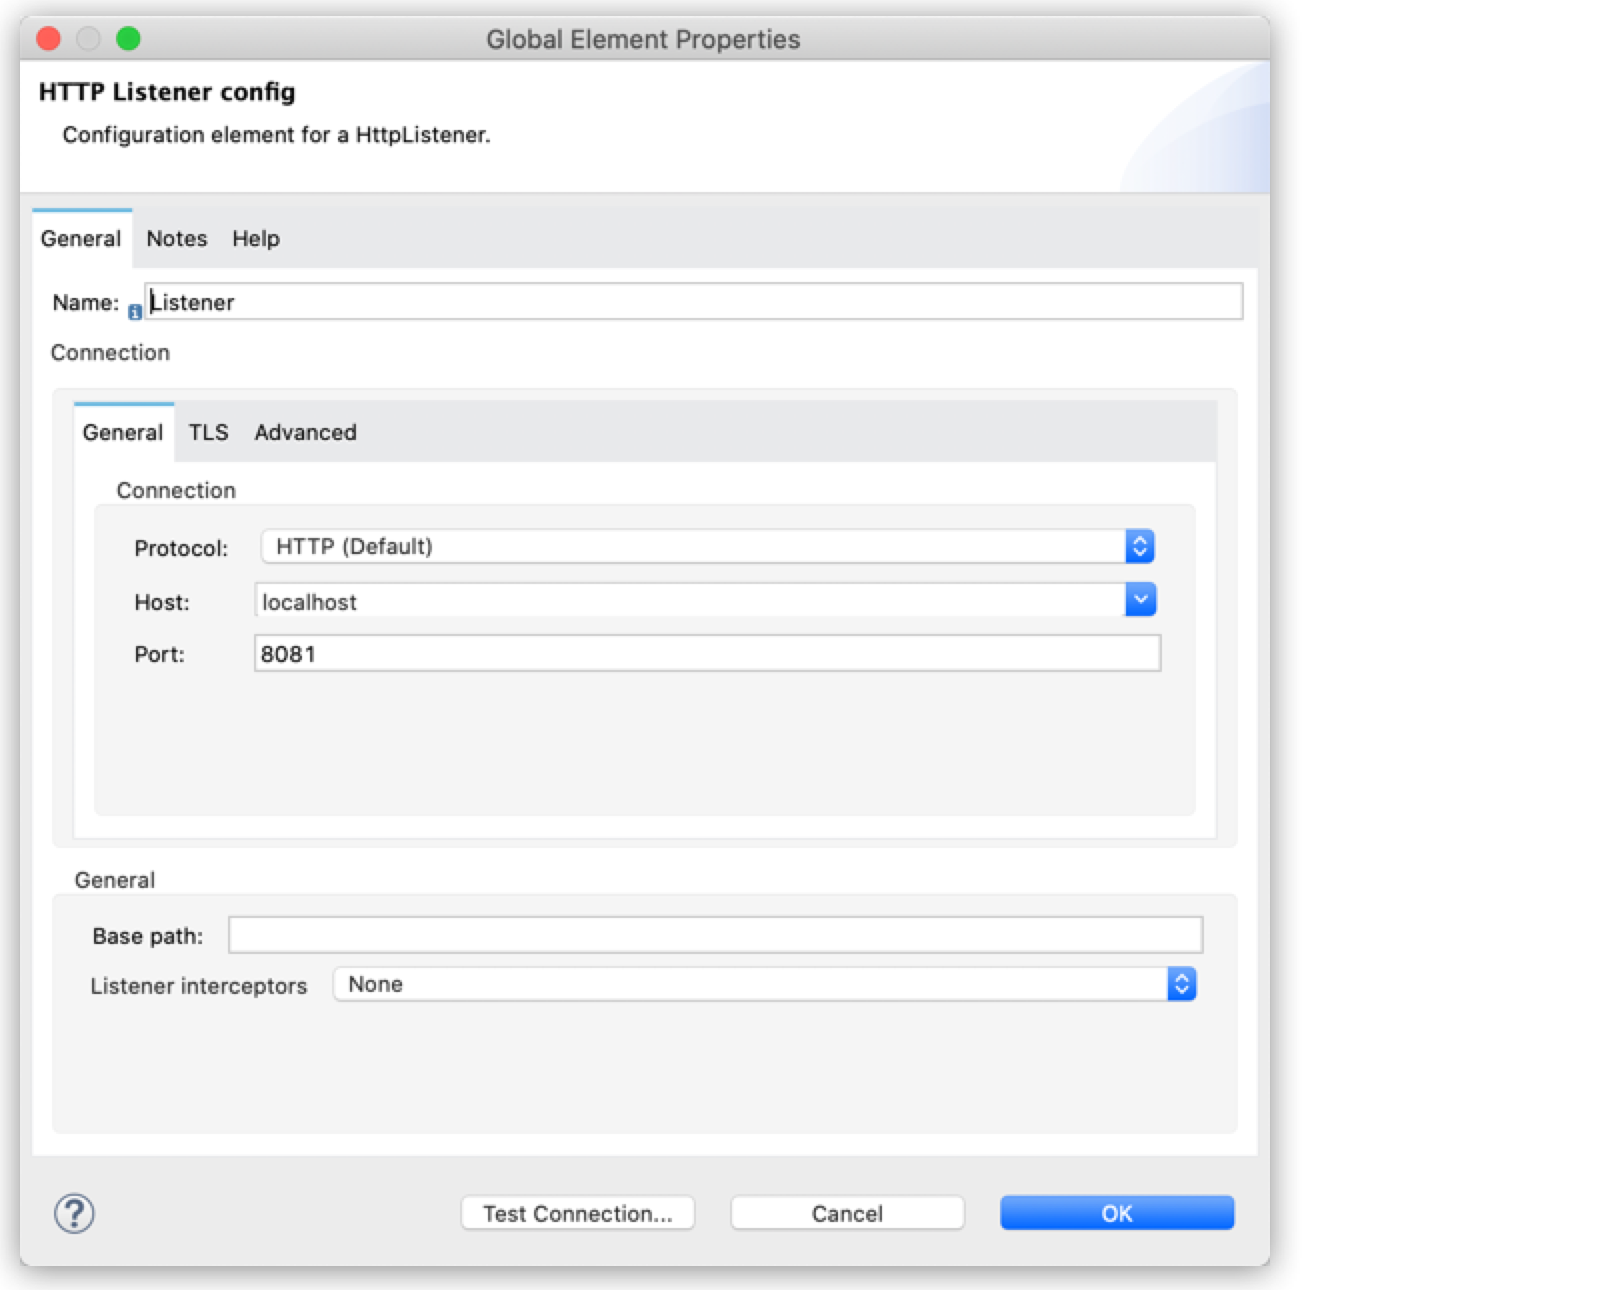
In the Global Element Properties dialog, provide the following values:
-
Name
Listener -
Host
localhost -
Port
8081The following image shows an example of the HTTP Listener global element configuration:
-
-
Click OK.
-
-
Drag the Amazon EC2 Connector Create volume operation next to the Listener component.
-
Add a new Amazon EC2 global element:
-
Select the Create volume operation on the canvas.
-
In the configuration screen for the operation, click the plus sign (+) next to the Connector configuration field to access the global element configuration fields.
-
-
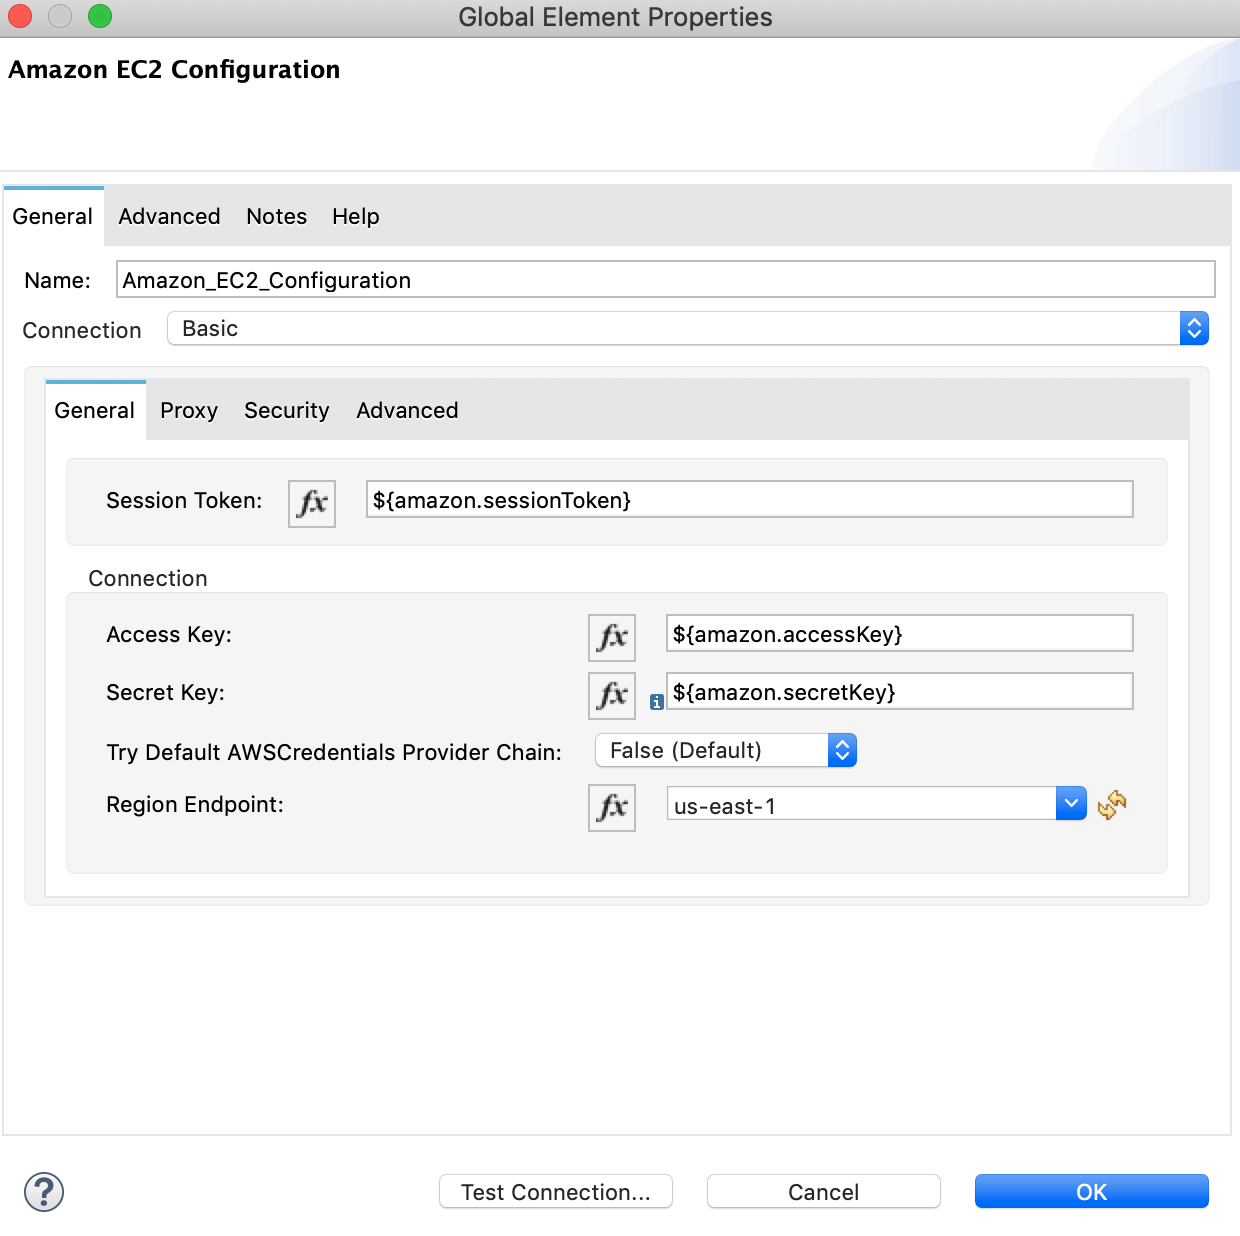
Configure the global element as follows:
-
Name
Amazon EC2 Configuration -
Session Token
Session token used to validate the temporary security credentials -
Access Key
Alphanumeric text string that uniquely identifies the user who owns the account -
Secret Key
Key that acts as the password
-
Region Endpoint
Region to select from the drop-down menu for the Amazon EC2 clientThe following image shows an example of what the configuration looks like:
The corresponding XML looks like this:
<ec2:config name="Amazon_EC2_configuration" doc:name="Amazon EC2 Configuration" > <ec2:basic-connection accessKey="${amazon.accesskey}" secretKey="${amazon.secretkey}" region="${amazon.region}" sessionToken="${amazon.sessionToken}"/> </ec2:config>xml
-
-
Click Test Connection to confirm that Mule can connect with the Amazon EC2 instance.
-
If the connection is successful, click OK to save the configurations.
Otherwise, review or correct any incorrect parameters, then test again.
Configure Additional Properties
-
Select the Create volume operation on the Studio canvas.
-
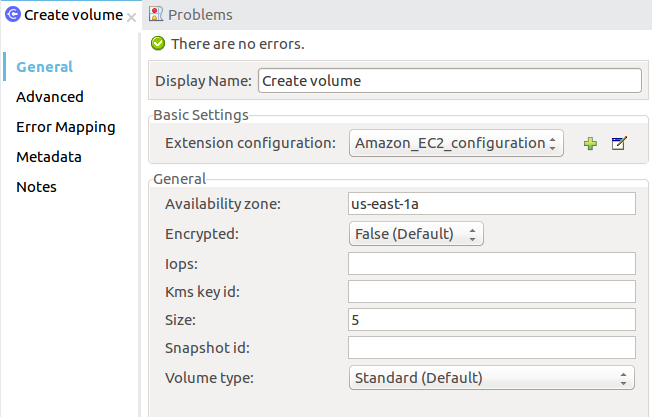
In the General tab, enter the following values:
-
Enter a value for Display Name.
This example usesCreate volume. -
In the Basic Settings section, select the name of the Amazon EC2 configuration you created in Configure Global Elements for the Connector.
-
In the General section, enter values for the following fields:
-
Availability Zone
Amazon availability zone you have access to. This example uses
us-east-1a. -
Size
Size of the volume in gibibytes (GiBs). This example uses
5. -
Volume Type
The default volume type is Standard.
-
-
-
Verify that your XML looks like this:
<ec2:create-volume config-ref="Amazon_EC2_configuration" availabilityZone="us-east-1a" doc:name="Create volume" size="5"/>xml
Configure the Set Payload Component
-
In the Mule Palette view, select Set Payload and drag it to the right of the Amazon EC2 Create volume operation.
The Set Payload transformer sends the response to the client in the browser. -
In the canvas, select Set Payload and set the Value field to
#[payload.volume.volumeId].This prints the volume ID of the EBS volume.
The following image shows the Set Payload configuration:

Add and Configure the Logger Component
-
In the Mule Palette view, select Logger and drag it to the right of the Set Payload component.
The Logger component displays the volume ID that is transformed by the Set Payload component from the Create Volume operation in the Mule console. -
In the canvas, select Logger and enter the following values:
-
Message
#[payload] -
Level
INFO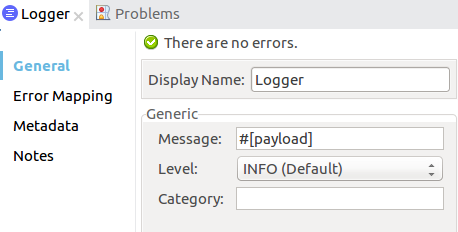
-
-
Save the project.
Test the App
-
In Package Explorer, right-click the project and select Run As > Mule Application.
-
Browse to
http://localhost:8081/createVolume.You see the generated volume ID in the browser and console.
Example Mule App XML Code
Copy and paste this code into your XML Editor to quickly load the flow for this example use case into your Mule app:
<?xml version="1.0" encoding="UTF-8"?>
<mule xmlns:ec2="http://www.mulesoft.org/schema/mule/ec2"
xmlns:http="http://www.mulesoft.org/schema/mule/http"
xmlns="http://www.mulesoft.org/schema/mule/core"
xmlns:doc="http://www.mulesoft.org/schema/mule/documentation"
xmlns:xsi="http://www.w3.org/2001/XMLSchema-instance"
xsi:schemaLocation="http://www.mulesoft.org/schema/mule/core
http://www.mulesoft.org/schema/mule/core/current/mule.xsd
http://www.mulesoft.org/schema/mule/http
http://www.mulesoft.org/schema/mule/http/current/mule-http.xsd
http://www.mulesoft.org/schema/mule/ec2
http://www.mulesoft.org/schema/mule/ec2/current/mule-ec2.xsd">
<http:listener-config
name="HTTP_Listener_config"
doc:name="HTTP Listener config" >
<http:listener-connection host="localhost" port="8081" />
</http:listener-config>
<ec2:config
name="Amazon_EC2_configuration"
doc:name="Amazon EC2 Configuration" >
<ec2:basic-connection
accessKey="${amazon.accesskey}"
secretKey="${amazon.secretkey}"
region="USEAST1"
sessionToken="${amazon.sessionToken}"/>
</ec2:config>
<flow name="create-ebs-volume" >
<http:listener
config-ref="HTTP_Listener_config"
path="/createVolume"
doc:name="Listener" />
<ec2:create-volume
config-ref="Amazon_EC2_configuration"
availabilityZone="us-east-1a"
doc:name="Create volume"
size="5"/>
<set-payload
value="#[payload.volume.volumeId]"
doc:name="Set Payload" />
<logger
level="INFO"
doc:name="Logger"
message="#[payload]"/>
</flow>
</mule>xml