Amazon SNS 4.8 Studio Configuration
To install and configure Anypoint Connector for Amazon SNS (Amazon SNS Connector) in Anypoint Studio:
-
Install the connector.
-
Configure an input source for the connector.
-
Configure the connector.
Install the Connector in Studio Using Exchange
-
In Studio, create a Mule project.
-
Click the Exchange (X) icon in the Studio task bar.
-
In Exchange, click Login and supply your Anypoint Platform username and password.
-
In Exchange, search for Amazon SNS Connector.
-
Select Amazon SNS Connector and click Add to project.
-
Follow the prompts to install the connector.
Install the Connector in Studio
-
In Studio, create a Mule Project.
-
In the Mule Palette, click (X) Search in Exchange.
-
In Add Modules to Project, type the name of the connector in the search field.
-
Click the connector name in Available modules.
-
Click Add.
-
Click Finish.
Configure an Input Source
Configure an input source for the connector, such as an HTTP Listener or Scheduler.
Configure the Connector
To use Amazon SNS Connector in your Mule app, configure a global Amazon SNS element that can be used by all Amazon SNS Connectors in the application.
-
Drag a connector operation into the Studio canvas.
-
Click the Global Elements tab at the base of the canvas, and then click Create.
-
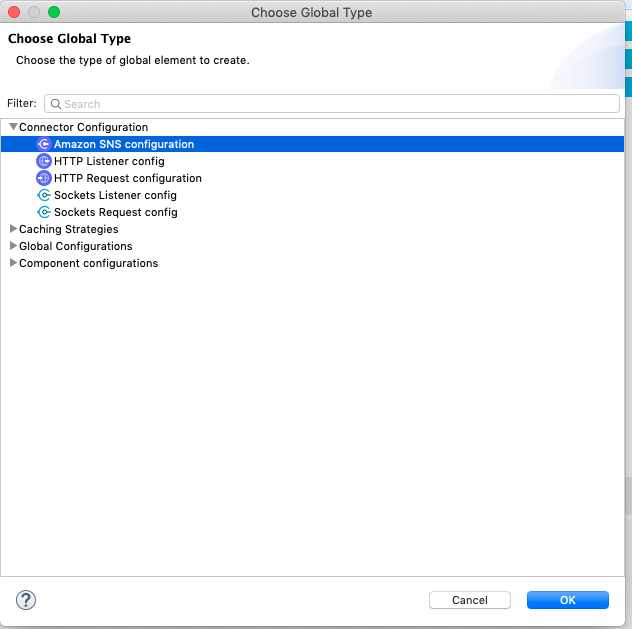
In the Choose Global Type window, expand Connector Configuration, and click Amazon SNS configuration:

-
Click OK.
-
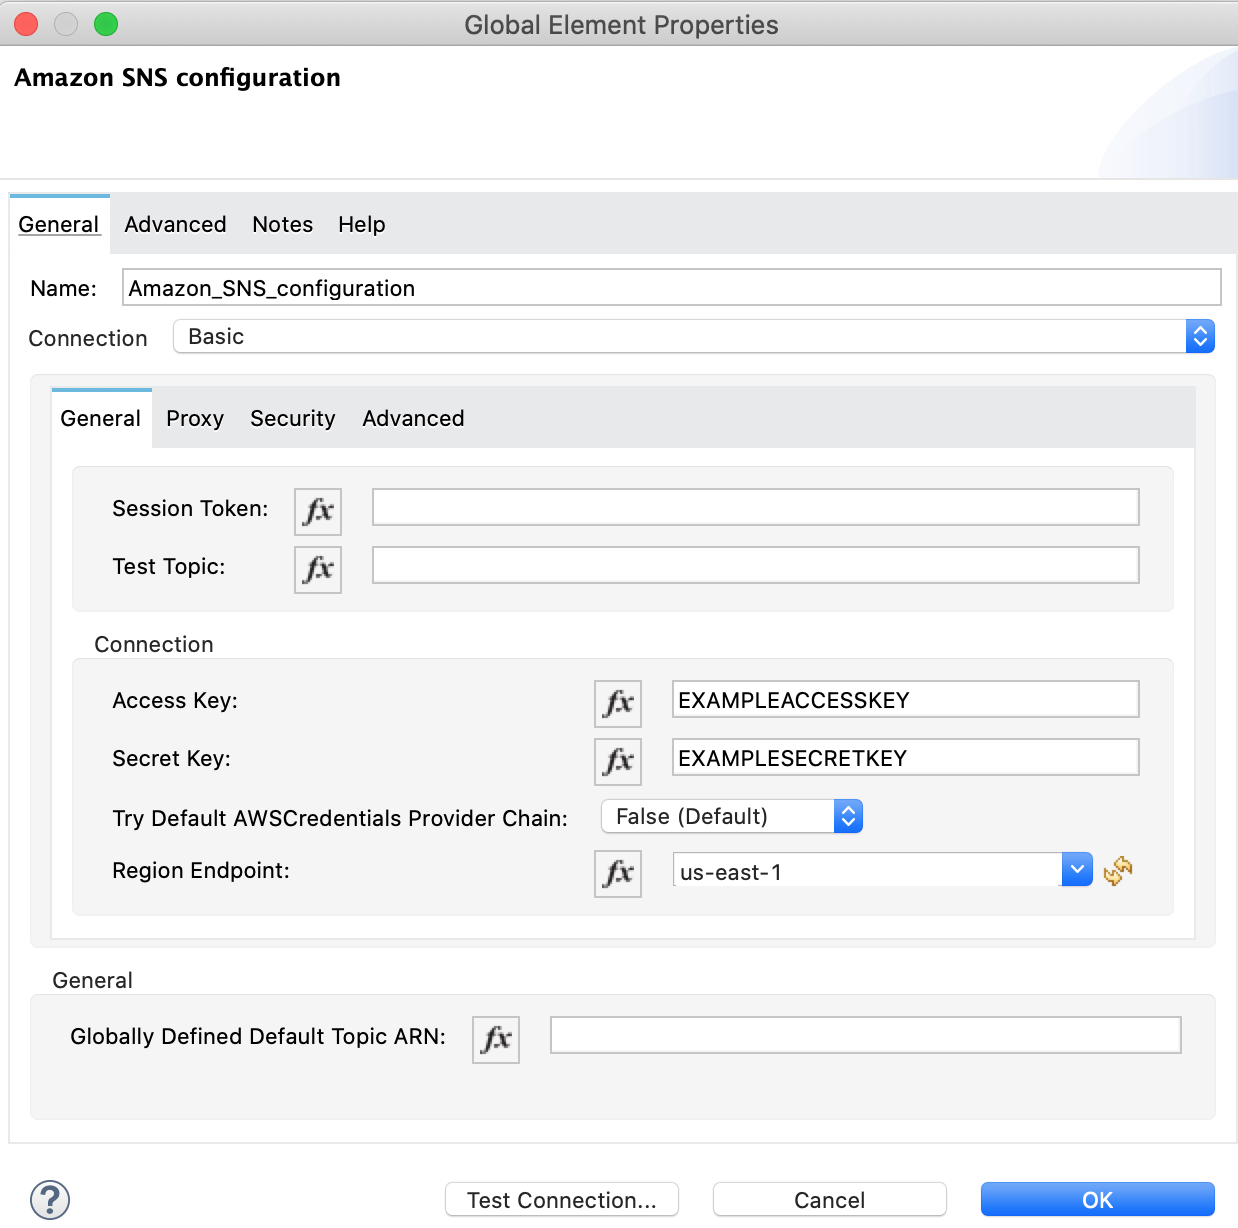
Specify the global element properties:

-
Configure the parameters as follows:
Parameter Description Name
Name by which the configuration is referenced
Session Token
Session token provided by AWS Security Token Service (STS)
Test Topic
Topic used to test the connection
Access Key
Alphanumeric text string that uniquely identifies the user who owns the account
Secret Key
Key that plays the role of a password
Try Default AWS Credentials Provider Chain
Checkbox that controls whether temporary credentials should be used
Region Endpoint
Topic region endpoint
Globally Defined Default Topic Arn
Topic ARN to test the connectivity
-
Retain the default entries for the Proxy, Security, and Advanced tabs.
-
Click Test Connection to confirm that the parameters of your global configuration are accurate, and that Mule is able to successfully connect to your instance of Amazon SNS.
-
Click OK.


