CloudHub Connector 1.0
Anypoint Connector for CloudHub (CloudHub Connector) enables you to connect to the CloudHub API from your Mule application.
For information about compatibility and fixed issues, see the CloudHub Connector Release Notes.
Create the CloudHub Configuration
The basic CloudHub configuration has the following properties:
-
Username
The user of the Anypoint Platform account -
Password
The password of the given user -
Environment
The CloudHub environment to use. By default this is the environment defined as the default in Anypoint Platform.
<cloudhub:config name="CloudHub_Config" >
<cloudhub:connection username="${ch.username}" password="${ch.password}" />
</cloudhub:config>xmlPOM File Information
If you create your app outside of Anypoint Studio, update your POM file as follows:
<dependency>
<groupId>com.mulesoft.connectors</groupId>
<artifactId>mule-cloudhub-connector</artifactId>
<version>x.x.x</version>
<classifier>mule-plugin</classifier>
</dependency>xmlReplace x.x.x with the version that corresponds to the connector you are using.
To obtain the most up-to-date pom.xml file information:
-
Go to Anypoint Exchange
 .
. -
In Exchange, click Login and supply your Anypoint Platform username and password.
-
In Exchange, search for
hdfs. -
Click Dependency Snippets.
List Available Environments
After the username and password are configured correctly, you can retrieve the available environments for easier configuration.
CloudHub Connector is sometimes unable to fetch the available environments from the /account API endpoint, resulting in an empty dropdown list. If you are using the OAuth Client Credentials connection type, the Environment field is optional so an empty dropdown list should not cause any issues.
Use the CloudHub Environment
To specify the app deployment environment, use the environment.id system property.
<cloudhub:config name="CloudHub_Config" >
<cloudhub:connection
username="${ch.username}"
password="${ch.password}"
environment="${environment.id}"/>
</cloudhub:config>xmlCreating a Notification
To create a notification, the user must have the Runtime Manager Read application permission for the specified environment.
For information about assigning permissions to users, see Granting Permissions and Roles to Users.
To create a notification, use the Create Notification operation.
This operation requires the notification message and the associated domain.
You can specify the domain using the domain system property.
You can also configure:
-
Custom properties
An open object to provide additional information about the created notification
-
Priority
Specify the priority of the notification:
-
ERROR
-
INFO
-
WARN
-
-
Transaction ID
The transaction ID associated with the created notification
<flow name="cloudhub-connector-flows" >
<cloudhub:create-notification domain="some-application-name" config-ref="CloudHub_Config"
transactionId="#[uuid()]" priority="WARN">
<cloudhub:message >
<![CDATA[#["Problem occurred trying to process customer data"]]]>
</cloudhub:message>
<cloudhub:custom-properties >
<![CDATA[#[output application/java
---
{
"customer-id" : "ASD-123",
"date" : now()
}]]]></cloudhub:custom-properties>
</cloudhub:create-notification>
</flow>xml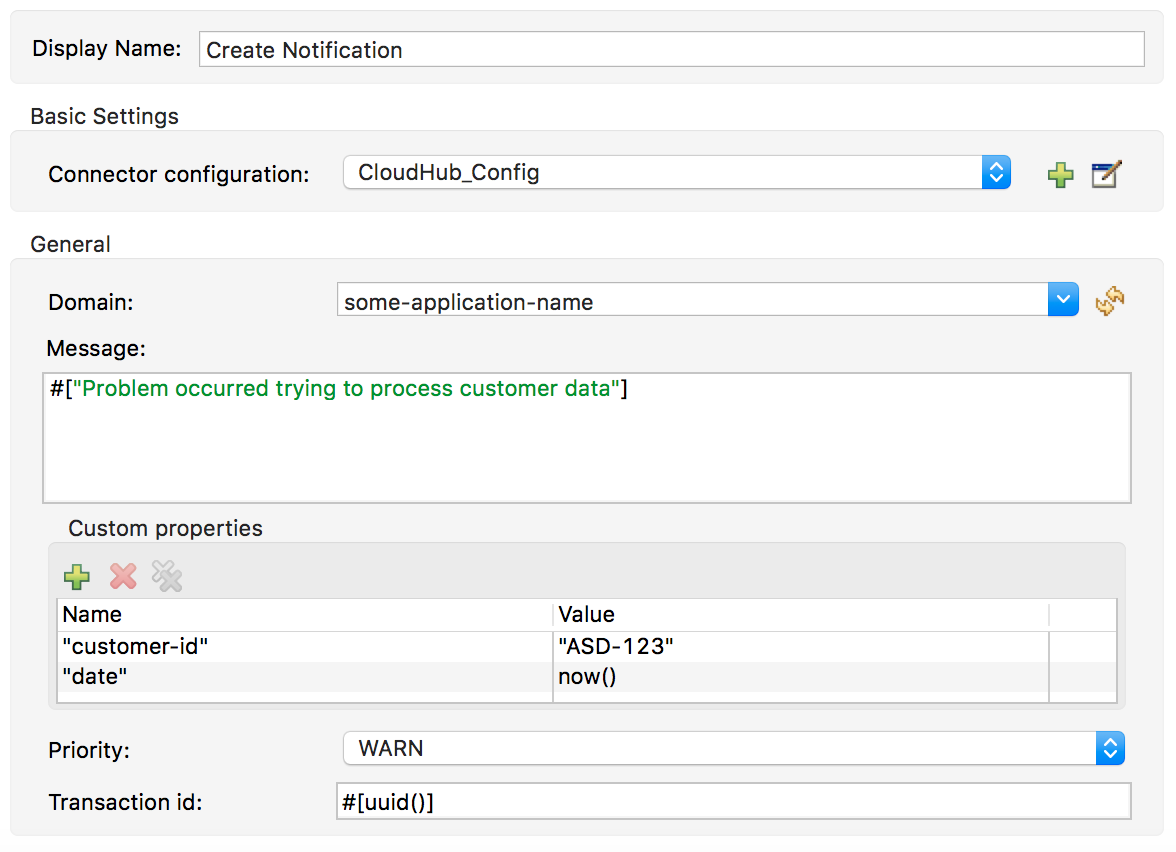
List Notifications
To consume notifications, use the List Notifications operation.
This operation requires only that you specify the domain from which to retrieve notifications.
You can specify the domain using the domain system property.
You can also configure:
-
Limit
Specifies the number of notifications to retrieve (default
-1, which indicates all available notifications) -
Status
Filters the notifications to retrieve as unread, read, or all (default
unread, which retrieves only notifications marked as unread -
Search
Retrieves only notifications that contain the specified text
<cloudhub:list-notifications config-ref="CloudHub_Config" domain="some-application-name"/>xml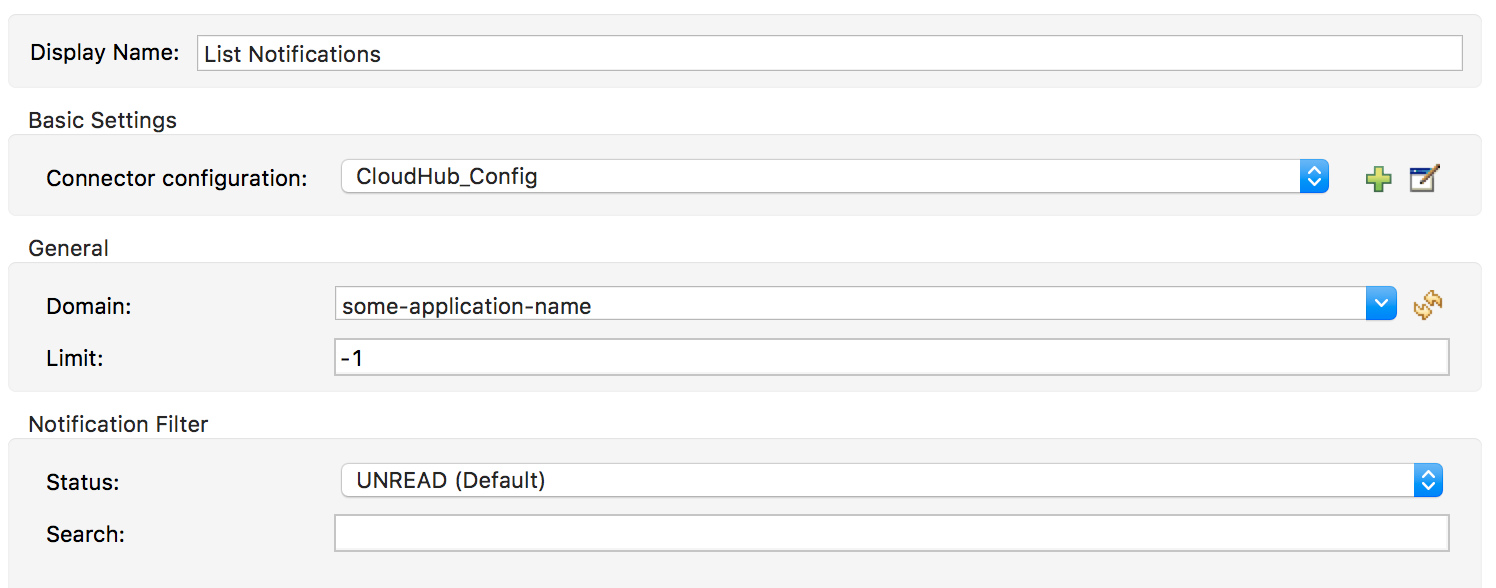
This operation returns a list of notifications with the following structure:
Notification:
type: object
properties:
id: string
domain: string
priority?: string
read: boolean
readOn?: datetime
createdAt: datetime
href: string
properties: objectyamlMark a Notification as Read
Use the Mark Notification operation to mark the notification as read.
After a notification is consumed, mark a notification as read so that the next time notifications are read, only the unread ones are retrieved.
The Mark Notification operation requires only the notification ID, which you can obtain from the id property of a Notification object.
<cloudhub:list-notifications config-ref="CloudHub_Config" domain="some-application-name"/>
<foreach>
<cloudhub:mark-notification markAs="READ" config-ref="CloudHub_Config" notificationId="#[payload.id]"/>
</foreach>xmlList Applications
Using the connector, you can retrieve all available applications in the given environment. No configuration is required.
<cloudhub:list-applications config-ref="CloudHub_Config"/>xmlYou can customize how information is retrieved to get less or more information about the applications.
Retrieve an Application
The connector retrieves information about an application’s deployment.
The only required configuration is to specify the domain and the application name.
You can specify the domain using the domain system property.
<cloudhub:get-application domain="some-application-name" config-ref="CloudHub_Config"/>xmlThis operation returns all information about the application deployment.