Commerce Cloud B2C Shop Connector 2.0 Example
Commerce Cloud B2C Shop Connector is an operation-based connector, which means that when you add the connector to your flow, you need to configure a specific operation for the connector to perform. Commerce Cloud B2C Shop Connector supports two different types of configuration. This example uses the Customer Auth Connection Provider configuration. After successful execution of the Get Customer operation we get the customer result.
The use case requires you to follow these steps:
Authorize Customer
-
Perform an Authorize Customer operation to get the Shopper JWT token.
-
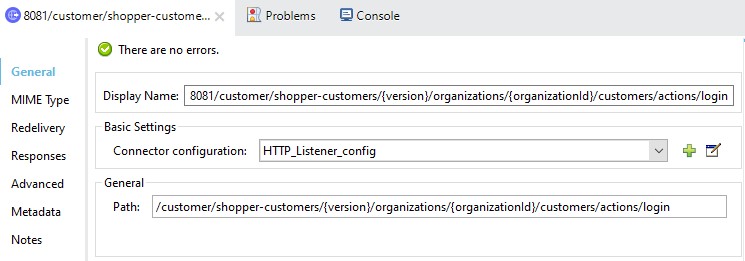
Create a new Mule application in Anypoint Studio (Studio), configuring port 8081 as HTTP Listener and the path as "/customer/shopper-customers/{version}/organizations/{organizationId}/customers/actions/login".
-
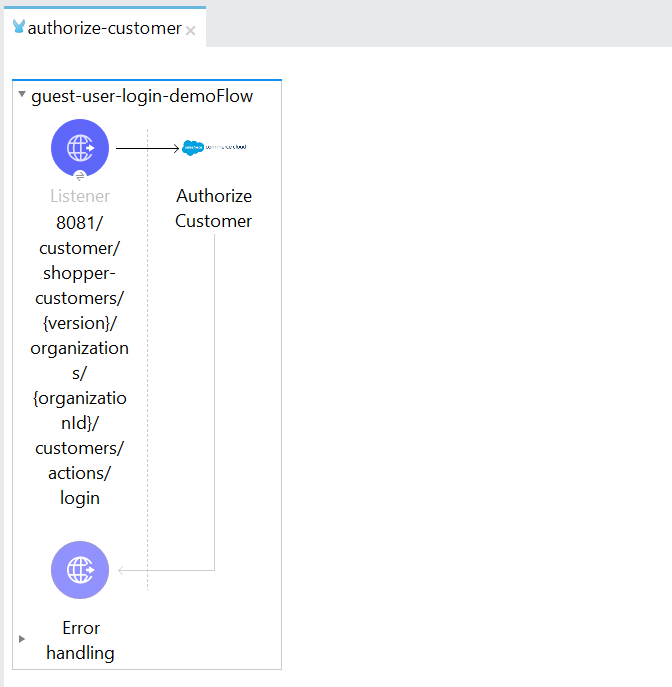
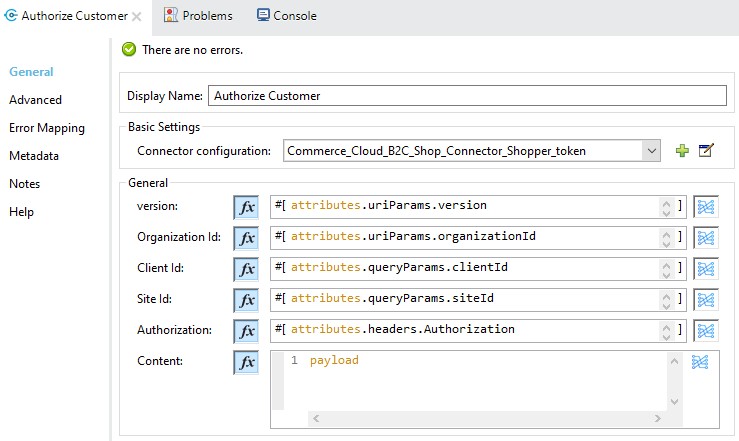
Add Operation, "Authorize Customer" from the palette to the flow.
-
Obtain the required parameters for Authorize Customer operation from the postman.
-
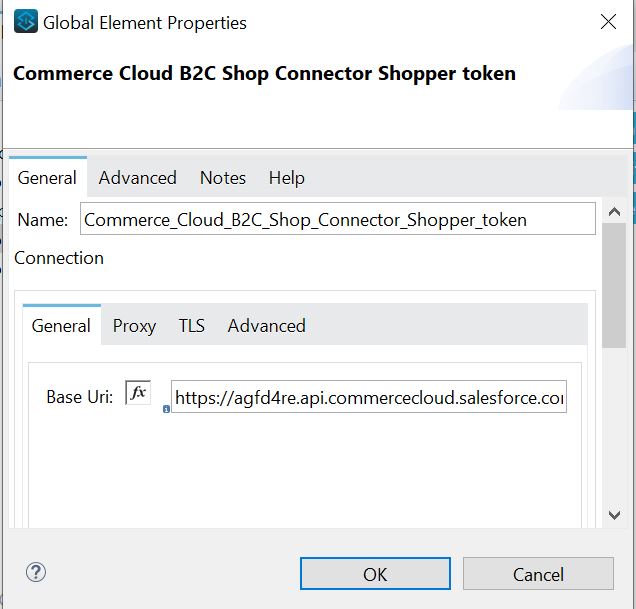
Select the Commerce Cloud B2C Shop Connector Shopper Token Config from Commerce Cloud B2C Shop Connector and configure it with the required values or add a new configuration by clicking the green plus (+) symbol.
-
After entering all the required parameters, save the Mule project.
-
Run the project as a Mule application by right-clicking the project name in Package Explorer and selecting Run As > Mule Application.
-
Navigate to
http://localhost:8081/customer/shopper-customers/{version}/organizations/{organizationId}/customers/actions/login, open Postman, and check the response. -
You should see the JWT Token in the response header. Provide this JWT Token from Postman as authorization header parameter to perform operations.
Get Customer
-
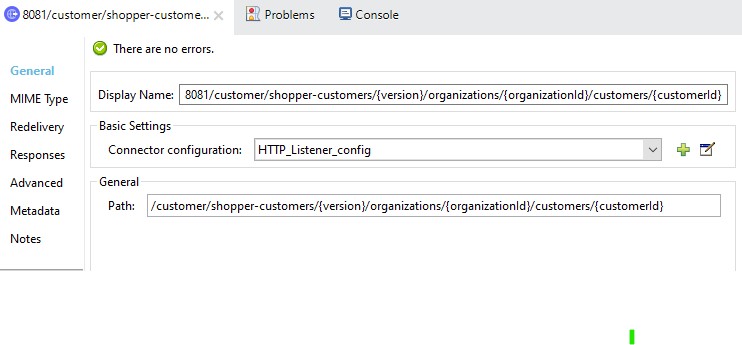
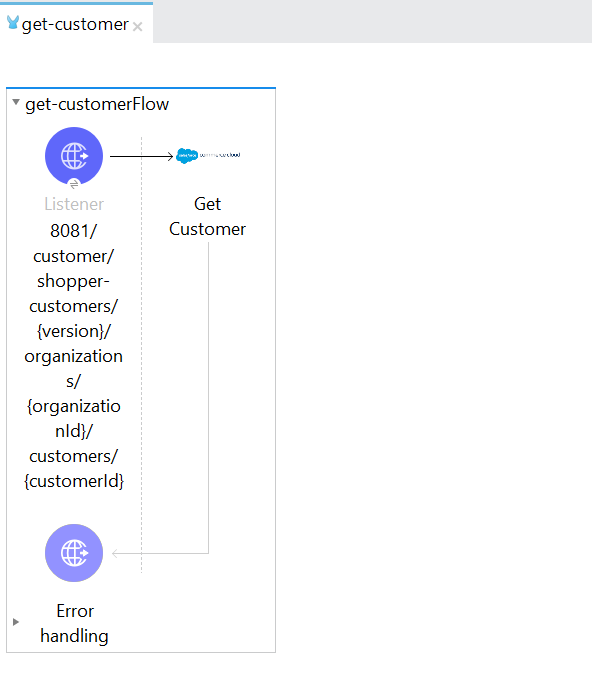
Create a new Mule application in Anypoint Studio (Studio), configuring port 8081 as HTTP Listener and the path as "/customer/shopper-customers/{version}/organizations/{organizationId}/customers/{customerId}".
-
Add Operation, "Get Customer" from the palette to the flow.
-
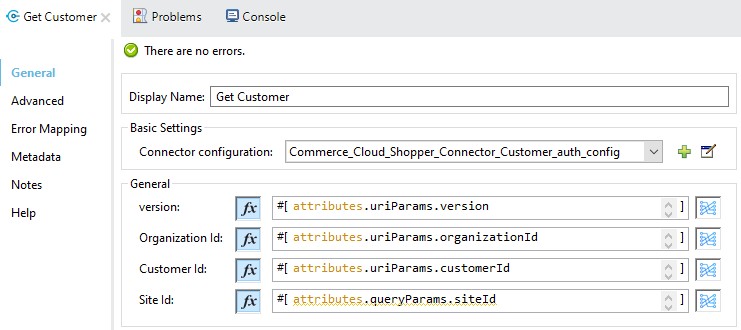
Obtain the required parameters for Get Customer operation from the postman.
-
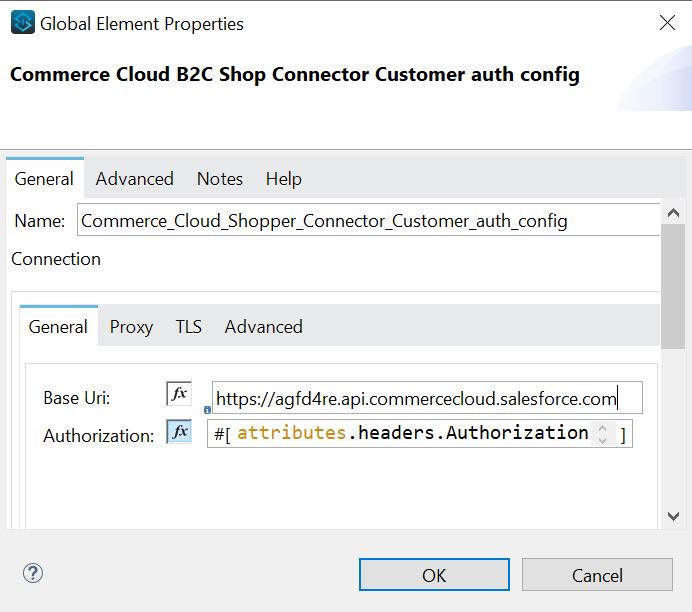
Select the Commerce Cloud B2C Shop Connector Config from Commerce Cloud B2C Shop Connector and configure it with the required values or add a new configuration by clicking the green plus (+) symbol.
-
In the above image we are using the authentication token from Authorize Customer as Authorization parameter value.
-
After entering the all required parameters, save the Mule project.
-
Run the project as a Mule application by right-clicking the project name in Package Explorer and selecting Run As > Mule Application.
-
Navigate to
http://localhost:8081/customer/shopper-customers/{version}/organizations/{organizationId}/customers/{customerId}, open Postman, pass the Shopper JWT Token from the header and check the response. -
You should see the customer details in the output.
XML for Authorize Customer
Paste this code into the Studio XML editor to quickly load the flow for this example into your Mule app:
<?xml version="1.0" encoding="UTF-8"?>

<mule xmlns:commerce-cloud-shopper-api="http://www.mulesoft.org/schema/mule/commerce-cloud-shopper-api"
	xmlns:http="http://www.mulesoft.org/schema/mule/http"
	xmlns:commerce-cloud-shopperapi="http://www.mulesoft.org/schema/mule/commerce-cloud-shopperapi"
	xmlns="http://www.mulesoft.org/schema/mule/core" xmlns:doc="http://www.mulesoft.org/schema/mule/documentation"
	xmlns:xsi="http://www.w3.org/2001/XMLSchema-instance"
	xsi:schemaLocation="
http://www.mulesoft.org/schema/mule/http http://www.mulesoft.org/schema/mule/http/current/mule-http.xsd http://www.mulesoft.org/schema/mule/core http://www.mulesoft.org/schema/mule/core/current/mule.xsd
http://www.mulesoft.org/schema/mule/commerce-cloud-shopperapi http://www.mulesoft.org/schema/mule/commerce-cloud-shopperapi/current/mule-commerce-cloud-shopperapi.xsd
http://www.mulesoft.org/schema/mule/commerce-cloud-shopper-api http://www.mulesoft.org/schema/mule/commerce-cloud-shopper-api/current/mule-commerce-cloud-shopper-api.xsd">
	<flow name="guest-user-login-demoFlow">
		<http:listener
			doc:name="8081/customer/shopper-customers/{version}/organizations/{organizationId}/customers/actions/login"
			config-ref="HTTP_Listener_config"
			path="/customer/shopper-customers/{version}/organizations/{organizationId}/customers/actions/login"
			allowedMethods="POST">
			<http:response>
				<http:headers><![CDATA[#[output application/java
---
{
"Authorization" : message.attributes.headers.Authorization }]]]></http:headers>

			</http:response>
			<http:error-response statusCode="#[error.errorMessage.attributes.statusCode]">
				<http:body><![CDATA[#[output text/json --- error.errorMessage.payload]]]></http:body>

			</http:error-response>
		</http:listener>
		<commerce-cloud-shopper-api:create-customer-shopper-customers-organizations-customers-actions-login-by-version-organization-id
			doc:name="Authorize Customer"
			version="#[attributes.uriParams.version]"
			organizationId="#[attributes.uriParams.organizationId]" clientId="#[attributes.queryParams.clientId]"
			siteId="#[attributes.queryParams.siteId]" authorization="#[attributes.headers.Authorization]" config-ref="Commerce_Cloud_B2C_Shop_Connector_Shopper_token"/>

	</flow>
</mule>
Steps for Authorize Customer
-
Create new Mule Application.
-
Click the Configuration XML tab at the base of the canvas.
-
Copy and paste the above code.
-
Save the project.
-
Run the project as a Mule application by right-clicking the project name in Package Explorer and selecting Run As > Mule Application.
-
Navigate to
http://localhost:8081/customer/shopper-customers/{version}/organizations/{organizationId}/customers/actions/login, open Postman, and check the response. -
You should see the JWT Token in the response header. Provide this JWT Token from Postman as authorization header parameter to perform operations.
XML for Get Customer
Paste this code into your Studio XML editor to quickly load the flow for this example into your Mule app:
xml <?xml version="1.0" encoding="UTF-8"?>

<mule xmlns:commerce-cloud-shopper-api="http://www.mulesoft.org/schema/mule/commerce-cloud-shopper-api"
xmlns:http="http://www.mulesoft.org/schema/mule/http" xmlns="http://www.mulesoft.org/schema/mule/core"
xmlns:doc="http://www.mulesoft.org/schema/mule/documentation"
xmlns:xsi="http://www.w3.org/2001/XMLSchema-instance"
xsi:schemaLocation="http://www.mulesoft.org/schema/mule/core http://www.mulesoft.org/schema/mule/core/current/mule.xsd
http://www.mulesoft.org/schema/mule/http http://www.mulesoft.org/schema/mule/http/current/mule-http.xsd
http://www.mulesoft.org/schema/mule/commerce-cloud-shopper-api http://www.mulesoft.org/schema/mule/commerce-cloud-shopper-api/current/mule-commerce-cloud-shopper-api.xsd">
<flow name="get-customerFlow"> <http:listener doc:name="8081/customer/shopper-customers/{version}/organizations/{organizationId}/customers/{customerId}" config-ref="HTTP_Listener_config" path="/customer/shopper-customers/{version}/organizations/{organizationId}/customers/{customerId}" allowedMethods="GET"> <http:error-response statusCode="#[error.errorMessage.attributes.statusCode]"> <http:body><![CDATA[#[output text/json --- error.errorMessage.payload]]]></http:body>

			</http:error-response>
		</http:listener>
		<commerce-cloud-shopper-api:get-customer-shopper-customers-organizations-customers-by-version-organization-id-customer-id
			doc:name="Get Customer"
			config-ref="Commerce_Cloud_Shopper_Connector_Customer_auth_config"
			version="#[attributes.uriParams.version]" organizationId="#[attributes.uriParams.organizationId]"
			customerId="#[attributes.uriParams.customerId]" siteId="#[attributes.queryParams.siteId]" />
	</flow>
</mule>
Steps for Get Customer
-
Create new Mule Application.
-
Click the Configuration XML tab at the base of the canvas.
-
Copy and paste the above code.
-
Save the project.
-
Run the project as a Mule application by right-clicking the project name in Package Explorer and selecting Run As > Mule Application.
-
Navigate to
http://localhost:8081/customer/shopper-customers/{version}/organizations/{organizationId}/customers/{customerId}, open Postman, pass the Shopper JWT Token from the header and check the response. -
You should see the customer details in the output.