To Batch-Write to a File
In this procedure, a database connector retrieves data from two tables. Mule feeds this data into Transform Message inside the Batch Commit. In Transform Message, DataWeave maps the data from a Java.util.HashMap to the CSV format. A file connector writes the resulting CSV file to disk. A logger component writes processing details to the console.
This procedure uses a MySQL sample database, which you can import. Download the SQL script using the following URL:
https://docs.mulesoft.com/mule-user-guide/v/3.9/_attachments/create.sample.db.sql
The script creates the company database that has tables named employees and roles.
-
In Studio, create a new project, and drag connectors onto the canvas as follows:
-
Drag Poll onto the canvas.
-
Drag and put Processor Chain inside Poll.
-
Drag and put Database inside Processor Chain.
-
Drag Batch Step onto the canvas in the process section.
-
Drag and put Batch Commit inside Batch Step.
-
Drag and put Transform and File inside Batch Commit.
-
Put Logger in the on complete section of Batch Step, as shown in the following screenshot:

-
-
In Database properties, click Add
 , and set the following options:
-
Host: The name of the host running MySQL.
-
Port: 3306
-
User and Password: Your database user name and password.
-
Database: company
-
MySQL Driver: Browse to the location of and select the driver that is compatible with your database.
Test and save the settings.
-
-
In Database properties, set options according to the following table:
Parameter Value Operation
SelectQuery Type
ParameterizedParameterized SQL Statement
SELECT no, first_name, last_name, role FROM employees INNER JOIN roles ON employees.no = roles.emp_no -
Double-click Transform Message to open its configuration.
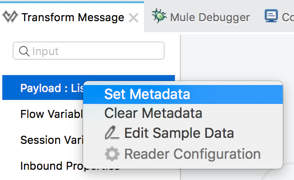
Datasense should build the input side of your transform. If not, to instruct DataWeave to process the MySQL data, right-click Payload on the left and click Set Metadata.

-
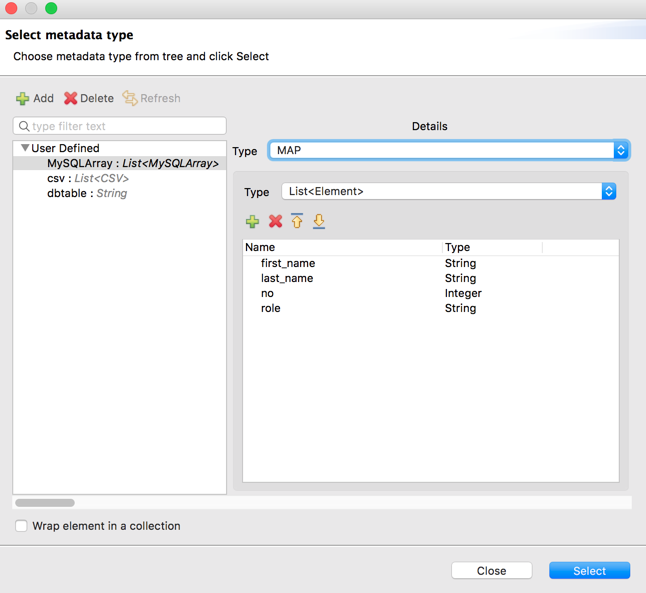
In Select Metadata Type, define the metadata as type Map, comprised of type List<Element>. Add the names and data types of the employees table database:
-
first_name, String
-
last_name, String
-
no, Integer
-
role, String

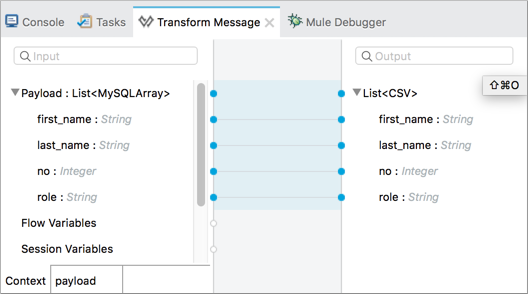
The Transform Message configuration appears as follows.

The resulting DataWeave code is auto-generated:
%dw 1.0 %output application/csv --- payload map ((payload01 , indexOfPayload01) -> { column_0: payload01.first_name, column_1: payload01.last_name, column_2: payload01.no, column_3: payload01.role })text
-
-
Configure the File connector to save the CSV file to your file system.
-
Configure the Logger to output the following message at log level
INFO.Total Records exported: #[message.payload.getLoadedRecords()], Failed Records: #[message.payload.getFailedRecords()], Processing time: #[message.payload.getElapsedTimeInMillis()]text -
Run the app, and check that the results appear in the file on your file system. Check the console and verify that logged messages appear as expected. For example:
INFO 2017-08-14 09:42:47,170 [batch-job-myprojectBatch-work-manager.02] org.mule.api.processor.LoggerMessageProcessor: Total Records exported: 100, Failed Records: 0, Processing time: 516 -
In the properties editor, click Terminate
 to stop the app from running every ten minutes.


