MUnit FTP Server
Overview
One of the main problems of testing production code are external system connections. If we create a test of a piece of code that connects with an FTP server, we need to install an FTP server in our local environment in order to run the tests. Another option is to have an external FTP server for testing only, but the major problem with this approach is that our Maven project would not be portable -- we would not be able to send it to a third party because they would not be able to compile it without installing the FTP server first.
To enable you to avoid this issue, MUnit allows you to implement an FTP server in your local environment.
Install MUnit FTP Server Module
For this example, you need to install the FTP server Module provided by MUnit.
From Anypoint Studio, go to Help and Install New Software….
In the Work with: panel look for MUnit Update Site, and from the MUnit Tools for Mule section, select FTP server Module (Mule 3.4.0+)
|
A few considerations if you are using Maven: You need to add the MUnit FTP server artifact to your Also this code example uses Spring for the Database configuration. When running from Maven, you should add Spring’s dependencies to your |
Creating a Test Using MUnit FTP Server
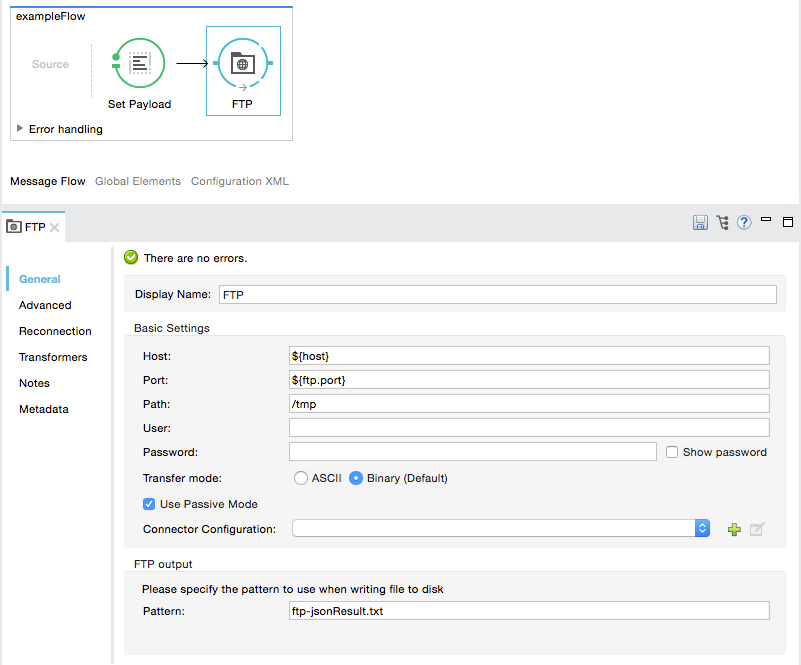
For the purpose of this documentation we are going to assume we are testing the following Mule code:
Studio Visual Editor
XML or Standalone Editor
<flow name="exampleFlow">
<set-payload value="#['something_something_dark_side']"/>
<ftp:outbound-endpoint host="${host}" port="${ftp.port}" user="${ftp.user}" password="${ftp.password}" outputPattern="ftp-jsonResult.txt" path="/tmp">
</ftp:outbound-endpoint>
</flow>xml|
For this example, we are using properties ftp.port=22 It is also required for you to set a user and a password for the FTP configuration. ftp.user=max |
|
The username field cannot be empty. |
Defining the FTP Server
Define the FTP server using the FTP Server connector from the MUnit Integration Test Tools in your Mule Pallet.
The DB Server can take the following parameters:
| Attribute Name | Description |
|---|---|
|
Defines the configuration name of this FTP server. The value must be unique. |
|
Defines the port on which the FTP server should listen. |
|
(Boolean.) Sets anonymous access to the FTP Server. If Anonymous is set to true, by setting the username to "anonymous" you don’t need to set a password to access the FTP server. Default value is true. |
|
(Boolean.) Defines the FTP protocol. When the secure parameter is set to true, the server behaves as a SFTP server and connections are allowed only through authentication. If it is set to false, the server behaves as a FTP server and allows either authenticated or anonymous connections. Default value is false. |
|
Defines the user home directory. The default value is the filesystem root. |
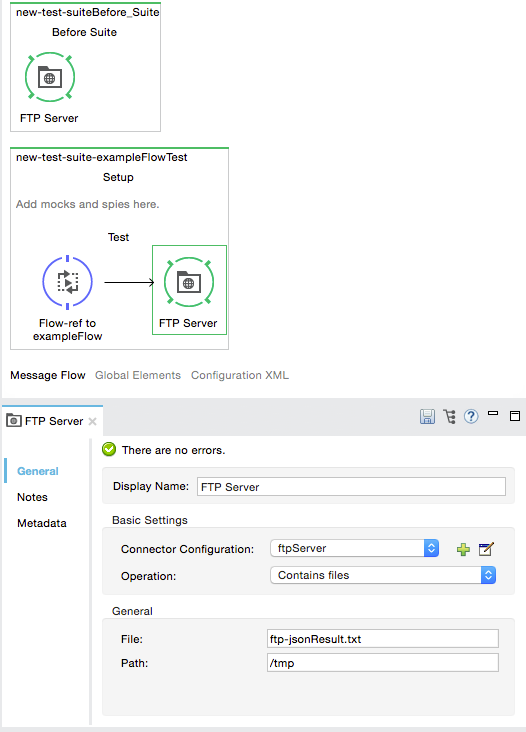
Proceed to define your FTP Server configuration in a new MUnit Suite.
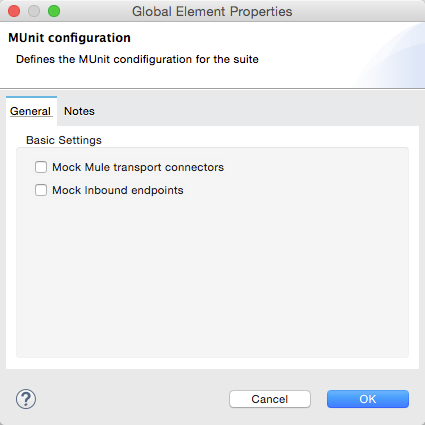
First, you need to set both mock connectors and mock inbounds options to false:
Studio Visual Editor
XML or Standalone Editor
<munit:config mock-inbounds="false" mock-connectors="false"/>xmlNext, define your FTP configuration:
Studio Visual Editor
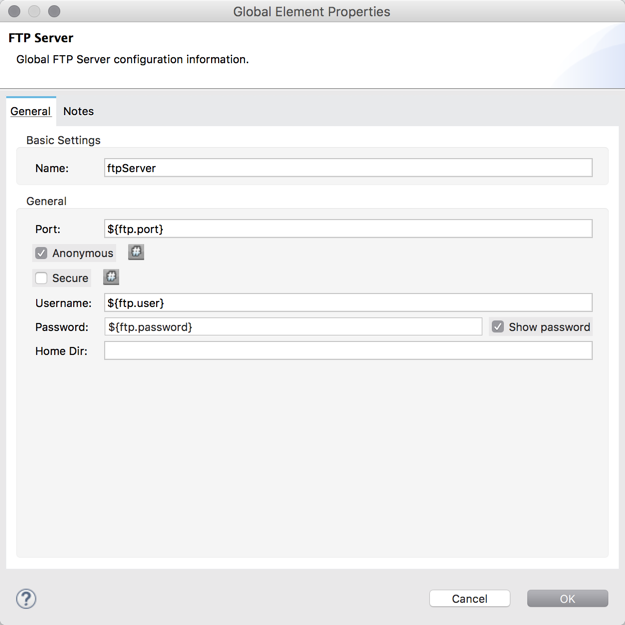
Navigate to your Global Elements tab, and select your FTP Server element. Click Edit and complete the fields:
Name: ftpServer
port.: ${ftp.port}
Username.: ${ftp.user}
Password.: ${ftp.password}
XML or Standalone Editor
<ftpserver:config port="${ftp.port}" name="ftpServer"/>xmlStarting the FTP Server
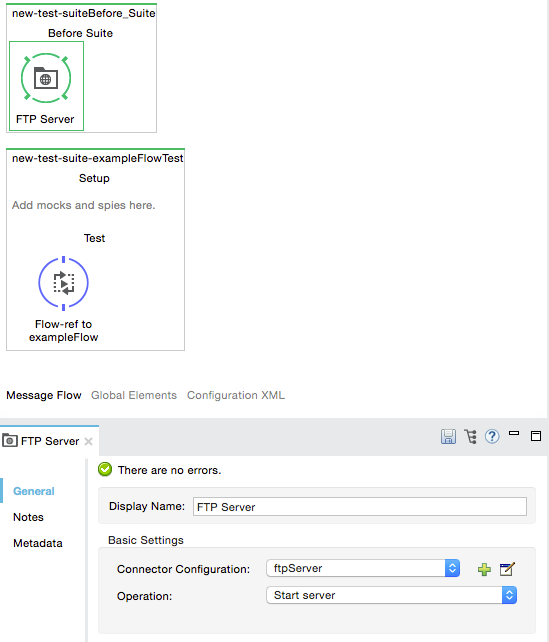
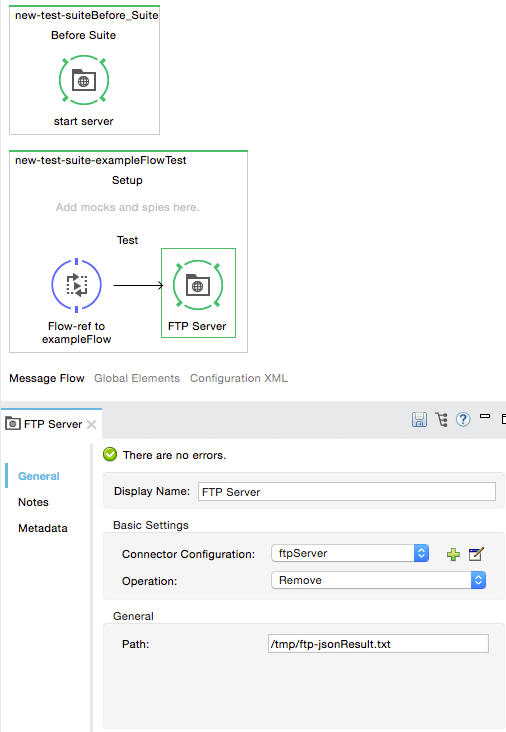
In order to run, the FTP server must be started in the before-suite. You start the server using the start-server message processor.
Studio Visual Editor
XML or Standalone Editor
<munit:before-suite name="before.suite" description="Starting FTP server">
<ftpserver:start-server config-ref="ftpServer"/>
</munit:before-suite>xmlRunning the Test
Once our FTP server is up and running we can run our test.
Studio Visual Editor
XML or Standalone Editor
<munit:test name="testFTPServer" description="Data must be stored in the ftp server">
<flow-ref name="exampleFlow" />
<ftpserver:contains-files file="ftp-jsonResult.txt" path="/tmp" config-ref="ftpServer"/>
</munit:test>xml| This FTP accepts any user, so there is no need to set up a user database or list. |
As you can see in the test, we make use of the contains-file message processor.
This message processor attempts to validate the existence of a file in the FTP server. If the file is not present, the message processor fails, thus causing the test to fail.
| Attribute Name | Description |
|---|---|
|
Defines the FTP server configuration. |
|
Defines in which folder to search based on the user home directory defined previously. |
|
Defines the name of the file to look for. |
The remove message processor provides another operation that may be of use. This operation instructs the FTP server to remove a file from storage.
Studio Visual Editor
XML or Standalone Editor
<ftpserver:remove config-ref="ftpServer" path="/tmp/ftp-jsonResult.txt"/>xml| Attribute Name | Description |
|---|---|
|
Defines the FTP server configuration. |
|
The full path of the file to remove. |
This feature is of use when we are creating the same file name several times. For example, we can make use of it in an after-test to ensure that no name collisions cause the test to fail.
|
Stopping the FTP Server
To stop the FTP server gracefully, it needs to be stopped in the after-suite, using the stop-server message processor.
Studio Visual Editor

XML or Standalone Editor
<munit:after-suite name="after.suite" description="Stoping FTP server">
<ftpserver:stop-server config-ref="ftpServer"/>
</munit:after-suite>xmlExecution Environments
You may have noticed that our production code example makes extensive use of placeholders for certain parameters, such as host, port etc. in the example below:
<ftp:outbound-endpoint host="${host}" port="${ftp.port}" user="${ftp.user}" password="${ftp.password}" outputPattern="ftp-jsonResult.txt" path="/tmp"/>xmlThe reason for this is that properties allow us to create code that is more configurable. Compare the example above with:
<ftp:outbound-endpoint host="some.host" port="myPort" user="myUser" password="myPassword" outputPattern="ftp-jsonResult.txt" path="/tmp"/>xmlThe second example code is untestable, even without MUnit. If we need to test this code before going to production, we always hit the production DB server with our real credentials, which entails risk.
On the other hand, the first example code allows us to define two different property files:
-
One for testing environment
-
One for the production environment
This is used in combination with the Mule property placeholder, shown below with $site:
<global-property value="mule.${env}.property"/>xmlIn the example above, the use of $site allows us to leverage execution environments. So for example we can define two separate properties files, mule.test.properties and mule.prod.properties, containing the same properties with values according to the environment we wish to use.
To run your test from Maven and issue the env parameter from the command line, you can run: mvn -DargLine="-Dmule.env=test" clean test.
|