SAP Connector 5.3 Studio Configuration
Install SAP Connector and configure the connector in Anypoint Studio. First install the SAP Java Connector (JCo) libraries that you obtain from SAP and then you can create an app containing one or more SAP Connector operations. Studio enables you to create an app and access the app from a browser.
To configure SAP Connector in Anypoint Studio:
-
Add the connector to your Mule project.
-
Configure the SAP connector.
-
Configure an input source for the connector.
Add the Connector to Your Mule Project
Add SAP Connector to your Mule project to automatically populate the XML code with the connector’s namespace and schema location and to add the required dependencies to the project’s pom.xml file:
-
In the Mule Palette view, click (X) Search in Exchange.
-
In the Add Dependencies to Project window, type
sapin the search field. -
Click SP Connector in Available modules.
-
Click Add.
-
Click Finish.
Adding a connector to a Mule project in Studio does not make that connector available to other projects in your Studio workspace.
Select a Source Operation
-
In Anypoint Studio, click the Mule Palette and type
sap. -
Choose an operation.
If you want your app to start when an object is sent from SAP, choose either of the following operations and drag the operation to the Source area of the Studio canvas.-
Document source listens for a change to an IDoc. When an IDoc changes, your app executes
-
Function source listens for a change to an SAP function module. When the targeted function module changes, your app executes.
See the SAP Connector Reference for field values. If you chose the Document source or Function source operation, proceed to the next section to install the SAP libraries.
-
-
Alternatively, you can configure an input source for this connector such as an HTTP Listener, or Scheduler, and drag the operation to the Studio canvas.
An HTTP Listener enables you to start your app from a browser. A Scheduler starts your app at a specific time. -
Install the SAP libraries.
Install SAP Libraries
To use SAP libraries in your Mule project, you must first download the libraries to your computer. You can use the three libraries in Anypoint Studio directly, without conversion. You must have an SAP ID to download the libraries.
The file types for each library depend on your operating system:
| OS | File Types |
|---|---|
Windows |
|
Mac OS |
|
Linux |
|
| SAP Connector supports SAP JCo libraries versions 3.0.x and 3.1.x. |
After you install the libraries, you can customize the global element properties and test the connection.
Configure the Libraries in Anypoint Studio
After installing the SAP Connector in Studio and adding the connector to your Mule project, configure the libraries.
-
Double-click the connector in the flow.
-
Click the plus sign (+) on the right of the Connector Configuration field.
This screen appears: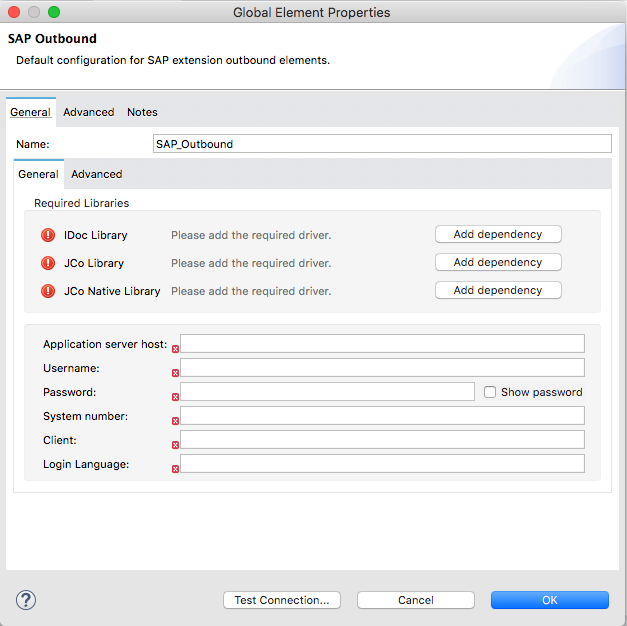
Install the IDOC Library
-
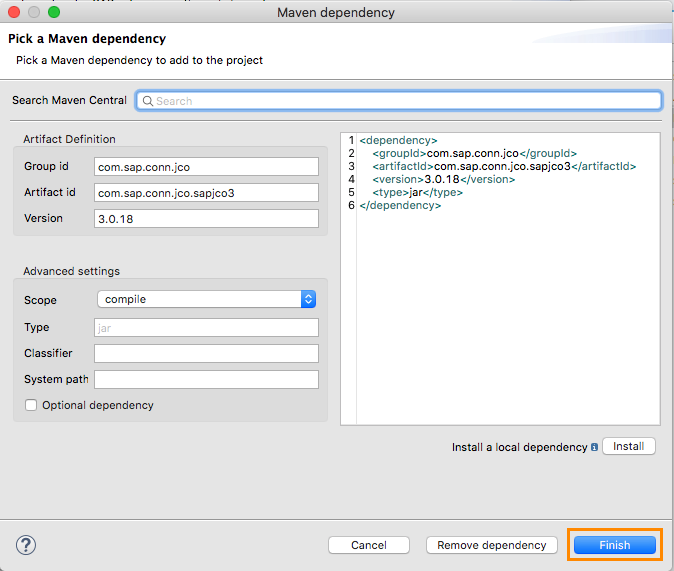
Click Add Dependency.
-
Click Install.
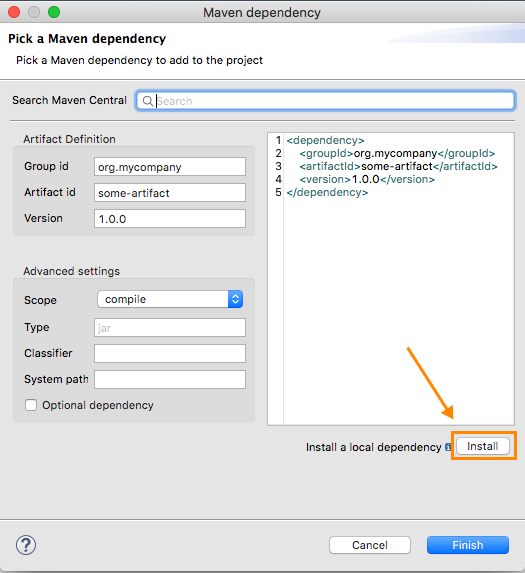
-
In the Install menu, click Browse to locate the library file.
-
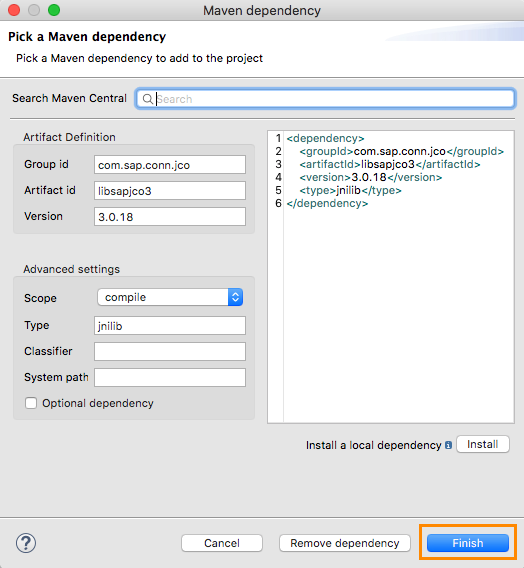
Specify a unique group ID, artifact ID, and version.

-
Click Finish or, if you want to cancel, click Remove Dependency.
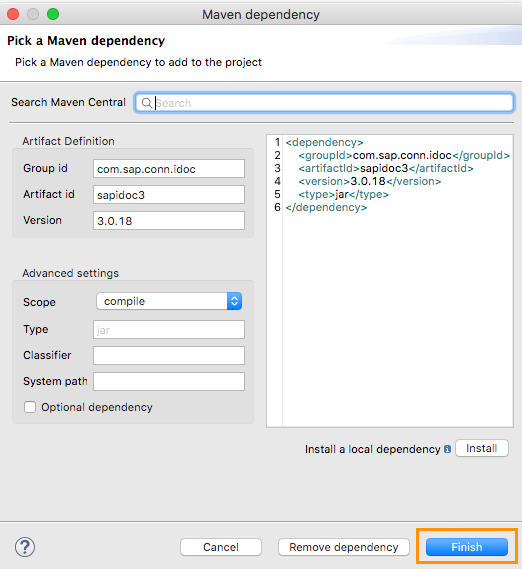
Install the JCO Library
-
Click Add Dependency.
-
Click Install.
-
In the Install menu, click Browse to locate the library file.
-
Specify a unique group ID, artifact ID, and version.
-
Click Finish or, if you want to cancel, click Remove Dependency.
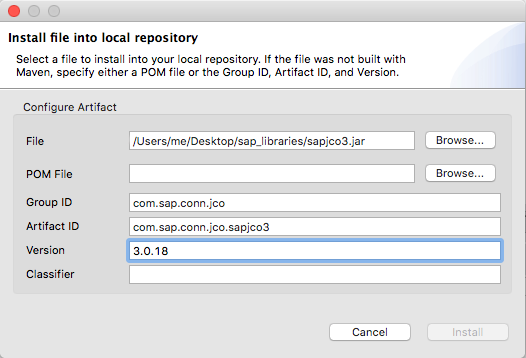
Install the JCO Native Library
-
Click Add Dependency.
-
Click Install.
-
In the Install menu, click Browse to locate the library file.
On MacOS, starting with JCO version 3.1.2, the native library extension was changed from
jnilibtodylib.-
After installing the library from the local machine:
-
Navigate to the bottom of the Shared Folder window.
-
Select Any, and then select the
dylibnative library. -
In the Install file into local repository window, enter values for the following fields:
-
Group ID
-
Artifact ID
-
Version
-
-
-
Specify a unique group ID, artifact ID, and version.
-
Click Finish or, if you want to cancel, click Remove Dependency.
When you are finished installing the libraries, the configuration screen appears as follows with green check marks for each successfully installed library:
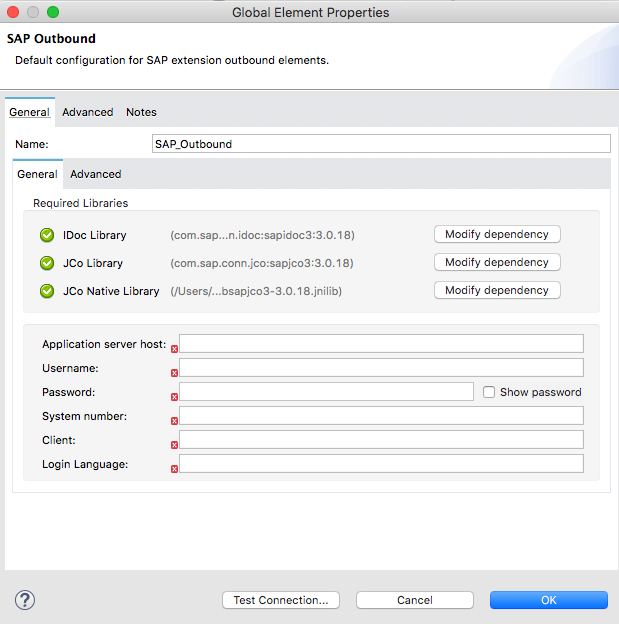
Test the Connection
-
Sign into your SAP login to get the information you need to configure the remaining Global Element Properties fields as described in Configure in Studio.
-
Click Test Connection to ensure that you have the correct login information.
Configure the Connector
If you need more than one SAP Connector instance in your Mule project, you can create a global SAP element. The SAP Connector object holds the configuration properties that allow you to connect to the SAP server.
To create a configuration for SAP Connector, complete the following steps:
-
Go to Global Elements section and click Create.
-
Select either SAP Inbound or SAP Outbound in the Connector Configuration section.
-
In the General tab pane, enter the required parameters for defining an SAP connection, which your SAP system administrator can supply.
The SAP global element properties allow you to define connection properties as well as to add the required SAP dependencies to your project.
For ease of use, SAP Connector shows only the most common properties as connector parameters. To configure a property that is not listed in the Properties panel, see the Define Extended Properties topic.
The minimum required attributes to define are:
| Field | Description |
|---|---|
Application Server Host |
SAP endpoint |
Username |
Username of an authorized SAP user |
Password |
Password credential of an authorized SAP user |
System Number |
System number used to connect to the SAP system |
Client |
The SAP client ID (usually a number) used to connect to the SAP system |
Login Language |
The language to use for the SAP connection. For example, |
As a best practice, use property placeholder syntax to load the credentials in a more simple and reusable way.
Click Test Connection to verify that the connection to the SAP instance is correct. If the credentials are correct you should see the Test Connection Successful message.
View the App Log
To check for problems, you can view the app log as follows:
-
If you’re running the app from Anypoint Platform, the output is visible in the Anypoint Studio console window.
-
If you’re running the app using Mule from the command line, the app log is visible in your OS console.
Unless the log file path is customized in the app’s log file (log4j2.xml), you can also view the app log in the default location MULE_HOME/logs/<app-name>.log.
Next
After configuring this connector in Studio, see the Additional Configuration Information topic for more configuration topics.