Connect to an SFTP Server Example
The following examples show how to configure Anypoint Connector for SFTP (SFTP Connector) global configuration element to:
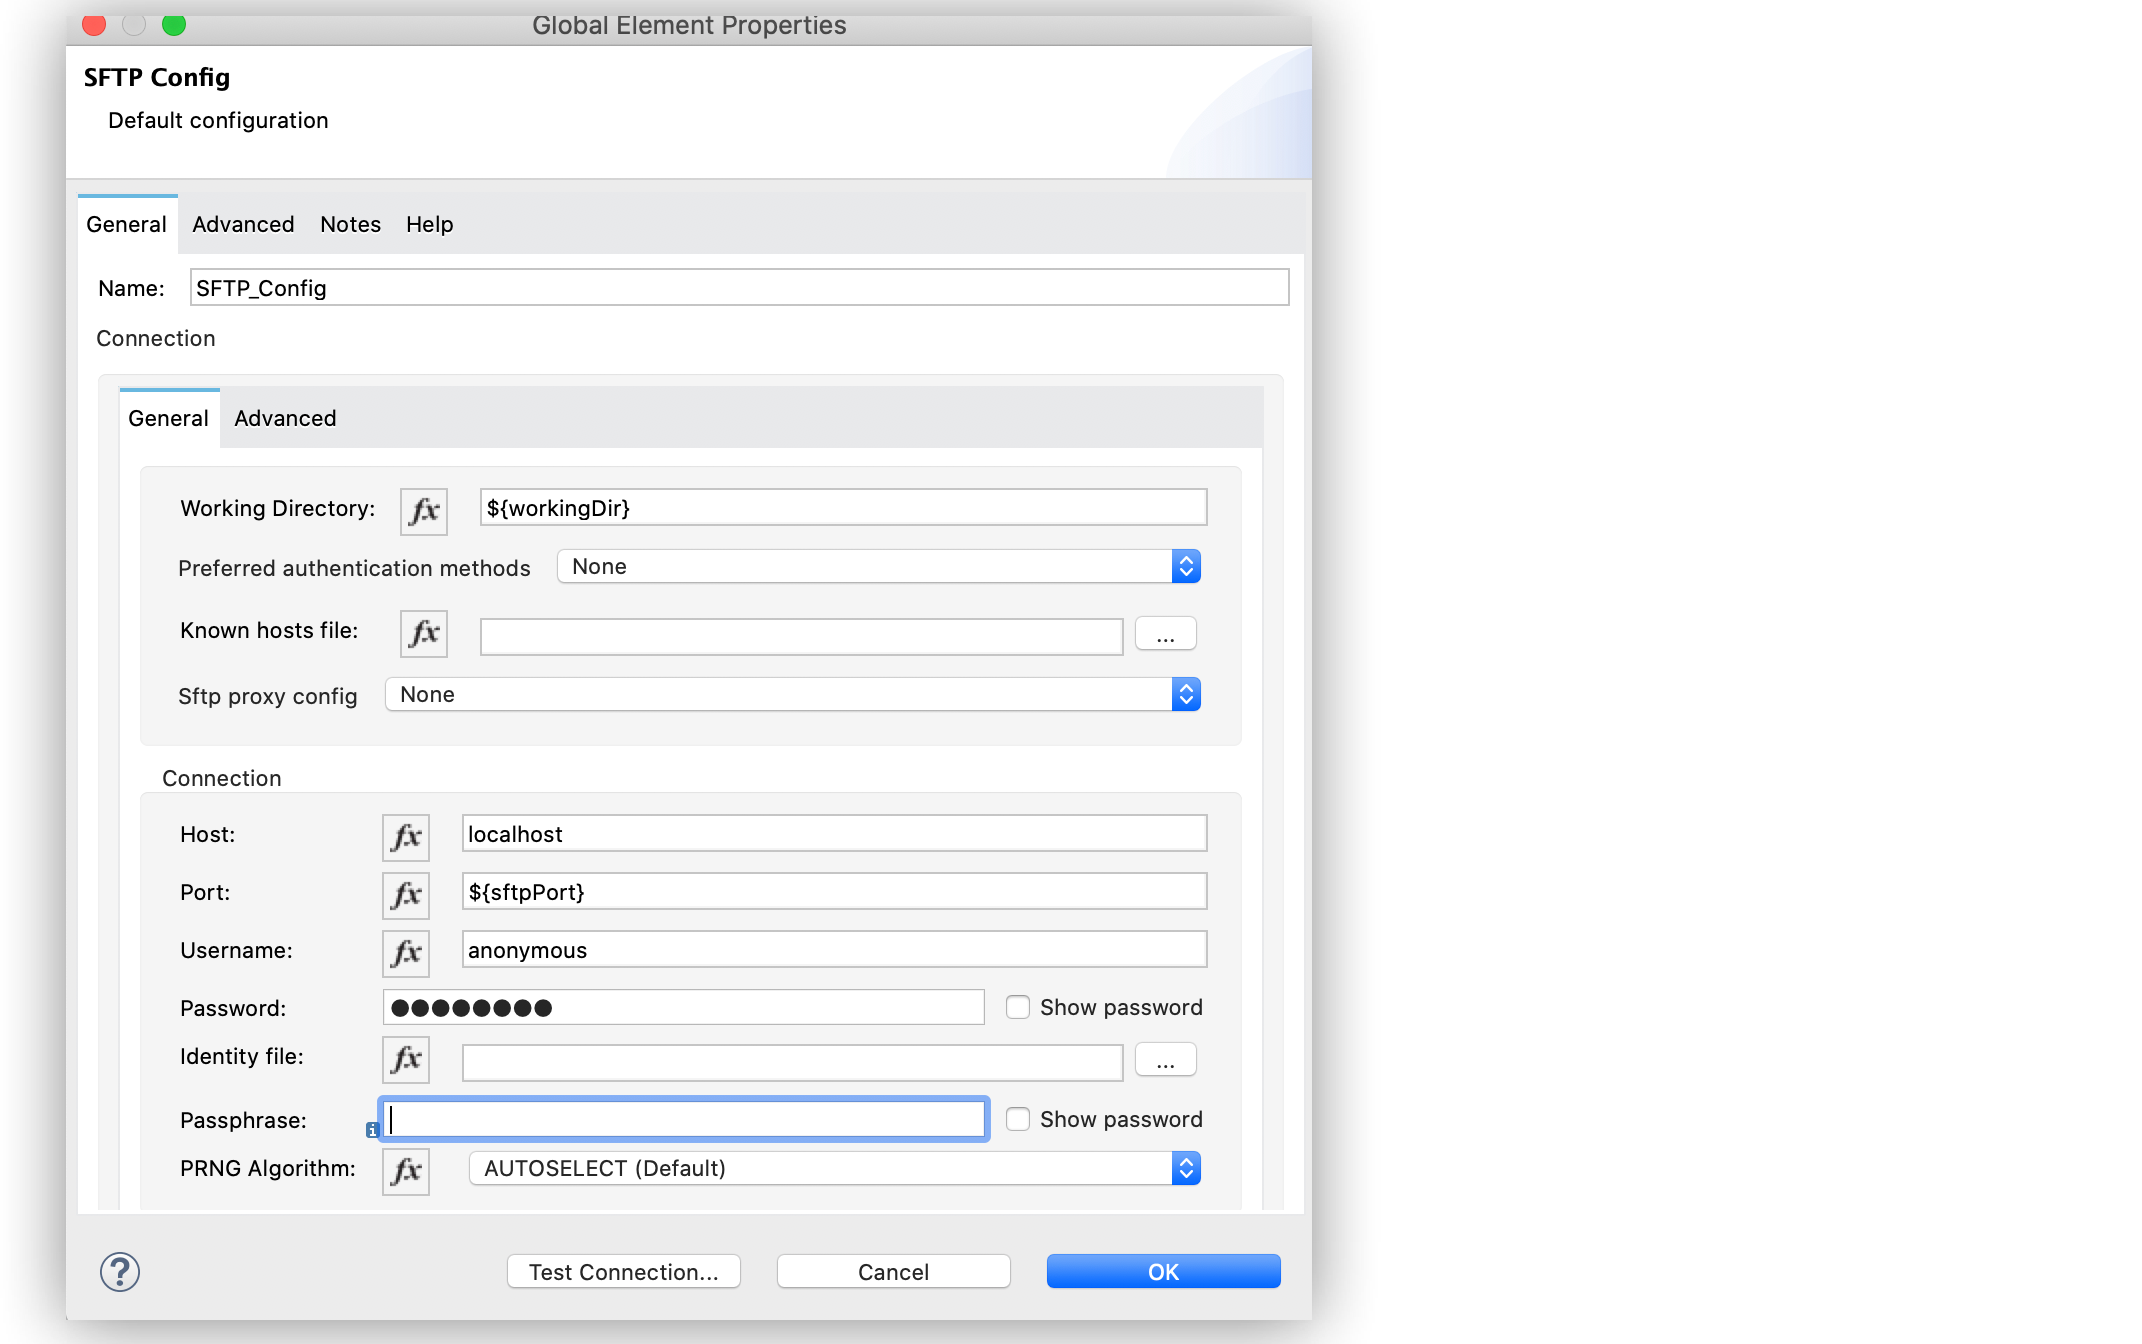
Connect to an SFTP Server
To configure the global element to connect to an SFTP Server, follow these steps:
-
Select the name of the connector in the Studio canvas.
-
Select the operation in the Studio canvas.
-
In the configuration screen for the operation, click the plus sign (+) next to the Connector configuration field to access the global element configuration fields.
-
On the General tab, specify the connection information for the connector.
-
Set the Working Directory field to
${workingDir}.
This is root of every relative path used with this connector. If it’s not provided, the value defaults to the remote server. -
Set the Host field to specify the SFTP server host, for example
localhostor192.168.0.1. -
Set the Port field to
${sftpPort}. -
Set the Username field to
anonymousand the Password field topassword. -
On the Advanced tab, optionally specify timeout configuration and reconnection strategy.
-
Click Test Connection to confirm that Mule can connect with the specified server.
-
Click OK.
In the Configuration XML editor, the configuration sftp:config looks like this:
<sftp:config name="sftp">
  <sftp:connection username="anonymous" password="password"
    host="localhost" port="${sftpPort}"
    workingDir="${workingDir}"/>
</sftp:config>
Connect to an SFTP Server Through a Proxy
To configure the global element to connect to an SFTP server through a proxy, follow these steps:
-
Select the name of the connector in the Studio canvas.
-
Select the operation in the Studio canvas.
-
In the configuration screen for the operation, click the plus sign (+) next to the Connector configuration field to access the global element configuration fields.
-
On the General tab, specify the connection information for the connector.
-
Set the Working Directory field to
${workingDir}.
This is root of every relative path used with this connector. If it’s not provided, the value defaults to the remote server. -
Set the Host field to
127.0.0.100. -
Set the Port field to
${SFTP_PORT}. -
Set the Username field to
muletest1and the Password field topassword. -
For the Sftp proxy config field, select Edit inline, and set the following fields:
-
Host:
localhost -
Port:
${proxyPort} -
Protocol:
HTTP
The protocol can be eitherHTTP,SOCKS4, orSOCKS5.
-
-
On the Advanced tab, optionally specify a timeout configuration and reconnection strategy.
-
Click Test Connection to confirm that Mule can connect with the specified server.
-
Click OK.

In the Configuration XML editor, the configuration sftp:config looks like this:
<sftp:config name="sftp">
  <sftp:connection username="muletest1" password="password"
    host="127.0.0.100" port="${SFTP_PORT}" workingDir="${workingDir}">
      <sftp:sftp-proxy-config host="localhost" port="${proxyPort}" protocol="HTTP"/>
  </ftp:sftp-connection>
</ftp:config>