Tableau Connector 1.1 Examples
The following examples show how to perform Hyper and Rest configuration operations with Tableau Connector:
-
Hyper configuration operations include:
-
Rest configuration operations include:
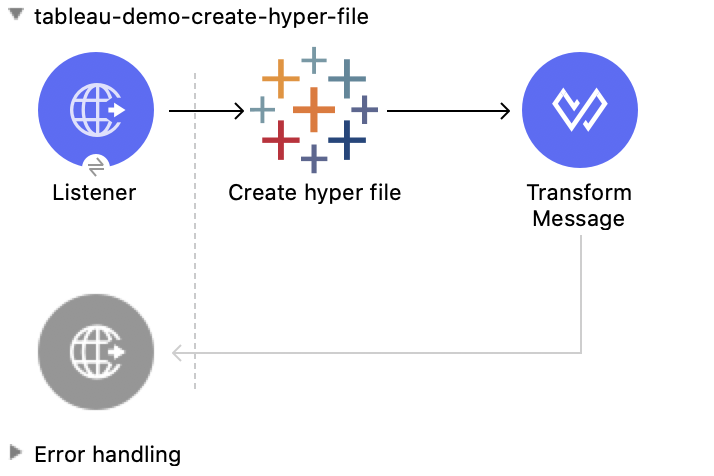
Create Hyper File - Hyper Configuration
This Mule flow creates a hyper file with specified table properties.
This example uses the following operations:
-
HTTP Listener
Accepts data from HTTP requests -
Create hyper file
Creates an empty hyper file based on the column definition provided by the user -
Transform Message
Outputs the results of the Create hyper file operation in JSON format
XML for This Example
Paste this code into the Studio XML editor to quickly load the flow for this example into your Mule app:
<?xml version="1.0" encoding="UTF-8"?>

<mule xmlns:file="http://www.mulesoft.org/schema/mule/file" xmlns:ee="http://www.mulesoft.org/schema/mule/ee/core"
	xmlns:http="http://www.mulesoft.org/schema/mule/http"
	xmlns:tableau-specialist="http://www.mulesoft.org/schema/mule/tableau-specialist" xmlns="http://www.mulesoft.org/schema/mule/core" xmlns:doc="http://www.mulesoft.org/schema/mule/documentation" xmlns:xsi="http://www.w3.org/2001/XMLSchema-instance" xsi:schemaLocation="http://www.mulesoft.org/schema/mule/core http://www.mulesoft.org/schema/mule/core/current/mule.xsd
http://www.mulesoft.org/schema/mule/tableau-specialist http://www.mulesoft.org/schema/mule/tableau-specialist/current/mule-tableau-specialist.xsd
http://www.mulesoft.org/schema/mule/http http://www.mulesoft.org/schema/mule/http/current/mule-http.xsd
http://www.mulesoft.org/schema/mule/ee/core http://www.mulesoft.org/schema/mule/ee/core/current/mule-ee.xsd
http://www.mulesoft.org/schema/mule/file http://www.mulesoft.org/schema/mule/file/current/mule-file.xsd">
	<http:listener-config name="HTTP_Listener_config" doc:name="HTTP Listener config" doc:id="d784f0fb-88c2-42ac-a729-199268071485" >
		<http:listener-connection host="0.0.0.0" port="8081" />
	</http:listener-config>
	<tableau-specialist:tableau-hyper-config name="Tableau_Specialist_Hyper_configuration" doc:name="Tableau Specialist Hyper configuration" doc:id="dd5a868e-8b70-4296-b4a4-b6c8c6479410" >
		<tableau-specialist:connection telemetry="DO_NOT_SEND_USAGE_DATA_TO_TABLEAU"/>
	</tableau-specialist:tableau-hyper-config>
		<flow name="tableau-demo-create-hyper-file" doc:id="615f59de-2e3f-48fc-ae09-4f4ab893aaef" >
		<http:listener doc:name="Listener" doc:id="1417bfaa-e778-465f-a95d-a7cea478d092" config-ref="HTTP_Listener_config" path="/create-hyper-file"/>
		<tableau-specialist:create-hyper-file doc:name="Create hyper file" doc:id="cd6303c9-e42e-4d75-a1c1-9ce92054f4f0" config-ref="Tableau_Specialist_Hyper_configuration" hyperFileName="hyperFileDemo.hyper" schemaName="schemademo" tableName="tabledemo">
			<tableau-specialist:columns>
				<tableau-specialist:column-definition columnName="Customer ID" columnType="TEXT" columnNullability="NOT_NULLABLE" />
				<tableau-specialist:column-definition columnName="Customer Name" columnType="TEXT" columnNullability="NOT_NULLABLE" />
				<tableau-specialist:column-definition columnName="Loyalty Reward Points" columnType="BIG_INT" columnNullability="NOT_NULLABLE" />
				<tableau-specialist:column-definition columnName="Segment" columnType="TEXT" columnNullability="NOT_NULLABLE" />
			</tableau-specialist:columns>
		</tableau-specialist:create-hyper-file>
		<ee:transform doc:name="Transform Message" doc:id="d1415eb0-1fd0-4bef-aa60-0fee97b28e61">
			<ee:message>
				<ee:set-payload><![CDATA[%dw 2.0
output application/json
---
payload]]></ee:set-payload>
			</ee:message>
		</ee:transform>
	</flow>
</mule>
Steps for Running This Example
-
Verify that your connector is configured.
-
Save the project.
-
From a web browser, test the application by entering
http://localhost:8081/create-hyper-file-from-csv.
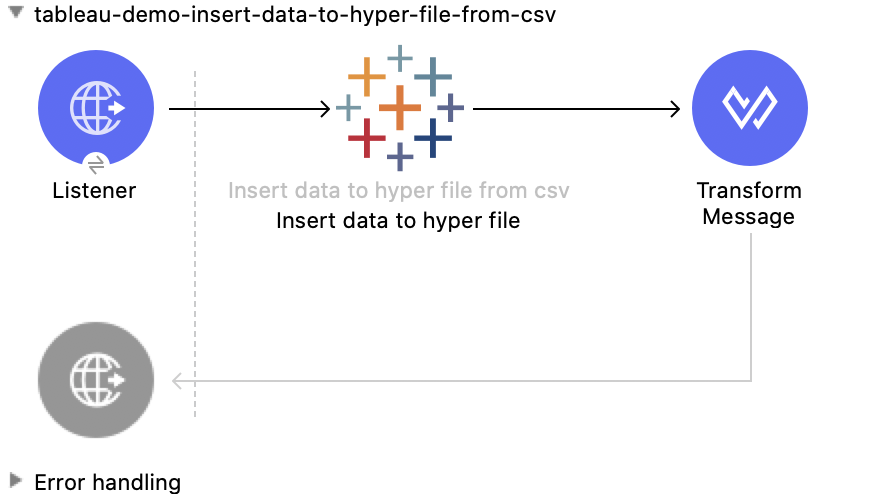
Insert Data to Hyper File from CSV - Hyper Configuration
This Mule flow creates a hyper table and populates the table with data from
a CSV file. To use this flow, run the Create Hyper File
flow to create the hyper table and then use the src/main/resources/customers.csv
file to populate the table.
This example uses the following operations:
-
HTTP Listener
Accepts data from HTTP requests -
Insert data to hyper file from csv
Populates a hyper file from an existing CSV document -
Transform Message
Outputs the results of the Insert data to hyper file from csv operation in JSON format
XML for This Example
Paste this code into the Studio XML editor to quickly load the flow for this example into your Mule app:
<?xml version="1.0" encoding="UTF-8"?>

<mule xmlns:file="http://www.mulesoft.org/schema/mule/file" xmlns:ee="http://www.mulesoft.org/schema/mule/ee/core"
	xmlns:http="http://www.mulesoft.org/schema/mule/http"
	xmlns:tableau-specialist="http://www.mulesoft.org/schema/mule/tableau-specialist" xmlns="http://www.mulesoft.org/schema/mule/core" xmlns:doc="http://www.mulesoft.org/schema/mule/documentation" xmlns:xsi="http://www.w3.org/2001/XMLSchema-instance" xsi:schemaLocation="http://www.mulesoft.org/schema/mule/core http://www.mulesoft.org/schema/mule/core/current/mule.xsd
http://www.mulesoft.org/schema/mule/tableau-specialist http://www.mulesoft.org/schema/mule/tableau-specialist/current/mule-tableau-specialist.xsd
http://www.mulesoft.org/schema/mule/http http://www.mulesoft.org/schema/mule/http/current/mule-http.xsd
http://www.mulesoft.org/schema/mule/ee/core http://www.mulesoft.org/schema/mule/ee/core/current/mule-ee.xsd
http://www.mulesoft.org/schema/mule/file http://www.mulesoft.org/schema/mule/file/current/mule-file.xsd">
	<http:listener-config name="HTTP_Listener_config" doc:name="HTTP Listener config" doc:id="d784f0fb-88c2-42ac-a729-199268071485" >
		<http:listener-connection host="0.0.0.0" port="8081" />
	</http:listener-config>
	<tableau-specialist:tableau-hyper-config name="Tableau_Specialist_Hyper_configuration" doc:name="Tableau Specialist Hyper configuration" doc:id="dd5a868e-8b70-4296-b4a4-b6c8c6479410" >
		<tableau-specialist:connection telemetry="DO_NOT_SEND_USAGE_DATA_TO_TABLEAU"/>
	</tableau-specialist:tableau-hyper-config>
	<flow name="tableau-demo-insert-data-to-hyper-file-from-csv" doc:id="0c21c1b1-8320-4d5e-bd43-8b7bb4441120" >
		<http:listener doc:name="Listener" doc:id="45f9c1a0-ce2a-4265-9319-cdad8a685a8b" config-ref="HTTP_Listener_config" path="/create-hyper-file-from-csv"/>
		<tableau-specialist:insert-data-to-hyper-file-from-csv doc:name="Insert data to hyper file" config-ref="Tableau_Specialist_Hyper_configuration" hyperFileName="hyperFileDemo.hyper" schemaName="schemademo" tableName="tabledemo" csvNullColumn="NULL" csvDelimiter="," csvHeader="true" csvFilePath="The csv file that contains the records">
                <tableau-specialist:columns >
                    <tableau-specialist:column-definition columnName="Customer ID" columnType="TEXT" columnNullability="NOT_NULLABLE" />
                    <tableau-specialist:column-definition columnName="Customer Name" columnType="TEXT" columnNullability="NOT_NULLABLE" />
                    <tableau-specialist:column-definition columnName="Loyalty Reward Points" columnType="BIG_INT" columnNullability="NOT_NULLABLE" />
                    <tableau-specialist:column-definition columnName="Segment" columnType="TEXT" columnNullability="NOT_NULLABLE" />
                </tableau-specialist:columns>
            </tableau-specialist:insert-data-to-hyper-file-from-csv>
		<ee:transform doc:name="Transform Message" doc:id="73408a47-9b24-4209-a549-a0c54bb6e666" >
			<ee:message >
				<ee:set-payload ><![CDATA[%dw 2.0
output application/json
---
payload]]></ee:set-payload>
			</ee:message>
		</ee:transform>
	</flow>
</mule>
Steps for Running This Example
-
Verify that your connector is configured.
-
Save the project.
-
From a web browser, test the application by entering
http://localhost:8081//create-hyper-file.
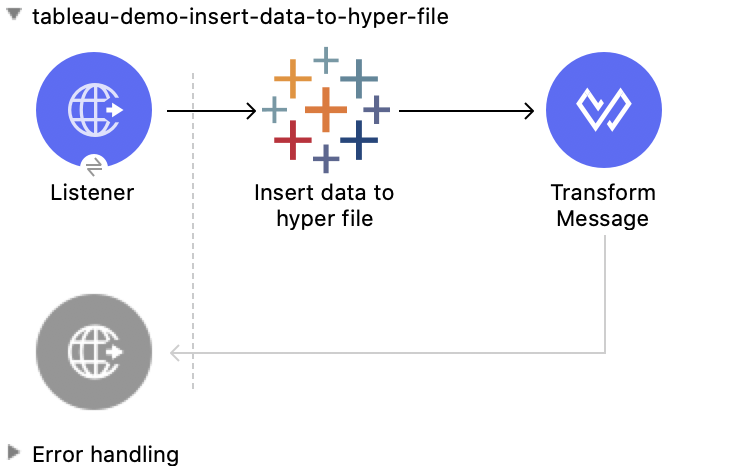
Insert Data to Hyper File - Hyper Configuration
This Mule flow inserts data into a table that belongs to a hyper file. To use this flow, run the Create Hyper File flow to create the hyper table and then use the SQL provided to insert the data.
This example uses the following operations:
-
HTTP Listener
Accepts data from HTTP requests -
Insert data to hyper file
Inserts data into a table that belongs to a hyper file -
Transform Message
Outputs the results of the Insert data to hyper file operation in JSON format
XML for This Example
Paste this code into the Studio XML editor to quickly load the flow for this example into your Mule app:
<?xml version="1.0" encoding="UTF-8"?>

<mule xmlns:file="http://www.mulesoft.org/schema/mule/file" xmlns:ee="http://www.mulesoft.org/schema/mule/ee/core"
	xmlns:http="http://www.mulesoft.org/schema/mule/http"
	xmlns:tableau-specialist="http://www.mulesoft.org/schema/mule/tableau-specialist" xmlns="http://www.mulesoft.org/schema/mule/core" xmlns:doc="http://www.mulesoft.org/schema/mule/documentation" xmlns:xsi="http://www.w3.org/2001/XMLSchema-instance" xsi:schemaLocation="http://www.mulesoft.org/schema/mule/core http://www.mulesoft.org/schema/mule/core/current/mule.xsd
http://www.mulesoft.org/schema/mule/tableau-specialist http://www.mulesoft.org/schema/mule/tableau-specialist/current/mule-tableau-specialist.xsd
http://www.mulesoft.org/schema/mule/http http://www.mulesoft.org/schema/mule/http/current/mule-http.xsd
http://www.mulesoft.org/schema/mule/ee/core http://www.mulesoft.org/schema/mule/ee/core/current/mule-ee.xsd
http://www.mulesoft.org/schema/mule/file http://www.mulesoft.org/schema/mule/file/current/mule-file.xsd">
	<http:listener-config name="HTTP_Listener_config" doc:name="HTTP Listener config" doc:id="d784f0fb-88c2-42ac-a729-199268071485" >
		<http:listener-connection host="0.0.0.0" port="8081" />
	</http:listener-config>
	<tableau-specialist:tableau-hyper-config name="Tableau_Specialist_Hyper_configuration" doc:name="Tableau Specialist Hyper configuration" doc:id="dd5a868e-8b70-4296-b4a4-b6c8c6479410" >
		<tableau-specialist:connection telemetry="DO_NOT_SEND_USAGE_DATA_TO_TABLEAU"/>
	</tableau-specialist:tableau-hyper-config>
	<flow name="tableau-demo-insert-data-to-hyper-file" doc:id="f3ea2c94-c19f-4abd-94b7-1664e3ddefd9" >
		<http:listener doc:name="Listener" doc:id="726f3a96-ba6c-45f3-8ac0-701eda923d7e" config-ref="HTTP_Listener_config" path="/insert-data-to-hyper-file"/>
		<tableau-specialist:insert-data-to-hyper-file doc:name="Insert data to hyper file" doc:id="5df6d16d-478e-4e56-bb5a-3e30df47dd41" config-ref="Tableau_Specialist_Hyper_configuration" hyperFileName="hyperFileDemo.hyper">
			<tableau-specialist:insert-command ><![CDATA[INSERT INTO schemademo.tabledemo VALUES ('insert', 'data', 1, 'operation')]]></tableau-specialist:insert-command>
		</tableau-specialist:insert-data-to-hyper-file>
		<ee:transform doc:name="Transform Message" doc:id="b3191066-f573-40be-b8dd-5ca2b10b4e3b" >
			<ee:message >
				<ee:set-payload ><![CDATA[%dw 2.0
output application/json
---
payload]]></ee:set-payload>
			</ee:message>
		</ee:transform>
	</flow>
</mule>
Steps for Running This Example
-
Verify that your connector is configured.
-
Save the project.
-
From a web browser, test the application by entering
http://localhost:8081/insert-data-to-hyper-file.
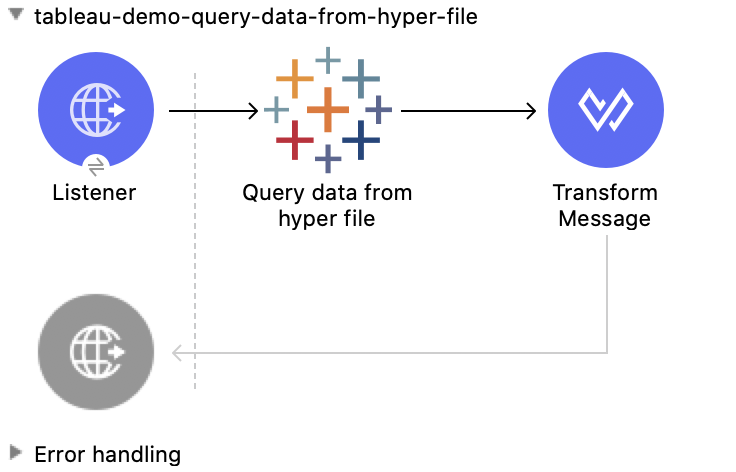
Query Data from Hyper File - Hyper Configuration
This Mule flow queries data from tables belonging to a hyper file. To use this flow, run the Create Hyper File flow to populate the table with data. This flow returns all of the data in the specified hyper table.
This example uses the following operations:
-
HTTP Listener
Accepts data from HTTP requests -
Query data from hyper file
Queries data from tables belonging to a hyper file -
Transform Message
Outputs the results of the Query data from hyper file operation in JSON format
XML for This Example
Paste this code into the Studio XML editor to quickly load the flow for this example into your Mule app:
<?xml version="1.0" encoding="UTF-8"?>

<mule xmlns:file="http://www.mulesoft.org/schema/mule/file" xmlns:ee="http://www.mulesoft.org/schema/mule/ee/core"
	xmlns:http="http://www.mulesoft.org/schema/mule/http"
	xmlns:tableau-specialist="http://www.mulesoft.org/schema/mule/tableau-specialist" xmlns="http://www.mulesoft.org/schema/mule/core" xmlns:doc="http://www.mulesoft.org/schema/mule/documentation" xmlns:xsi="http://www.w3.org/2001/XMLSchema-instance" xsi:schemaLocation="http://www.mulesoft.org/schema/mule/core http://www.mulesoft.org/schema/mule/core/current/mule.xsd
http://www.mulesoft.org/schema/mule/tableau-specialist http://www.mulesoft.org/schema/mule/tableau-specialist/current/mule-tableau-specialist.xsd
http://www.mulesoft.org/schema/mule/http http://www.mulesoft.org/schema/mule/http/current/mule-http.xsd
http://www.mulesoft.org/schema/mule/ee/core http://www.mulesoft.org/schema/mule/ee/core/current/mule-ee.xsd
http://www.mulesoft.org/schema/mule/file http://www.mulesoft.org/schema/mule/file/current/mule-file.xsd">
	<http:listener-config name="HTTP_Listener_config" doc:name="HTTP Listener config" doc:id="6e854c70-b5c7-4487-b594-7e9005696065" >
		<http:listener-connection host="0.0.0.0" port="8081" />
	</http:listener-config>
	<tableau-specialist:tableau-hyper-config name="Tableau_Specialist_Hyper_configuration" doc:name="Tableau Specialist Hyper configuration" doc:id="82d48441-af0b-48bb-a008-5d0347fc4e75" >
		<tableau-specialist:connection telemetry="DO_NOT_SEND_USAGE_DATA_TO_TABLEAU"/>
	</tableau-specialist:tableau-hyper-config>
	<flow name="tableau-demo-query-data-from-hyper-file" doc:id="e80f6bd0-6a42-49be-b231-1a3cce42a810" >
		<http:listener doc:name="Listener" doc:id="a589a1c0-8e81-47c4-8f29-6c5f74bcea18" config-ref="HTTP_Listener_config" path="/query-data-from-hyper-file"/>
		<tableau-specialist:query-data-from-hyper-file doc:name="Query data from hyper file" doc:id="5cfaf771-00c5-46ce-be52-05ca44545169" config-ref="Tableau_Specialist_Hyper_configuration" hyperFileName="hyperFileDemo.hyper">
			<tableau-specialist:query ><![CDATA[SELECT * FROM schemademo.tabledemo]]></tableau-specialist:query>
		</tableau-specialist:query-data-from-hyper-file>
		<ee:transform doc:name="Transform Message" doc:id="ec5a0311-c920-475b-a8b1-b19de6e2ad8c" >
			<ee:message >
				<ee:set-payload ><![CDATA[%dw 2.0
output application/json
---
payload]]></ee:set-payload>
			</ee:message>
		</ee:transform>
	</flow>
</mule>
Steps for Running This Example
-
Verify that your connector is configured.
-
Save the project.
-
From a web browser, test the application by entering
http://localhost:8081/query-data-from-hyper-file.
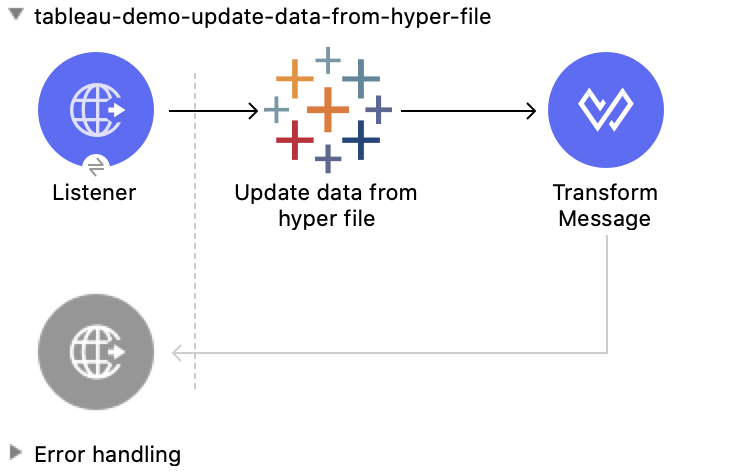
Update Data from Hyper File - Hyper Configuration
This Mule flow updates data from tables into a .hyper file by sending SQL queries. To use this flow, run the Create Hyper File flow and Insert Data to Hyper File flow to create the hyper table and insert the data into the table. The flow updates the data that was previously inserted into the table.
This example uses the following operations:
-
HTTP Listener
Accepts data from HTTP requests -
Update data from hyper file
Updates data from tables into a .hyper file by sending SQL queries -
Transform Message
Outputs the results of the Update data from hyper file operation in JSON format
XML for This Example
Paste this code into the Studio XML editor to quickly load the flow for this example into your Mule app:
<?xml version="1.0" encoding="UTF-8"?>

<mule xmlns:file="http://www.mulesoft.org/schema/mule/file" xmlns:ee="http://www.mulesoft.org/schema/mule/ee/core"
	xmlns:http="http://www.mulesoft.org/schema/mule/http"
	xmlns:tableau-specialist="http://www.mulesoft.org/schema/mule/tableau-specialist" xmlns="http://www.mulesoft.org/schema/mule/core" xmlns:doc="http://www.mulesoft.org/schema/mule/documentation" xmlns:xsi="http://www.w3.org/2001/XMLSchema-instance" xsi:schemaLocation="http://www.mulesoft.org/schema/mule/core http://www.mulesoft.org/schema/mule/core/current/mule.xsd
http://www.mulesoft.org/schema/mule/tableau-specialist http://www.mulesoft.org/schema/mule/tableau-specialist/current/mule-tableau-specialist.xsd
http://www.mulesoft.org/schema/mule/http http://www.mulesoft.org/schema/mule/http/current/mule-http.xsd
http://www.mulesoft.org/schema/mule/ee/core http://www.mulesoft.org/schema/mule/ee/core/current/mule-ee.xsd
http://www.mulesoft.org/schema/mule/file http://www.mulesoft.org/schema/mule/file/current/mule-file.xsd">
	<http:listener-config name="HTTP_Listener_config" doc:name="HTTP Listener config" doc:id="6e854c70-b5c7-4487-b594-7e9005696065" >
		<http:listener-connection host="0.0.0.0" port="8081" />
	</http:listener-config>
	<tableau-specialist:tableau-hyper-config name="Tableau_Specialist_Hyper_configuration" doc:name="Tableau Specialist Hyper configuration" doc:id="82d48441-af0b-48bb-a008-5d0347fc4e75" >
		<tableau-specialist:connection telemetry="DO_NOT_SEND_USAGE_DATA_TO_TABLEAU"/>
	</tableau-specialist:tableau-hyper-config>
	<flow name="tableau-demo-update-data-from-hyper-file" doc:id="d179e972-ff36-4909-bc89-e399a526e602" >
		<http:listener doc:name="Listener" doc:id="03ffc8a6-55c6-420e-bca7-a17498533271" config-ref="HTTP_Listener_config" path="/update-data-from-hyper-file"/>
		<tableau-specialist:update-data-from-hyper-file doc:name="Update data from hyper file" doc:id="ef1859fc-dfec-41b4-bf3b-c833ce7ab167" config-ref="Tableau_Specialist_Hyper_configuration" hyperFileName="hyperFileDemo.hyper">
			<tableau-specialist:update-command ><![CDATA[UPDATE schemademo.tabledemo
SET "Customer Name"='updatedName'
WHERE "Customer ID"='insert']]></tableau-specialist:update-command>
		</tableau-specialist:update-data-from-hyper-file>
		<ee:transform doc:name="Transform Message" doc:id="b5395963-4001-4241-b3e8-f511dc9caa92" >
			<ee:message >
				<ee:set-payload ><![CDATA[%dw 2.0
output application/json
---
payload]]></ee:set-payload>
			</ee:message>
		</ee:transform>
	</flow>
</mule>
Steps for Running This Example
-
Verify that your connector is configured.
-
Save the project.
-
From a web browser, test the application by entering
http://localhost:8081/update-data-from-hyper-file.
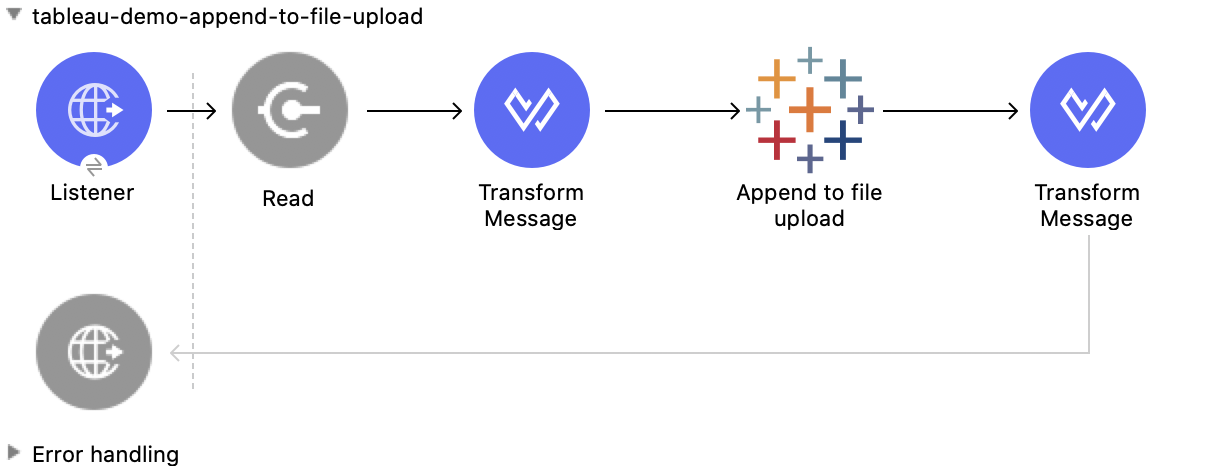
Append to File Upload - Rest Configuration
This Mule flow uploads a block of data and appends it to the data that is already uploaded. To get an Upload Session Id, run the Initiate file upload operation.
This example uses the following operations:
-
HTTP Listener
Accepts data from HTTP requests -
Read
Reads a file -
Transform Message
Transforms the HTTP input -
Append to file upload
Uploads a block of data and appends it to the data that is already uploaded -
Transform Message
Outputs the results of the Append to file upload operation in JSON format
XML for This Example
Paste this code into the Studio XML editor to quickly load the flow for this example into your Mule app:
<?xml version="1.0" encoding="UTF-8"?>

<mule xmlns:tableau="http://www.mulesoft.org/schema/mule/tableau" xmlns:file="http://www.mulesoft.org/schema/mule/file"
	xmlns:ee="http://www.mulesoft.org/schema/mule/ee/core"
	xmlns:http="http://www.mulesoft.org/schema/mule/http" xmlns:tableau-specialist="http://www.mulesoft.org/schema/mule/tableau-specialist" xmlns="http://www.mulesoft.org/schema/mule/core" xmlns:doc="http://www.mulesoft.org/schema/mule/documentation" xmlns:xsi="http://www.w3.org/2001/XMLSchema-instance" xsi:schemaLocation="http://www.mulesoft.org/schema/mule/core http://www.mulesoft.org/schema/mule/core/current/mule.xsd
http://www.mulesoft.org/schema/mule/tableau-specialist http://www.mulesoft.org/schema/mule/tableau-specialist/current/mule-tableau-specialist.xsd
http://www.mulesoft.org/schema/mule/http http://www.mulesoft.org/schema/mule/http/current/mule-http.xsd
http://www.mulesoft.org/schema/mule/ee/core http://www.mulesoft.org/schema/mule/ee/core/current/mule-ee.xsd
http://www.mulesoft.org/schema/mule/file http://www.mulesoft.org/schema/mule/file/current/mule-file.xsd
http://www.mulesoft.org/schema/mule/tableau http://www.mulesoft.org/schema/mule/tableau/current/mule-tableau.xsd">
	<configuration-properties file="project-properties.properties"/>
	<tableau-specialist:tableau-specialist-config name="Tableau_Specialist_Configuration" doc:name="Tableau Specialist Configuration" doc:id="0086ca3c-2ec6-4940-96e5-d319c5d35c15" >
		<tableau-specialist:basic-username-password-connection serverUrl="${credentials.serverUrl}" apiVersion="${credentials.apiVersion}" contentUrl="${credentials.contentUrl}" username="${credentials.username}" password="${credentials.password}" />
	</tableau-specialist:tableau-specialist-config>
	<http:listener-config name="HTTP_Listener_config" doc:name="HTTP Listener config" doc:id="fa83ce28-e898-4ac9-b524-3fdef2ad15f6" >
		<http:listener-connection host="0.0.0.0" port="8081" />
	</http:listener-config>
	<flow name="tableau-demo-append-to-file-upload" doc:id="4dc68be9-5aeb-4ac0-bb7a-21e0ae9bd60a" >
		<http:listener doc:name="Listener" doc:id="59db6c98-5a3d-4b7e-9a48-618367c27431" config-ref="HTTP_Listener_config" path="/append-to-file-upload"/>
		<file:read doc:name="Read" doc:id="46317ac5-ac57-4481-9872-4e794f9dd95d" config-ref="File_Config" path="customers.hyper" />
		<ee:transform doc:name="Transform Message" doc:id="94e523a5-e86e-482f-a45f-0257c6896247">
			<ee:variables>
				<ee:set-variable variableName="fileContent"><![CDATA[%dw 2.0
output application/java
---
payload]]></ee:set-variable>
			</ee:variables>
		</ee:transform>
		<tableau-specialist:append-to-file-upload doc:name="Append to file upload" doc:id="b9439947-1577-4443-a0bc-1a8583e3a3a8" config-ref="Tableau_Specialist_Configuration" uploadSessionId="Upload session id"/>
		<ee:transform doc:name="Transform Message" doc:id="20359447-a8b0-46a6-8a01-fc708e816557" >
			<ee:message >
				<ee:set-payload ><![CDATA[%dw 2.0
output application/json
---
payload]]></ee:set-payload>
			</ee:message>
		</ee:transform>
	</flow>
</mule>
Steps for Running This Example
-
Verify that your connector is configured.
-
Save the project.
-
From a web browser, test the application by entering
http://localhost:8081/append-to-file-upload.
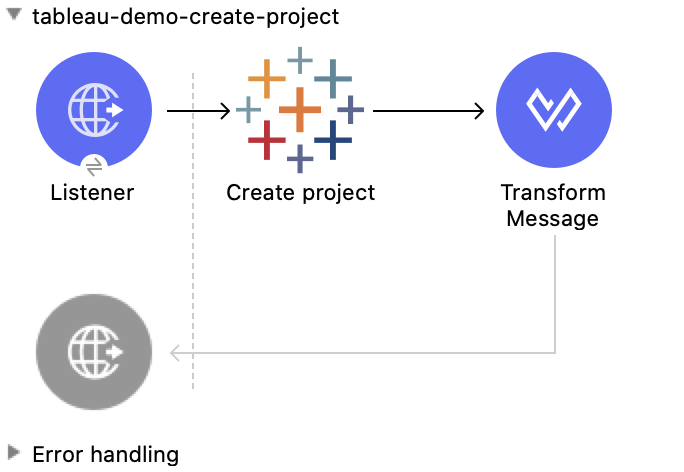
Create Project - Rest Configuration
This Mule flow creates a project on the specified site.
This example uses the following operations:
-
HTTP Listener
Accepts data from HTTP requests -
Create project
Creates a project on the site -
Transform Message
Outputs the results of the Create project operation in JSON format
XML for This Example
Paste this code into the Studio XML editor to quickly load the flow for this example into your Mule app:
<?xml version="1.0" encoding="UTF-8"?>

<mule xmlns:tableau="http://www.mulesoft.org/schema/mule/tableau" xmlns:file="http://www.mulesoft.org/schema/mule/file"
	xmlns:ee="http://www.mulesoft.org/schema/mule/ee/core"
	xmlns:http="http://www.mulesoft.org/schema/mule/http" xmlns:tableau-specialist="http://www.mulesoft.org/schema/mule/tableau-specialist" xmlns="http://www.mulesoft.org/schema/mule/core" xmlns:doc="http://www.mulesoft.org/schema/mule/documentation" xmlns:xsi="http://www.w3.org/2001/XMLSchema-instance" xsi:schemaLocation="http://www.mulesoft.org/schema/mule/core http://www.mulesoft.org/schema/mule/core/current/mule.xsd
http://www.mulesoft.org/schema/mule/tableau-specialist http://www.mulesoft.org/schema/mule/tableau-specialist/current/mule-tableau-specialist.xsd
http://www.mulesoft.org/schema/mule/http http://www.mulesoft.org/schema/mule/http/current/mule-http.xsd
http://www.mulesoft.org/schema/mule/ee/core http://www.mulesoft.org/schema/mule/ee/core/current/mule-ee.xsd
http://www.mulesoft.org/schema/mule/file http://www.mulesoft.org/schema/mule/file/current/mule-file.xsd
http://www.mulesoft.org/schema/mule/tableau http://www.mulesoft.org/schema/mule/tableau/current/mule-tableau.xsd">
	<configuration-properties file="project-properties.properties"/>
	<tableau-specialist:tableau-specialist-config name="Tableau_Specialist_Configuration" doc:name="Tableau Specialist Configuration" doc:id="0086ca3c-2ec6-4940-96e5-d319c5d35c15" >
		<tableau-specialist:basic-username-password-connection serverUrl="${credentials.serverUrl}" apiVersion="${credentials.apiVersion}" contentUrl="${credentials.contentUrl}" username="${credentials.username}" password="${credentials.password}" />
	</tableau-specialist:tableau-specialist-config>
	<http:listener-config name="HTTP_Listener_config" doc:name="HTTP Listener config" doc:id="fa83ce28-e898-4ac9-b524-3fdef2ad15f6" >
		<http:listener-connection host="0.0.0.0" port="8081" />
	</http:listener-config>
<flow name="tableau-demo-create-project" doc:id="21de738a-6777-4305-aced-c8ce22f93062" >
		<http:listener doc:name="Listener" doc:id="b189857b-6fbe-4f8b-b50a-274d4f9c738b" config-ref="HTTP_Listener_config" path="/create-project"/>
		<tableau-specialist:create-project doc:name="Create project" doc:id="95f6ddb3-f33b-4f46-a694-5f918766a38f" config-ref="Tableau_Specialist_Configuration">
			<tableau-specialist:content ><![CDATA[#[output application/json
---
{
	project: {
		name: "demo-test",
		description: "demo-description"
	}
}]]]></tableau-specialist:content>
		</tableau-specialist:create-project>
		<ee:transform doc:name="Transform Message" doc:id="1dbb0073-df1a-46db-bde7-7e7157b96572" >
			<ee:message >
				<ee:set-payload ><![CDATA[%dw 2.0
output application/json
---
payload]]></ee:set-payload>
			</ee:message>
		</ee:transform>
	</flow>
</mule>
Steps for Running This Example
-
Verify that your connector is configured.
-
Save the project.
-
From a web browser, test the application by entering
http://localhost:8081/create-project.
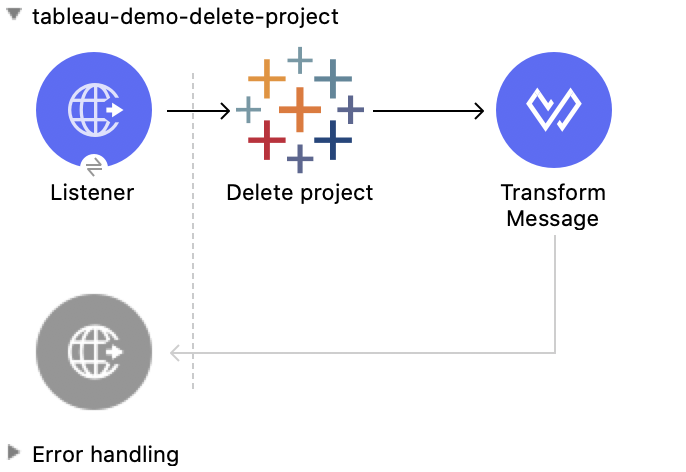
Delete Project - Rest Configuration
This Mule flow deletes a project from the specified site. When a project is deleted, all of its assets are also deleted, such as its associated workbooks, data sources, project view options, and rights. Use this operation with caution.
This example uses the following operations:
-
HTTP Listener
Accepts data from HTTP requests -
Delete project
Deletes a project from the site -
Transform Message
Outputs the results of the Delete project operation in JSON format
XML for This Example
Paste this code into the Studio XML editor to quickly load the flow for this example into your Mule app:
<?xml version="1.0" encoding="UTF-8"?>

<mule xmlns:tableau="http://www.mulesoft.org/schema/mule/tableau" xmlns:file="http://www.mulesoft.org/schema/mule/file"
	xmlns:ee="http://www.mulesoft.org/schema/mule/ee/core"
	xmlns:http="http://www.mulesoft.org/schema/mule/http" xmlns:tableau-specialist="http://www.mulesoft.org/schema/mule/tableau-specialist" xmlns="http://www.mulesoft.org/schema/mule/core" xmlns:doc="http://www.mulesoft.org/schema/mule/documentation" xmlns:xsi="http://www.w3.org/2001/XMLSchema-instance" xsi:schemaLocation="http://www.mulesoft.org/schema/mule/core http://www.mulesoft.org/schema/mule/core/current/mule.xsd
http://www.mulesoft.org/schema/mule/tableau-specialist http://www.mulesoft.org/schema/mule/tableau-specialist/current/mule-tableau-specialist.xsd
http://www.mulesoft.org/schema/mule/http http://www.mulesoft.org/schema/mule/http/current/mule-http.xsd
http://www.mulesoft.org/schema/mule/ee/core http://www.mulesoft.org/schema/mule/ee/core/current/mule-ee.xsd
http://www.mulesoft.org/schema/mule/file http://www.mulesoft.org/schema/mule/file/current/mule-file.xsd
http://www.mulesoft.org/schema/mule/tableau http://www.mulesoft.org/schema/mule/tableau/current/mule-tableau.xsd">
	<configuration-properties file="project-properties.properties"/>
	<tableau-specialist:tableau-specialist-config name="Tableau_Specialist_Configuration" doc:name="Tableau Specialist Configuration" doc:id="cb468146-0f1e-4582-823f-931301fe573e" >
		<tableau-specialist:basic-username-password-connection serverUrl="${credentials.serverUrl}" apiVersion="${credentials.apiVersion}" contentUrl="${credentials.contentUrl}" username="${credentials.username}" password="${credentials.password}" />
	</tableau-specialist:tableau-specialist-config>
	<http:listener-config name="HTTP_Listener_config" doc:name="HTTP Listener config" doc:id="a5594c7d-a121-4db2-a96b-09b935af2550" >
		<http:listener-connection host="0.0.0.0" port="8081" />
	</http:listener-config>
	<flow name="tableau-demo-delete-project" doc:id="96cf801d-bcae-4f2c-91c2-973feb4eb9bc" >
		<http:listener doc:name="Listener" doc:id="fb1582e1-4445-48c5-b53f-adda3ab50592" config-ref="HTTP_Listener_config" path="/delete-project"/>
		<tableau-specialist:delete-project doc:name="Delete project" doc:id="7e135059-0ccd-4d51-b10d-fc38bc4f304d" config-ref="Tableau_Specialist_Configuration" projectId="Id of the project to be deleted"/>
		<ee:transform doc:name="Transform Message" doc:id="b69f9dd5-9a97-47a3-a7ad-6fae4056d396" >
			<ee:message >
				<ee:set-payload ><![CDATA[%dw 2.0
output application/json
---
payload]]></ee:set-payload>
			</ee:message>
		</ee:transform>
	</flow>
</mule>
Steps for Running This Example
-
Verify that your connector is configured.
-
Save the project.
-
From a web browser, test the application by entering
http://localhost:8081/delete-project.
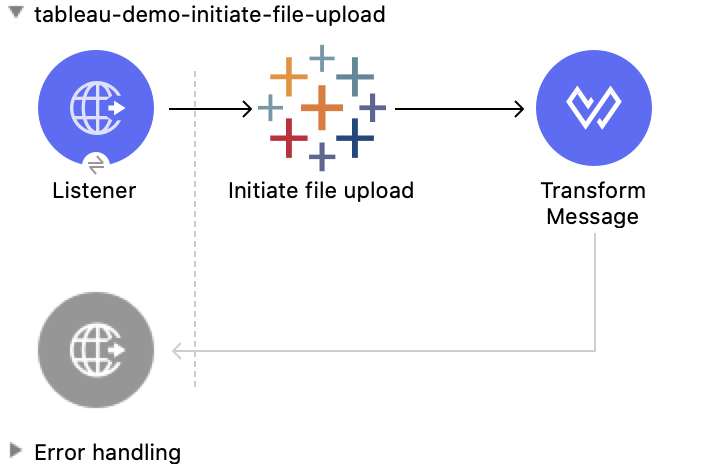
Initiate File Upload - Rest Configuration
This Mule flow initiates the upload process for a file.
This example uses the following operations:
-
HTTP Listener
Accepts data from HTTP requests -
Initiate file upload
Initiates the upload process for a file -
Transform Message
Outputs the results of the Initiate file upload operation in JSON format
XML for This Example
Paste this code into the Studio XML editor to quickly load the flow for this example into your Mule app:
<?xml version="1.0" encoding="UTF-8"?>

<mule xmlns:tableau="http://www.mulesoft.org/schema/mule/tableau" xmlns:file="http://www.mulesoft.org/schema/mule/file"
	xmlns:ee="http://www.mulesoft.org/schema/mule/ee/core"
	xmlns:http="http://www.mulesoft.org/schema/mule/http" xmlns:tableau-specialist="http://www.mulesoft.org/schema/mule/tableau-specialist" xmlns="http://www.mulesoft.org/schema/mule/core" xmlns:doc="http://www.mulesoft.org/schema/mule/documentation" xmlns:xsi="http://www.w3.org/2001/XMLSchema-instance" xsi:schemaLocation="http://www.mulesoft.org/schema/mule/core http://www.mulesoft.org/schema/mule/core/current/mule.xsd
http://www.mulesoft.org/schema/mule/tableau-specialist http://www.mulesoft.org/schema/mule/tableau-specialist/current/mule-tableau-specialist.xsd
http://www.mulesoft.org/schema/mule/http http://www.mulesoft.org/schema/mule/http/current/mule-http.xsd
http://www.mulesoft.org/schema/mule/ee/core http://www.mulesoft.org/schema/mule/ee/core/current/mule-ee.xsd
http://www.mulesoft.org/schema/mule/file http://www.mulesoft.org/schema/mule/file/current/mule-file.xsd
http://www.mulesoft.org/schema/mule/tableau http://www.mulesoft.org/schema/mule/tableau/current/mule-tableau.xsd">
	<configuration-properties file="project-properties.properties"/>
	<tableau-specialist:tableau-specialist-config name="Tableau_Specialist_Configuration" doc:name="Tableau Specialist Configuration" doc:id="6c0dc7f6-facd-4f38-acbe-b598686b2fb6" >
		<tableau-specialist:basic-username-password-connection serverUrl="${credentials.serverUrl}" apiVersion="${credentials.apiVersion}" contentUrl="${credentials.contentUrl}" username="${credentials.username}" password="${credentials.password}" />
	</tableau-specialist:tableau-specialist-config>
	<http:listener-config name="HTTP_Listener_config" doc:name="HTTP Listener config" doc:id="6dd0ac5f-0a8b-421f-bd81-ceb4f450a792" >
		<http:listener-connection host="0.0.0.0" port="8081" />
	</http:listener-config>
	<flow name="tableau-demo-initiate-file-upload" doc:id="2d565997-700f-4828-b129-ade9777d37f8" >
		<http:listener doc:name="Listener" doc:id="4ca7aa6e-54e6-4b11-b3d9-8cd6c5a35527" config-ref="HTTP_Listener_config" path="/initiate-file-upload"/>
		<tableau-specialist:initiate-file-upload doc:name="Initiate file upload" doc:id="2f6a418d-6122-49f1-83b9-21e37f64a86d" config-ref="Tableau_Specialist_Configuration"/>
		<ee:transform doc:name="Transform Message" doc:id="7e32ae77-622a-4ba8-8b13-5529bbcf5dc1" >
			<ee:message >
				<ee:set-payload ><![CDATA[%dw 2.0
output application/json
---
payload]]></ee:set-payload>
			</ee:message>
		</ee:transform>
	</flow>
</mule>
Steps for Running This Example
-
Verify that your connector is configured.
-
Save the project.
-
From a web browser, test the application by entering
http://localhost:8081/initiate-file-upload.
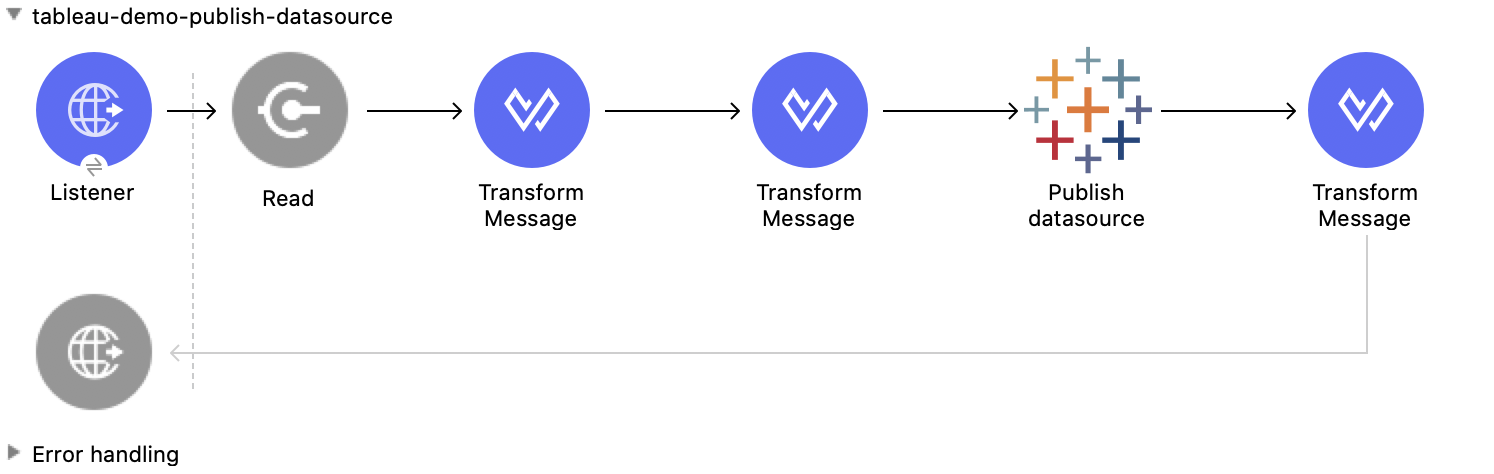
Publish Datasource - Rest Configuration
This Mule flow publishes a data source on the specified site, or appends data to an existing data source. You can use customers.hyper as an example of a datasource to upload.
This example uses the following operations:
-
HTTP Listener
Accepts data from HTTP requests -
Read
Reads a file -
Transform Message
Transforms the HTTP input -
Transform Message
Transforms the datasource into Java format -
Publish datasource
Publishes a data source on the site, or appends data to an existing data source -
Transform Message
Outputs the results of the Publish datasource operation in JSON format
XML for This Example
Paste this code into the Studio XML editor to quickly load the flow for this example into your Mule app:
<?xml version="1.0" encoding="UTF-8"?>

<mule xmlns:tableau="http://www.mulesoft.org/schema/mule/tableau" xmlns:file="http://www.mulesoft.org/schema/mule/file"
	xmlns:ee="http://www.mulesoft.org/schema/mule/ee/core"
	xmlns:http="http://www.mulesoft.org/schema/mule/http" xmlns:tableau-specialist="http://www.mulesoft.org/schema/mule/tableau-specialist" xmlns="http://www.mulesoft.org/schema/mule/core" xmlns:doc="http://www.mulesoft.org/schema/mule/documentation" xmlns:xsi="http://www.w3.org/2001/XMLSchema-instance" xsi:schemaLocation="http://www.mulesoft.org/schema/mule/core http://www.mulesoft.org/schema/mule/core/current/mule.xsd
http://www.mulesoft.org/schema/mule/tableau-specialist http://www.mulesoft.org/schema/mule/tableau-specialist/current/mule-tableau-specialist.xsd
http://www.mulesoft.org/schema/mule/http http://www.mulesoft.org/schema/mule/http/current/mule-http.xsd
http://www.mulesoft.org/schema/mule/ee/core http://www.mulesoft.org/schema/mule/ee/core/current/mule-ee.xsd
http://www.mulesoft.org/schema/mule/file http://www.mulesoft.org/schema/mule/file/current/mule-file.xsd
http://www.mulesoft.org/schema/mule/tableau http://www.mulesoft.org/schema/mule/tableau/current/mule-tableau.xsd">
	<configuration-properties file="project-properties.properties"/>
	<tableau-specialist:tableau-specialist-config name="Tableau_Specialist_Configuration" doc:name="Tableau Specialist Configuration" doc:id="6c0dc7f6-facd-4f38-acbe-b598686b2fb6" >
		<tableau-specialist:basic-username-password-connection serverUrl="${credentials.serverUrl}" apiVersion="${credentials.apiVersion}" contentUrl="${credentials.contentUrl}" username="${credentials.username}" password="${credentials.password}" />
	</tableau-specialist:tableau-specialist-config>
	<http:listener-config name="HTTP_Listener_config" doc:name="HTTP Listener config" doc:id="6dd0ac5f-0a8b-421f-bd81-ceb4f450a792" >
		<http:listener-connection host="0.0.0.0" port="8081" />
	</http:listener-config>
	<flow name="tableau-demo-publish-datasource" doc:id="58868707-a720-4cd1-ba45-80710dc93bb2" >
		<http:listener doc:name="Listener" config-ref="HTTP_Listener_config" path="/publish-datasource"/>
        <file:read doc:name="Read" doc:id="a85bdc0e-605e-419b-9829-0d88962075fd" config-ref="File_Config" path="customers.hyper"/>
		<ee:transform doc:name="Transform Message">
                <ee:variables>
                    <ee:set-variable variableName="fileContent"><![CDATA[%dw 2.0
output application/java
---
payload]]></ee:set-variable>
                </ee:variables>
            </ee:transform>
        <ee:transform doc:name="Transform Message">
                <ee:message>
                    <ee:set-payload><![CDATA[%dw 2.0
output application/json
---
{
	datasource: {
		name: "datasource test",
		description: "test",
		project: {
			id: "Id of the project to publish the datasource."
		}
	}
}]]></ee:set-payload>
                </ee:message>
            </ee:transform>
        <tableau-specialist:publish-datasource doc:name="Publish datasource" config-ref="Tableau_Specialist_Configuration" overwriteFlag="true">
			<tableau-specialist:datasource-request-options >
				 <tableau-specialist:publish-datasource-request-body datasourceFileContent="#[vars.fileContent]" datasourceFileName="myfile.hyper" />
			</tableau-specialist:datasource-request-options>
		</tableau-specialist:publish-datasource>
		<ee:transform doc:name="Transform Message" doc:id="b2fc285a-a384-4c62-b9aa-afabf96d07d6" >
			<ee:message >
				<ee:set-payload ><![CDATA[%dw 2.0
output application/json
---
payload]]></ee:set-payload>
			</ee:message>
		</ee:transform>
	</flow>
</mule>
Steps for Running This Example
-
Verify that your connector is configured.
-
Save the project.
-
From a web browser, test the application by entering
http://localhost:8081/publish-datasource.
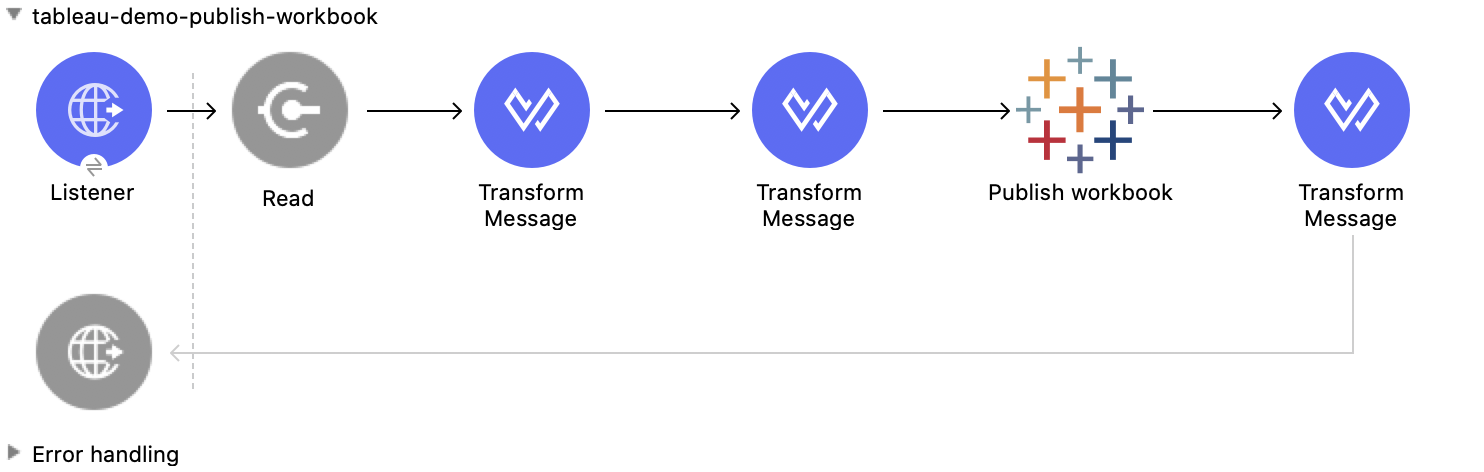
Publish Workbook - Rest Configuration
This Mule flow publishes a workbook on the specified site.
This example uses the following operations:
-
HTTP Listener
Accepts data from HTTP requests -
Read
Reads a file -
Transform Message
Transforms the HTTP input -
Transform Message
Transforms the datasource into Java format -
Publish workbook
Publishes a workbook on the site -
Transform Message
Outputs the results of the Publish workbook operation in JSON format
XML for This Example
Paste this code into the Studio XML editor to quickly load the flow for this example into your Mule app:
<?xml version="1.0" encoding="UTF-8"?>

<mule xmlns:tableau="http://www.mulesoft.org/schema/mule/tableau" xmlns:file="http://www.mulesoft.org/schema/mule/file"
	xmlns:ee="http://www.mulesoft.org/schema/mule/ee/core"
	xmlns:http="http://www.mulesoft.org/schema/mule/http" xmlns:tableau-specialist="http://www.mulesoft.org/schema/mule/tableau-specialist" xmlns="http://www.mulesoft.org/schema/mule/core" xmlns:doc="http://www.mulesoft.org/schema/mule/documentation" xmlns:xsi="http://www.w3.org/2001/XMLSchema-instance" xsi:schemaLocation="http://www.mulesoft.org/schema/mule/core http://www.mulesoft.org/schema/mule/core/current/mule.xsd
http://www.mulesoft.org/schema/mule/tableau-specialist http://www.mulesoft.org/schema/mule/tableau-specialist/current/mule-tableau-specialist.xsd
http://www.mulesoft.org/schema/mule/http http://www.mulesoft.org/schema/mule/http/current/mule-http.xsd
http://www.mulesoft.org/schema/mule/ee/core http://www.mulesoft.org/schema/mule/ee/core/current/mule-ee.xsd
http://www.mulesoft.org/schema/mule/file http://www.mulesoft.org/schema/mule/file/current/mule-file.xsd
http://www.mulesoft.org/schema/mule/tableau http://www.mulesoft.org/schema/mule/tableau/current/mule-tableau.xsd">
	<configuration-properties file="project-properties.properties"/>
	<tableau-specialist:tableau-specialist-config name="Tableau_Specialist_Configuration" doc:name="Tableau Specialist Configuration" doc:id="6c0dc7f6-facd-4f38-acbe-b598686b2fb6" >
		<tableau-specialist:basic-username-password-connection serverUrl="${credentials.serverUrl}" apiVersion="${credentials.apiVersion}" contentUrl="${credentials.contentUrl}" username="${credentials.username}" password="${credentials.password}" />
	</tableau-specialist:tableau-specialist-config>
	<http:listener-config name="HTTP_Listener_config" doc:name="HTTP Listener config" doc:id="6dd0ac5f-0a8b-421f-bd81-ceb4f450a792" >
		<http:listener-connection host="0.0.0.0" port="8081" />
	</http:listener-config>
	<flow name="tableau-demo-publish-workbook" doc:id="960ecd4c-91fd-4884-bb94-d2aedbcf94ec" >
		<http:listener doc:name="Listener" doc:id="75a721e3-77fc-4c6c-93b4-6bc5b2e0a1cb" config-ref="HTTP_Listener_config" path="/publish-workbook"/>
		<file:read doc:name="Read" doc:id="e5342f6f-02a1-4c38-982a-b780a7dcaaac" config-ref="File_Config" path="test-workbook.twbx"/>
		<ee:transform doc:name="Transform Message">
                <ee:variables>
                    <ee:set-variable variableName="fileContent"><![CDATA[%dw 2.0
output application/java
---
payload]]></ee:set-variable>
                </ee:variables>
            </ee:transform>
        <ee:transform doc:name="Transform Message">
				<ee:message>
					<ee:set-payload><![CDATA[%dw 2.0
output application/json
---
{
	workbook: {
		name: "Publish_workbook_test"
	}
}]]></ee:set-payload>
				</ee:message>
			</ee:transform>
			<tableau-specialist:publish-workbook doc:name="Publish workbook" doc:id="74fe54f8-8165-4183-b7fd-1a1ed63a9428" config-ref="Tableau_Specialist_Configuration" overwriteFlag="true">
			<tableau-specialist:workbook-request-options >
					<tableau-specialist:publish-workbook-request-body workbookFileContent="#[vars.fileContent]" workbookFileName="test-workbook.twbx" />
			</tableau-specialist:workbook-request-options>
		</tableau-specialist:publish-workbook>
		<ee:transform doc:name="Transform Message" doc:id="bc5a4103-da41-48ac-b08a-8676684d3965" >
			<ee:message >
				<ee:set-payload ><![CDATA[%dw 2.0
output application/json
---
payload]]></ee:set-payload>
			</ee:message>
		</ee:transform>
	</flow>
</mule>
Steps for Running This Example
-
Verify that your connector is configured.
-
Save the project.
-
From a web browser, test the application by entering
http://localhost:8081/publish-workbook.
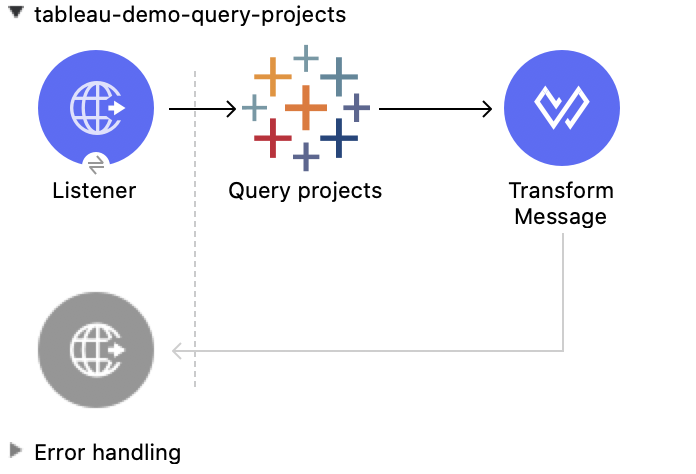
Query Projects - Rest Configuration
This Mule flow returns a list of projects from the specified site. It uses optional parameters to page large results.
This example uses the following operations:
-
HTTP Listener
Accepts data from HTTP requests -
Query projects
Returns a list of projects from the site -
Transform Message
Outputs the results of the Query projects operation in JSON format
XML for This Example
Paste this code into the Studio XML editor to quickly load the flow for this example into your Mule app:
<?xml version="1.0" encoding="UTF-8"?>

<mule xmlns:tableau="http://www.mulesoft.org/schema/mule/tableau" xmlns:file="http://www.mulesoft.org/schema/mule/file"
	xmlns:ee="http://www.mulesoft.org/schema/mule/ee/core"
	xmlns:http="http://www.mulesoft.org/schema/mule/http" xmlns:tableau-specialist="http://www.mulesoft.org/schema/mule/tableau-specialist" xmlns="http://www.mulesoft.org/schema/mule/core" xmlns:doc="http://www.mulesoft.org/schema/mule/documentation" xmlns:xsi="http://www.w3.org/2001/XMLSchema-instance" xsi:schemaLocation="http://www.mulesoft.org/schema/mule/core http://www.mulesoft.org/schema/mule/core/current/mule.xsd
http://www.mulesoft.org/schema/mule/tableau-specialist http://www.mulesoft.org/schema/mule/tableau-specialist/current/mule-tableau-specialist.xsd
http://www.mulesoft.org/schema/mule/http http://www.mulesoft.org/schema/mule/http/current/mule-http.xsd
http://www.mulesoft.org/schema/mule/ee/core http://www.mulesoft.org/schema/mule/ee/core/current/mule-ee.xsd
http://www.mulesoft.org/schema/mule/file http://www.mulesoft.org/schema/mule/file/current/mule-file.xsd
http://www.mulesoft.org/schema/mule/tableau http://www.mulesoft.org/schema/mule/tableau/current/mule-tableau.xsd">
	<configuration-properties file="project-properties.properties"/>
	<tableau-specialist:tableau-specialist-config name="Tableau_Specialist_Configuration" doc:name="Tableau Specialist Configuration" doc:id="6c0dc7f6-facd-4f38-acbe-b598686b2fb6" >
		<tableau-specialist:basic-username-password-connection serverUrl="${credentials.serverUrl}" apiVersion="${credentials.apiVersion}" contentUrl="${credentials.contentUrl}" username="${credentials.username}" password="${credentials.password}" />
	</tableau-specialist:tableau-specialist-config>
	<http:listener-config name="HTTP_Listener_config" doc:name="HTTP Listener config" doc:id="6dd0ac5f-0a8b-421f-bd81-ceb4f450a792" >
		<http:listener-connection host="0.0.0.0" port="8081" />
	</http:listener-config>
	<flow name="tableau-demo-query-projects" doc:id="11b6ccc2-a74a-4c51-bf55-6e218a4d2d2b" >
		<http:listener doc:name="Listener" doc:id="4481b0ce-c317-45ca-9395-30241ec38422" config-ref="HTTP_Listener_config" path="/query-projects"/>
		<tableau-specialist:query-projects doc:name="Query projects" doc:id="fd755a6c-a570-4ee3-b3ab-b5e175b6266e" config-ref="Tableau_Specialist_Configuration"/>
		<ee:transform doc:name="Transform Message" doc:id="28053ee5-5e84-4c72-a771-f0b2a1ea8f15" >
			<ee:message >
				<ee:set-payload ><![CDATA[%dw 2.0
output application/json
---
payload]]></ee:set-payload>
			</ee:message>
		</ee:transform>
	</flow>
</mule>
Steps for Running This Example
-
Verify that your connector is configured.
-
Save the project.
-
From a web browser, test the application by entering
http://localhost:8081/query-projects.
Update Project - Rest Configuration
This Mule flow updates a project on the specified site.
This example uses the following operations:
-
HTTP Listener
Accepts data from HTTP requests -
Update project
Updates a project on the site -
Transform Message
Outputs the results of the Update project operation in JSON format

XML for This Example
Paste this code into the Studio XML editor to quickly load the flow for this example into your Mule app:
<?xml version="1.0" encoding="UTF-8"?>

<mule xmlns:tableau="http://www.mulesoft.org/schema/mule/tableau" xmlns:file="http://www.mulesoft.org/schema/mule/file"
	xmlns:ee="http://www.mulesoft.org/schema/mule/ee/core"
	xmlns:http="http://www.mulesoft.org/schema/mule/http" xmlns:tableau-specialist="http://www.mulesoft.org/schema/mule/tableau-specialist" xmlns="http://www.mulesoft.org/schema/mule/core" xmlns:doc="http://www.mulesoft.org/schema/mule/documentation" xmlns:xsi="http://www.w3.org/2001/XMLSchema-instance" xsi:schemaLocation="http://www.mulesoft.org/schema/mule/core http://www.mulesoft.org/schema/mule/core/current/mule.xsd
http://www.mulesoft.org/schema/mule/tableau-specialist http://www.mulesoft.org/schema/mule/tableau-specialist/current/mule-tableau-specialist.xsd
http://www.mulesoft.org/schema/mule/http http://www.mulesoft.org/schema/mule/http/current/mule-http.xsd
http://www.mulesoft.org/schema/mule/ee/core http://www.mulesoft.org/schema/mule/ee/core/current/mule-ee.xsd
http://www.mulesoft.org/schema/mule/file http://www.mulesoft.org/schema/mule/file/current/mule-file.xsd
http://www.mulesoft.org/schema/mule/tableau http://www.mulesoft.org/schema/mule/tableau/current/mule-tableau.xsd">
	<configuration-properties file="project-properties.properties"/>
	<tableau-specialist:tableau-specialist-config name="Tableau_Specialist_Configuration" doc:name="Tableau Specialist Configuration" doc:id="6c0dc7f6-facd-4f38-acbe-b598686b2fb6" >
		<tableau-specialist:basic-username-password-connection serverUrl="${credentials.serverUrl}" apiVersion="${credentials.apiVersion}" contentUrl="${credentials.contentUrl}" username="${credentials.username}" password="${credentials.password}" />
	</tableau-specialist:tableau-specialist-config>
	<http:listener-config name="HTTP_Listener_config" doc:name="HTTP Listener config" doc:id="6dd0ac5f-0a8b-421f-bd81-ceb4f450a792" >
		<http:listener-connection host="0.0.0.0" port="8081" />
	</http:listener-config>
	<flow name="tableau-demo-update-project" doc:id="3c7e74d4-0992-47a6-b4ce-5cf550af0c85" >
		<http:listener doc:name="Listener" doc:id="b78ce590-c90b-4274-9347-312e6f4f6568" config-ref="HTTP_Listener_config" path="/update-project"/>
            <tableau-specialist:update-project doc:name="Update project" doc:id="b27c3751-14a0-436d-8f47-dbb9d72360cc" config-ref="Tableau_Specialist_Configuration" projectId="Id of the project to update">
			<tableau-specialist:content ><![CDATA[#[output application/json
---
{
	project: {
		name: "Update test",
		description: "Update description"
	}
}]]]></tableau-specialist:content>
		</tableau-specialist:update-project>
		<ee:transform doc:name="Transform Message" doc:id="45cdd3cd-51a8-4ed7-a364-07650c8fda10" >
			<ee:message >
				<ee:set-payload ><![CDATA[%dw 2.0
output application/json
---
payload]]></ee:set-payload>
			</ee:message>
		</ee:transform>
	</flow>
</mule>
Steps for Running This Example
-
Verify that your connector is configured.
-
Save the project.
-
From a web browser, test the application by entering
http://localhost:8081/update-project.