VM Connector Publish and Listen to Messages Example
The following example illustrates how to publish a message that is received by a different flow:
-
The first flow takes an incoming HTTP message payload, then the VM Publish operation publishes the message to a VM queue.
-
In the second flow, the VM Listener source receives the message payload from the previous flow via the same VM queue.
-
To do this, point both operations to the same queue which prevents message loss caused by sending messages to a queue with no active listener.
The following screenshot shows the Anypoint Studio app flow for this example:
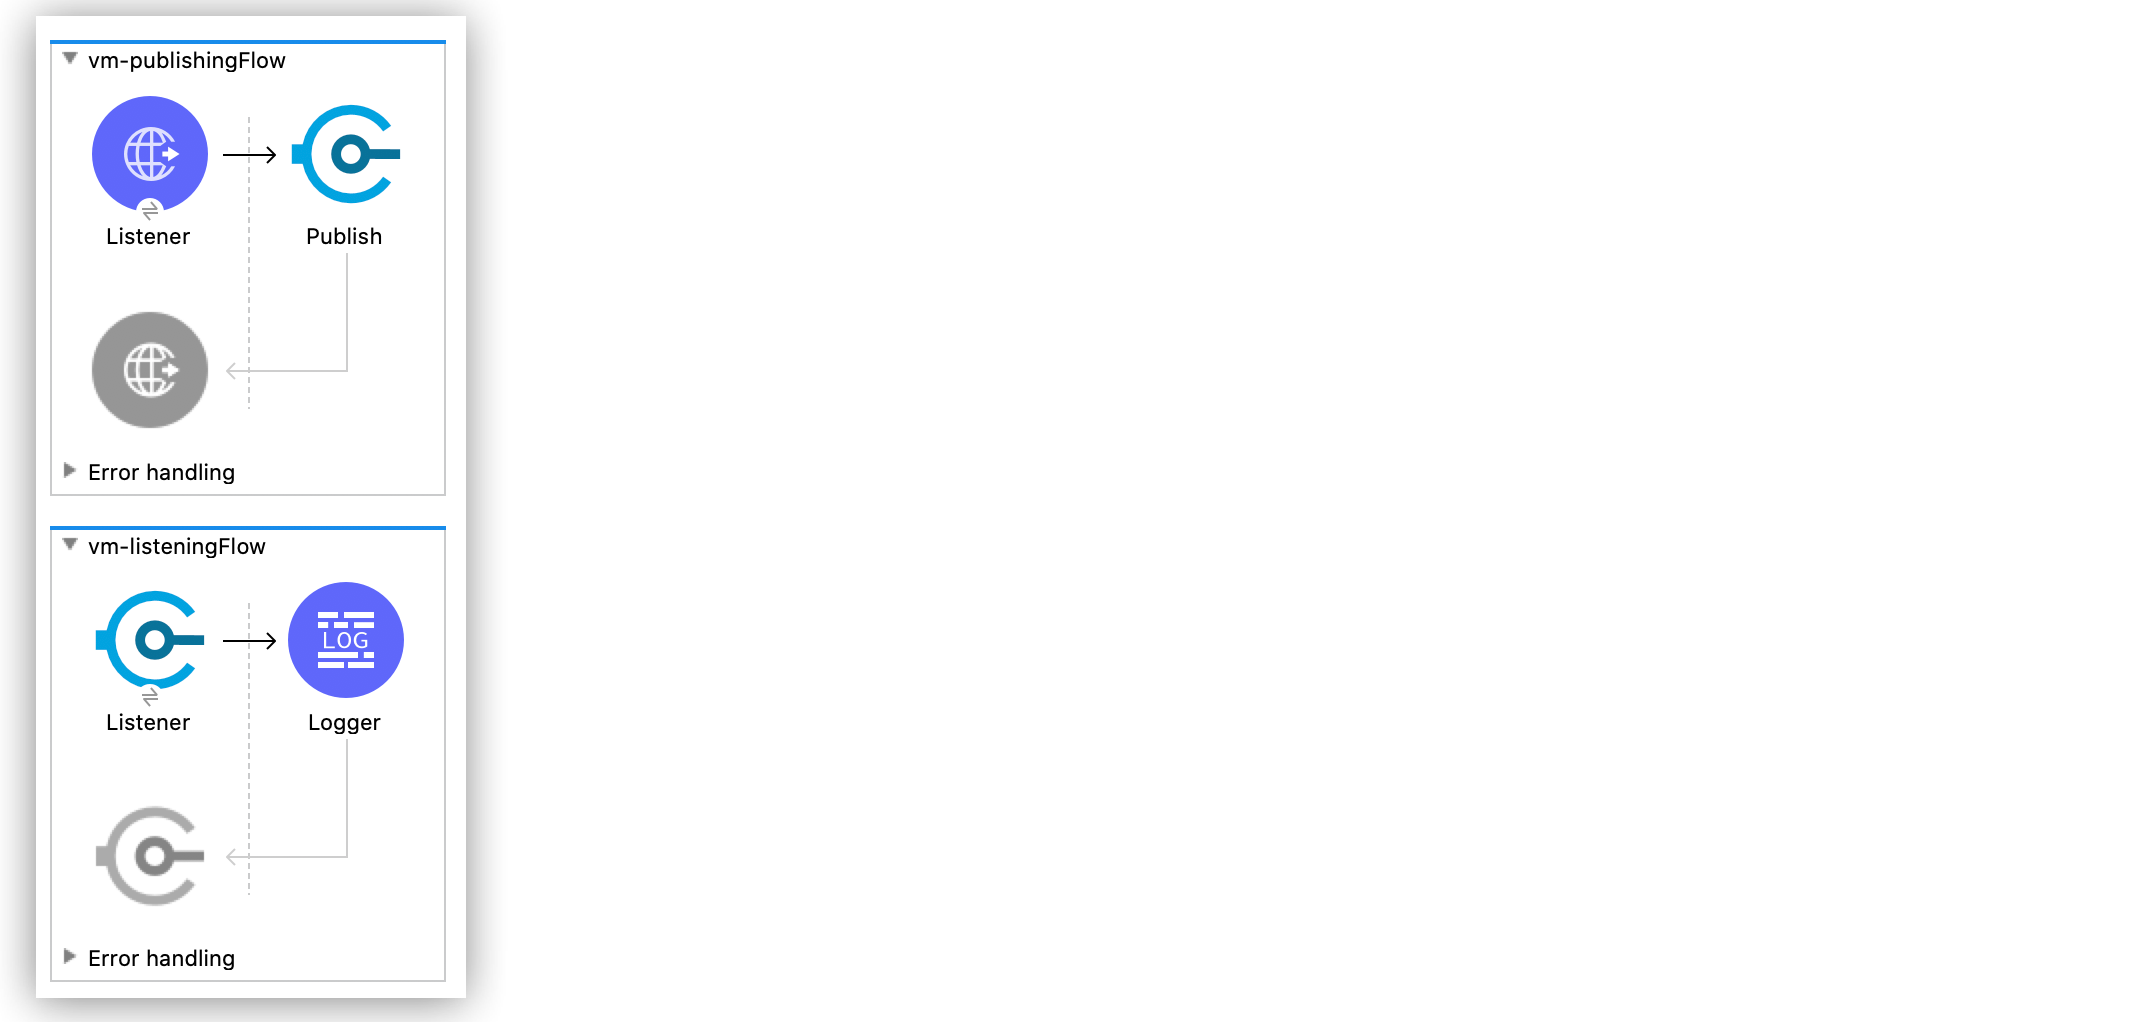
Create the VM Publishing Flow
The VM publishing flow first listens for an incoming HTTP message payload, which contains the body attribute of a JSON object. Then, in a one-way VM Publish operation, the message is published in a VM queue, and the flow continues.
To create the VM publishing flow:
-
Create a new Mule project in Studio.
-
In the Mule Palette view, select the HTTP Listener source and drag it on to the canvas.
The source listens for incoming HTTP messages attributes. -
On the HTTP Listener configuration screen, set the Path field to
/json-here. -
Click the plus sign (+) next to the Connector configuration field to configure a global element that can be used by all instances of the HTTP Listener in the app.
-
In the Connection section, enter the following values:
-
Protocol
HTTP (Default) -
Host
All Interfaces [0.0.0.0] (default) -
Port
8081
-
-
Click Test Connection to confirm that Mule can connect with the specified server.
-
Click OK.
-
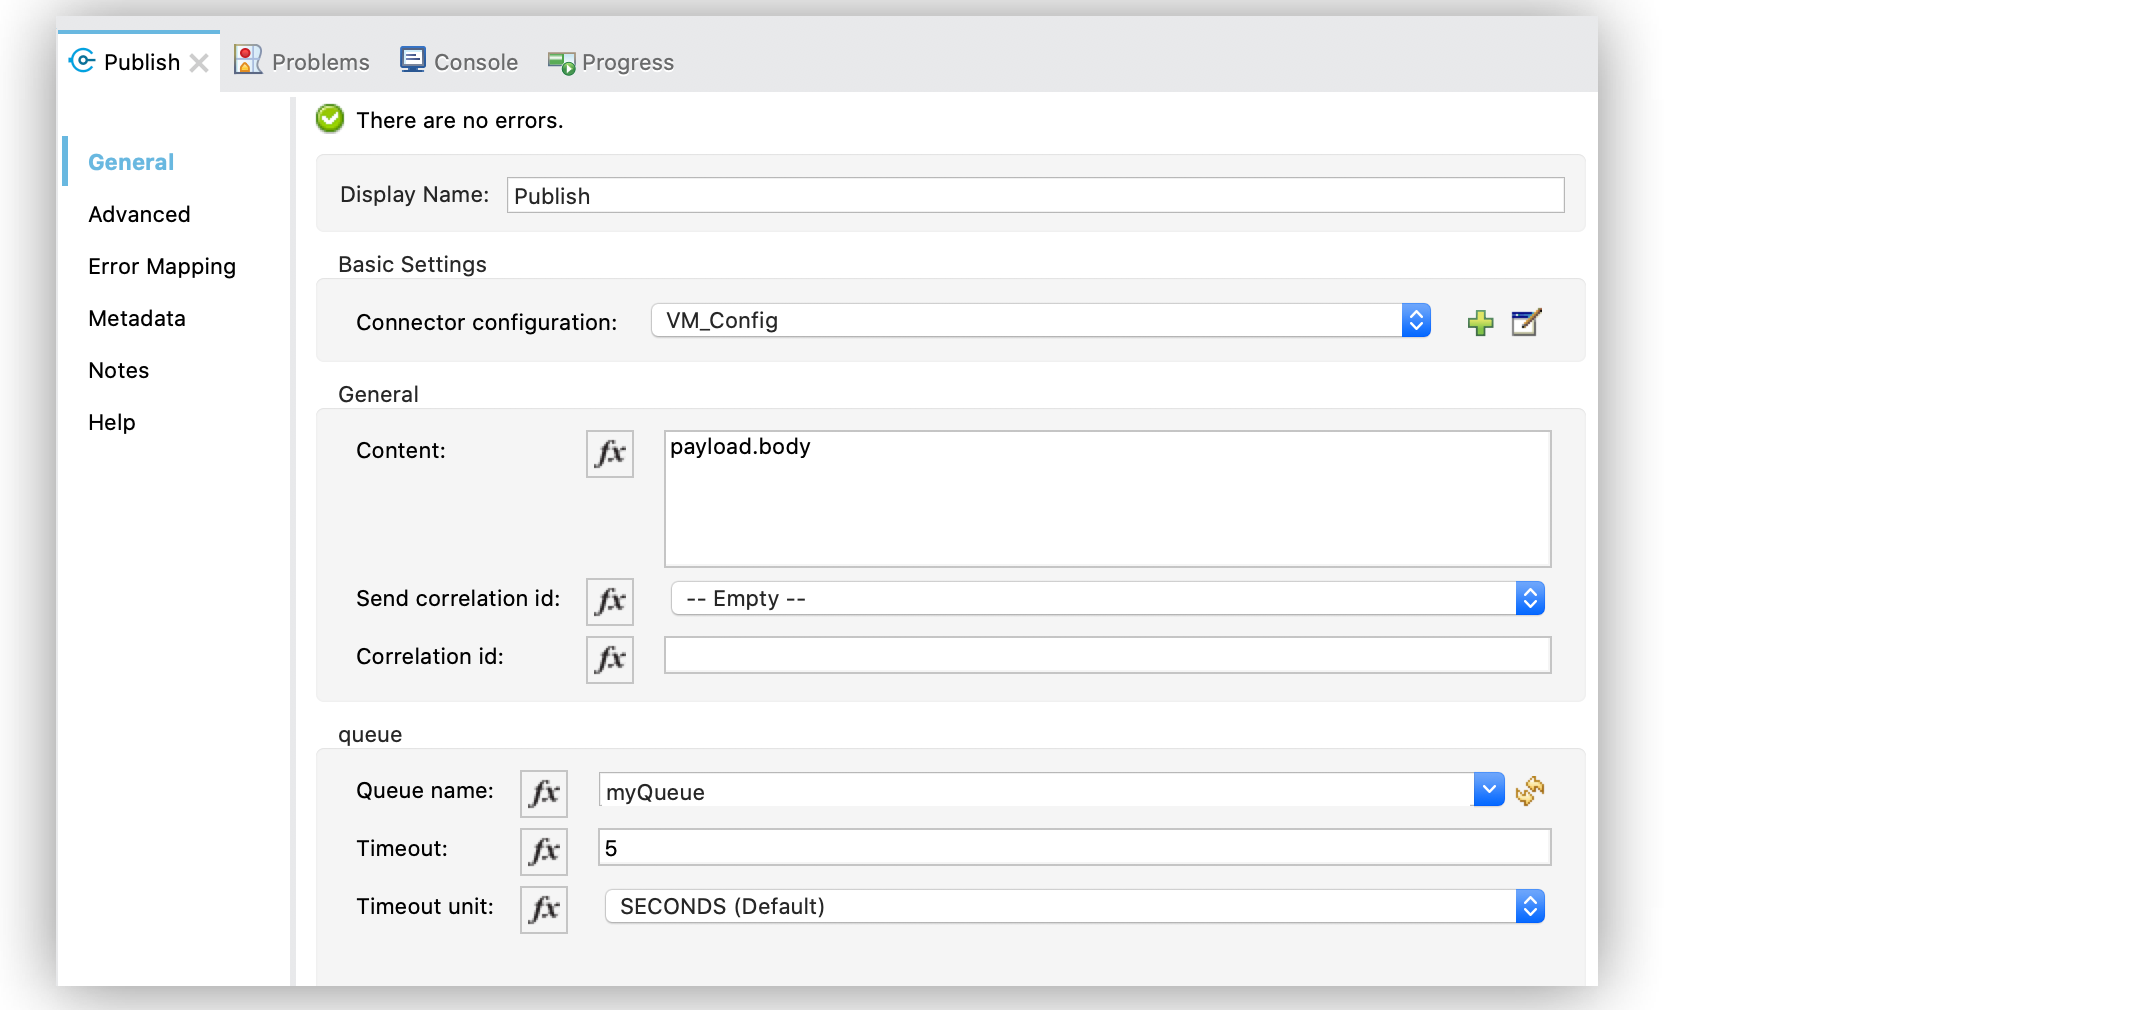
Drag the VM Publish operation to the right of the HTTP Listener source.
The operation publishes the message payload in the VM queue. -
In the Content field of the connector configuration, set the value to
payload.body.
This field enables you to use DataWeave to build the value to send. If you do not specify a parameter value, the entire payload is sent. -
On the VM Publish configuration screen, click the plus sign (+) next to the Connector configuration field to configure a global element for the VM queue.
-
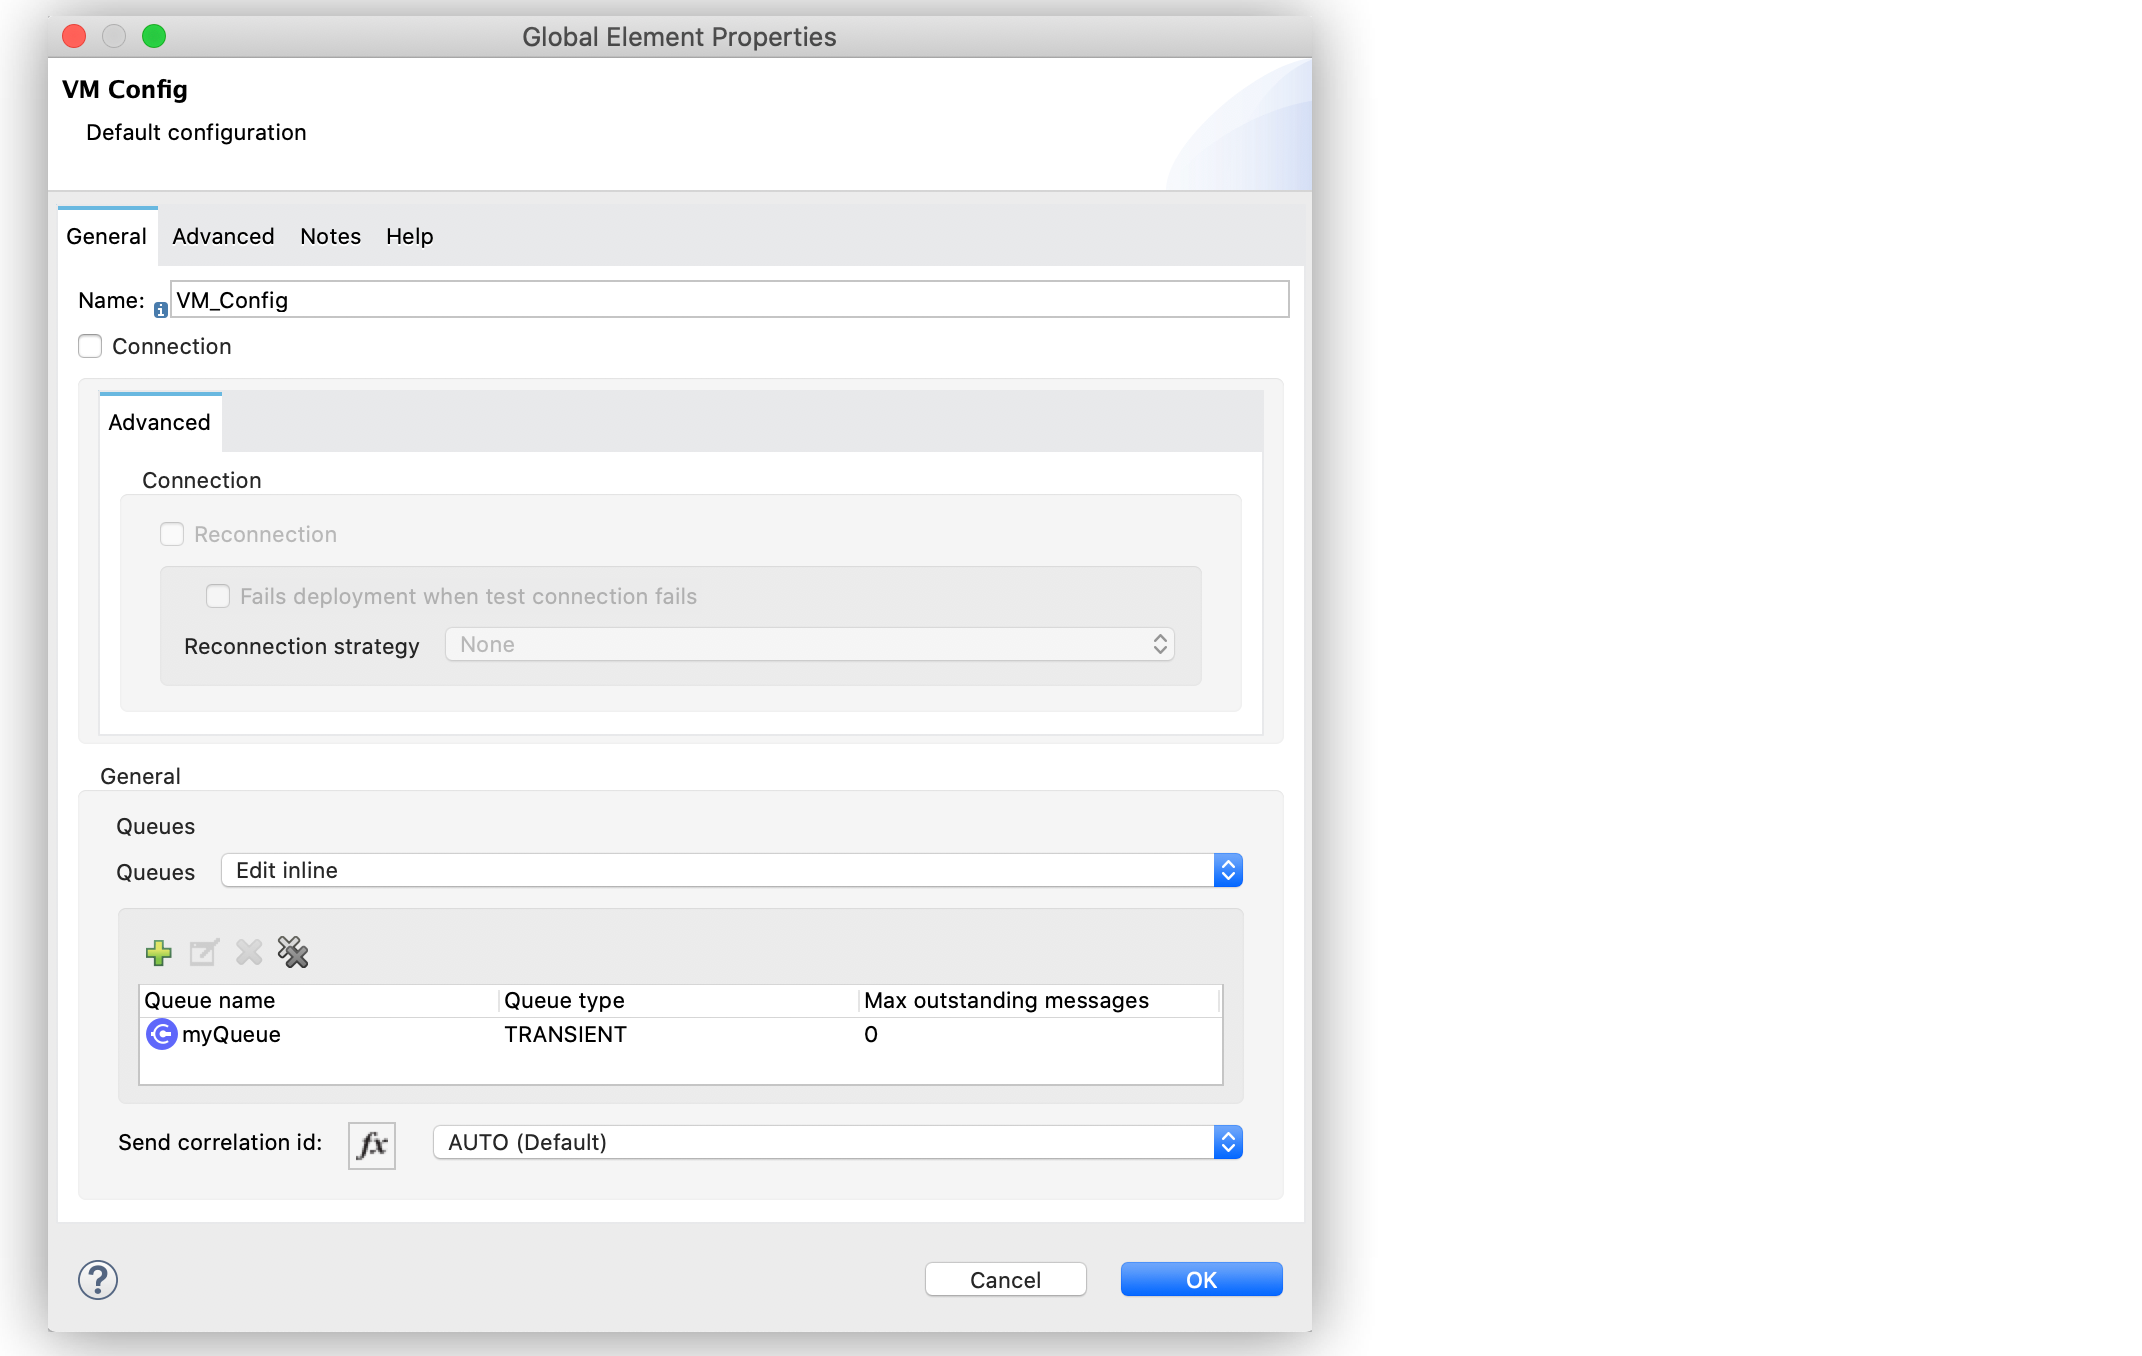
On the VM Config window, for Queues, select Edit inline.
-
On the Queue window, enter the following values:
-
Queue name
myQueue -
Queue type
TRANSIENT (Default) -
Max outstanding message
o
-
-
Click Finish.
-
Click OK.
The following screenshot shows the VM Config global element configuration:
The following screenshot shows the VM Publish operation screen configuration:
Create the VM Listening Flow
The VM listening flow listens for the message payload in the VM queue from the previous VM Publish flow, and then logs the message. The flow contains a VM Listener as a message source and points to the same VM queue configured in the VM Publish operation. The processing on the listening side happens asynchronously. You do not receive notification of its outcome.
To create the VM listening flow:
-
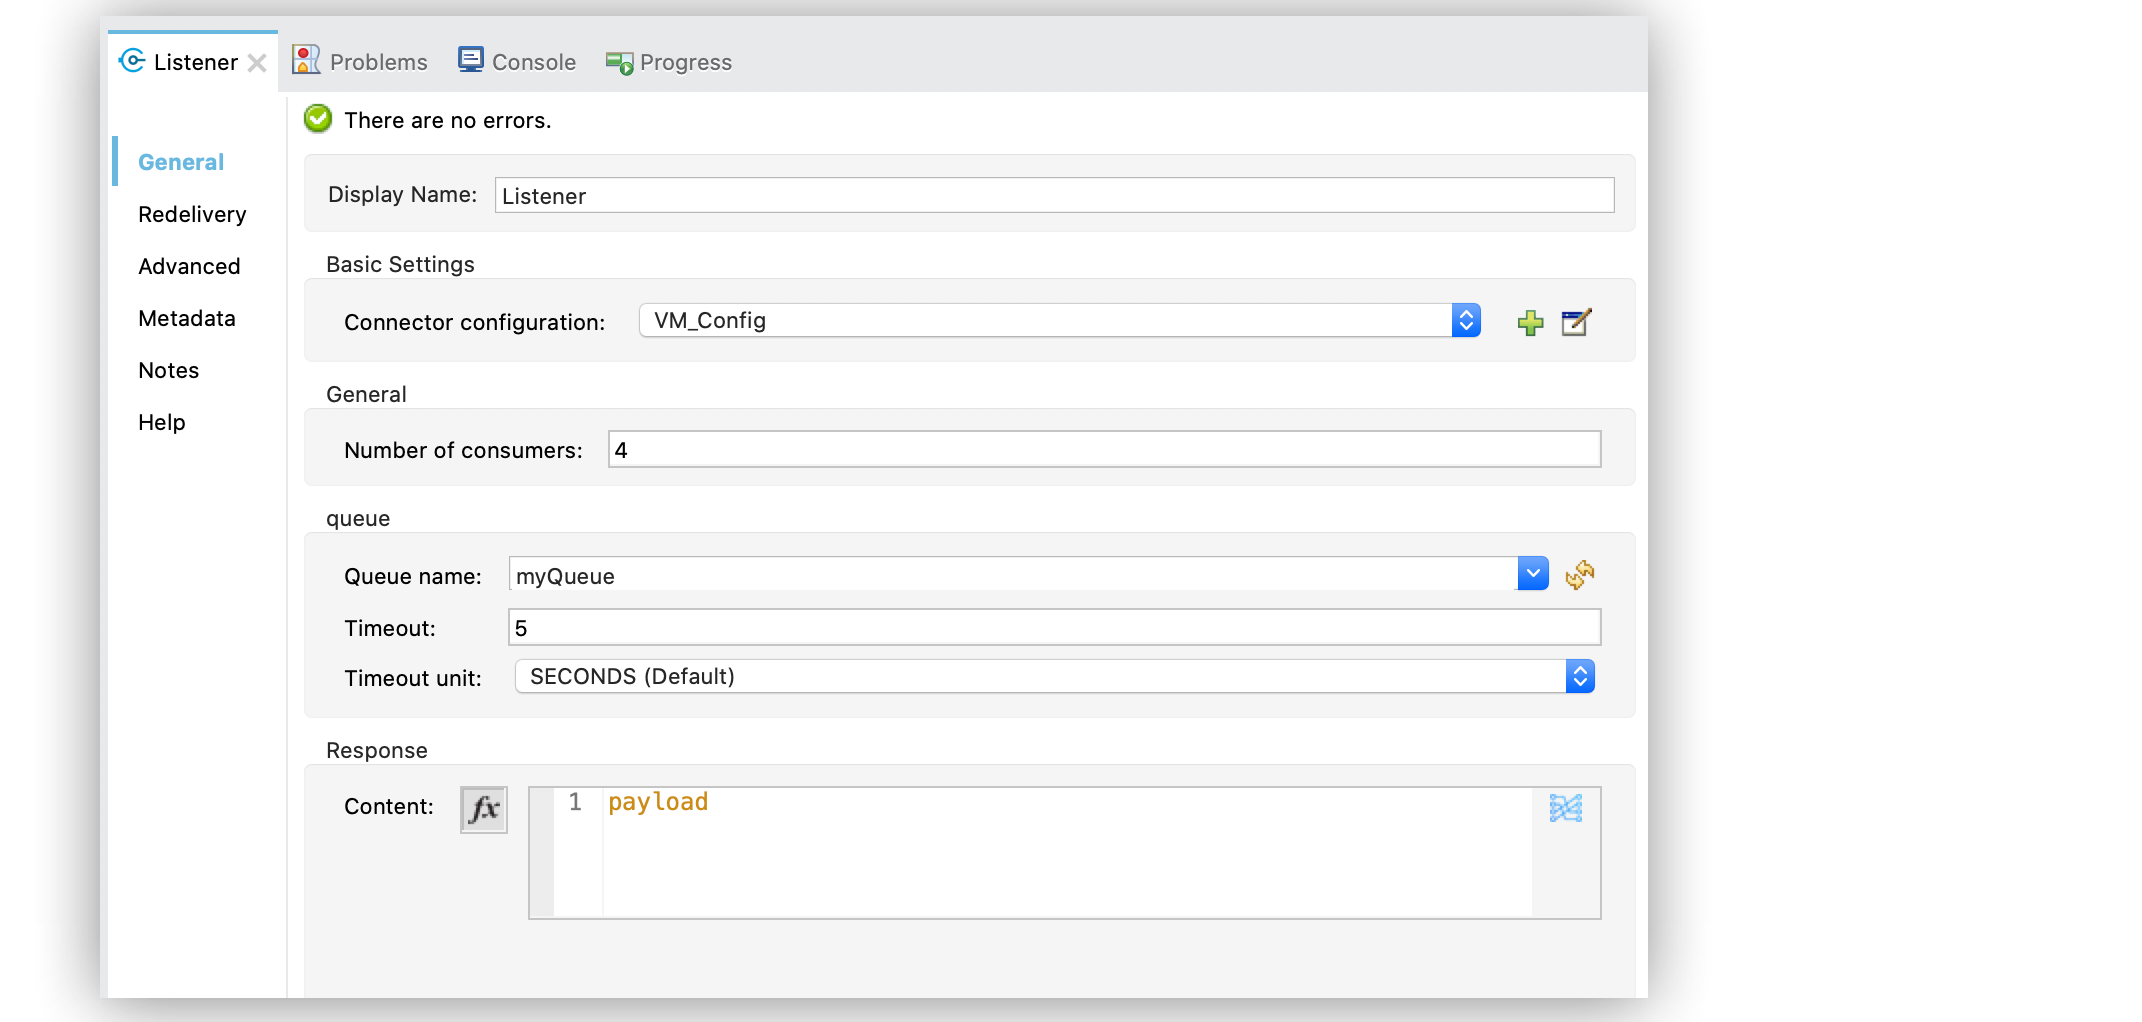
In the Mule Palette view, select the VM Listener source and drag it onto the canvas below the first VM publishing flow.
The source listens for the message payload received from the previous flow. -
On the VM Listener configuration screen, click the plus sign (+) next to the Connector configuration field and select the VM queue configuration created in the VM publishing flow.
-
Drag a Logger component to the right of the VM Listener source.
-
Save the project and run the app.
-
Test the app by sending a request to
http://127.0.0.1:8081/json-here.
The following screenshot shows the VM Listener source screen configuration:
XML for Publishing and Listening to Messages
Paste this code into the Studio XML editor to quickly load the flow for this example into your Mule app:
<?xml version="1.0" encoding="UTF-8"?>
<mule xmlns:vm="http://www.mulesoft.org/schema/mule/vm" xmlns:http="http://www.mulesoft.org/schema/mule/http"
xmlns="http://www.mulesoft.org/schema/mule/core"
xmlns:doc="http://www.mulesoft.org/schema/mule/documentation" xmlns:xsi="http://www.w3.org/2001/XMLSchema-instance" xsi:schemaLocation="http://www.mulesoft.org/schema/mule/core http://www.mulesoft.org/schema/mule/core/current/mule.xsd
http://www.mulesoft.org/schema/mule/http http://www.mulesoft.org/schema/mule/http/current/mule-http.xsd
http://www.mulesoft.org/schema/mule/vm http://www.mulesoft.org/schema/mule/vm/current/mule-vm.xsd">
<http:listener-config name="HTTP_Listener_config" doc:name="HTTP Listener config">
<http:listener-connection host="0.0.0.0" port="8081" />
</http:listener-config>
<vm:config name="VM_Config" doc:name="VM Config">
<vm:queues >
<vm:queue queueName="myQueue" />
</vm:queues>
</vm:config>
<flow name="vm-publishingFlow">
<http:listener doc:name="Listener" config-ref="HTTP_Listener_config" path="/json-here"/>
<vm:publish doc:name="Publish" config-ref="VM_Config" queueName="myQueue">
<vm:content ><![CDATA[payload.body]]></vm:content>
</vm:publish>
</flow>
<flow name="vm-listeningFlow" >
<vm:listener queueName="myQueue" doc:name="Listener" config-ref="VM_Config"/>
<logger level="INFO" doc:name="Logger" />
</flow>
</mule>xml