Web Service Consumer Connector Examples
The following example shows how to transform a variable value into XML and pass that value to Anypoint Connector for Web Service Consumer (Web Service Consumer Connector), which subsequently consumes a web service:
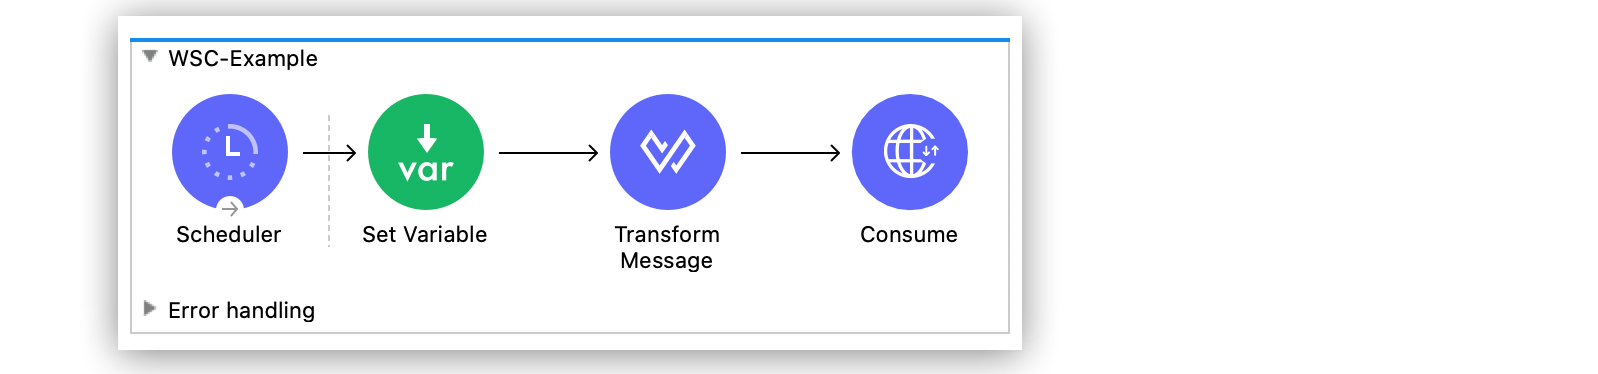
Create the Mule App in Anypoint Studio
To create the flow in Anypoint Studio:
-
In the Mule Palette view, select Core > Scheduler.
-
Drag the Scheduler component to the Studio canvas.
The Scheduler component initiates a flow when a time-based condition is met. -
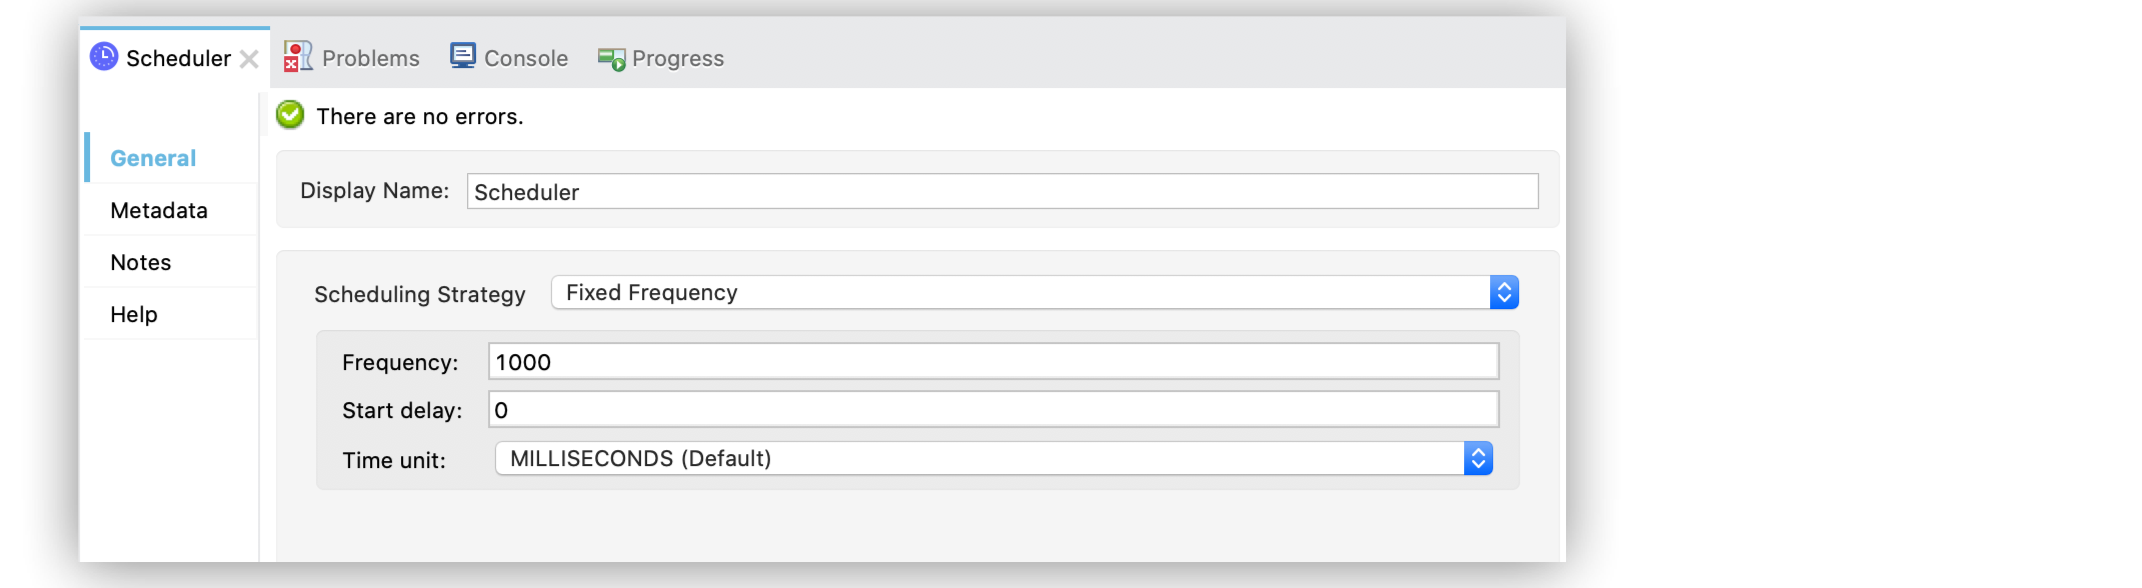
Set the Display Name field to
Scheduler. -
Set Scheduling Strategy to
Fixed Frequency, Frequency to1000, Start delay to0and Time unit toMILLISECONDS (Default).
In Studio, the Scheduler configuration looks like this:
-
Drag a Set Variable component onto the canvas, to the right of the Scheduler component.
The Set Variable component creates the variable to be transformed into XML later in the flow. -
Set the Display Name field to
Set Variable. -
Set Name to
variableSampleand Value totest.
In Studio, the Set Variable configuration looks like this:

-
Drag a Transform Message component onto the canvas, to the right of the Set Variable component.
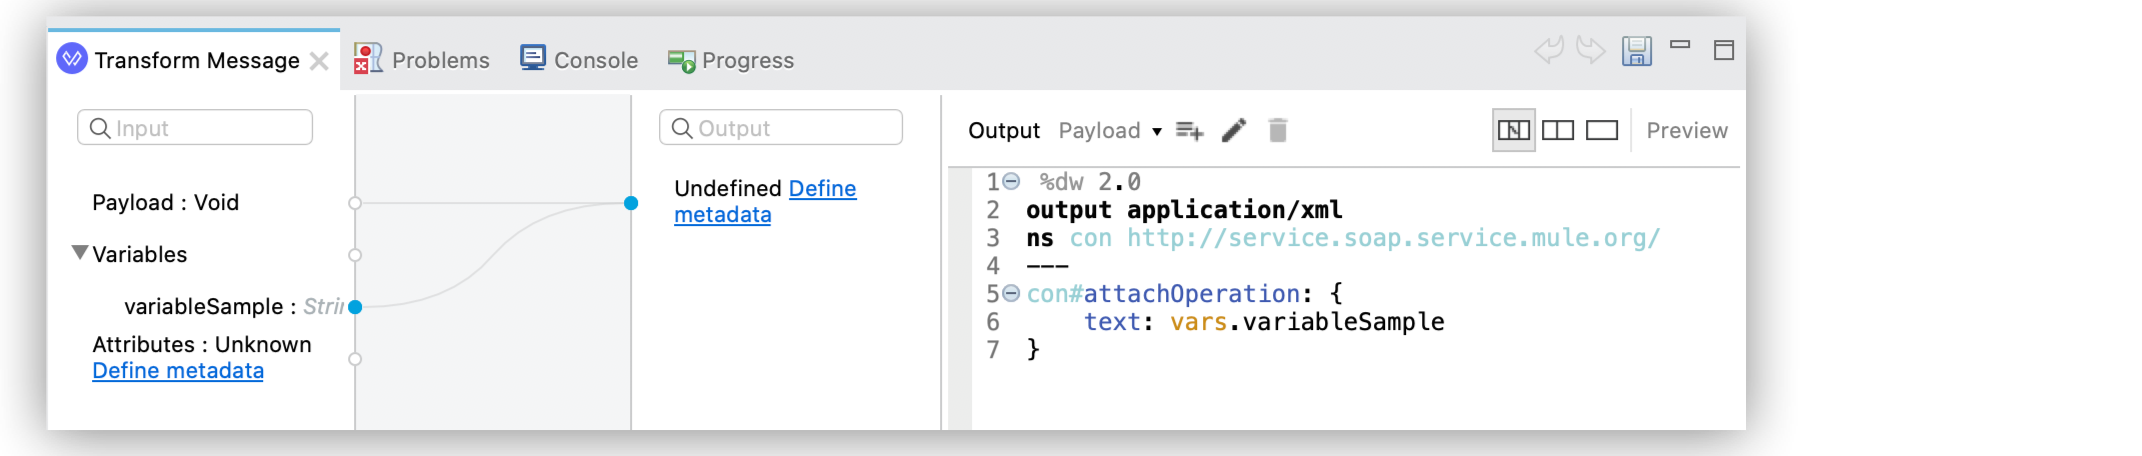
The Transform Message component transforms the variable value into XML. -
In the Output field of the Transform Message component configuration, set a DataWeave expression that:
-
Transforms the variable value output to
application/xml. -
Defines the name of the web service operation that the Web Service Consumer Connector aims to invoke by
attachOperation.
-
%dw 2.0
output application/xml
ns con http://service.soap.service.mule.org/
---
con#attachOperation: {
   text: vars.variableSample
}
In Studio, the Transform Message configuration looks like this:
-
Drag the Consume operation onto the canvas, to the right of the Transform Message component.
-
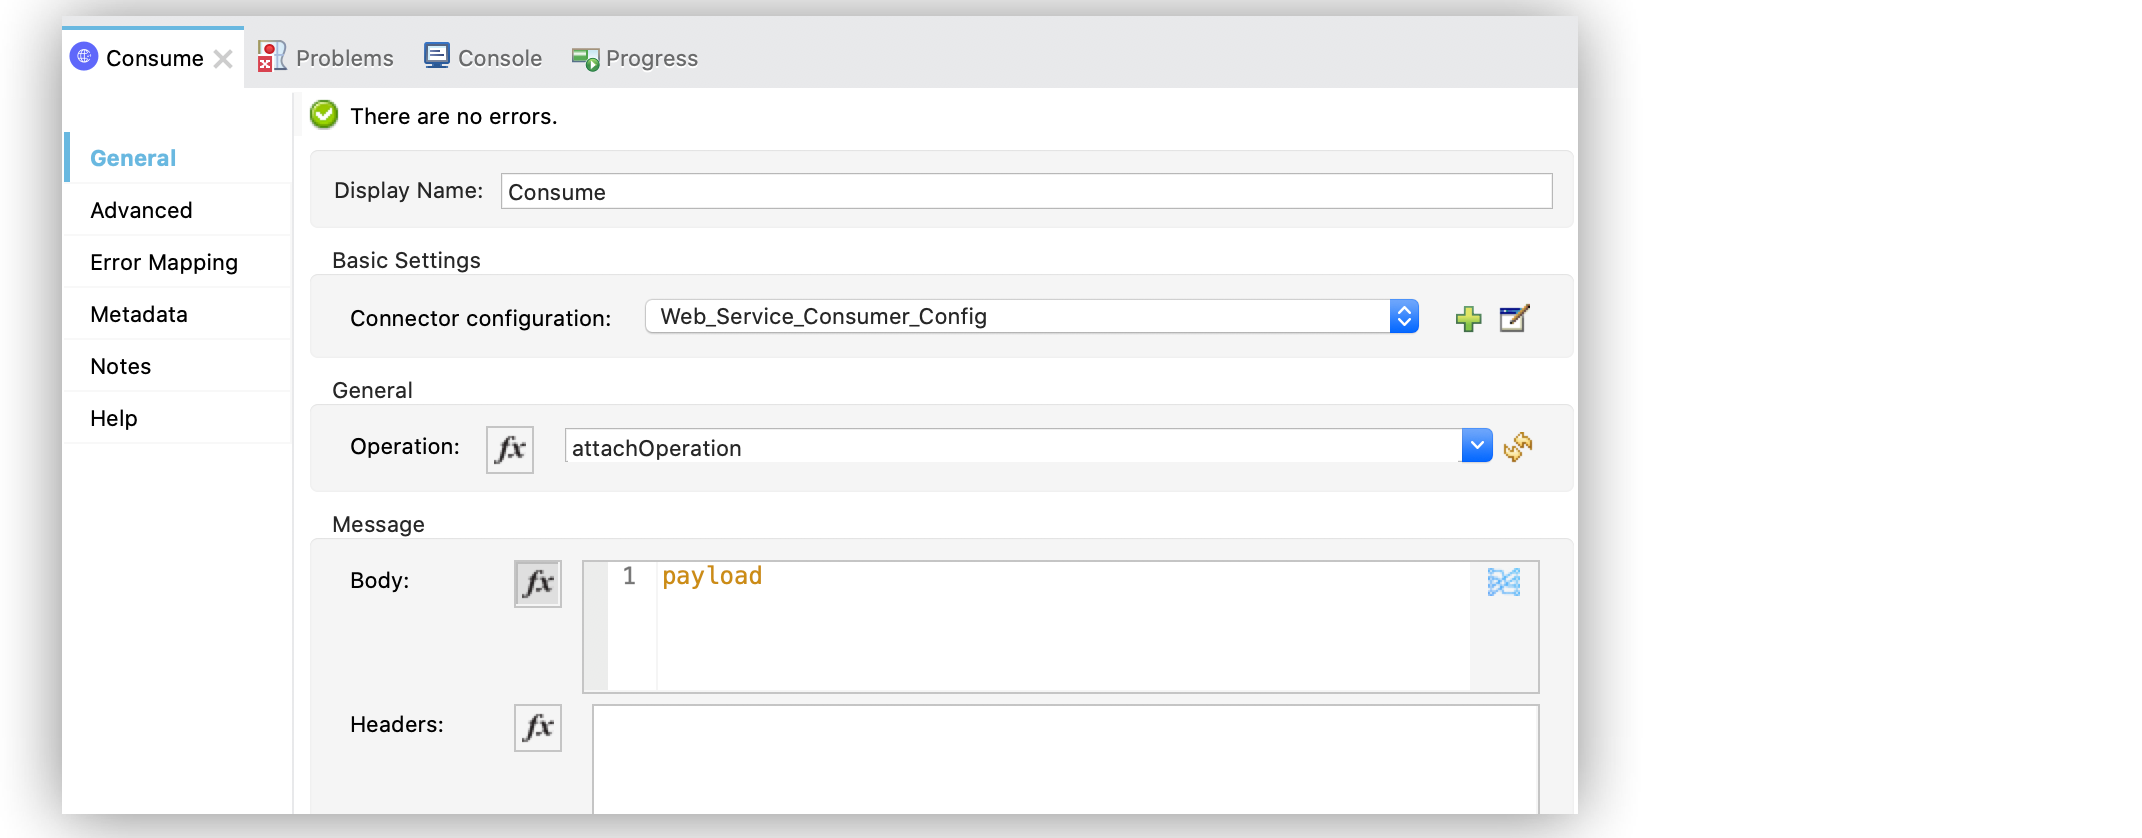
Set the Display Name field to
Consume. -
Set Operation to
attachOperationand the Body message topayload. -
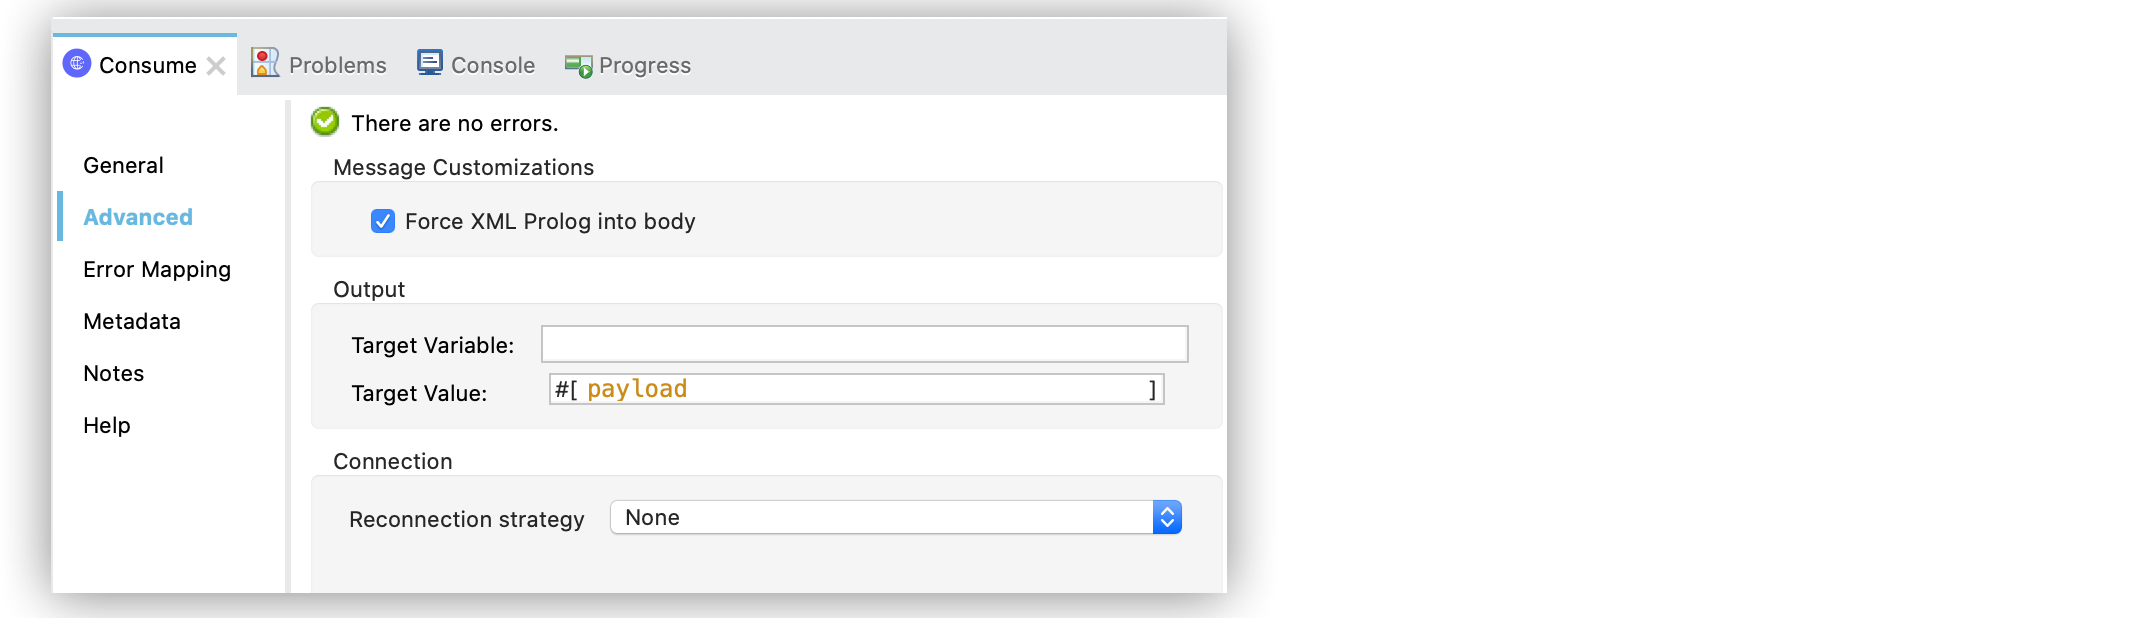
In the Message Customization section of the Advanced tab, enable the option Force XML Prolog into body to append the XML prolog to the content of the envelope’s body XML.
In Studio, the Consume operation configuration looks like this:
In Studio, the XML Prolog configuration looks like this:
-
On the General tab, click the plus sign (+) next to the Connector configuration field to access the Global Element Properties configuration.
-
On the Connection section of the General tab, configure the following parameters:
-
WSDL location
The remote or local WSDL file URL -
Service
The service name -
Port
The port name -
Address
The address of the web server to dispatch requests but if the Service and Port parameters don’t auto-populate the web server address, you must manually provide the correct Address.
-
-
Click OK.
In Studio, the Global Element Properties configuration looks like this:

-
Save your changes in Studio.
-
Deploy the application.
XML for Consuming a Web Service
Paste this code into the Studio XML editor to quickly load the flow for this example into your Mule app:
<?xml version="1.0" encoding="UTF-8"?>

<mule xmlns:ee="http://www.mulesoft.org/schema/mule/ee/core" xmlns:wsc="http://www.mulesoft.org/schema/mule/wsc"
	xmlns="http://www.mulesoft.org/schema/mule/core"
	xmlns:doc="http://www.mulesoft.org/schema/mule/documentation" xmlns:xsi="http://www.w3.org/2001/XMLSchema-instance" xsi:schemaLocation="http://www.mulesoft.org/schema/mule/core http://www.mulesoft.org/schema/mule/core/current/mule.xsd
http://www.mulesoft.org/schema/mule/wsc http://www.mulesoft.org/schema/mule/wsc/current/mule-wsc.xsd
http://www.mulesoft.org/schema/mule/ee/core http://www.mulesoft.org/schema/mule/ee/core/current/mule-ee.xsd">
	<wsc:config name="Web_Service_Consumer_Config">
		<wsc:connection wsdlLocation="api/attach-demo.wsdl" service="AttachDemo" port="AttachDemoSOAP" address="http://localhost:8085/AttachDemo/AttachDemoSOAP" />
	</wsc:config>
	<flow name="WSC-Example">
		<scheduler>
			<scheduling-strategy >
				<fixed-frequency />
			</scheduling-strategy>
		</scheduler>
		<set-variable value="test" variableName="variableSample"/>
		<ee:transform>
			<ee:message >
				<ee:set-payload ><![CDATA[ %dw 2.0
output application/xml
ns con http://service.soap.service.mule.org/
---
con#attachOperation: {
    text: vars.variableSample
}]]></ee:set-payload>
			</ee:message>
		</ee:transform>
		<wsc:consume config-ref="Web_Service_Consumer_Config" operation="attachOperation">
			<wsc:message-customizations forceXMLProlog="true"/>
		</wsc:consume>
	</flow>
</mule>