Build Environment
All Mule applications run under the Java Runtime Environment (JRE). Application components are built and deployed using Maven, a popular software management tool used in DevOps environments. MuleSoft also provides an Eclipse-based Integrated Development Environment (IDE) called Anypoint Studio, which is used for developing Mule applications in a graphical environment. While Studio can also be used for building, testing, and deploying applications, the instructions provided in the Accelerator documentation assume the use of Maven from the command line, except where noted.
Software Requirements
The MuleSoft Accelerators for Salesforce Clouds are built on Mule 4 and Studio 7. Assets may work with other versions of Mule and Studio, but no assurances can be given. The following is a list of the minimum software requirements for working with Accelerator assets:
-
Anypoint Studio 7.12.0 or higher
-
Mule Runtime 4.4.0 or higher (included with Studio)
-
Latest AdoptOpenJDK 8 release (included with Studio)
-
Latest Maven 3.8.x release (for command-line deployments)
-
Postman 9.x or higher (for API testing)
|
If you use Anypoint Studio 7.16 and later, you must override the Maven settings to use Maven version 3.8.x. To override the settings:
|
Workstation Setup
Perform the following steps to prepare your workstation for building, deploying, and testing Accelerator assets. These instructions assume some basic knowledge of using Maven and Eclipse-based products.
Installing
-
Download and install the latest 64-bit version of the OpenJDK 8 release from https://adoptium.net/. On Windows, add or update the
JAVA_HOMEenvironment variable to point to the installation root directory, for exampleC:\Program Files\Java\jdk1.8.0_265, and append%JAVA_HOME%\binto thePATHvariable. -
Download and install the latest Apache Maven 3.8.x release from https://maven.apache.org/download.cgi. Add or update the
MAVEN_HOMEenvironment variable to point to the installation root directory, for exampleC:\Utilities\apache-maven-3.8.4, and append%MAVEN_HOME%\bin($MAVEN_HOME/binon Linux/MacOS) to thePATHvariable. -
Download and install the latest 64-bit version of the Anypoint Studio 7 release from https://www.mulesoft.com/lp/dl/anypoint-mule-studio. Do not install the product under a folder containing spaces in the name.
-
Launch Studio and create a new workspace for the accelerator assets. Do not locate the workspace under a folder containing spaces in the name.
Configuring the Accelerator Build
-
Download the Accelerator Common Resources asset from Exchange and unpack the archive to a temporary directory. The directory should contain a single Studio project folder called
accelerator-common-resources. -
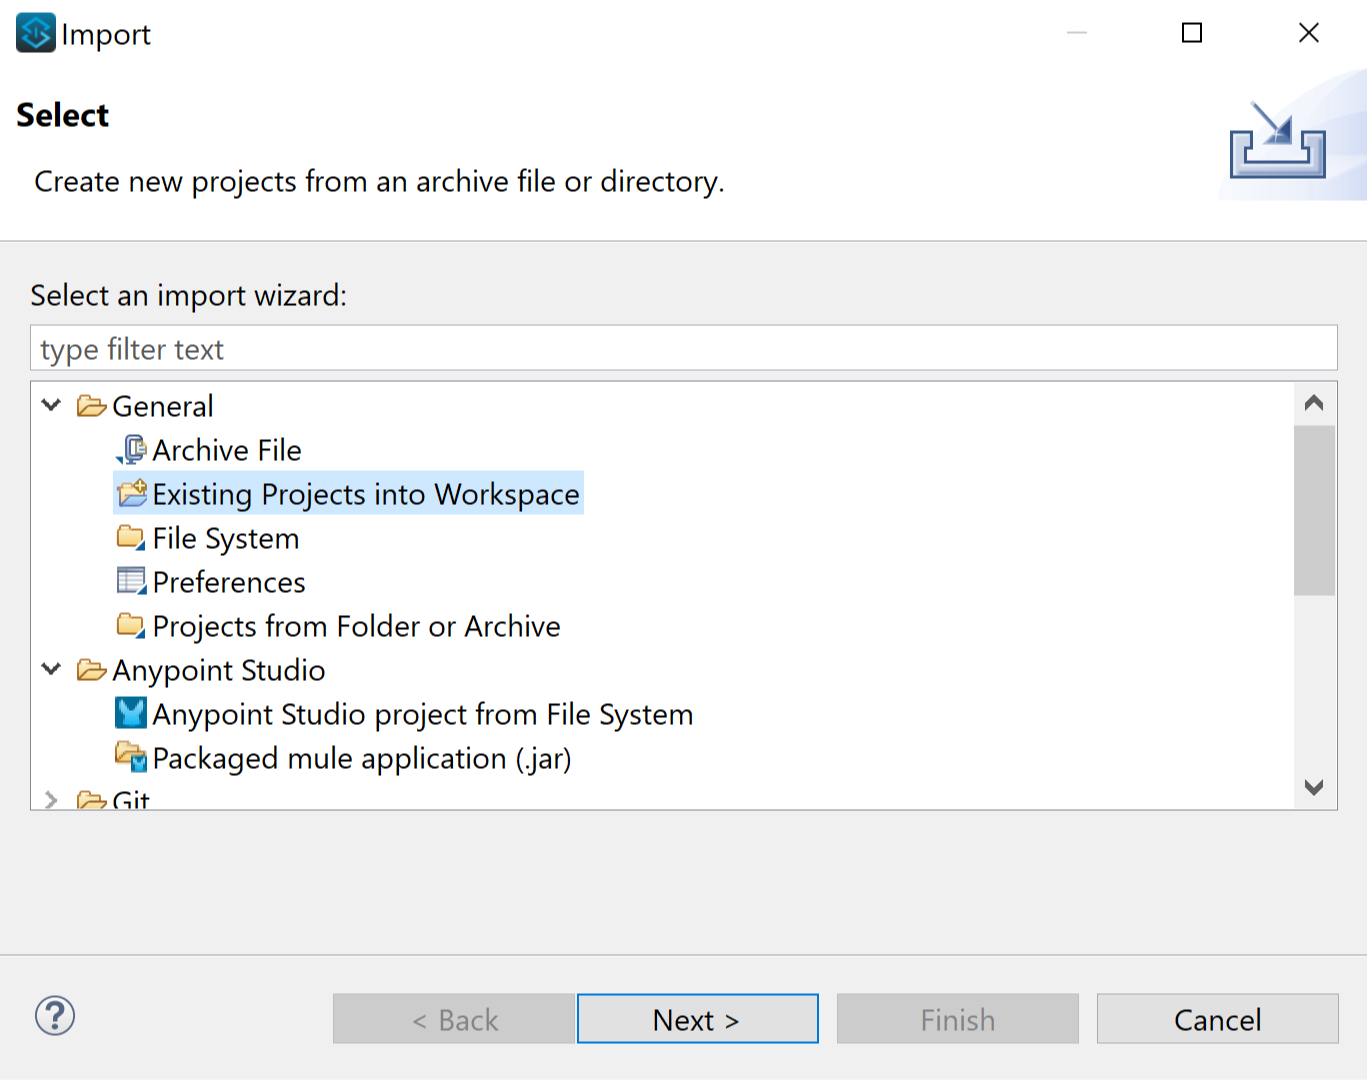
Import the project folder into Studio using the accel/Existing Projects into Workspace wizard (not the Anypoint Studio project wizard). If the project does not import as
accelerator-common-resources, you can select the project in the Package Explorer view and press F2 to rename it:
-
Copy the contents of the
settings-accelerators.xmlfile to your local Mavensettings.xmlfile, which is usually located under$HOME/.m2on Linux/MacOS hosts and%USERPROFILE%\.m2on Windows hosts; create a new file if it does not exist. If the file already exists, make sure to merge the contents of thesettings-accelerators.xmlwith the existing. You may also choose to keep the file separate and specify the-s <filename>option when running Maven commands; in Studio you will also need to override the user settings path, which is underAnypoint Studio/Maven/User Settingsin the Preferences dialog.This step is optional, if the project is intended to build only in Anypoint Studio. -
For now, update the
serverentries to specify your own usernames and passwords for the two Exchange repositories:anypoint-exchange-v2andaccelerator-exchange. If you want to run MUnit tests from the command line, you will also need to provide separate credentials for the MuleSoft Nexus EE repository `mule-enterprise).
Testing the Configuration
| Having proper values in the Maven settings file is critical for being able to resolve, build and deploy components using Maven. |
To verify your workstation setup, import any Accelerator implementation template asset into Studio. You can either manually download the asset from Exchange and import it using the Packaged mule application (jar) wizard or you can launch the Exchange viewer in Studio to browse and open one directly.
Once the project has been imported, verify that the project name in Studio matches the name element in the pom.xml file. If it does not, which is usually the case when importing from a downloaded archive, press F2 to rename it accordingly. This will make it easier to use the build scripts later. Ignore any warnings or errors for now.
Open your favorite shell and navigate to the project root folder, for example C:\workspaces\accelerators\accelerator-jira-sys-api). Run the command mvn clean. If the message BUILD SUCCESS appears, then the command has completed successfully. If any errors are reported, they must be resolved before continuing; consult the Troubleshooting section below for help with common issues.
In Studio, close the project, wait until Studio has finished processing any tasks, and then open it again. Ensure the project builds with no errors.
Troubleshooting
If the mvn clean command does not complete successfully, or if Studio reports errors for the imported project, something in your setup is missing or incorrect. The following table provides common issues that may be encountered and steps for resolving the issues:
| Issue | Possible Cause | Resolution |
|---|---|---|
Maven cannot find one or more dependencies |
Credentials provided for the |
First, verify your credentials, and then add then run |
Studio reports "null" version errors |
Studio is not resolving the parent POM correctly. |
If the |
Error reported during project rename |
Studio has locked one or more files. |
Verify the new project folder contains the same files as the old one. Close Studio, delete the old project folder, and then launch Studio again. |
Studio reports "cannot import as Mule project" error |
The wrong wizard was used to import the project. |
If the project still appears in the Package Explorer view, you can ignore the error. If it does not still appear, try the import again with a different import wizard. |
Cannot update connector versions using Studio |
Accelerator assets use dependency management defined in the parent Maven config. |
To update the version of a dependency, either add a |