Amazon SQS Connector 5.10 Studio Configuration
Anypoint Studio (Studio) editors help you design and update your Mule applications, properties, and configuration files.
To add and configure a connector in Studio:
When you run the connector, you can view the app log to check for problems, as described in View the App Log.
If you are new to configuring connectors in Studio, see Using Anypoint Studio to Configure a Connector. If, after reading this topic, you need additional information about the connector fields, see the Amazon SQS Connector Reference.
Create a Mule Project
In Studio, create a new Mule project in which to add and configure the connector:
-
In Studio, select File > New > Mule Project.
-
Enter a name for your Mule project and click Finish.
Add the Connector to Your Mule Project
Add Amazon SQS Connector to your Mule project to automatically populate the XML code with the connector’s namespace and schema location and add the required dependencies to the project’s pom.xml file:
-
In the Mule Palette view, click (X) Search in Exchange.
-
In Add Modules to Project, type
amazon sqsin the search field. -
Click Amazon SQS in Available modules.
-
Click Add.
-
Click Finish.
Adding a connector to a Mule project in Studio does not make that connector available to other projects in your Studio workspace.
Configure a Source
A source initiates a flow when a specified condition is met. You can configure one of these input sources to use with Amazon SQS Connector:
-
Receive messages
Retrieves one or more messages from the specified queue -
HTTP > Listener
Initiates a flow each time it receives a request on the configured host and port -
Scheduler
Initiates a flow when a time-based condition is met
For example, to configure the Receive messages source operation, follow these steps:
-
In the Mule Palette view, select Amazon SQS > Receive messages.
-
Drag Receive messages to the Studio canvas.
-
On the Receive messages configuration screen, optionally change the value of the Display Name field.
-
Specify values for the following fields:
-
Visibility Timeout
Period of time during which other consumers are prevented from receiving and processing the same message in the queue -
Visibility Timeout unit
The time unit for the Visibility Timeout:-
NANOSECONDS
-
MICROSECONDS
-
MILLISECONDS
-
SECONDS
-
MINUTES
-
HOURS
-
DAYS
-
-
Preserve Messages
Preserve messages after they are read rather than immediately deleting them from the queue after they are read -
Number Of Messages
Number of messages to retrieve -
Queue Url
URL of the queue in which to receive messages
-
-
If you are using the Receive messages source in cluster mode and want to receive messages on the primary node only, select the Primary node only checkbox on the Receive messages > Advanced tab:

For more information, see Receiving Messages in Cluster Mode.
Configure a Global Element for the Connector
When you configure a connector, it’s best to configure a global element that all instances of that connector in the app can use. Configuring a global element requires you to provide the authentication credentials the connector uses to access the target Amazon SQS system. Amazon SQS supports the Basic and Role authentication methods for connections.
You can either enter your credentials into the global configuration properties or reference a configuration placed in a file in the src folder of your project file that contains these values. For simpler maintenance and better reuse of your project, use a configuration file.
-
Drag a connector operation onto the Studio canvas.
-
To create a global element for the connector, click the Global Elements tab at the base of the canvas, and then click Create.
-
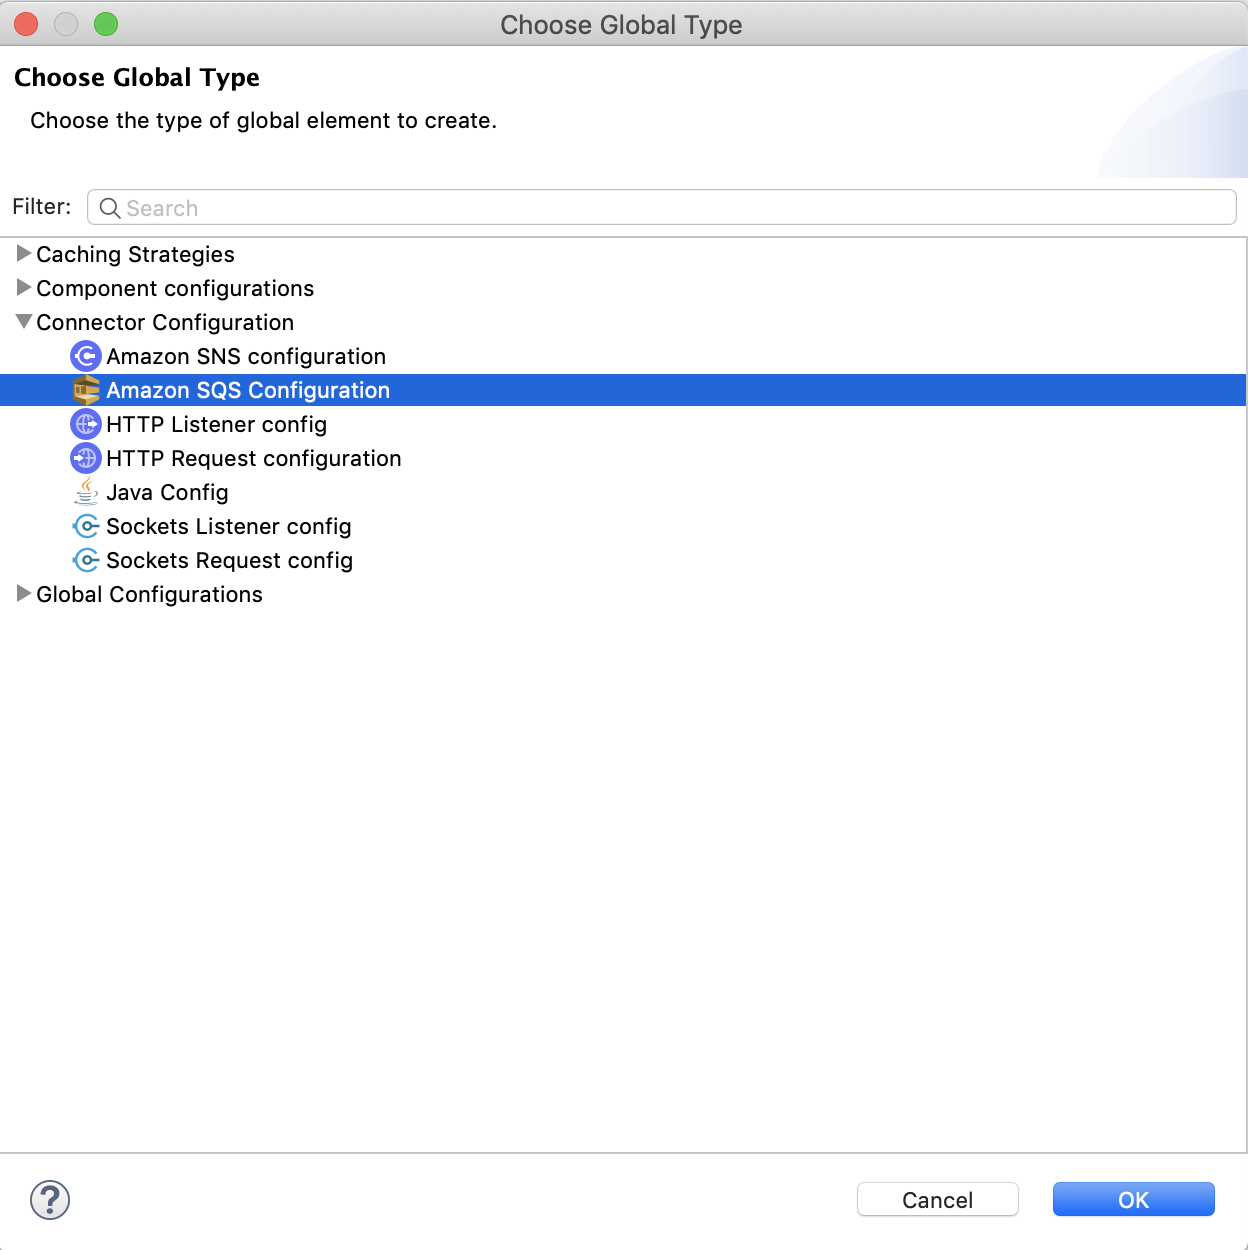
In the Choose Global Type window, expand Connector Configuration and select Amazon SQS Configuration:

-
Click OK.
-
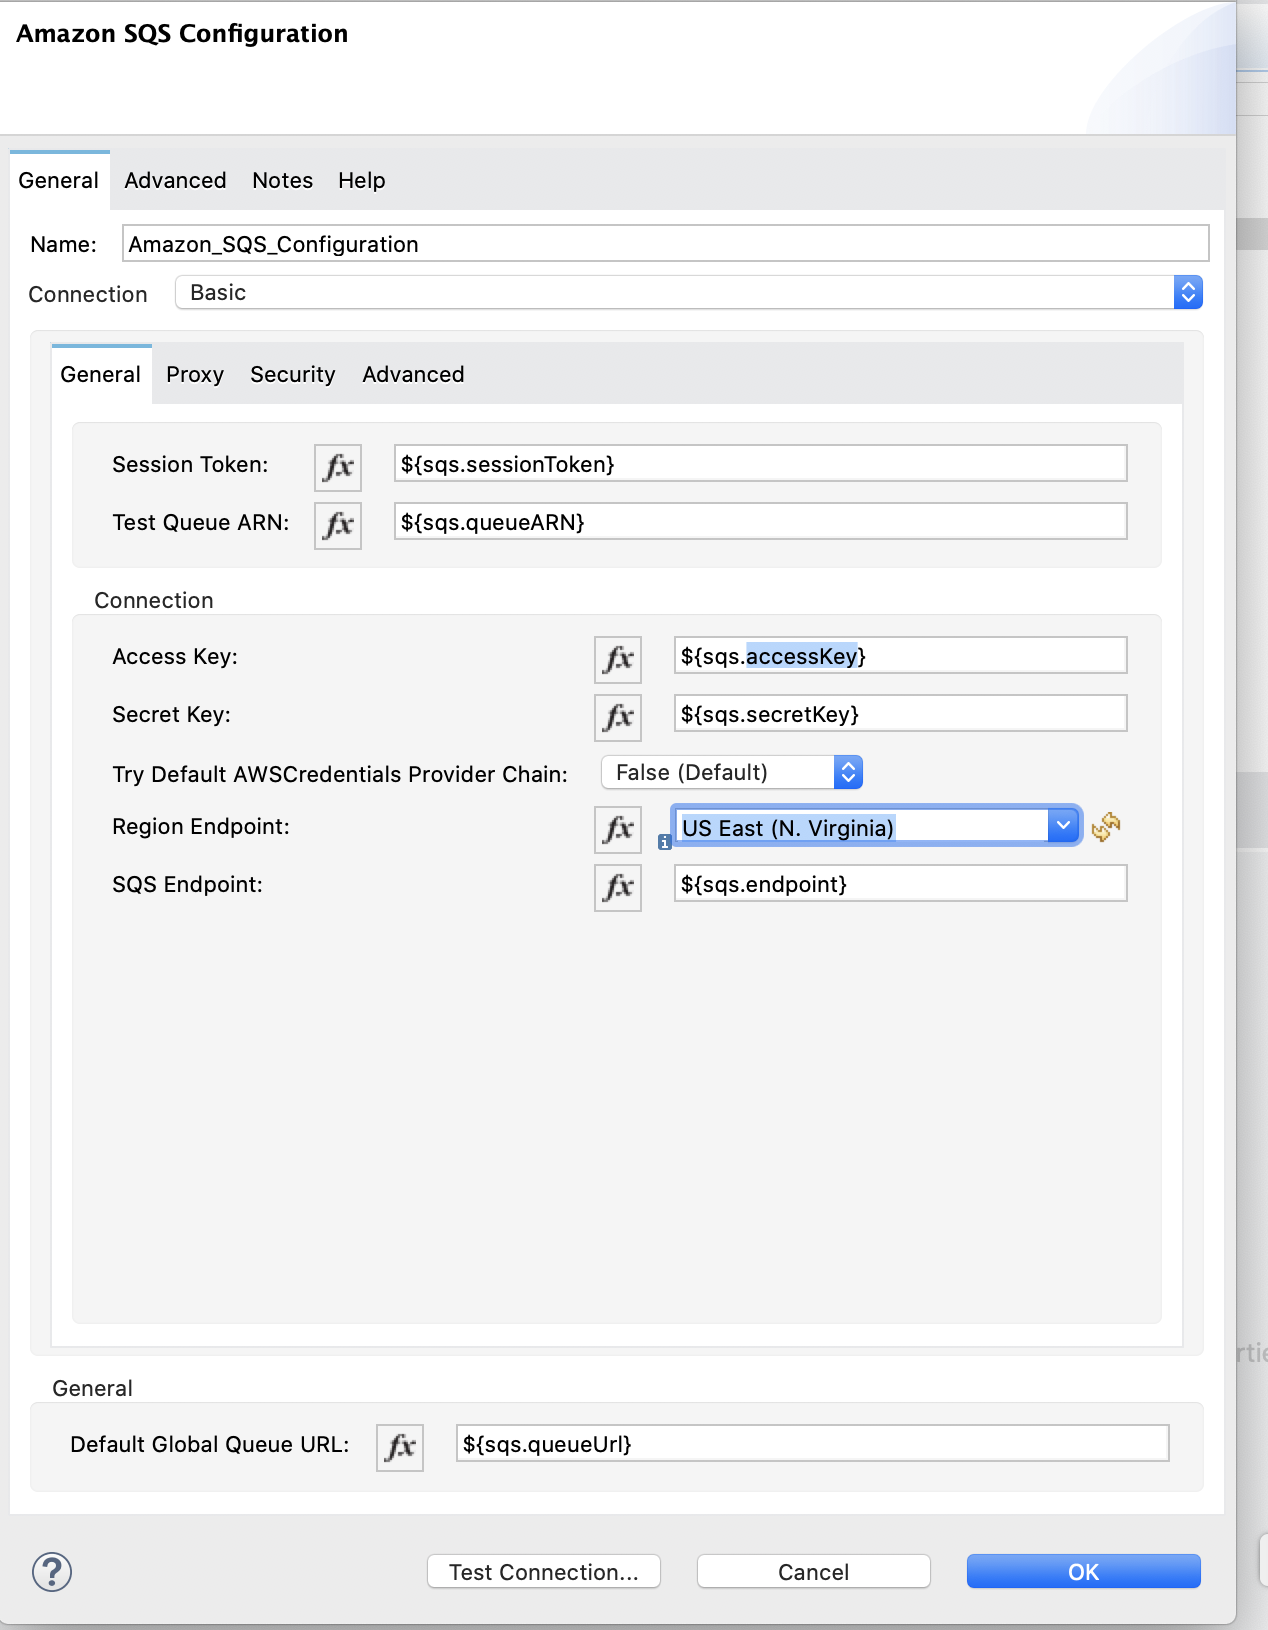
Specify the global element properties:

Field Description Name
Name used to reference the configuration
Session Token
Session token used to validate the temporary security credentials
Access Key
Alphanumeric text string that uniquely identifies the user who owns the account
Secret Key
Key that acts as a password
Try AWS Credentials Provider Chain
Drop-down menu that controls whether to use temporary credentials
Region Endpoint
Regional endpoint to process your requests
SQS Endpoint
SQS endpoint for Amazon VPC support.
Default Global URL
URL of the Amazon SQS queue to act upon
When you provide a queue URL in the Default Global Queue URL field of the global element, the connector automatically creates the queue and sets the URL of this queue as the provided value. All Amazon SQS message processors that reference the global element perform operations using this queue URL.
To reference a different queue URL for a particular message processor in the flow, perform the operation using the
Queue URLattribute provided by the message processor. -
Leave the default entries for the Proxy tab.
-
Click Test Connection to confirm that the parameters of your global configuration are accurate and that Mule is able to connect successfully to your instance of Amazon SQS.
To test the connection, you must specify a value for the Test Queue Arn field in the configuration. If a value is not specified, the test connection is not performed, and the console displays a warning when the operation is invoked. -
Click OK.
View the App Log
To check for problems, you can view the app log as follows:
-
If you’re running the app from Anypoint Platform, the output is visible in the Anypoint Studio console window.
-
If you’re running the app using Mule from the command line, the app log is visible in your OS console.
Unless the log file path is customized in the app’s log file (log4j2.xml), you can also view the app log in the default location MULE_HOME/logs/<app-name>.log.
Next Step
After configuring this connector in Studio, see Additional Configuration Information for more configuration steps.


