Using Anypoint Studio to Configure a Connector
To use Anypoint Studio to configure a connector:
-
Supply your authentication credentials to Anypoint Platform.
-
Install the connector.
-
Configure a source for the connector’s flow.
-
Configure the connector.
Follow these best practices when you configure a source and connector in Studio:
-
Configure an associated global element for the source and connector.
-
Create a YAML file or properties file to contain your properties, and then reference the file from the configuration.
-
Configure a reconnection strategy for the source and target connector.
For information about these best practices, see Best Practices for Configuring Connectors.
Supply Authentication Credentials to the Anypoint Platform
To access connectors on the Anypoint Exchange portal, you must first configure Anypoint Platform credentials if these have not been configured:
-
If you use the US cloud, see Configuring Anypoint Platform Credentials (Anypoint Studio) for information.
-
If you use the EU cloud or Anypoint Private Cloud Edition (Anypoint PCE), see Configure Private Cloud Edition in Studio for information.
Add the Connector to Your Mule Project
Installing a connector adds it to a Mule project:
-
In Studio, create a Mule project.
-
In the Mule Palette view, click (X) Search in Exchange.
-
In Add Dependencies to Project, enter the connector name in the search field.
-
Click the connector name in Available modules.
-
Click Add.
-
Click Finish.
Configure a Source for the Connector
A source initiates a flow when a specified condition is met. Configure a source for the connector’s flow, such as an HTTP Listener operation (HTTP Listener), Scheduler endpoint (Scheduler), or connector-specific source.
Use HTTP Listener as a Source
HTTP Listener listens for HTTP requests and triggers the associated flow when it receives them. To use HTTP Listener as a source:
-
In the Mule Palette view, search for HTTP and select the Listener operation:
Select HTTP Listener to listen for HTTP requestsimage"::intro-config-studio-select-listener.png["Selecting HTTP Listener as a source"]
-
Drag the Listener operation onto the canvas.
-
In the Listener configuration screen, click the plus sign (+) next to the Connector configuration field to add a global element for HTTP Listener.
The following screenshot shows the default values on the General tab for the HTTP Listener global element:
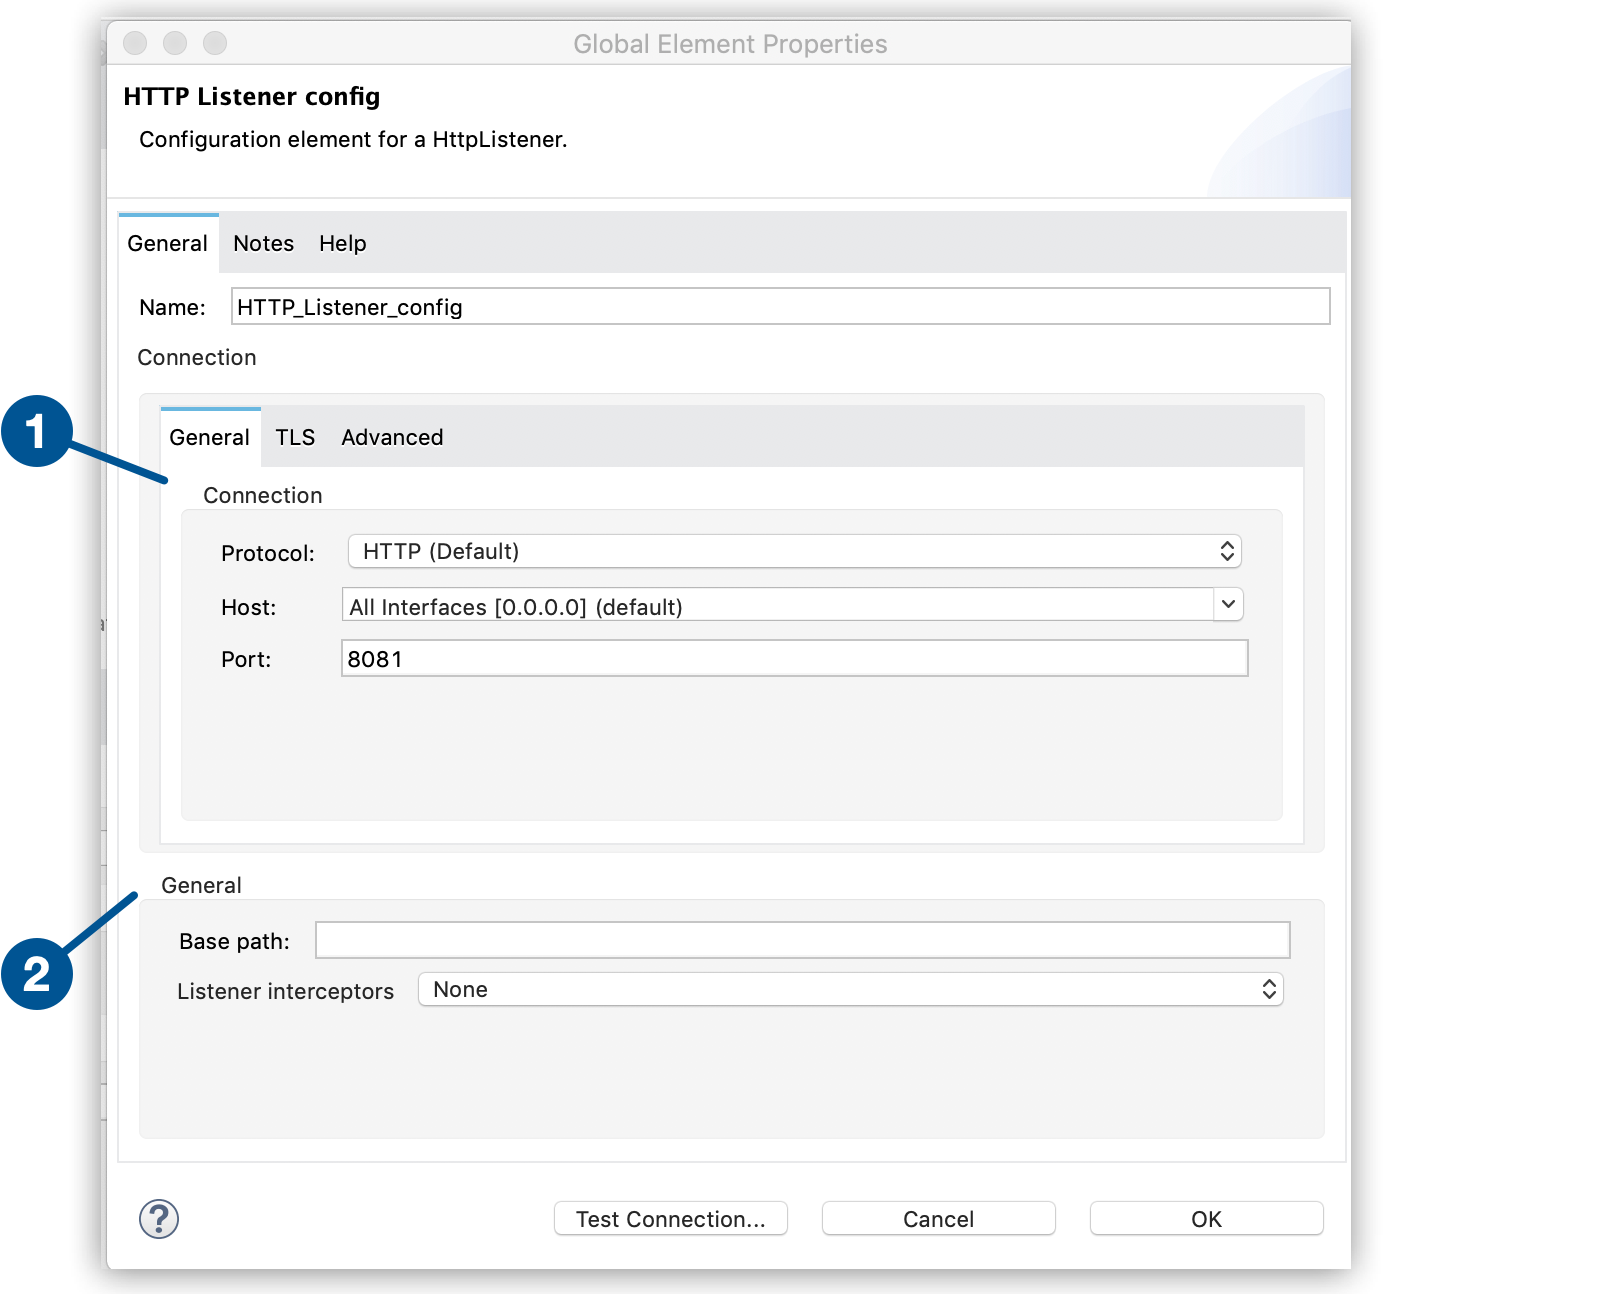 Figure 1. Default values for the HTTP Listener global element
-
The first section shows the default values for the protocol, host, and port to use in the connection.
-
The second section shows the default values for the base path and listener interceptors to use in the connection.
-
-
Accept the defaults on the General tab or specify required information:
-
To listen on a specific port for every network interface on the server, leave the default value
0.0.0.0for the Host property. -
To listen for incoming requests generated inside the server, set the Port value to
localhost.
-
-
To use TLS, click the TLS tab and specify the required information.
-
On the Advanced tab, specify a reconnection strategy. For information, see Anypoint Connector Configuration.
-
Click Test Connection to confirm that Mule can connect with the specified server.
-
Click OK.
-
Set the Path field to the appropriate path.
-
Select the other tabs and specify the appropriate field values.
For more information about HTTP Listener, see the HTTP Connector Reference.
Use Scheduler as a Source
Use Scheduler to initiate a flow when a time-based condition is met. You can configure Scheduler to initiate a flow at a regular interval or you can use a more flexible cron expression. For example, you can use Scheduler to initiate a flow every five seconds, or you can set up a cron expression to initiate a flow at noon every day for one month.
To use Scheduler as a source:
-
In the Mule Palette view, search for and select Scheduler:
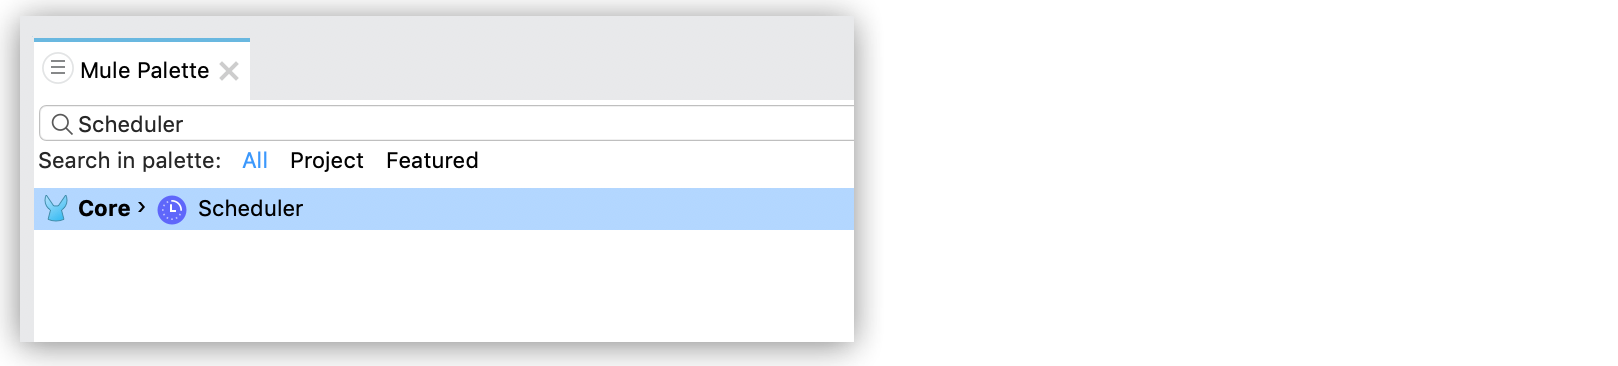 Figure 2. Select Scheduler to schedule when a flow is initiated
 -
Drag Scheduler onto the canvas.
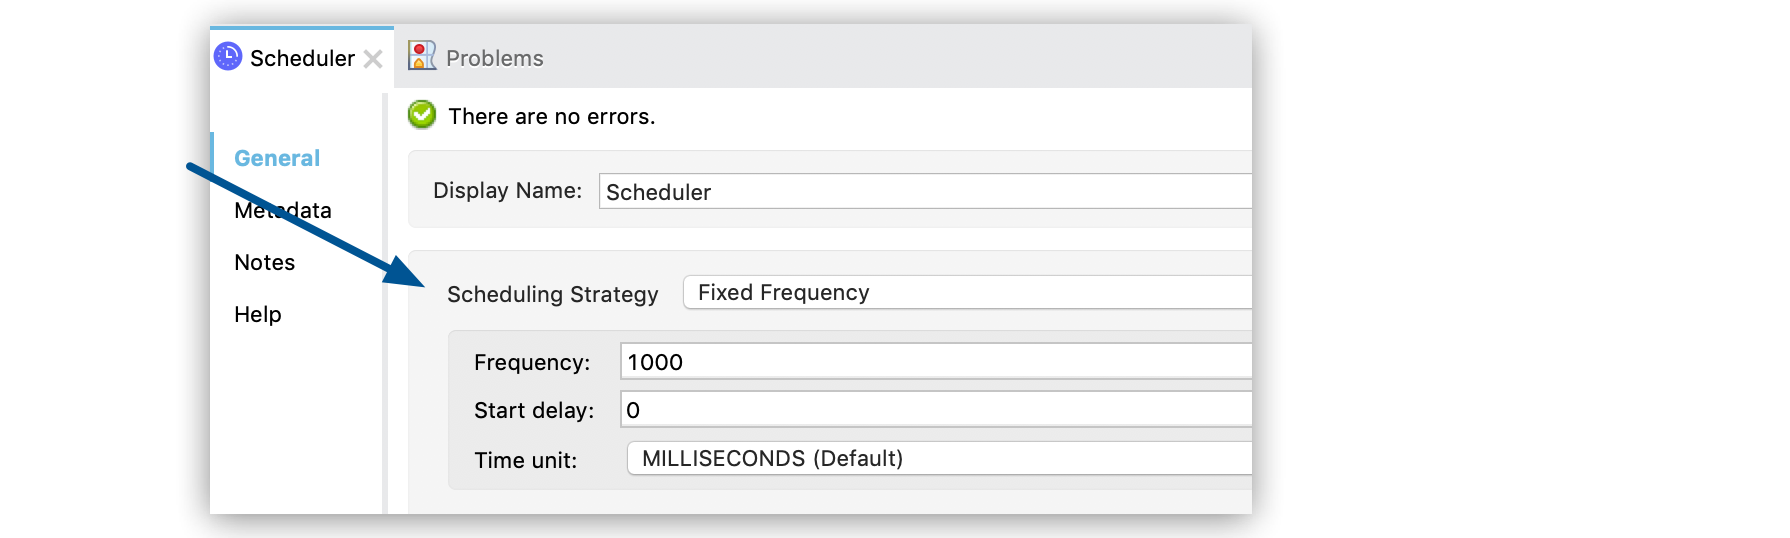
This screenshot shows the default values for the scheduling strategy:
-
In the Scheduling Strategy field of the Scheduler configuration screen, select whether you want to use a fixed frequency or cron expression to initiate the flow:
-
If you select Fixed Frequency, enter values for these fields:
-
Frequency
The frequency at which the Scheduler initiates the flow, based on the time unit specified in the Time unit field
-
Start delay
The amount of time to wait before initiating the flow for the first time after the app starts, based on the time unit specified in the Time unit field
-
Time unit
The time unit for the values of Frequency and Start Delay
-
-
If you select Cron, enter the cron expression in the Expression field and the time zone in the Time Zone field.
For the format and valid values for the Time Zone field, see the Javadoc for the Java TimeZone class.
-
-
To configure metadata for the payload, variables, and attributes, select the Metadata tab and add the appropriate metadata.
For more information about Scheduler, see Scheduler Endpoint.
Use a Connector-Specific Source
If a connector has associated sources, you can use a connector-specific source to initiate the flow. Each connector source has a unique configuration.
For example, you can use Amazon SQS Receive Messages as a source for Amazon SQS Connector. This source initiates a flow each time the specified Amazon SQS queue receives a new message.
To configure a connector-specific source:
-
In the Mule Palette view, search for the connector and select the source.
For example, search for Amazon SQS and select the Receive Messages source:
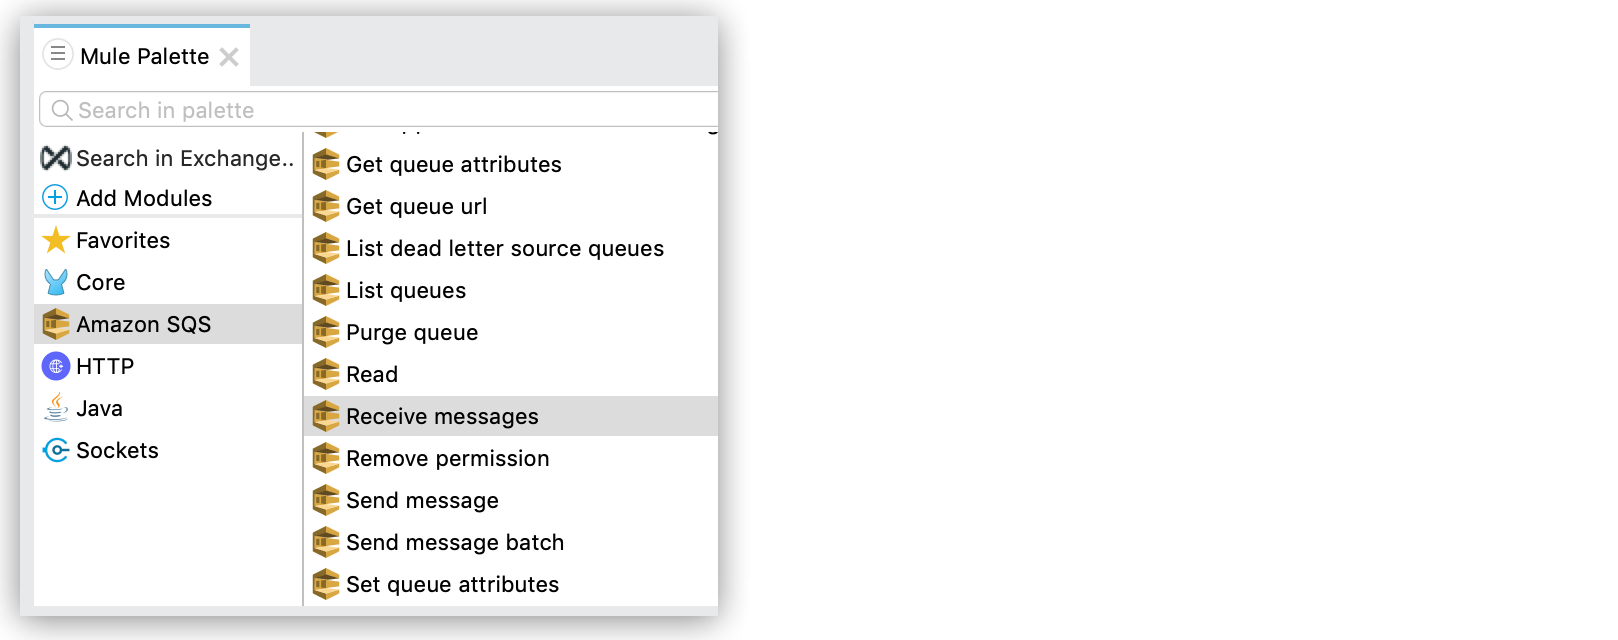 Figure 3. Searching for the Amazon SQS Receive Messages source
 -
Drag the source onto the canvas.
-
In the configuration screen, click the plus sign (+) next to the Connector configuration field to add a global element for the source.
-
Enter values for the required fields.
-
On the Advanced tab for the global element, specify a reconnection strategy. For information, see Anypoint Connector Configuration.
-
Click Test Connection to confirm that Mule can connect with the specified server.
-
Click OK.
Configure the Connector
To configure a connector in your Mule app, first configure a global element that can be used by all instances of that connector in the flow:
-
In the Mule Palette view, search for the connector and select the desired operation.
-
Drag the operation onto the canvas to the right of the source.
-
In the configuration screen for the operation, click the plus sign (+) next to the Connector configuration field to add a global element for connector.
-
Specify the global element properties for the connector.
-
On the Advanced tab in the global element properties, specify a reconnection strategy, if supported. For information, see Anypoint Connector Configuration and the reference guide for the connector.
-
Click Test Connection to confirm that Mule can connect with the specified server.
-
Click OK.
After you configure a global element, configure the other fields for the connector.
For information about configuring a specific connector, see the user guide and reference guide for that connector.