public class BasicOperationsTestCase extends MuleArtifactFunctionalTestCase {
}javaWriting Your First Test Case
This section provides a step-by-step introduction to testing a module’s operation. It explains the basics of test cases that you must perform.
First Concepts
Every test case for a module contains these basic items:
-
Test Case Class: A Java class containing the test logic. Call flows and assert the results.
-
Mule App XML: A Mule app that makes use of the Module to test.
Note that this documentation is based on the module project generated with the Mule Extension Archetype (Creating Your First SDK Project). Learn how to test a module using this example and refer to that documentation for the parent dependency, which includes all the dependencies required to build the test case. To export packages, refer to Export Resources.
1. Creating the Test Case Class
Your Test Case Class must inherit from MuleArtifactFunctionalTestCase, which enables the testing of modules inside a Mule app.
You must include the following tag in your pom.xml file:
<parent>
<groupId>org.mule.extensions</groupId>
<artifactId>mule-modules-parent</artifactId>
<version>1.6.0</version>
</parent>xml2. Writing Your Mule App
You test a module by running Mule app that uses the module, executing its flows and making assertions about the result of these executions.
The Mule app XML must be placed inside the src/test/resources folder of the module project.
<mule xmlns="http://www.mulesoft.org/schema/mule/core"
xmlns:xsi="http://www.w3.org/2001/XMLSchema-instance"
xmlns:basic="http://www.mulesoft.org/schema/mule/basic"
xsi:schemaLocation="http://www.mulesoft.org/schema/mule/core http://www.mulesoft.org/schema/mule/core/current/mule.xsd
http://www.mulesoft.org/schema/mule/basic http://www.mulesoft.org/schema/mule/basic/current/mule-basic.xsd">
<basic:config name="basic-config" configId="configId">
<basic:connection requiredParameter="aValue" />
</basic:config>
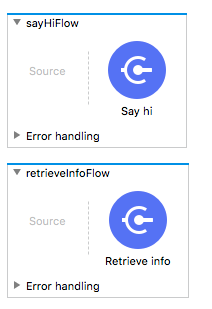
<flow name="sayHiFlow">
<basic:say-hi person="Mariano Gonzales"/>
</flow>
<flow name="retrieveInfoFlow">
<basic:retrieve-info config-ref="basic-config"/>
</flow>
</mule>xml
Tip: An easy way to write Mule apps is to create them in Anypoint Studio, copy the generated XML, and paste it inside the Module project.
3. Importing Your Mule App into the Test Case
After creating the test case class and Mule app XML, you bind the two components, identifying the Mule app that will execute the test case. You do this by overriding the getConfigFile() method and returning a String containing a relative path of the Mule app XML.
The config file path is relative to the module-project/src/test/resources folder. For example, if the XML file is located in module-project/src/test/resources/test-connector-mule-app.xml,
the getConfigFile() method must return test-connector-mule-app.xml.
|
public class ModuleTestCase extends MuleArtifactFunctionalTestCase {
@Override
protected String getConfigFile() {
return "test-connector-mule-app.xml";
}
}java4. Writing Your First Test Case
At this stage, everything is set up to start writing the module test cases. The first test to write tests a simple operation that executes the flow, retrieves the output, and makes an assertion over it.
4.1 Executing a flow
You use the flowRunner("flowName") utility method to create an instance of FlowRunner, a utility that can execute flows. The FlowRunner instance is configured to run the flow identified in the parameter.
Then you use run() on the FlowRunner instance, for example:
Event event = flowRunner("sayHiFlow").run();javaExecution of the flow returns an Event that contains the payload, attributes, vars, and all the available information about the execution of the
flow.
|
If your flow returns a stream, you must call the keepStreamsOpen() method to prevent the runtime from closing streams (which is the normal behavior when a flow ends). If you do not call the keepStreamsOpen() method, you receive a |
4.2 Retrieving the Payload Value
After executing the flow, you have an event variable that contains the result
of the flow execution. This variable is required for obtaining the value of the payload and make the required assertions:
Object payloadValue = event.getMessage()
.getPayload()
.getValue();
assertThat(payloadValue, is("Hello Mariano Gonzales!!!"))java4.3 Summary
This example puts the preceding steps of the test case together:
@Test
public void executeSayHiOperation() throws Exception {
Event sayHiFlow = flowRunner("sayHiFlow").run(); (1)
String payloadValue = ((String) sayHiFlow
.getMessage()
.getPayload()
.getValue()); (2)
assertThat(payloadValue, is("Hello Mariano Gonzales!!!")); (3)
}java| 1 | Executes the sayHiFlow flow. |
| 2 | Retrieves the payload value. |
| 3 | Makes an assertion over the value. |


