Set a Client ID with MQTT Connector
Client IDs are important for MQTT because they identify a connection to an MQTT broker. Moreover, they identify a specific device or client, and it can be useful in terms of traceability to set a client ID that clearly identifies a device’s connection to the broker.
MQTT brokers usually implement a mechanism that closes an old connection if a new connection request with the same client ID as the existing (old) connection is received and then accepts the new connection. MQTT brokers employ this mechanism to prevent situations such as TCP connections reaching a half-open or invalid state due to a crash in one of the communication ends, which is undesirable. The broker assumes the new incoming connection to be valid, closes the older connection, and continues using the newly established connection.
The client takeover mechanism can become a problem if you want to deploy an application in a cluster, and still provide an explicit client ID that identifies the client. Anypoint Connector for MQTT (MQTT Connector) provides client ID generators that help you set a static client ID, set a client ID with a dynamic component to adjust to different deployment scenarios, or define your custom client ID generator.
Configure the Client ID Custom Expression Generator
This generator enables you to set a static string prefix and an expression as a suffix. Both parameters are optional but you must provide at least one of them in order to generate a client ID. If you do not provide any parameter, an INVALID_CLIENT_ID exception is thrown.
In the following example, you configure the client ID string to include the current date at the end, generating a client ID similar to principality-123-2020-09-03:
-
In Studio, navigate to the Global Elements tab.
-
Click Create.
-
In the filter box, type
mqttand select MQTT3 Config. -
Click OK.
-
In MQTT3 Config > Connection, select MQTT3 URL Connection.
-
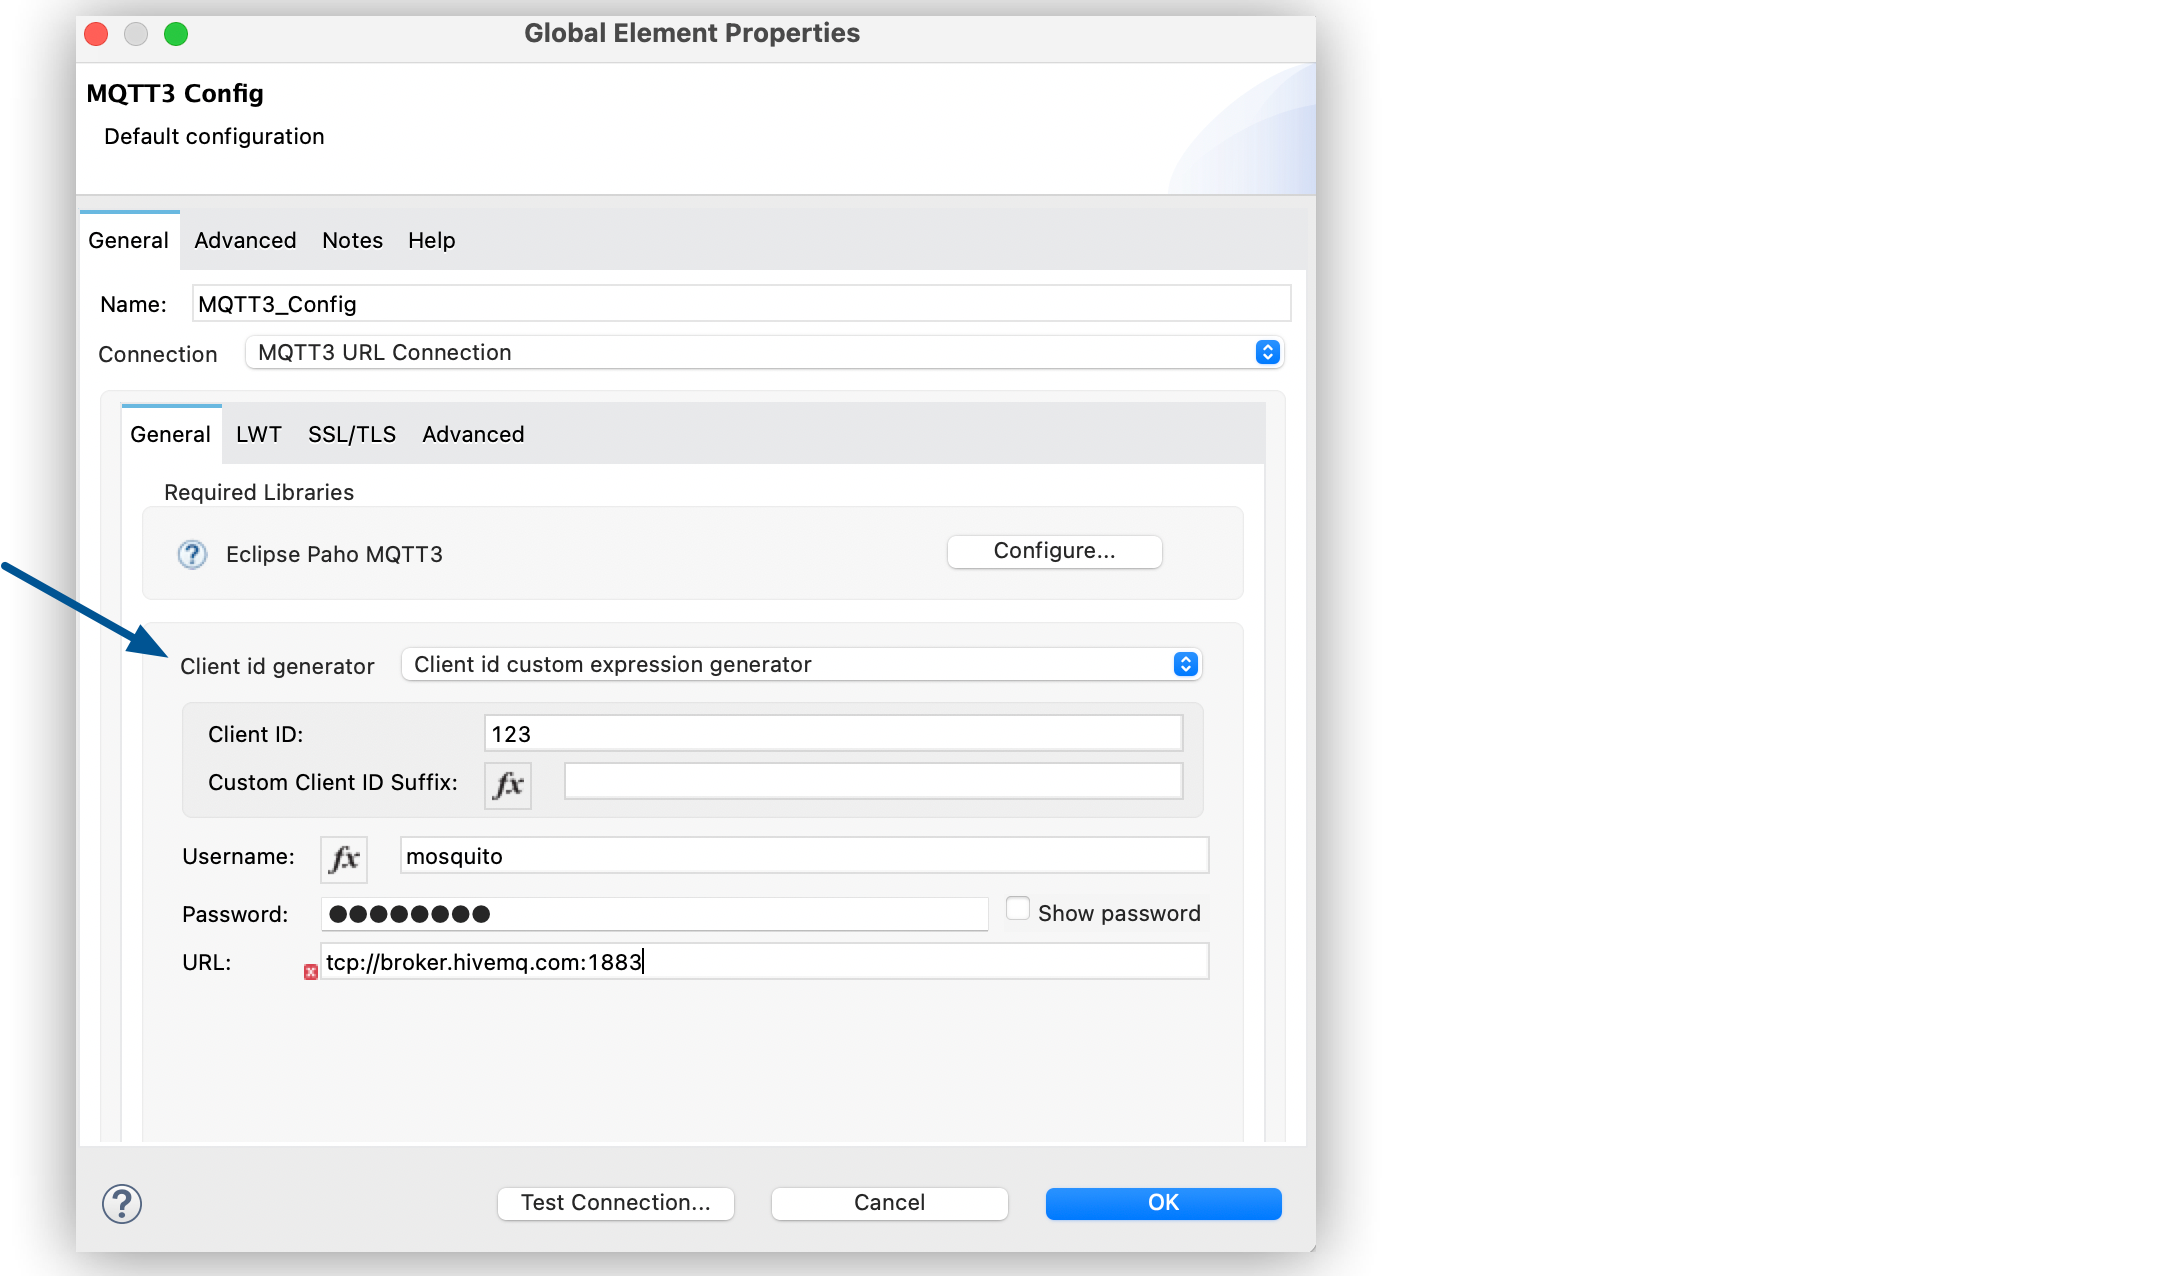
For Client id generator, select Client id custom expression generator.
-
Set the following fields:
-
Client ID:
principality-123- -
Custom Client ID Suffix:
#[%dw 2.0 output text/plain --- now() as String {format: 'y-MM-dd'}]" -
Username:
mosquitto -
Password:
password -
URL:
tcp://broker.hivemq.com:1883
-
-
Click OK.
In the Configuration XML editor, the <mqtt3:client-id-custom-expression-generator> and customClientIdSuffix configurations look like this:
<mqtt3:config name="MQTT_ClientID_Static_Prefix_And_Expression_Suffix_Config">
<mqtt3:connection username="mosquitto" password="password" url="tcp://broker.hivemq.com:1883"/>
<mqtt3:client-id-generator>
<mqtt3:client-id-custom-expression-generator clientId="principality-123-" customClientIdSuffix="#[%dw 2.0 output text/plain --- now() as String {format: 'y-MM-dd'}]"/>
</mqtt3:client-id-generator>
<mqtt3:connection-options maxInFlight="60" cleanSession="true" />
</mqtt3:form-connection>
</mqtt3:config>xmlYou can also specify an expression as a client ID. In the following example, dynamic configurations generate new connections for each new expression value:
<mqtt3:config name="MQTT_ClientID_Only_Expression_Suffix_Config">
<mqtt3:form-connection username="aziraphale" password="principality" protocol="TCP" host="127.0.0.1" port="${mosquitto.port1}">
<mqtt3:client-id-generator>
<mqtt3:client-id-custom-expression-generator customClientIdSuffix="#['smart-bentley-' ++ randomInt(1000) as String]"/>
</mqtt3:client-id-generator>
<mqtt3:connection-options maxInFlight="60" cleanSession="true" />
</mqtt3:form-connection>
</mqtt3:config>xmlIn the following example, you configure a simple string as the client ID, which generates a static client ID principality-123:
<mqtt3:config name="MQTT_Static_ClientID_Config">
<mqtt3:form-connection username="aziraphale" password="principality" protocol="TCP" host="127.0.0.1" port="${mosquitto.port1}">
<mqtt3:client-id-generator>
<mqtt3:client-id-custom-expression-generator clientId="principality-123"/>
</mqtt3:client-id-generator>
<mqtt3:connection-options maxInFlight="60" cleanSession="true" />
</mqtt3:form-connection>
</mqtt3:config>xmlConfigure the Client ID Random Suffix Generator
This generator enables you to set an optional static string prefix and adds a random UUID as a suffix. If you provide a static prefix, it is separated from the random UUID suffix with a - character.
In the following example, you configure the generator to generate a client ID similar to smart-bentley-123-0f321a85-fddf-429f-ba89-26d201db9777, but each new connection has its own randomly generated UUID suffix:
-
In Studio, navigate to the Global Elements tab.
-
Click Create.
-
In the filter box, type
mqttand select MQTT3 Config. -
Click OK.
-
In MQTT3 Config > Connection, select MQTT3 URL Connection.
-
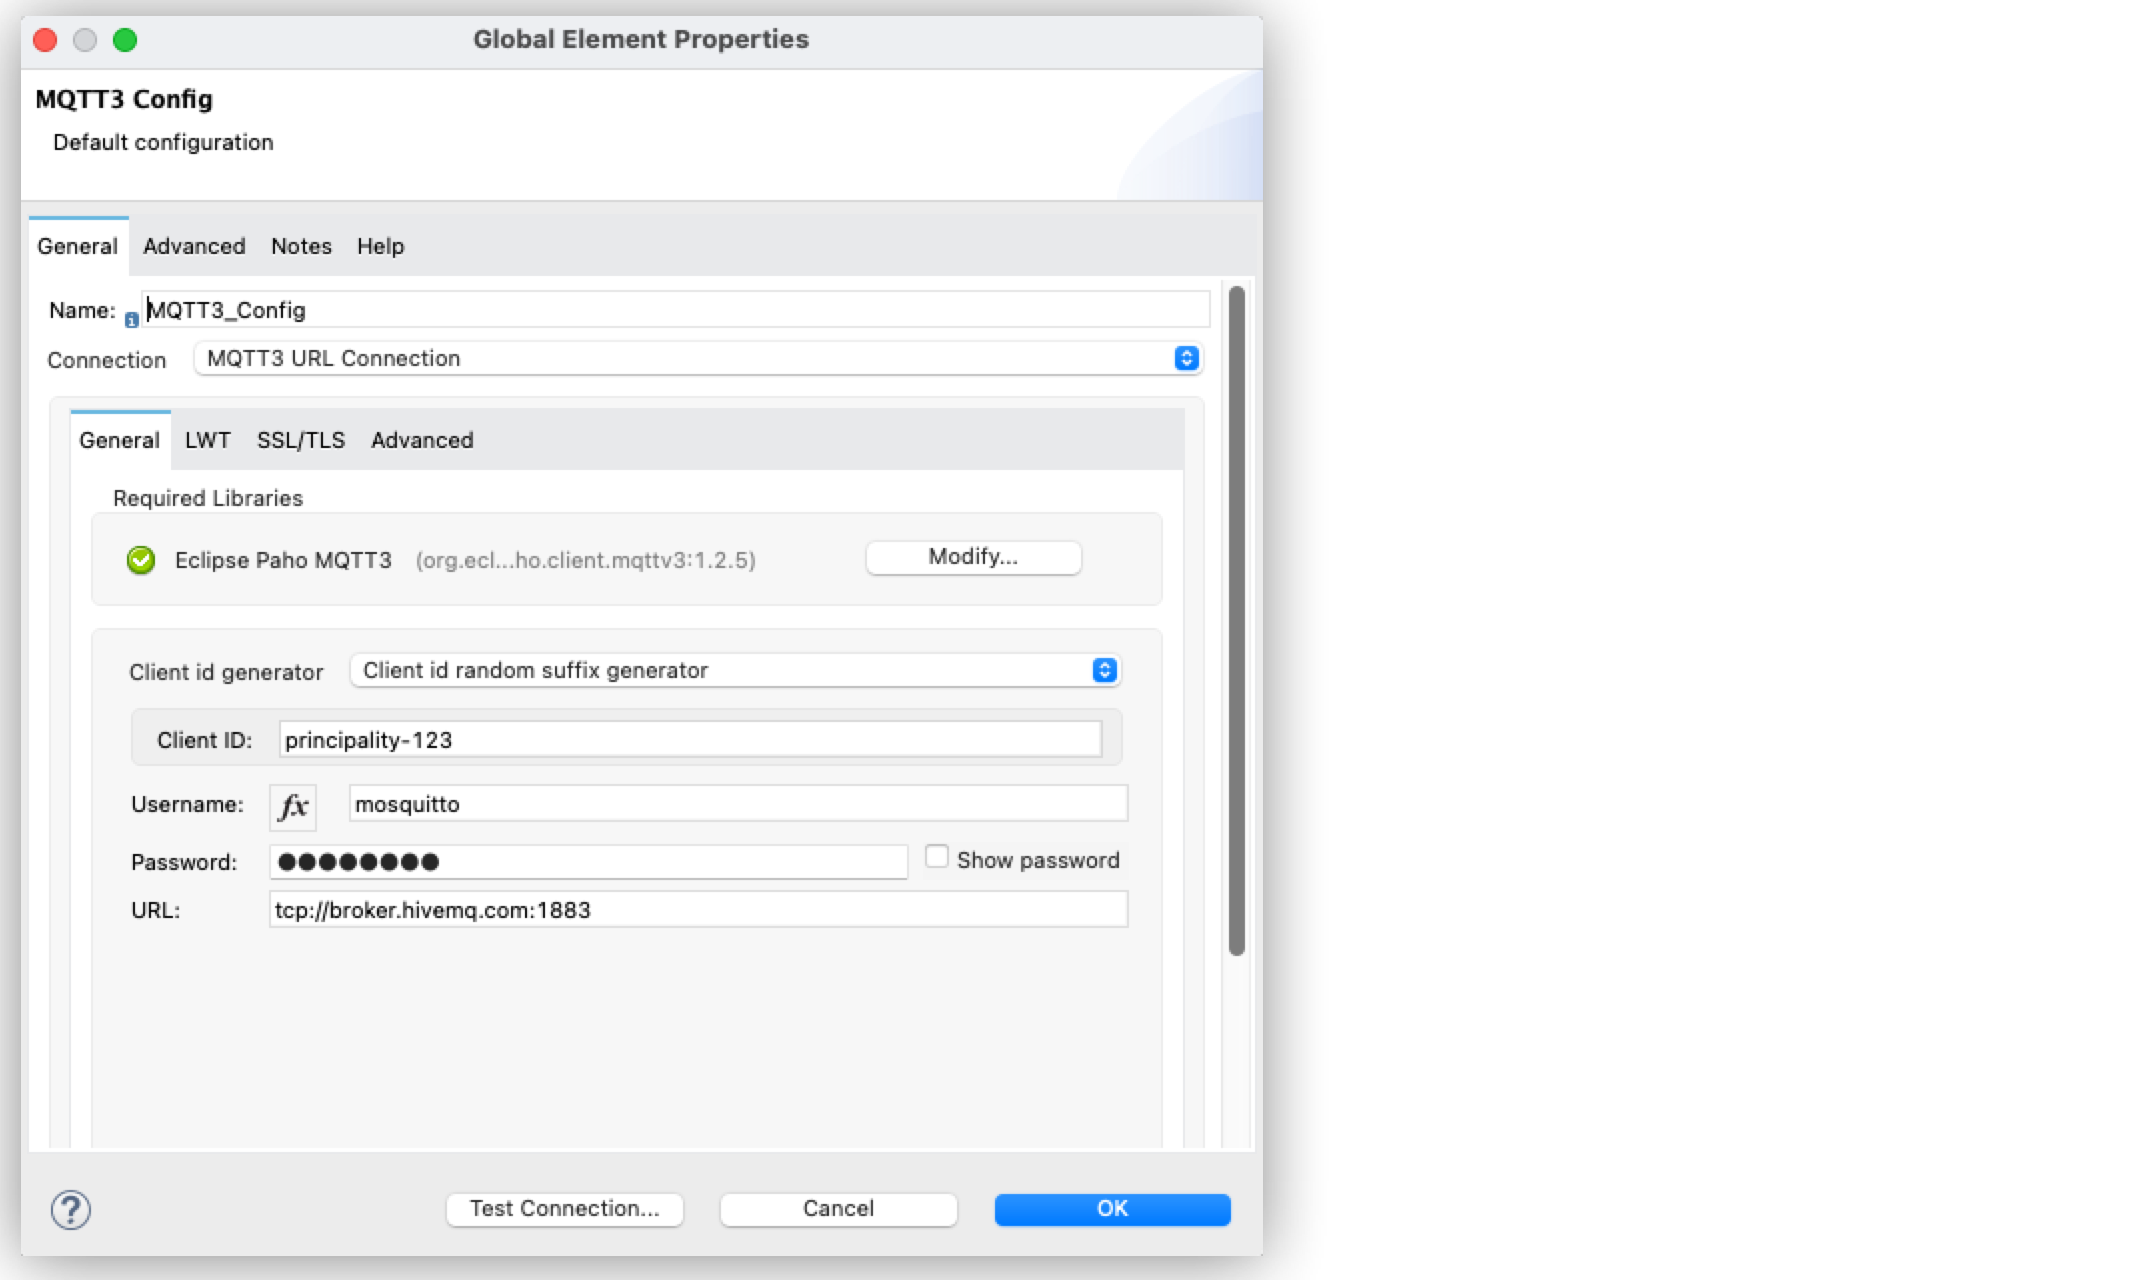
For Client id generator, select Client id random suffix generator.
-
Set the following fields:
-
Client ID:
smart-bentley-123 -
Username:
mosquitto -
Password:
password -
URL:
tcp://127.0.0.1:${mosquitto.port1}
-
-
Click OK.
In the Configuration XML editor, the <<mqtt3:client-id-random-suffix-generator> configuration looks like this:
<mqtt3:config name="MQTT_Static_Prefix_And_Random_Suffix_Config">
<mqtt3:connection username="mosquitto" password="password" url="tcp://127.0.0.1:${mosquitto.port1}">
<mqtt3:client-id-generator>
<mqtt3:client-id-random-suffix-generator clientId="smart-bentley-123" />
</mqtt3:client-id-generator>
<mqtt3:connection-options maxInFlight="60" cleanSession="true" />
</mqtt3:connection>
</mqtt3:config>xmlYou can also omit the client ID prefix, in which case the generator assigns a random UUID as your client ID. In the following example, you configure the generator to generate a client ID similar to 0f321a85-fddf-429f-ba89-26d201db9777:
<mqtt3:config name="MQTT_Static_Prefix_And_Random_Suffix_Config">
<mqtt3:connection username="mosquitto" password="mosquitto" url="tcp://127.0.0.1:${mosquitto.port1}">
<mqtt3:client-id-generator>
<mqtt3:client-id-random-suffix-generator />
</mqtt3:client-id-generator>
<mqtt3:connection-options maxInFlight="60" cleanSession="true" />
</mqtt3:connection>
</mqtt3:config>xmlConfigure a Custom Client ID Generator
If you want to supply your own custom client ID generator, you must be familiar with the Mule SDK subtypes, and the import and export annotations.
In the following example, you configure your own client ID generator:
-
Create your own Java connector project.
-
In the
pom.xmlfile of your connector project, add MQTT Connector as a dependency, for example:<modelVersion>4.0.0</modelVersion> <groupId>org.example</groupId> <artifactId>mqtt3-extended-connector</artifactId> <version>1.0.0-SNAPSHOT</version> <packaging>mule-extension</packaging> <name>MQTT Extended Connector</name> <parent> <groupId>org.mule.extensions</groupId> <artifactId>mule-ee-core-modules-parent</artifactId> </parent> <dependencies> <dependency> <groupId>com.mulesoft.connectors</groupId> <artifactId>mule4-mqtt3-connector</artifactId> <version>1.0.0</version> <classifier>mule-plugin</classifier> </dependency> </dependencies>xml
-
Create your connector’s definition class, for example:
@Xml(prefix = "mqtt3-extended") @Extension(name = "MQTT3Extended", category = SELECT) public class MQTT3ExtendedConnector { }java
-
In your custom extension, define your implementation for the
ClientIDGeneratorinterface, exposed by MQTT Connector.MQTT Connector exposes the
ClientIDGeneratorinterface, which requires only that you implement the methodgenerateClientID(). At this point, you import this interface using the@Importannotation, which is then exported by MQTT Connector.@Xml(prefix = "mqtt3-extended") @Extension(name = "MQTT3Extended", category = SELECT) @Import(type = ClientIDGenerator.class) public class MQTT3ExtendedConnector { }java
-
Define an implementation for the
ClientIDGeneratorinterface:@Alias("custom-client-id") public class MyClientIdGenerator implements ClientIDGenerator { /** * Client id to be used to identify the connection to the MQTT broker. */ @Parameter @DisplayName("Client ID") @Optional(defaultValue = "") @Expression(NOT_SUPPORTED) @ClientId protected String clientId; private String suffix = "my-custom-suffix"; /** * @return a client ID that results from concatenating the clientId and a randomly generated UUID string. */ @Override public String generateClientID() { return clientId + (clientId.isEmpty() ? "" : "-") + suffix; } }java -
Define the subtype in your connector definition and export your custom implementation:
To do so, make the previously defined implementation available to MQTT Connector by defining your custom implementation as a
ClientIDGeneratorsubtype in your connector class. Also, export yourMyClientIdGeneratorclass using the@Exportannotation:@Xml(prefix = "mqtt3-extended") @Extension(name = "MQTT3Extended", category = SELECT) @Import(type = ClientIDGenerator.class) @Export(classes = {MyClientIdGenerator.class}) @SubTypeMapping(baseType = ClientIDGenerator.class, subTypes = {MyClientIdGenerator.class}) public class MQTT3ExtendedConnector { }javaAfter you set up your custom connector project, you are ready to access the new implementation from your application using MQTT Connector.
-
In Studio, import both your custom connector and MQTT Connector in your application’s
pom.xmlfile, for example:<groupId>com.mycompany</groupId> <artifactId>mqtt-custom-id-generator</artifactId> <version>1.0.0-SNAPSHOT</version> <packaging>mule-application</packaging> <name>mqtt-custom-id-generator</name> <properties> <project.build.sourceEncoding>UTF-8</project.build.sourceEncoding> <project.reporting.outputEncoding>UTF-8</project.reporting.outputEncoding> <app.runtime>4.3.0-20210719</app.runtime> <mule.maven.plugin.version>3.5.2</mule.maven.plugin.version> </properties> <build> <plugins> <plugin> <groupId>org.apache.maven.plugins</groupId> <artifactId>maven-clean-plugin</artifactId> <version>3.0.0</version> </plugin> <plugin> <groupId>org.mule.tools.maven</groupId> <artifactId>mule-maven-plugin</artifactId> <version>${mule.maven.plugin.version}</version> <extensions>true</extensions> <configuration> <sharedLibraries> <sharedLibrary> <groupId>org.eclipse.paho</groupId> <artifactId>org.eclipse.paho.client.mqttv3</artifactId> </sharedLibrary> </sharedLibraries> </configuration> </plugin> </plugins> </build> <dependencies> <dependency> <groupId>org.mule.connectors</groupId> <artifactId>mule-http-connector</artifactId> <version>1.5.25</version> <classifier>mule-plugin</classifier> </dependency> <dependency> <groupId>org.mule.connectors</groupId> <artifactId>mule-sockets-connector</artifactId> <version>1.2.1</version> <classifier>mule-plugin</classifier> </dependency> <dependency> <groupId>org.eclipse.paho</groupId> <artifactId>org.eclipse.paho.client.mqttv3</artifactId> <version>1.2.5</version> </dependency> <dependency> <groupId>org.example</groupId> <artifactId>mqtt3-extended-connector</artifactId> <version>1.0.0-SNAPSHOT</version> <classifier>mule-plugin</classifier> </dependency> <dependency> <groupId>com.mulesoft.connectors</groupId> <artifactId>mule4-mqtt3-connector</artifactId> <version>1.0.0</version> <classifier>mule-plugin</classifier> </dependency> </dependencies> </project>xmlWhen you subsequently create a new MQTT Connector configuration in your application, your custom client ID implementation appears in the list of available client ID generators.
-
To use your custom ID generator in an MQTT Connector configuration, navigate to the Global Elements tab.
-
Click Create.
-
In the filter box, type
mqttand select MQTT3 Config. -
Click OK.
-
In MQTT3 Config > Connection, select MQTT3 URL Connection.
-
For Client id generator, select Custom client id.
-
Set the following fields:
-
Client ID:
123 -
Username:
mosquitto -
Password:
password -
URL:
tcp://broker.hivemq.com:1883"
-
-
Click OK.
In the Configuration XML editor, the <mqtt3:client-id-generator> and <mqtt3-extended:custom-client-id> configurations look like this:
<mqtt3:config name="MQTT3_Config">
<mqtt3:connection username="mosquitto" password="password" url="tcp://broker.hivemq.com:1883">
<mqtt3:client-id-generator >
<mqtt3-extended:custom-client-id clientId="123" />
</mqtt3:client-id-generator>
</mqtt3:connection>
</mqtt3:config>xml