Listen and Publish Messages with MQTT Connector
In these examples, you configure the Anypoint Connector for MQTT (MQTT Connector) On New Message source and the Publish operation to listen and publish messages to a specific topic.
Create a Mule App to Listen and Publish Messages
In the following example, you configure the On New Message source and the Publish operation to listen and publish messages to a specific topics.
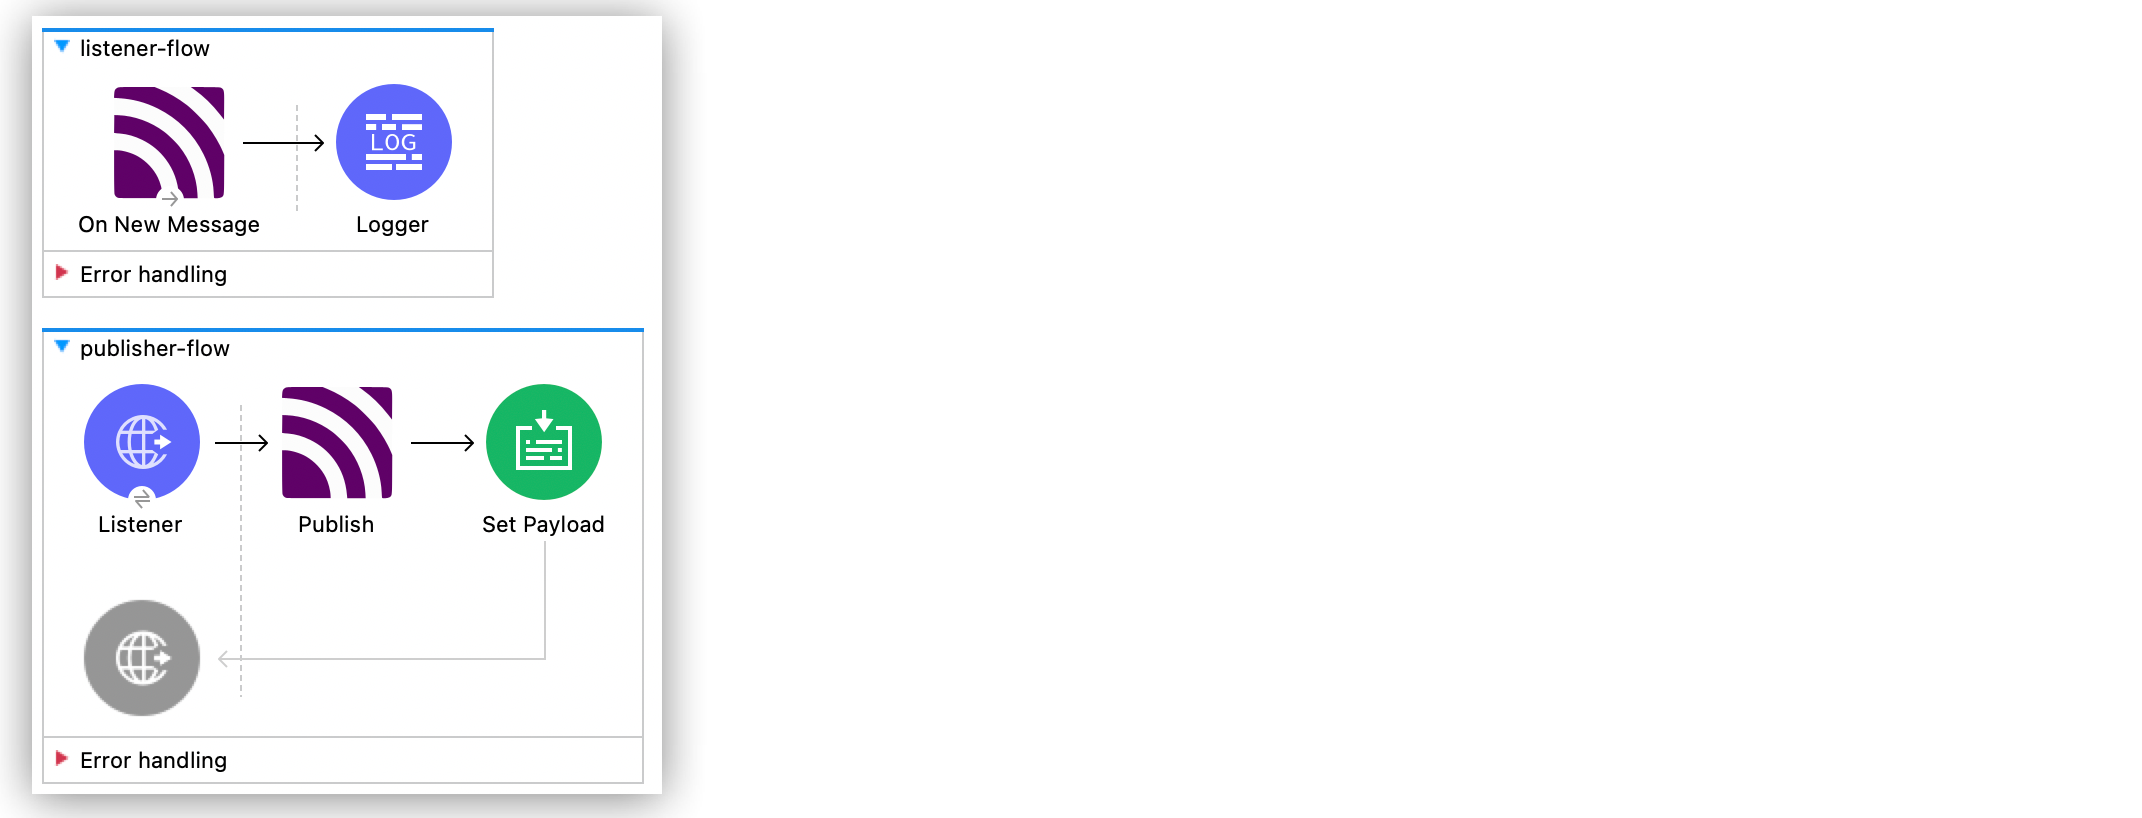
Create a Listener Flow
In the first part of the example, create a flow with an On New Message source that triggers an event for incoming messages on topics matching the filter topic/quotes/#, and add a Logger component that logs the received message:
-
In Studio > Mule Palette view, select MQTT3 > On New Message.
-
Drag the On New Message source to the Studio canvas.
-
Click the plus sign (+) next to the Connector configuration field to configure a global element that can be used by all instances of the source in the app.
-
In MQTT3 Config > Connection select MQTT3 URL Connection.
-
For Client id generator, select Client id custom expression generator.
-
Set the following fields:
-
Client ID:
crowley123 -
Username:
mosquitto -
Password:
mosquitto -
URL:
tcp://0.0.0.0:1883
-
-
Click LWT.
-
Set the following fields:
-
Topic:
topic/lwt -
Body:
This is the LWT message -
Is retained: True
-
-
Click OK.
-
In the On New Message configuration screen, set Topics to Edit inline.
-
Click the plus sign (+) to add a new topic.
-
In Topic filter, set
topic/quotes/#. -
Click OK.
-
Drag a Logger component to the right of the On New Message source.
-
Set Message to
Received message '#[payload]' with at topic #[attributes.topic] with qos #[attributes.qos].
Create a Publisher Flow
For the second part of the example, create a flow with a Publish operation that publishes messages to the topic topic/quotes/shakespeare and triggers an event in listener-flow:
-
In Studio, drag an HTTP Listener source below the first
listener-flow. -
Set Path to
publish/message. -
Click the plus sign (+) next to the Connector configuration field to configure a global element that can be used by all instances of the source in the app.
-
Set Host to
0.0.0.0and Port to8081. -
Click OK.
-
Drag an MQTT3 Publisher operation next to the HTTP Listener source.
-
For Connector configuration, select the
MQTT3_Config_1configuration created inlistener-flow. -
Set the following fields:
-
Topic:
topic/quotes/shakespeare -
Message:
"Uneasy lies the head that wears a crown"
-
-
Drag a Set Payload component to the right of the Publish operation.
-
Set Value to
SUCCESSFULLY PUBLISHED MESSAGE!. -
Save and run your Mule application.
-
To publish the message, send a request to the HTTP endpoint using the following curl command:
curl -v --request GET localhost:8081/publish/message.
XML for Listening and Publishing Messages with MQTT Connector
Paste this code into your Studio XML editor to quickly load the flow for this example into your Mule app:
<?xml version="1.0" encoding="UTF-8"?>
<mule xmlns:http="http://www.mulesoft.org/schema/mule/http" xmlns:mqtt3="http://www.mulesoft.org/schema/mule/mqtt3"
xmlns="http://www.mulesoft.org/schema/mule/core"
xmlns:doc="http://www.mulesoft.org/schema/mule/documentation" xmlns:xsi="http://www.w3.org/2001/XMLSchema-instance" xsi:schemaLocation="http://www.mulesoft.org/schema/mule/core http://www.mulesoft.org/schema/mule/core/current/mule.xsd
http://www.mulesoft.org/schema/mule/mqtt3 http://www.mulesoft.org/schema/mule/mqtt3/current/mule-mqtt3.xsd
http://www.mulesoft.org/schema/mule/http http://www.mulesoft.org/schema/mule/http/current/mule-http.xsd">
<mqtt3:config name="MQTT3_Config1" >
<mqtt3:connection username="mosquitto" password="mosquitto" url="tcp://0.0.0.0:1883" >
<mqtt3:client-id-generator >
<mqtt3:client-id-custom-expression-generator clientId="crowley123" />
</mqtt3:client-id-generator>
<mqtt3:last-will-and-testament topic="topic/lwt" body="This is the LWT message" isRetained="true" />
</mqtt3:connection>
</mqtt3:config>
<http:listener-config name="HTTP_Listener_config" >
<http:listener-connection host="0.0.0.0" port="8081" />
</http:listener-config>
<flow name="listener-flow" >
<mqtt3:listener doc:name="On New Message" config-ref="MQTT3_Config1">
<mqtt3:topics >
<mqtt3:topic topicFilter="topic/quotes/#" />
</mqtt3:topics>
</mqtt3:listener>
<logger level="INFO" message="Received message '#[payload]' with at topic #[attributes.topic] with qos #[attributes.qos]" />
</flow>
<flow name="publisher-flow" >
<http:listener config-ref="HTTP_Listener_config" path="publish/message"/>
<mqtt3:publish config-ref="MQTT3_Config1" topic="topic/quotes/shakespeare">
<mqtt3:message ><![CDATA[#["Uneasy lies the head that wears a crown"]]]></mqtt3:message>
</mqtt3:publish>
<set-payload value="SUCCESSFULLY PUBLISHED MESSAGE!" />
</flow>
</mule>xmlCreate a Mule App and Subscribe to a LWT Message Topic
In the following example, you use the previous listener flow and create a second listener flow subscribed to the same LWT message topic as the first flow. If the Mule app crashes and the first listener flow gets disconnected, the MQTT broker sends the LWT message to the configured topic and retains the message. When the Mule app restarts, the second listener flow listens for the retained LWT message and logs it.
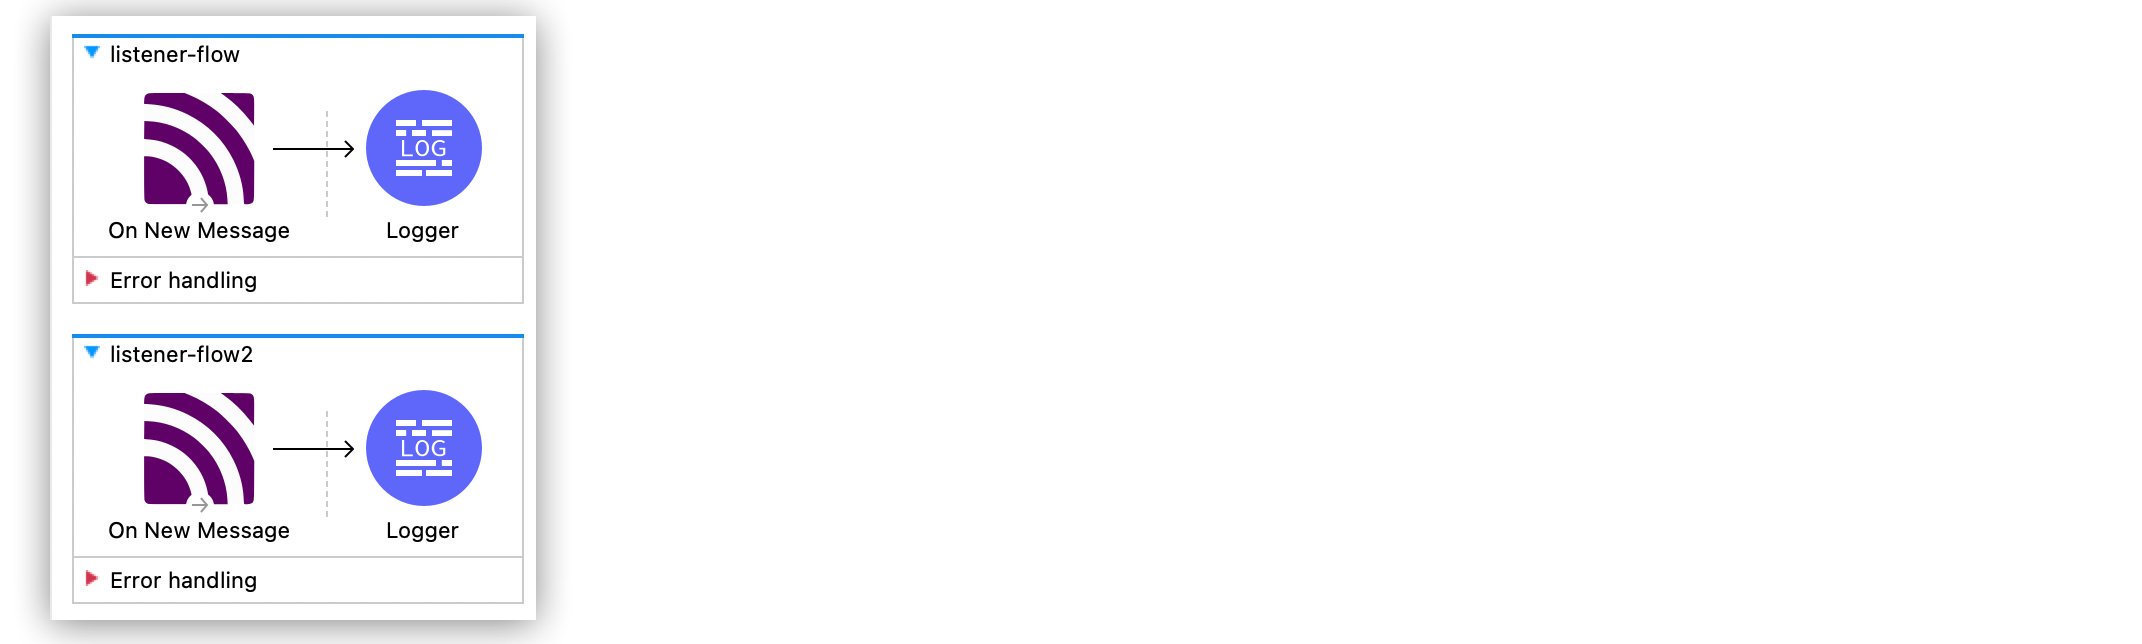
Create the First Listener Flow
In the first part of the example, create a flow with an On New Message source that triggers an event for incoming messages on topics matching the filter topic/quotes/#, and add a Logger component that logs the received message:
-
In Studio, in the Mule Palette view, select MQTT3 > On New Message.
-
Drag the On New Message source to the Studio canvas.
-
Click the plus sign (+) next to the Connector configuration field to configure a global element that can be used by all instances of the source in the app.
-
In the MQTT3 Config window, for Connection select MQTT3 URL Connection.
-
For Client id generator, select Client id custom expression generator.
-
Set the following fields:
-
Client ID:
crowley123 -
Username:
mosquitto -
Password:
mosquitto -
URL:
tcp://0.0.0.0:1883
-
-
Click the LWT tab.
-
Set the following fields:
-
Topic:
topic/lwt -
Body:
This is the LWT message -
Is retained: True
-
-
Click OK.
-
In the On New Message configuration screen, set Topics to Edit inline.
-
Click the plus sign (+) to add a new topic.
-
In Topic filter set
topic/quotes/#. -
Click OK.
-
Drag a Logger component to the right of the On New Message source.
-
Set Message to
Received message '#[payload]' with at topic #[attributes.topic] with qos #[attributes.qos].
Create the Second Listener Flow
For the second part of the example, create a second listener flow by adding another On New Message source that subscribes to the topic topic/lwt, and add a Logger component that logs the received message:
-
In Studio, drag another On New Message source below the first
listener-flow. -
Click the plus sign (+) next to the Connector configuration field to configure a global element that can be used by all instances of the source in the app.
-
In the MQTT3 Config window, for Connection select MQTT3 URL Connection.
-
For Client id generator, select Client id random suffix generator.
-
Set the following fields:
-
Client ID:
azfell123 -
Username:
mosquitto -
Password:
mosquitto -
URL:
tcp://0.0.0.0:1884
-
-
Click OK.
-
In the On New Message configuration screen, set Topics to Edit inline.
-
Click the plus sign (+) to add a new topic.
-
In Topic filter set
topic/lwt. -
Click OK.
-
Drag a Logger component to the right of the On New Message source.
-
Set Message to
Received message '#[payload]' with at topic #[attributes.topic] with qos #[attributes.qos]. -
Save and run the Mule app.
-
Simulate an app crash by locating the process ID of the Mule app and killing it in your terminal by using a command like
kill -9 <process-id>.
Because the Mule app crashes, the first listener flow is disconnected. -
Restart the Mule app.
The MQTT broker retains the LWT message, and the second listener flow logs the LWT message that was configured in the first listener flow.
XML for Listening Messages Subscribed to an LWT Message Topic
Paste this code into your Studio XML editor to quickly load the flow for this example into your Mule app:
<?xml version="1.0" encoding="UTF-8"?>
<mule xmlns:http="http://www.mulesoft.org/schema/mule/http" xmlns:mqtt3="http://www.mulesoft.org/schema/mule/mqtt3"
xmlns="http://www.mulesoft.org/schema/mule/core"
xmlns:doc="http://www.mulesoft.org/schema/mule/documentation" xmlns:xsi="http://www.w3.org/2001/XMLSchema-instance" xsi:schemaLocation="http://www.mulesoft.org/schema/mule/core http://www.mulesoft.org/schema/mule/core/current/mule.xsd
http://www.mulesoft.org/schema/mule/mqtt3 http://www.mulesoft.org/schema/mule/mqtt3/current/mule-mqtt3.xsd
http://www.mulesoft.org/schema/mule/http http://www.mulesoft.org/schema/mule/http/current/mule-http.xsd">
<mqtt3:config name="MQTT3_Config1" >
<mqtt3:connection username="mosquitto" password="mosquitto" url="tcp://0.0.0.0:1883" >
<mqtt3:client-id-generator>
<mqtt3:client-id-custom-expression-generator clientId="crowley123"/>
</mqtt3:client-id-generator>
<mqtt3:last-will-and-testament topic="topic/lwt" body="This is the LWT message" isRetained="true" />
</mqtt3:connection>
</mqtt3:config>
<http:listener-config >
<http:listener-connection host="0.0.0.0" port="8081" />
</http:listener-config>
<mqtt3:config name="MQTT3_Config2" >
<mqtt3:connection username="mosquitto" password="mosquitto" url="tcp://0.0.0.0:1884" />
<mqtt3:client-id-generator>
<mqtt3:client-id-random-suffix-generator clientId="azfell123" />
</mqtt3:client-id-generator>
</mqtt3:config>
<flow name="listener-flow" >
<mqtt3:listener config-ref="MQTT3_Config1">
<mqtt3:topics >
<mqtt3:topic topicFilter="topic/quotes/#" />
</mqtt3:topics>
</mqtt3:listener>
<logger level="INFO" message="Received message '#[payload]' with at topic #[attributes.topic] with qos #[attributes.qos]"/>
</flow>
<flow name="listener-flow2" >
<mqtt3:listener config-ref="MQTT3_Config2">
<mqtt3:topics >
<mqtt3:topic topicFilter="topic/lwt" />
</mqtt3:topics>
</mqtt3:listener>
<logger level="INFO" message="Received message '#[payload]' with at topic #[attributes.topic] with qos #[attributes.qos]"/>
</flow>
</mule>xml